Showing posts with label Saga. Show all posts

Wednesday, August 24, 2016

Saga Accessories from Kraken Skulls Consortium (Review)

Last week, I saw where a local player had ordered some items from Kraken Skulls Consortium, and I was intrigued. They make a wide variety of laser-cut and engraved gaming accessories, in particular for Saga. I went to their site to have a look around.

My browsing fu was weak and I could not find what I was looking for. I found their Facebook page and asked if they made what I wanted - specifically, fatigue tokens with the Viking raven engraved on them. I got an immedaite response. Not only do they make them, they make three kinds! (wood, black acrylic and clear acrylic).

I placed an order for the tokens, along with some other goodies, on Friday. On Monday I got an email saying my order was complete and shipped, and they arrived today, Wednesday. That is great customer service and turnaround time on an order. So, does the hype and service match the product?

Let's start with the raven design fatigue tokens. I chose the wooden tokens, and I was not disappointed!

Raven design fatigue tokens from Kraken Skulls.
They look as good in person as they do on their website.They're a huge upgrade for me from the little plastic discs I was using (which I believe originally came from the Heroscape game).

In addition, I ordered a set of their measuring sticks. They have a ton of different designs, themed to match all the different factions available in Saga. I went with their generic weapon-shaped sticks, since I play several different armies.

Weapon shaped measuring sticks.

I love these sticks. You can see from the picture that they are spot on in length, and they look great. My daughter saw them and is already asking for a set for her Viking army as well!

I splurged a little, and ordered a pair of dice from Kraken Skulls as well. I got them with the raven logo to match the fatigue tokens. Of course, for a typical Saga game you need a ton of dice, so it is not cost effective to order as many as you will need for combat. But I plan to use these as turn markers, or perhaps for other games as well.

Transparent blue and white dice with raven logo.

I ordered the transparent blue and opaque white dice. I paid the extra buck per die to have them color them in, and I am glad I did. The dice look as good as the rest of their products. The blue is clear throughout with no bubbles. And in a totally unscientific test (I rolled them a bunch of times to see how often I could get the beautiful ravens to show) they seemed to roll quite randomly. That's already better than my regular dice, which tend to roll "1" with alarming regularity.

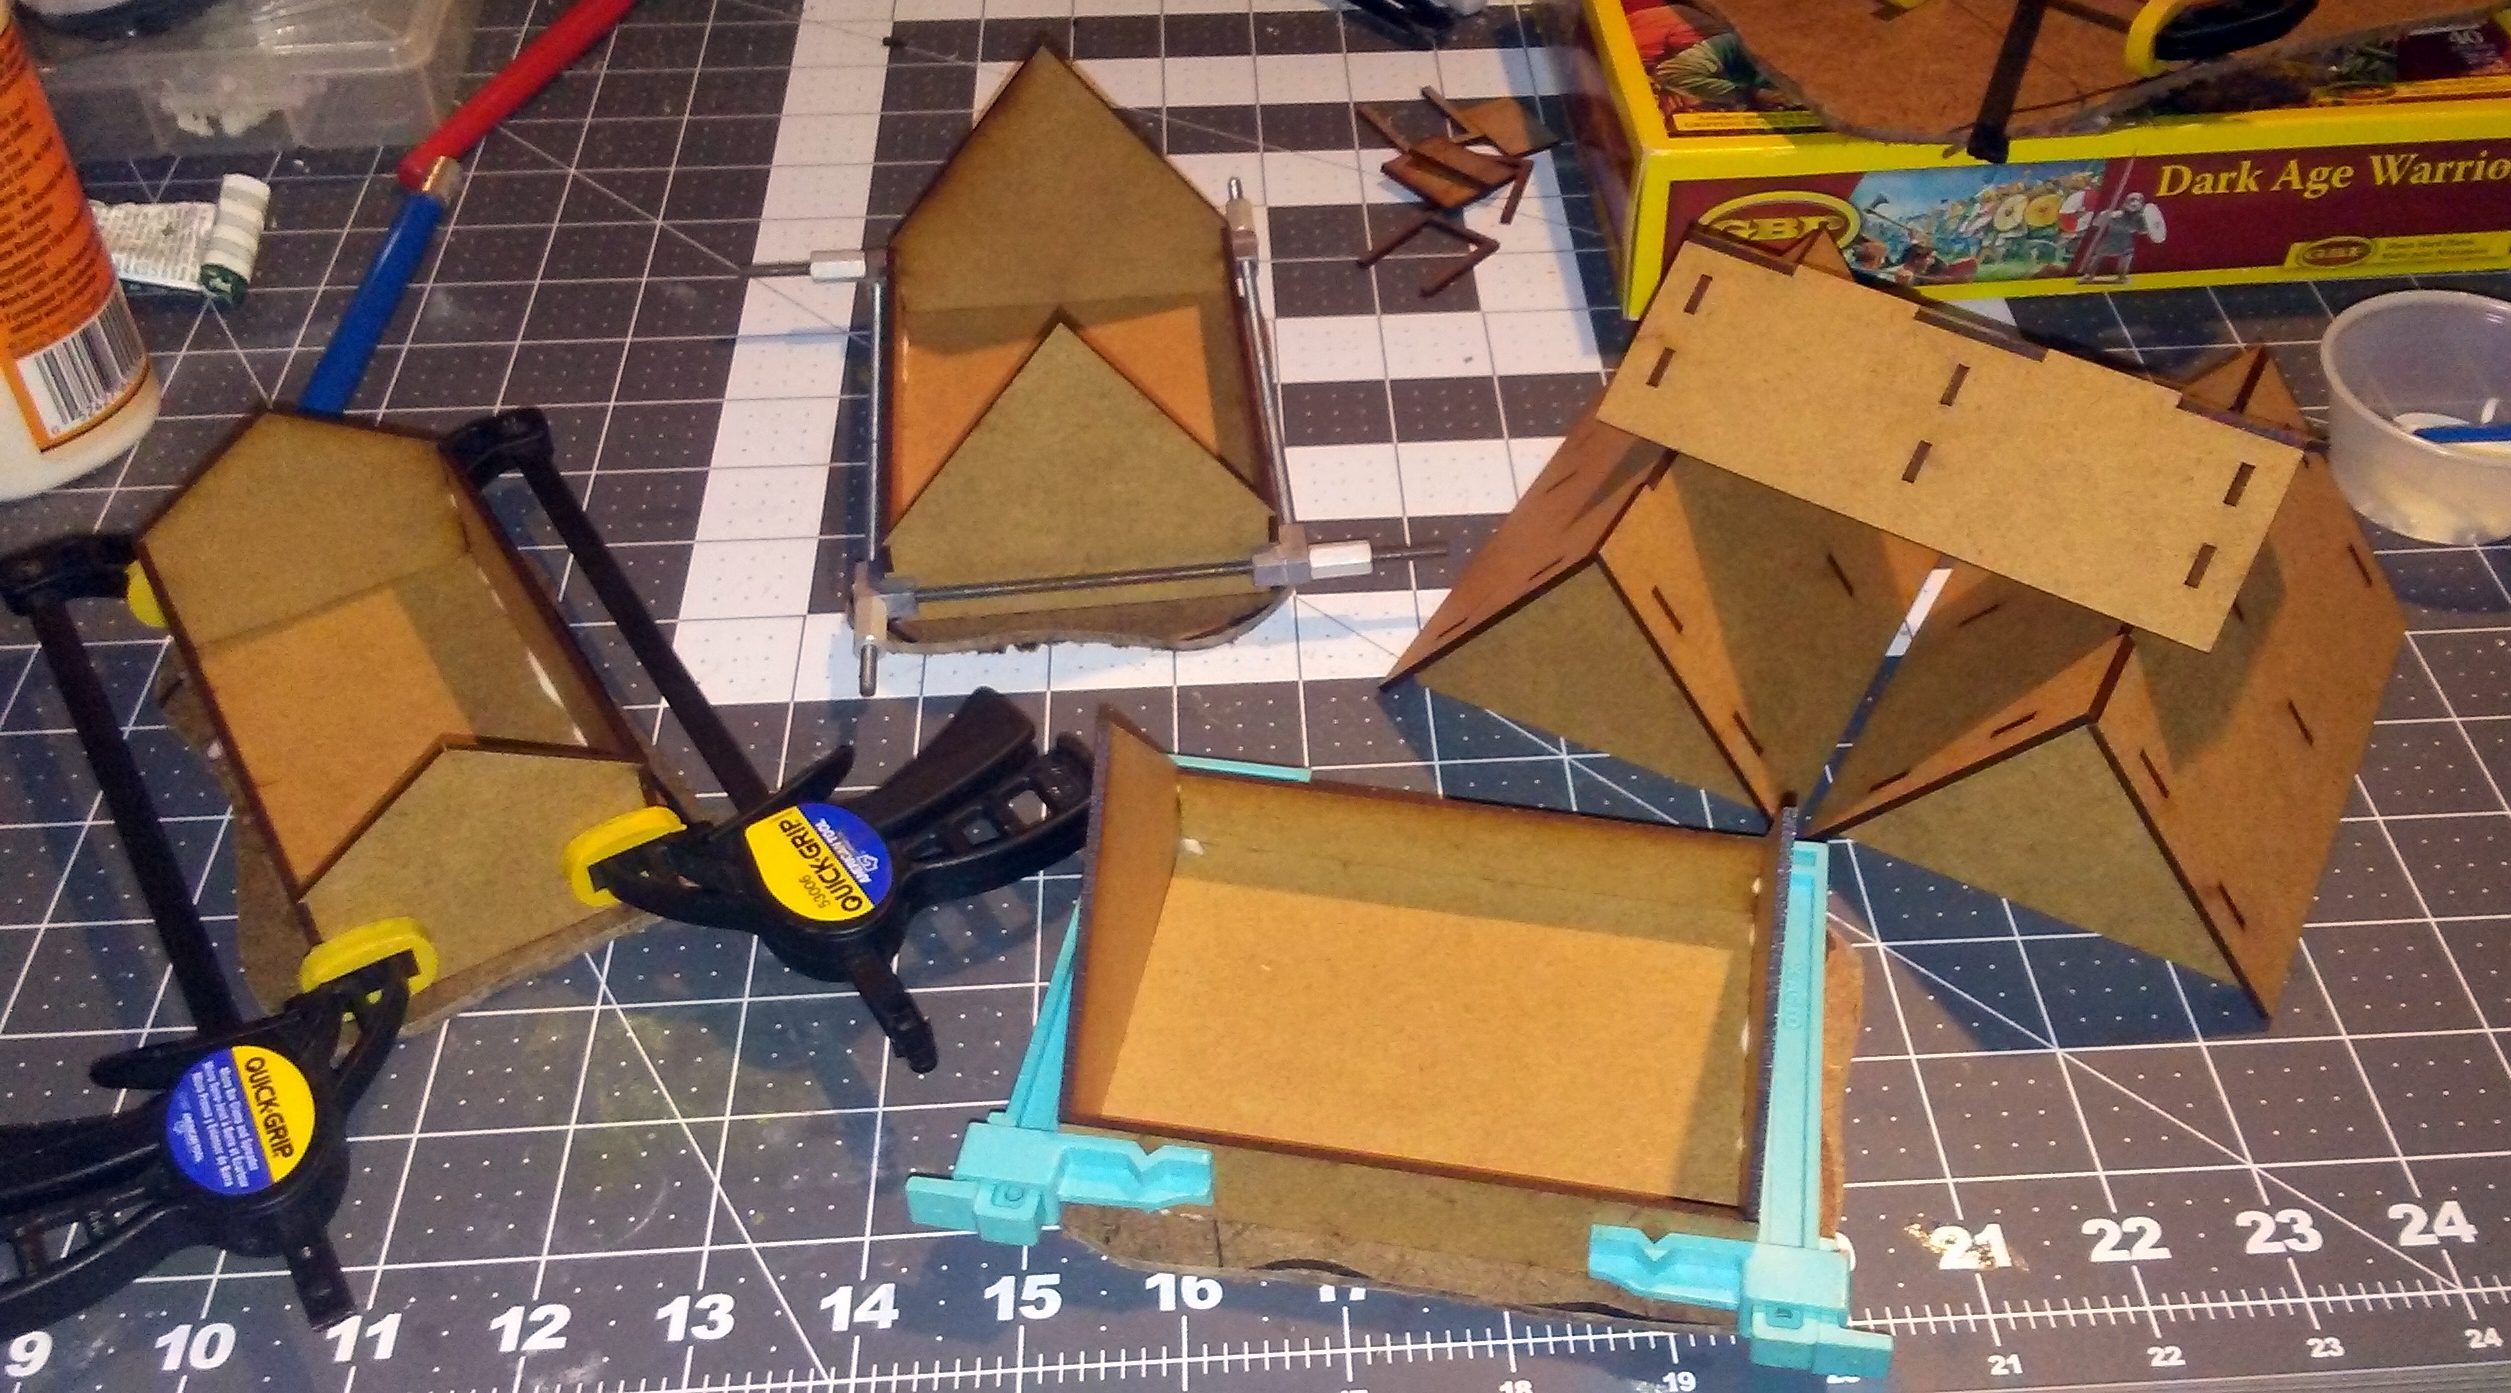
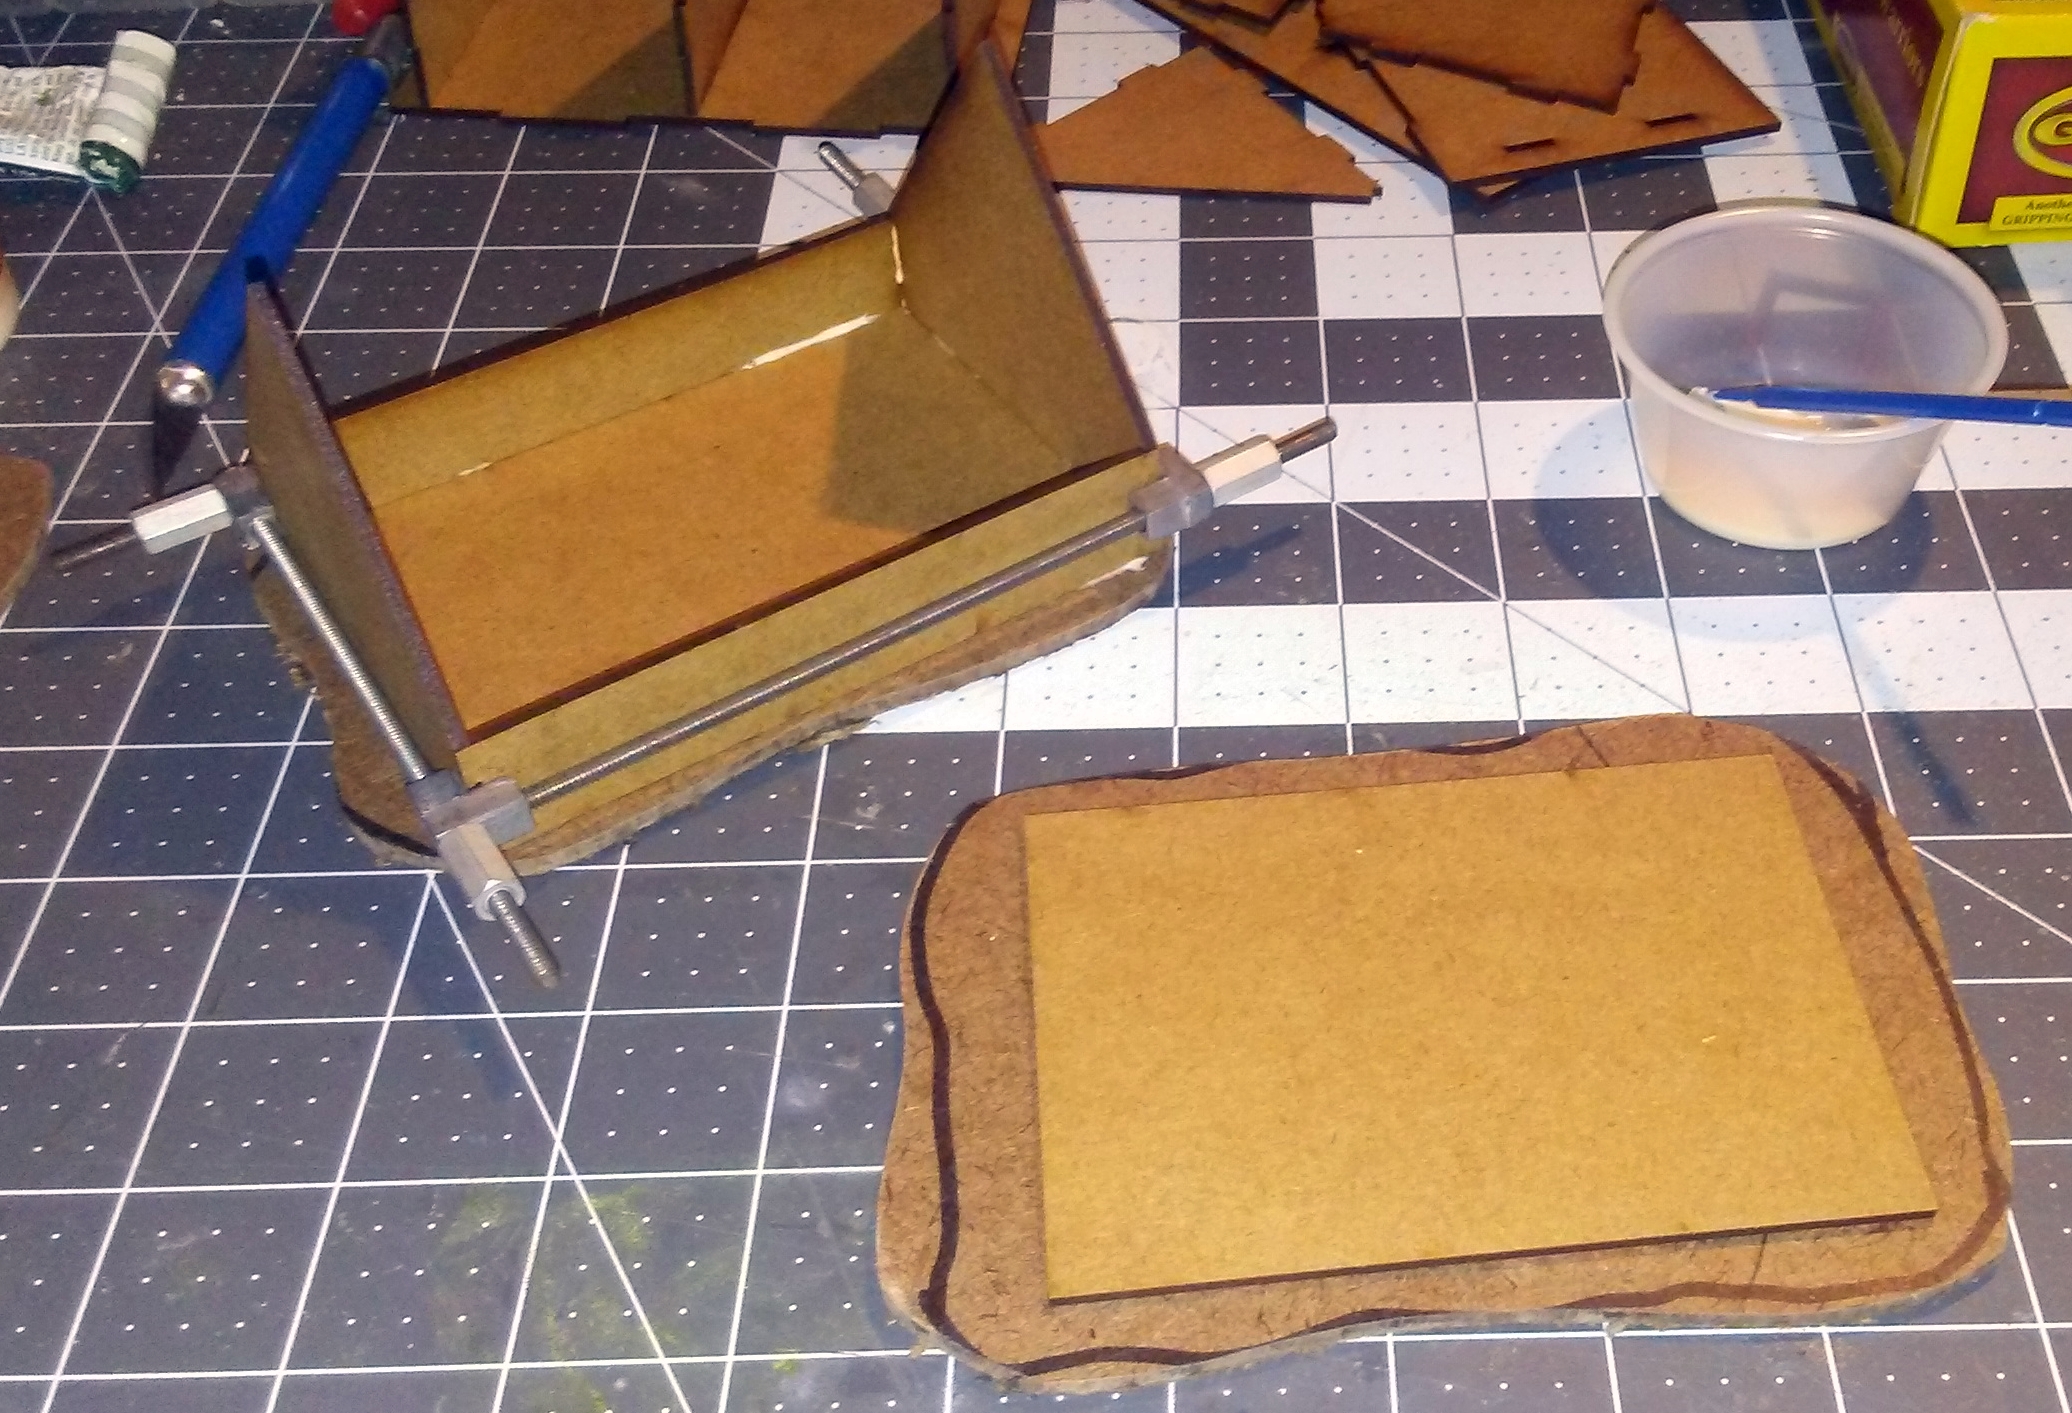
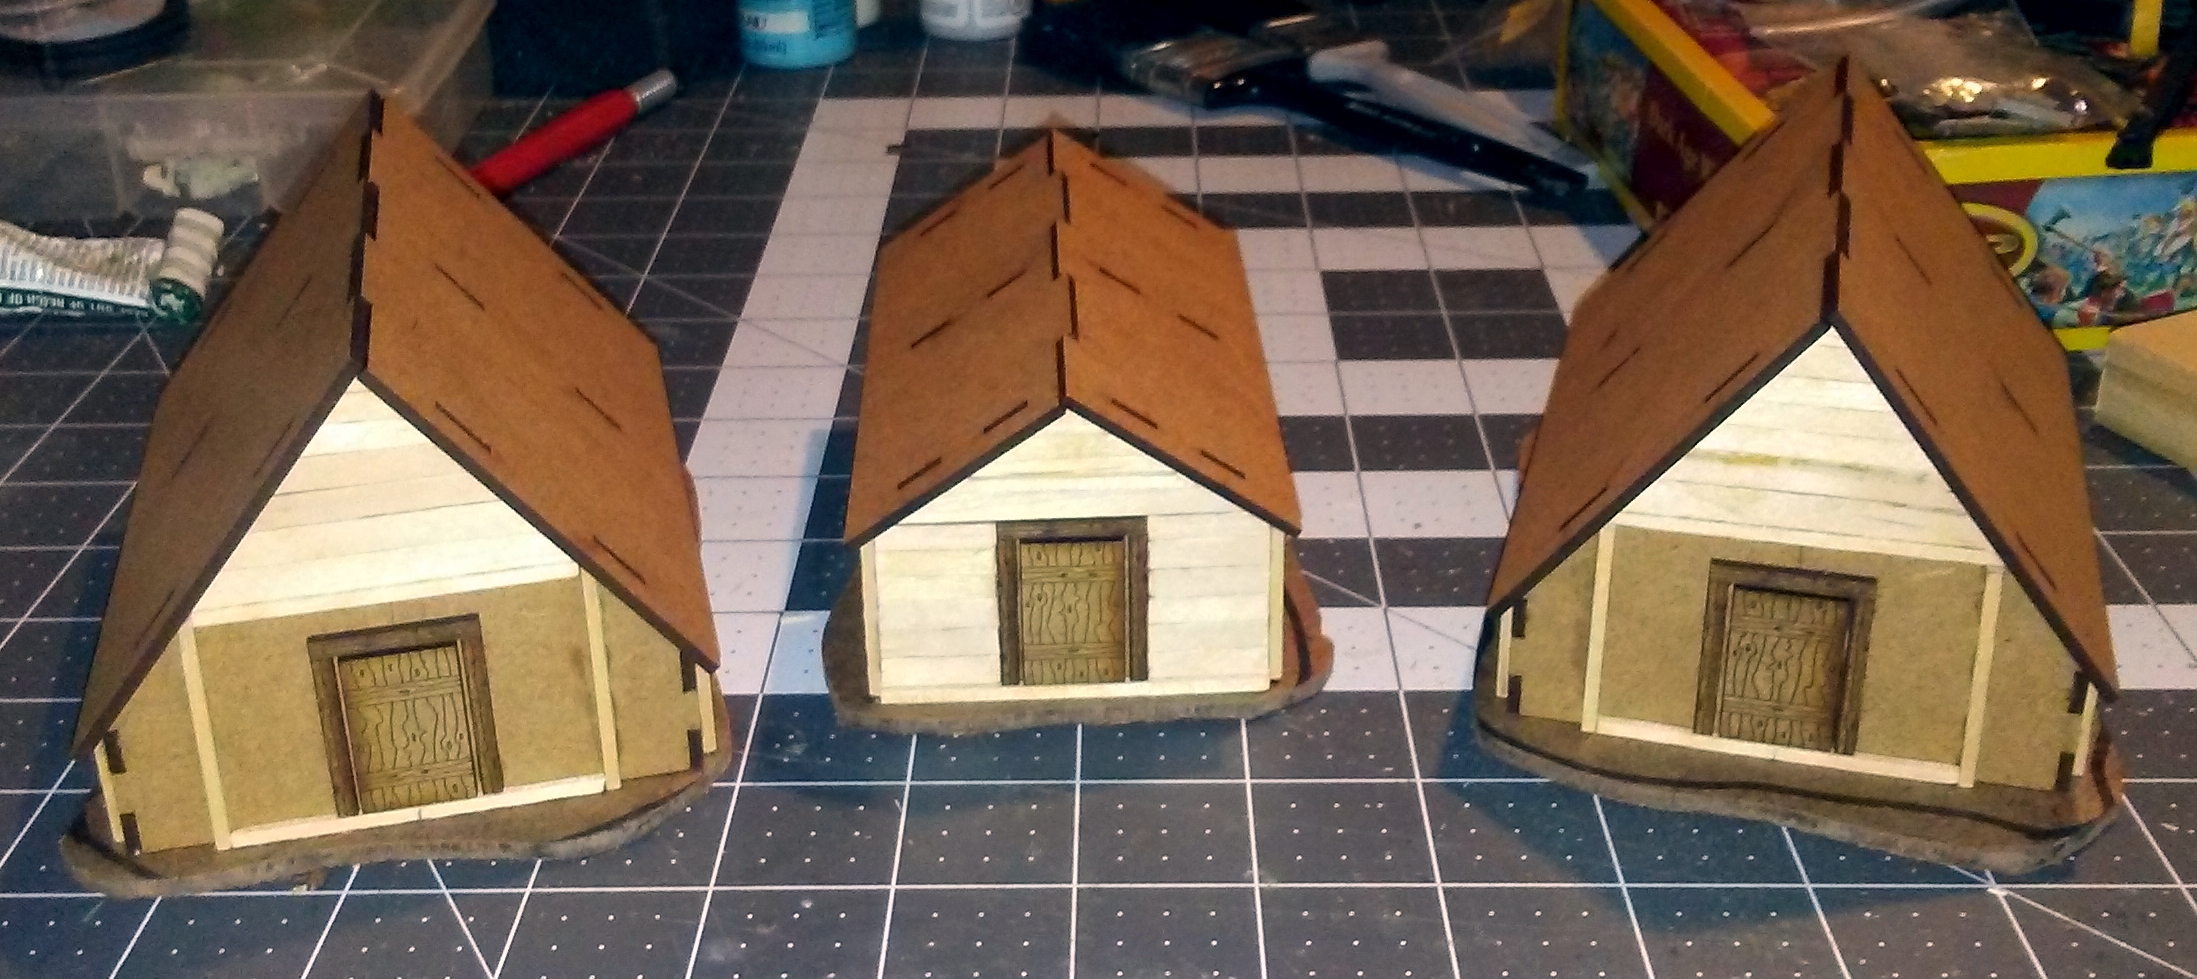
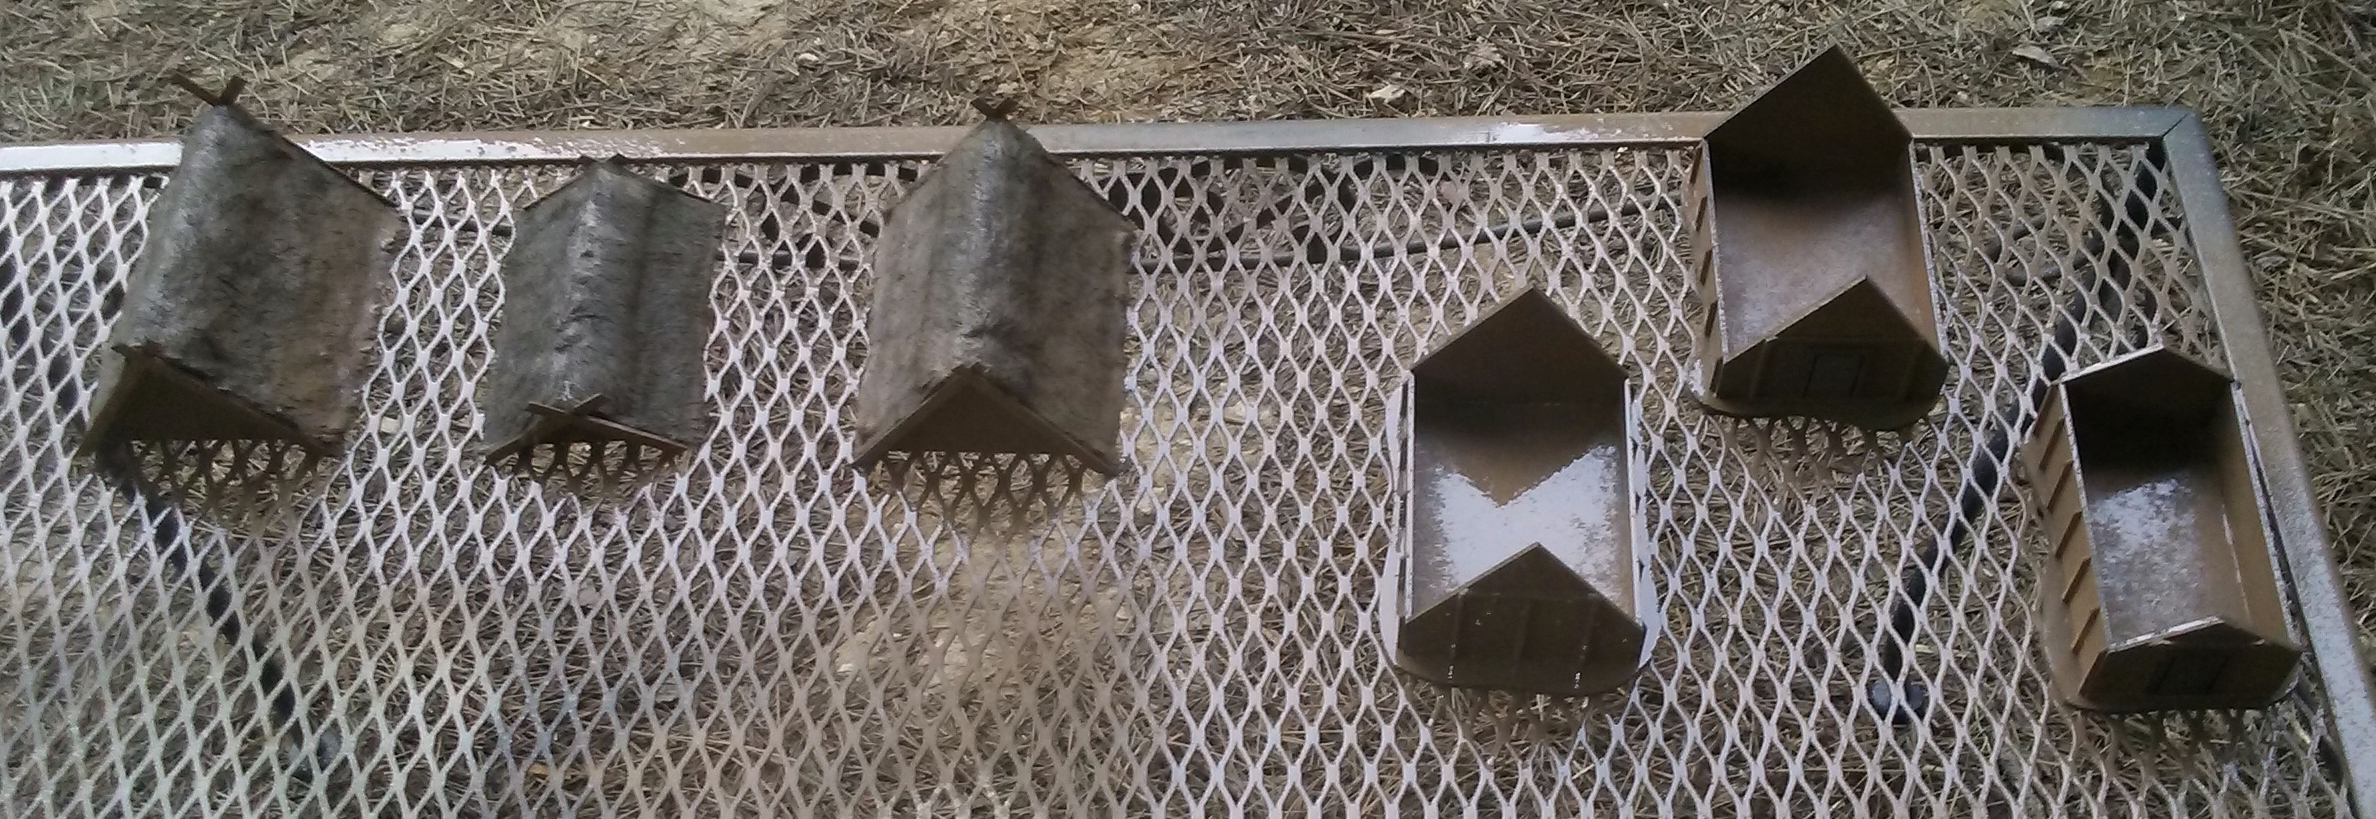
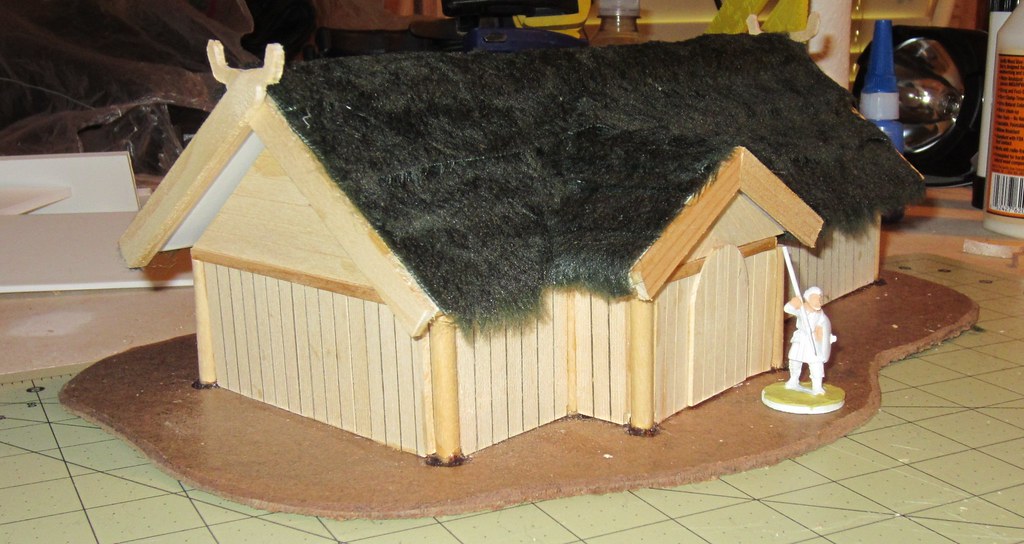
Lastly, since I love terrain projects, I ordered a set of their Viking tent frames. You get enough parts to make end frames for six tents for $3.50, or you can order the assembled frames for $2.50 a pair, or the complete tents for $3.50 each. (One very nice touch is that you can order different colored patterns for the complete tent kits.) Since I love to build and customize, I chose the unassembled frames.
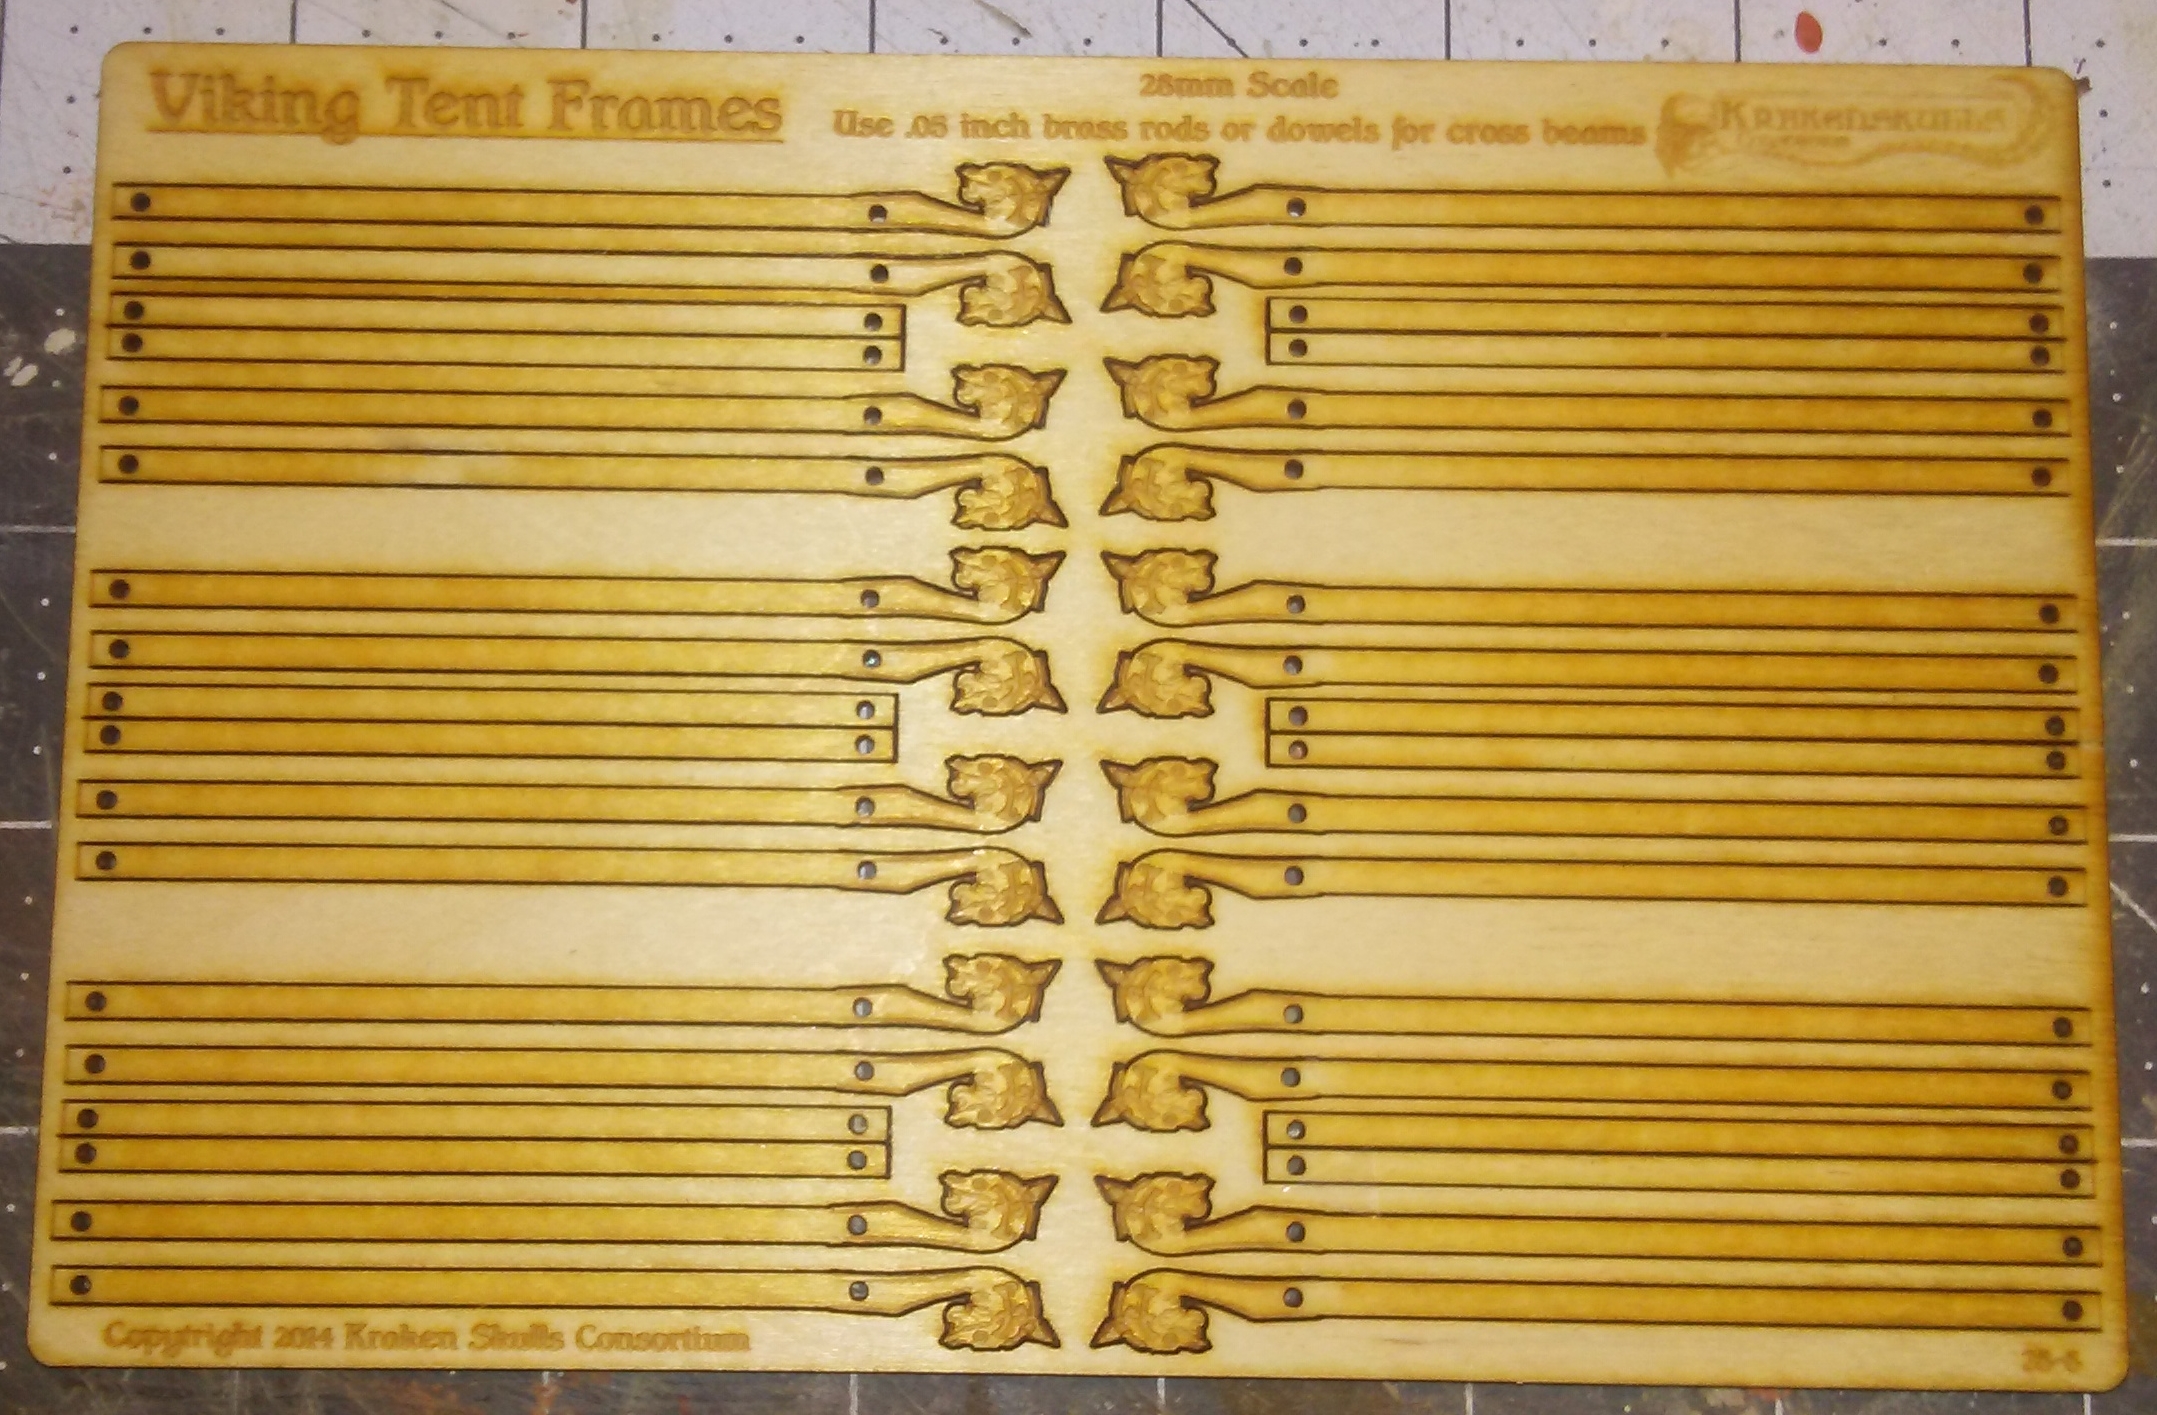
Viking tent frames.
I plan on using these to make a Viking seaside encampment, with a beached longboat as well. I already have the 1:50 Revell kit, it just needs to be assembled and painted.

Revell Viking ship kit.
I'll post again once I use the frames to actually make the tents. I am still in the process of deciding what to use for the tent cloths.

But, in the meantime, I can wholeheartedly endorse the good folks at Kraken Skulls Consortium - fantastic service and fantastic products. I am certain to be ordering from them again (if nothing else to get my daughter her set of measuring sticks, and they have a selection of laser-cut buildings that look intriguing).

'Til next time!

Sunday, July 24, 2016

Dark Ages - Upgrading Warbases' Grub Hut and Longhouse


Since my Spanish colonial town is almost finished, and I have not yet decided what I'm going to be working on next, I thought you might enjoy a return to my Dark Ages terrain, which I use for Saga (and hopefully soon for some games of Blood Eagle).

A while back I ordered some buildings from Warbases in the UK. The cost was very reasonable, even back when the pound was high and is of course better now. From the pictures on the website, I could tell these were very basic buildings, with no external textures or details (other than the doors), but I felt they had great potential.

I ordered three buildings (two grub huts, and one longhouse) from their Dark Ages line.

The first step was to assemble the buildings. As I mentioned, these are basic structures and so are very easy to assemble. I cut our bases for the buildings (this is not at all necessary, but something I wanted to do), and glued the floors down first. Then I glued the walls into place, clamped them and left them to dry.

Building walls drying after assembly.

Floor of one building glued to base.
After the building walls were dry, I glued the doors in place. Despite the website photo, I chose to glue the longhouse door on the short end as well. In addition, I glued balsa timbers and coffee stirrer planks in place to add some relief and visual interest to the otherwise plain walls.

Front of houses after adding details.

Rear of houses after adding details.

Houses with some figures for scale.
Once the sides of the buildings were done, it was time to turn our attention to the roofs. I added some beams on the edges, and teddy bear fur to represent the thatch.

Roofs detailed with beams and thatch,
For the final stages, it was simply a matter of painting and adding some terrain goop to the bases.


A rattle can spray of brown covers everything at first.

Applying terrain goop (filler, paint and sand).

After applying various drybrushes of lighter browns.


And that's it - the houses are finished.

The completed longhouse.

A completed grub hut.

The completed buildings.


Here's a couple of pictures with the Warbases buildings beside some of my scratch built buildings and a 4Ground house.


Warbases buildings besides a scratch-built house (left).

Warbases buildings with 4Ground (lower left) and scratch-built buildings (upper center and right).

As with most things in life, you get what you pay for. The Warbases buildings are inexpensive and very basic. But therein lies their value, at least to me. They save me from having to build the basic structure of a building, and allow me to get to the part that I truly enjoy - the detailing and customizing. Including assembly, I think I probably spent no more than three hours on these buildings in total, spread out over a few days to let the paint and glue dry in between steps. They can be finished in a variety of ways, so each builder can make them his own. Give them a try, I do not think you'll be disappointed.

Sharp-eyed readers may notice that my Viking hall is completed (top center in the previous photo). I did not take a lot of pictures of the final stages, so it will not get its own blog post (it was really just a case of finishing the base and painting the building and roof). Here's a photo of the completed building, which will (at least for now) be the central building of my Dark Ages Viking village.


'Til next time.

Friday, June 3, 2016

Desert terrain - more palms and a sand ridge

Following up on the desert theme from my last post, I've been able to get a lot of work done on making terrain in the past few days - better progress than I've ever been able to maintain consistently! I don't know about you, but with me it seems that almost every time I get up a good head of steam and enthusiasm for a new game, era, theatre, etc., life comes at me and quickly interrupts my progress. Or, I get in my own way by fixating on a new shiny before I complete work on --- SQUIRREL! You get the picture.

I finished the oasis piece, with the addition of some small beige tufts from Gamer's Grass.

Photo of Beige 6mm Tufts from Gamer's Grass website.
I'd never used pre-made tufts before, and I must say - I am sold. I will definitely be picking up a wider variety of these to use in all my various terrain-making and figure-basing projects. They look terrific, and they are very easy to apply. The tufts just peel off the backing paper, and they have a slight adhesive already on them. The instructions suggest using a dab of glue for a better bond. I used Aleene's Clear Gel Tacky Glue. Peel, dab and stick. It really is as easy as that, and improves the look of the terrain tremendously, in my opinion.

Here's a group shot of the all the various desert terrain pieces I've completed:

Group shot
This stand of trees was made using MDF for the base layer, and a sheet of craft wood for the top layers. I added an extra, smaller level of wood at the rear to give the piece added relief.

Before adding any texture or paint.
Palm tree stands, textured and flocked.
Here is the completed stand of trees. I am using DUST figures (1:48 scale) to show the size.

Completed and ready for use.
I made another large stand of palm trees to complement this one:

Yes, that's the Desert Fox himself hiding in the trees...
The smallest stand of trees is made from some scrap pieces of thick sheet styrene I had lying about the work area.

Tina and Hyane patrol the palms.
After I got done adding texture to the palm tree stands, I still had quite a bit of my texturing material left. Working quickly so as not to let it dry, I cut a piece of pink insulation foam into shape as a dune/sand ridge. I used a hot wire foam cutter to shape it. I use a cheap one, very similar to this one, that I bought at Michael's.

Pink foam, ready for flocking.
The completed ridge will provide some small amount of cover for advancing troops.

Axis troops led by Red Yana.
Now I need to make some larger dunes or sand formations. That's easy - the hard part will be not getting sidetracked!

Lastly, a friend asked me how well the trees would scale with 15mm figures. I sent him a photo, but thought to share it here as well in case anyone is interested. Here you can see some Flames of War 15mm US infantry troops among the trees. I hope you find it helpful.


'Til next time.

Wednesday, June 1, 2016

Desert terrain - palm trees and an oasis

Lately, my gaming has taken a turn for warmer climes... requiring desert and tropical terrain. I can use the same terrain for quite a number of gaming systems - Crusader battles for Saga: The Crescent and the Cross, Operation Babylon combat for Dust 1947, North African World War II combat for Bolt Action or Chain of Command (progress on my DAK force began last week. and can be seen here), or island terrain for pirate battles for Blood and Plunder.

To start, I decided I needed an oasis and several stands of palm trees.

I began by cutting out the basic shapes, using MDF, craft plywood, and plasticard. Each shape consists of two layers (or more if I wanted it to have a bit of relief). I then cut, in the case of the oasis, or drilled, in the case of the holes for the trees, into the top layer of the material.

Once that was done, I glued the layers together, clamped them, and allowed them to dry completely. On the oasis piece, I used filler to smooth out some of the edges, and to seal the area where I would pour the water.

Stand of palm trees

Oasis

After adding filler to smooth edges and seal oasis

I mixed up a batch of textured filler to spread over the terrain. I used a wood filler (but sometimes I use regular filler or spackle), added a dollop of craft paint, and cheap sand I bought at the dollar store. I mix thoroughly, then start applying it to the base. Once the bottom layer is on, I sprinkle a finer sand over the top, dab Woodland Scenics Scenic Cement on it and let it dry completely.

Paint, sand and filler used to make terrain texture

Batch of texture ready to apply with spatula

Fine sand sprinkled over coarse texture

Then the painting - successive drybrushes of craft paint leading to a very light sand color.

Craft paints used to drybrush texture

Looking good so far, once trees are placed
The oasis itself was made using Woodland Scenics' Realistic Water. I poured it as instructed, to a depth of about 1/8 inch, and allowed it to dry for two days until the cloudiness was gone and the water was clear.

Realistic water, still a little cloudy

For the trees, I bought inexpensive plastic palm trees in a pack of six from Woodland Scenics. Using the 40% off coupon at Hobby Lobby makes them even more affordable. They also sell pre-painted trees, in a pack of five. But these are much more expensive, in my opinion, and a quick dab with some paint will make the cheaper trees look just as good.

I used the same technique  as before on the bases of the trees. This was after I glued a washer to the base, and trimmed it so it would fit in a one inch diameter hole. I added steel sheet inserts into these holes, and added magnets to the bases of the palm trees, to keep them more secure. I am not sure they need it, as the palm trees fit rather snugly...

Once that was done, I drybrushed the bases as I did before. I also applied paint to the trunks and leaves, then coated everything with matte sealer.

Bases trimmed to one inch

Texture applied to bases

First batch of tree bases all done

Colors used to drybrush bases

Colors used on trunk and branches of palms

And that's it, project done.


The only difficulty I've encountered is that the MDF board tends to warp a small amount as the filler and paint dry. I am not really sure how to fix this. I am experimenting with painting the bottom of the boards and letting them dry first, but we'll see how that works. I am also making a stand of trees using thick styrene rather than MDF or craft plywood. I will report the results, but in any case the warping is minor and does not affect the usability of the terrain.

'Til next time!

Monday, September 29, 2014

Saga - Viking Hall - Thatched Roof and coat of primer!


I'm back with an update on the progress of my next Viking building.

Earlier posts detailed the initial steps:
Unfortunately, I did not feel well for part of the weekend, so I did not get as far as I wanted. But, I was able to finish construction, and get the building primed in preparation for painting and landscaping.

Using more of my bargain-bin teddy bear fur, I completed the thatching on the roof. I cut the material into strips about an inch or so wide, making sure the grain of the fur ran across the width of the strips. I also cut back the material backing along the bottom strip, leaving some of the fur overhanging the roof to give it a rougher look. I think it came out looking pretty good. And the nice thing is that I still have a LOT of that ugly green fur to make more buildings. I think I paid about $3 for a yard of material.


After the material was glued down, I brushed on a water-down PVA mixture over the entire thatch, then left it to dry overnight. I used less glue than on my first building, and it dried in just a day, rather than take several days like the last time.

The other thing I did in preparation for spraying the primer, was to coat all the exposed edges of foamcore with glue (I used carpenter's glue). Since spray paint often melts foam, I wanted to add a layer of protection of possible.

Once the roof and glue were completely dry, I sprayed the entire thing. Since the building is mostly of wood construction, I used a flat brown Rustoleum spray from Wal-mart. Once this dries, I will give it some shading, drybrush highlight, and call it done.


While I was at it, I took the opportunity to prime another building. This one is a pre-made medieval building that I got for my birthday (thanks David!) and appears to be a barn or storehouse. It's a one-piece cast of a very dense foam (I don't think it's resin). I used a lighter tan for this on, since it's of mud-covered wattle construction. The base may not fix exactly with a Dark Ages theme, but I think it'll be okay. I am not a stickler. Plus, this gives me a third building so that I'll have enough to play the Homeland scenario without having to borrow terrain.


Hopefully, I'll be able to get these finished up this week so I can move onto other projects.

'Til next time!