In addition to the other buildings for my Spanish colonial town (details of the first building can be found here:
Part 1,
Part 2), I wanted to have a large church. I wanted an imposing structure that would dominate the center of the town visually, and felt a church would be the perfect thing.
I began looking for inspiration by looking at the church that Gary Chalk built in an article for Wargames Illustrated.
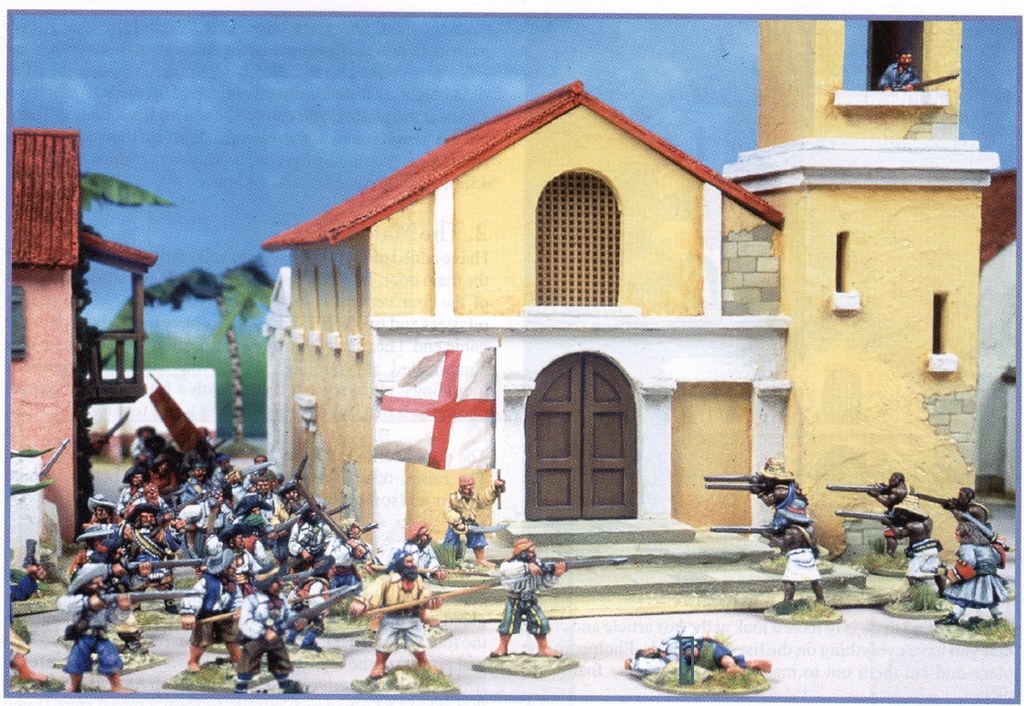 |
| Church built by Gary Chalk. |
I am a big fan of Mr. Chalk's work, and decided I'd follow his lead, My church is designed a little differently and has different dimensions, but has a similar look.
I began work on the bell tower portion of the church. As is my custom, I built the main structure of the church from foamcore, using wood strips and pieces to add relief and detail.
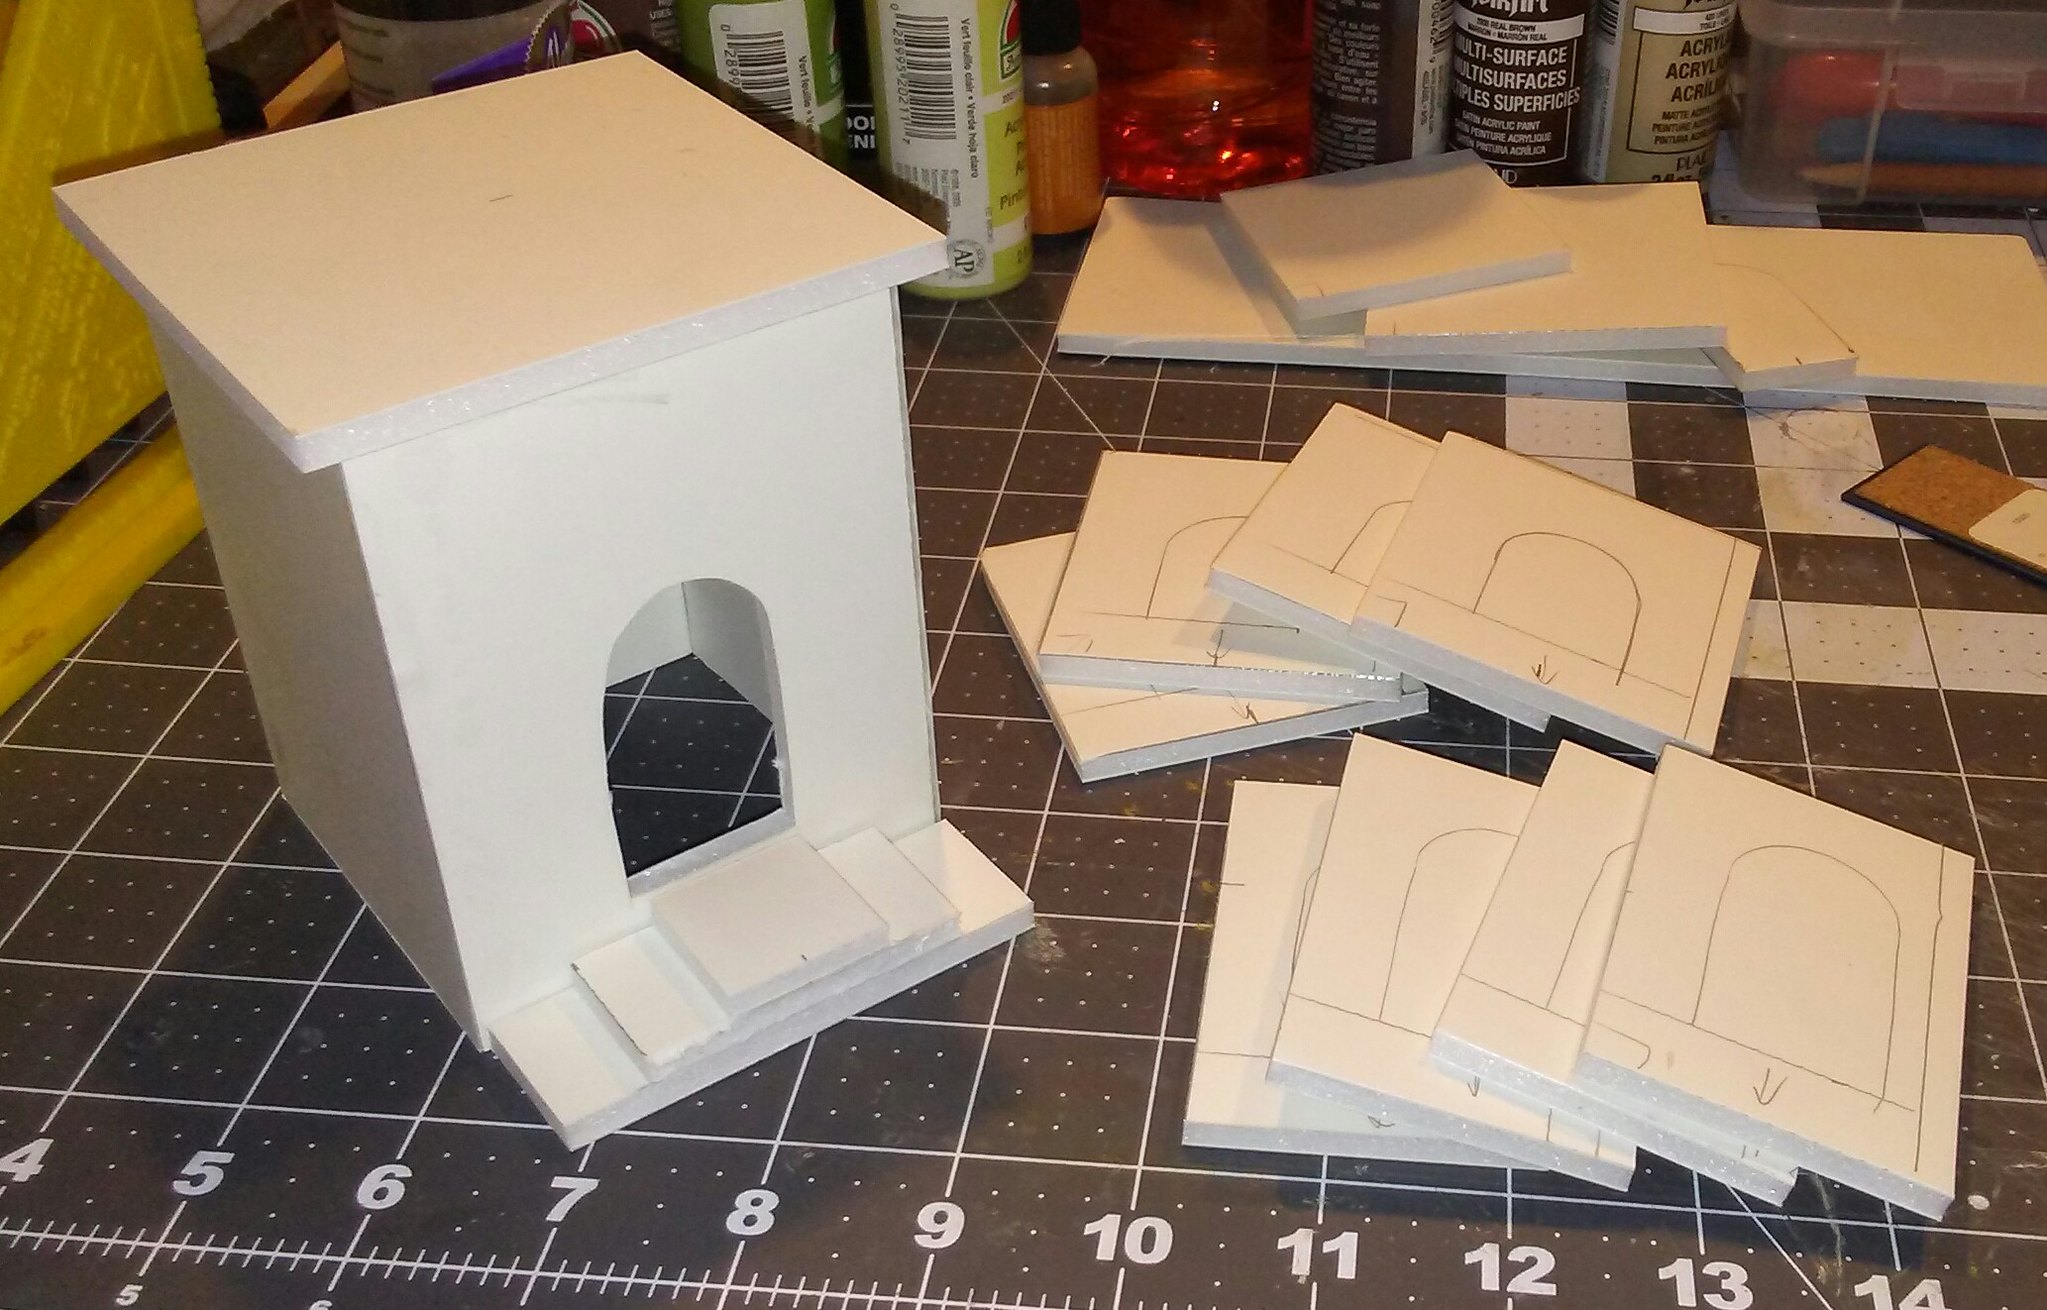 |
| Bell tower construction begins. |
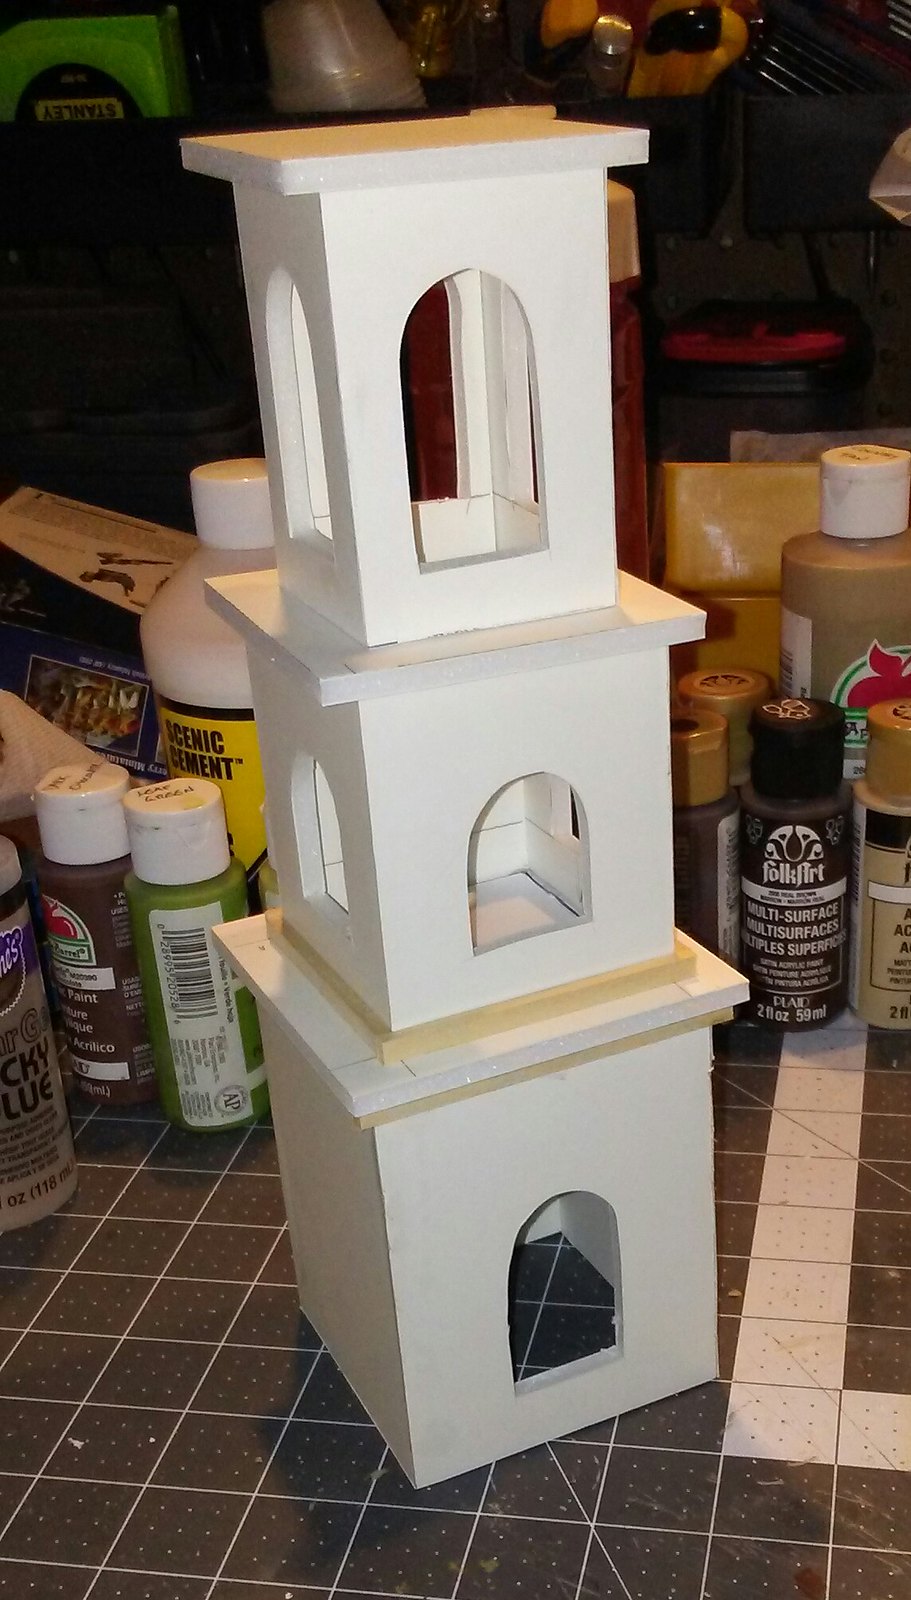 |
| Main tower structure assembled. |
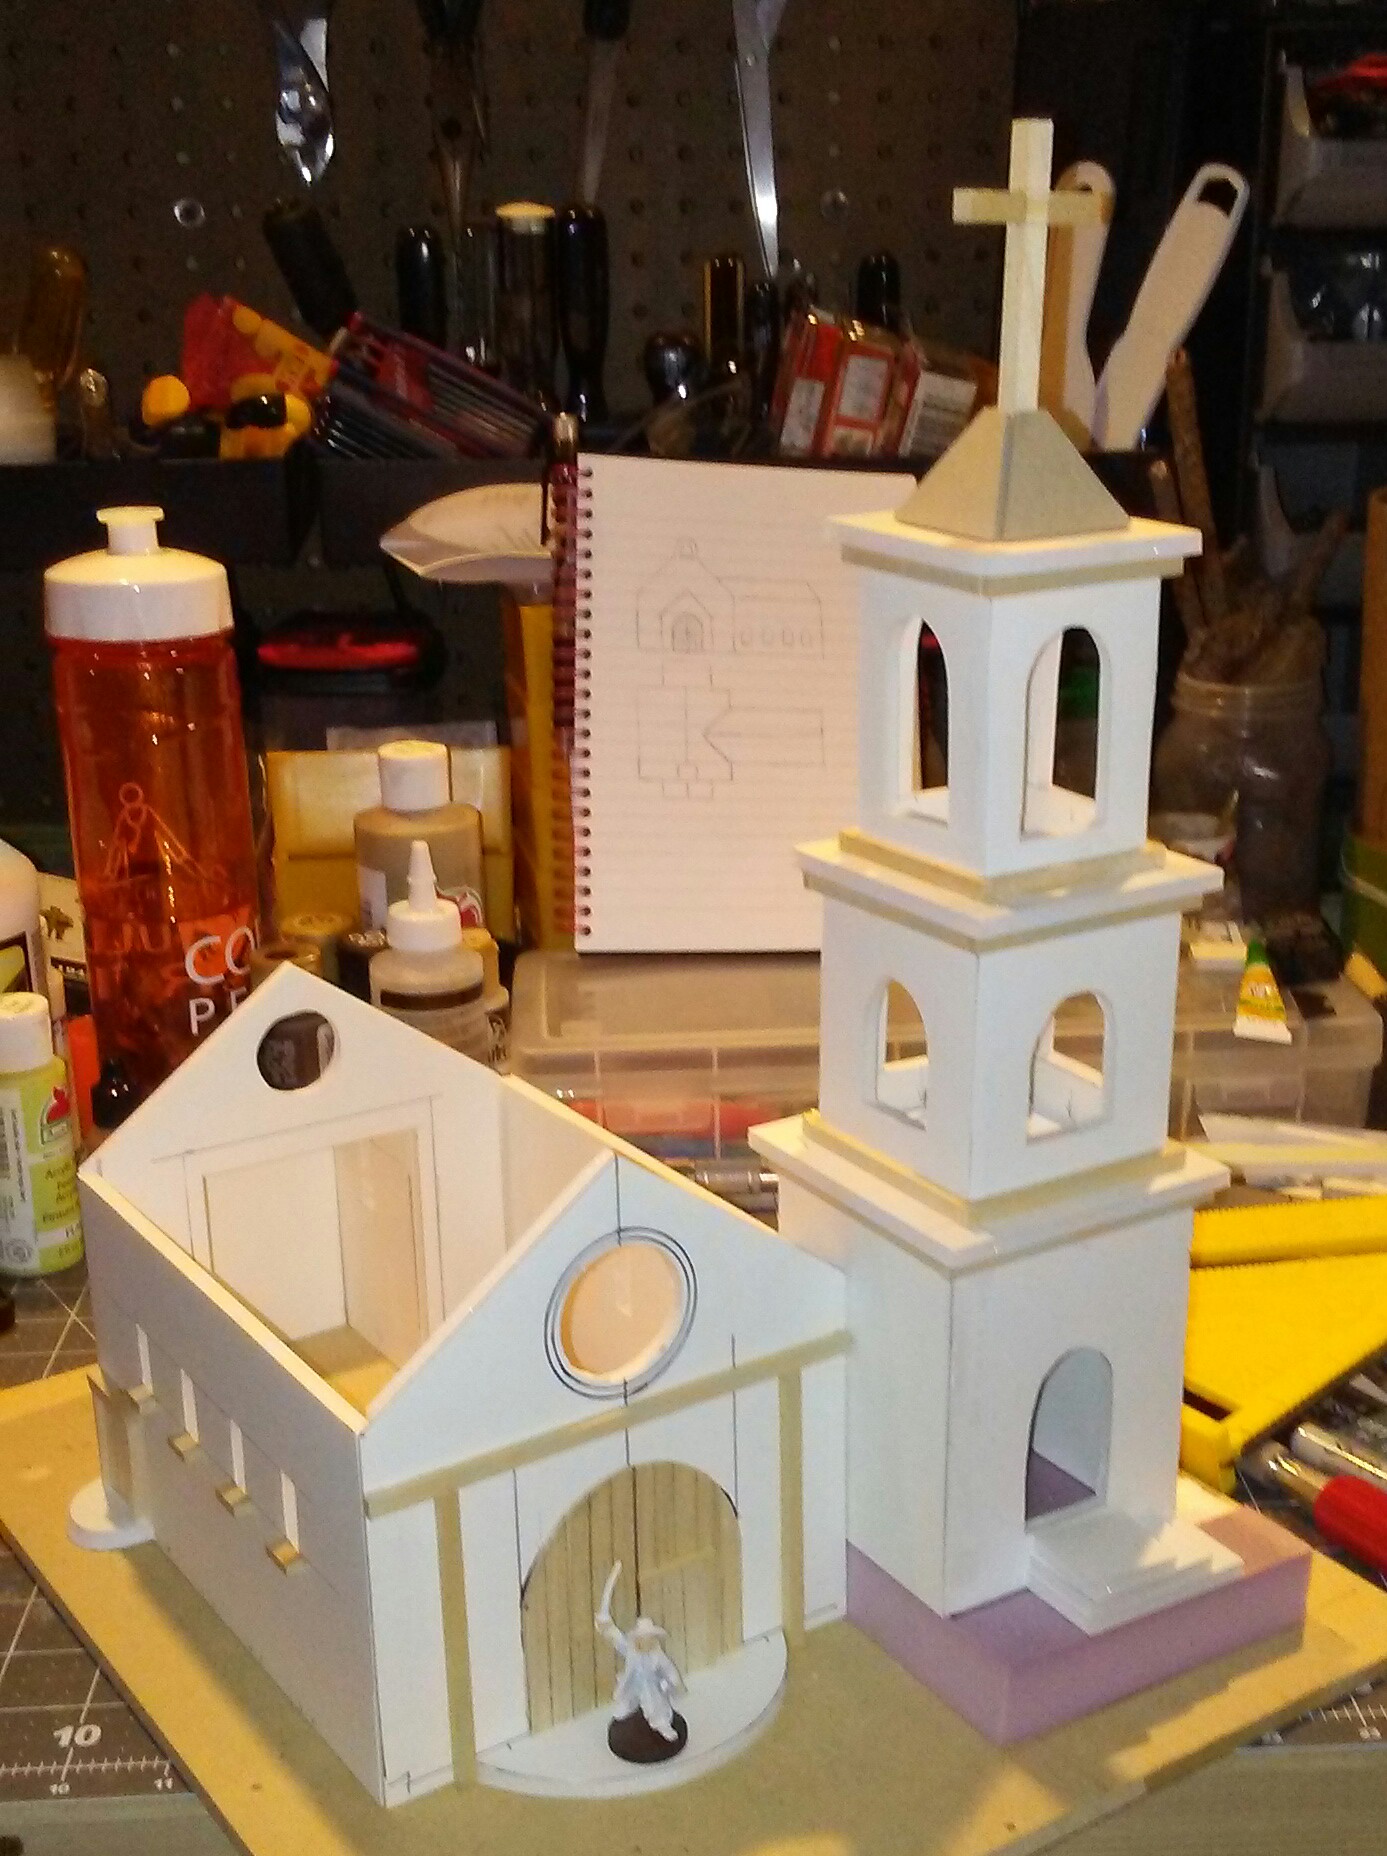
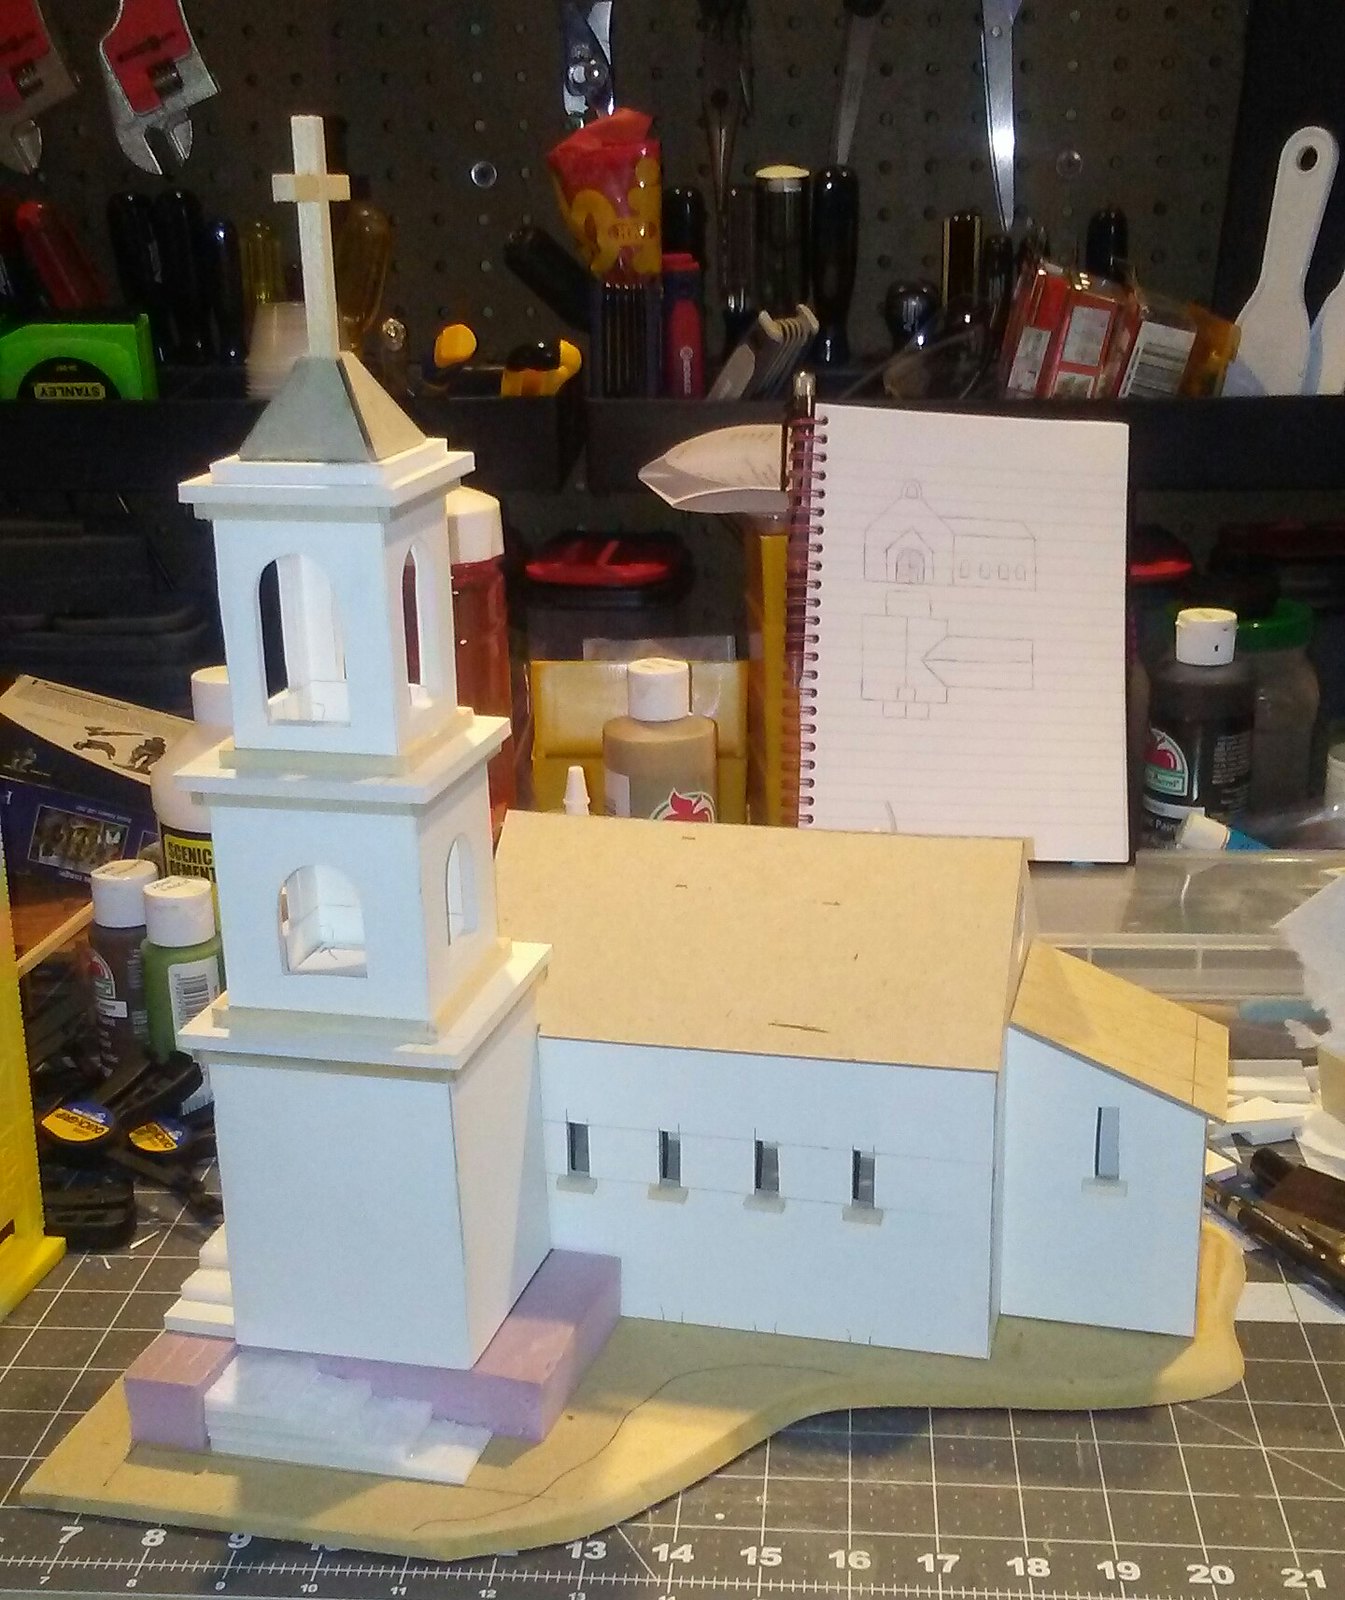
I sketched the front wall of the church directly on to the foamcore, and set it beside the tower to test size and fit. Unless I am working on a particularly complex building, I am a "trial and error" builder, and cut out the walls and parts as I need them, test fit them, then trim or re-cut them as needed.
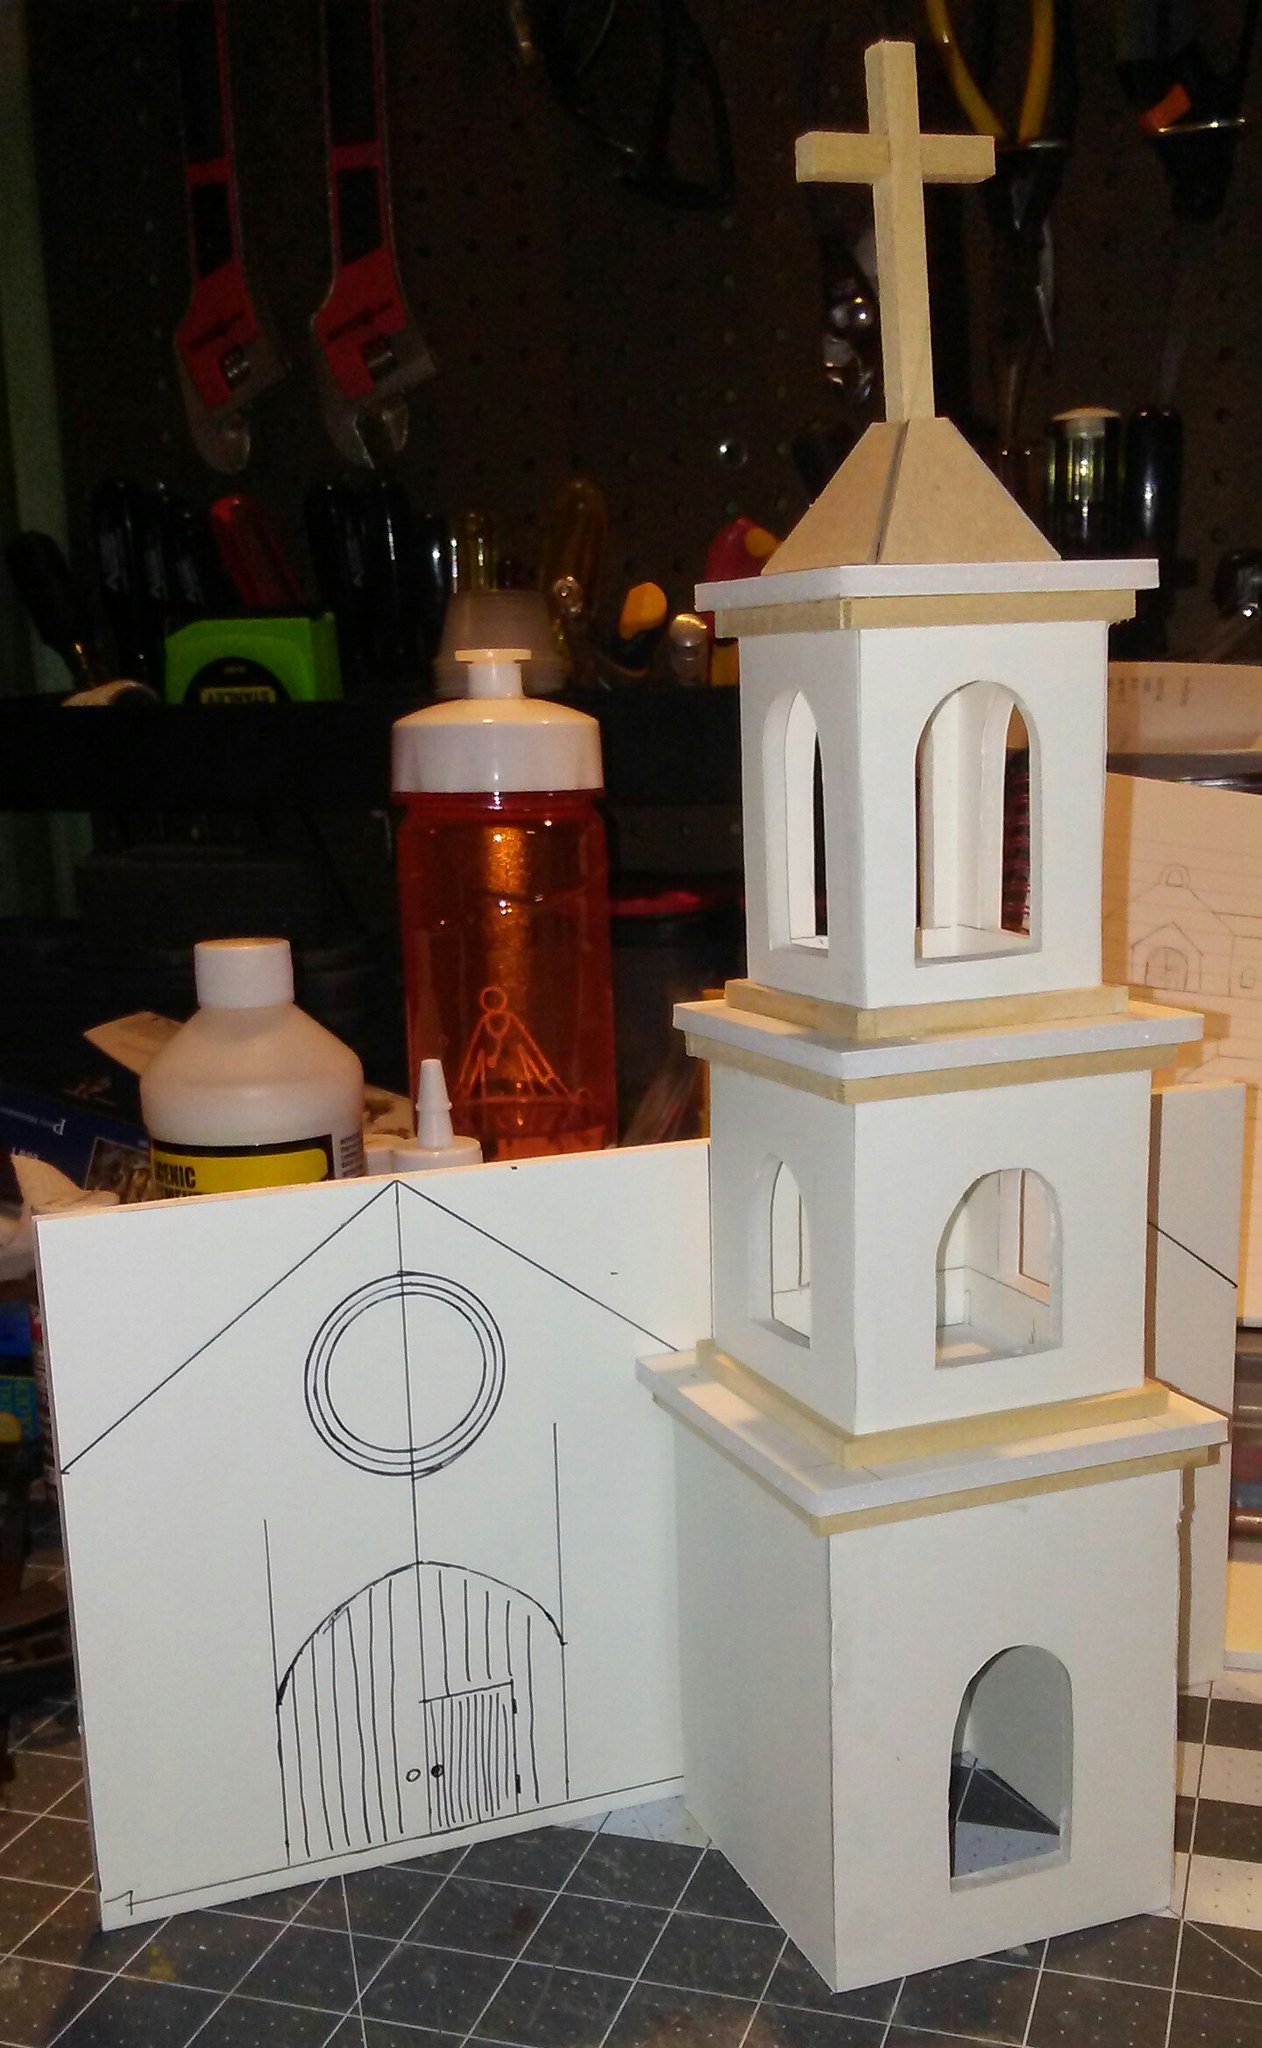 |
| Tower beside sketched front wall. |
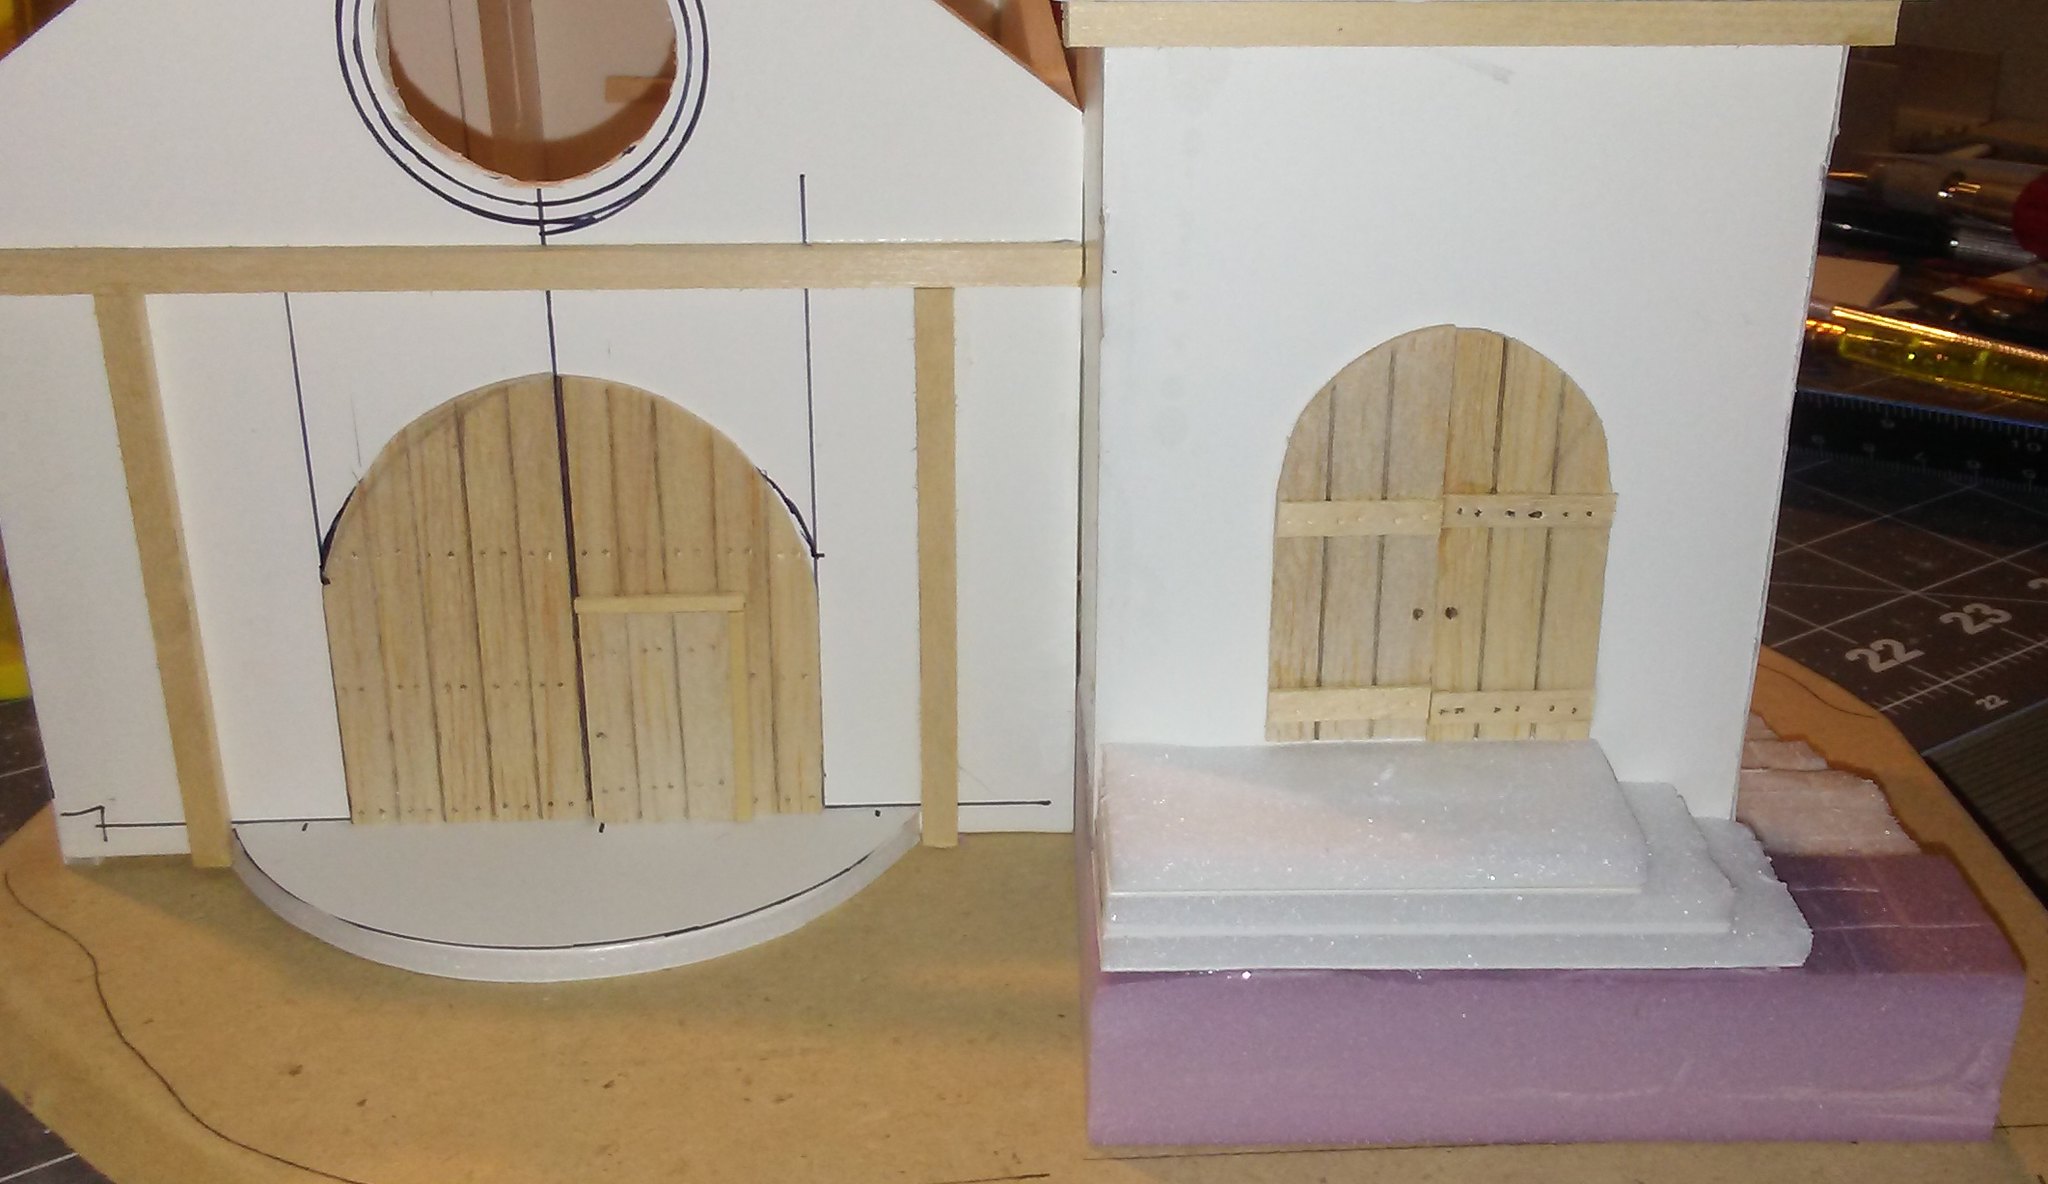
Once I was happy with the size of the front wall, I cut a matching rear wall. I built an alcove into the back of the church in which I would place the altar. I used a couple of layers of foamcore to build up the rear of the church. I cut the front door from balsa, scribed lines and nail holes into it, and glued it into place. I also cut some decorative beams from scrap pieces of wood and glued them on to the front of the church. I also cut out circular holes for large windows on each wall.
 |
| Front and rear walls. |
 |
| Bumped out section in rear wall. |
Following that, I cut out the side walls. I cut out small rectangular windows on the sides, and added a door near the altar for the priests to use. Then I glued the four walls together and the main structure was finished.
 |
| Main structure of church completed. |
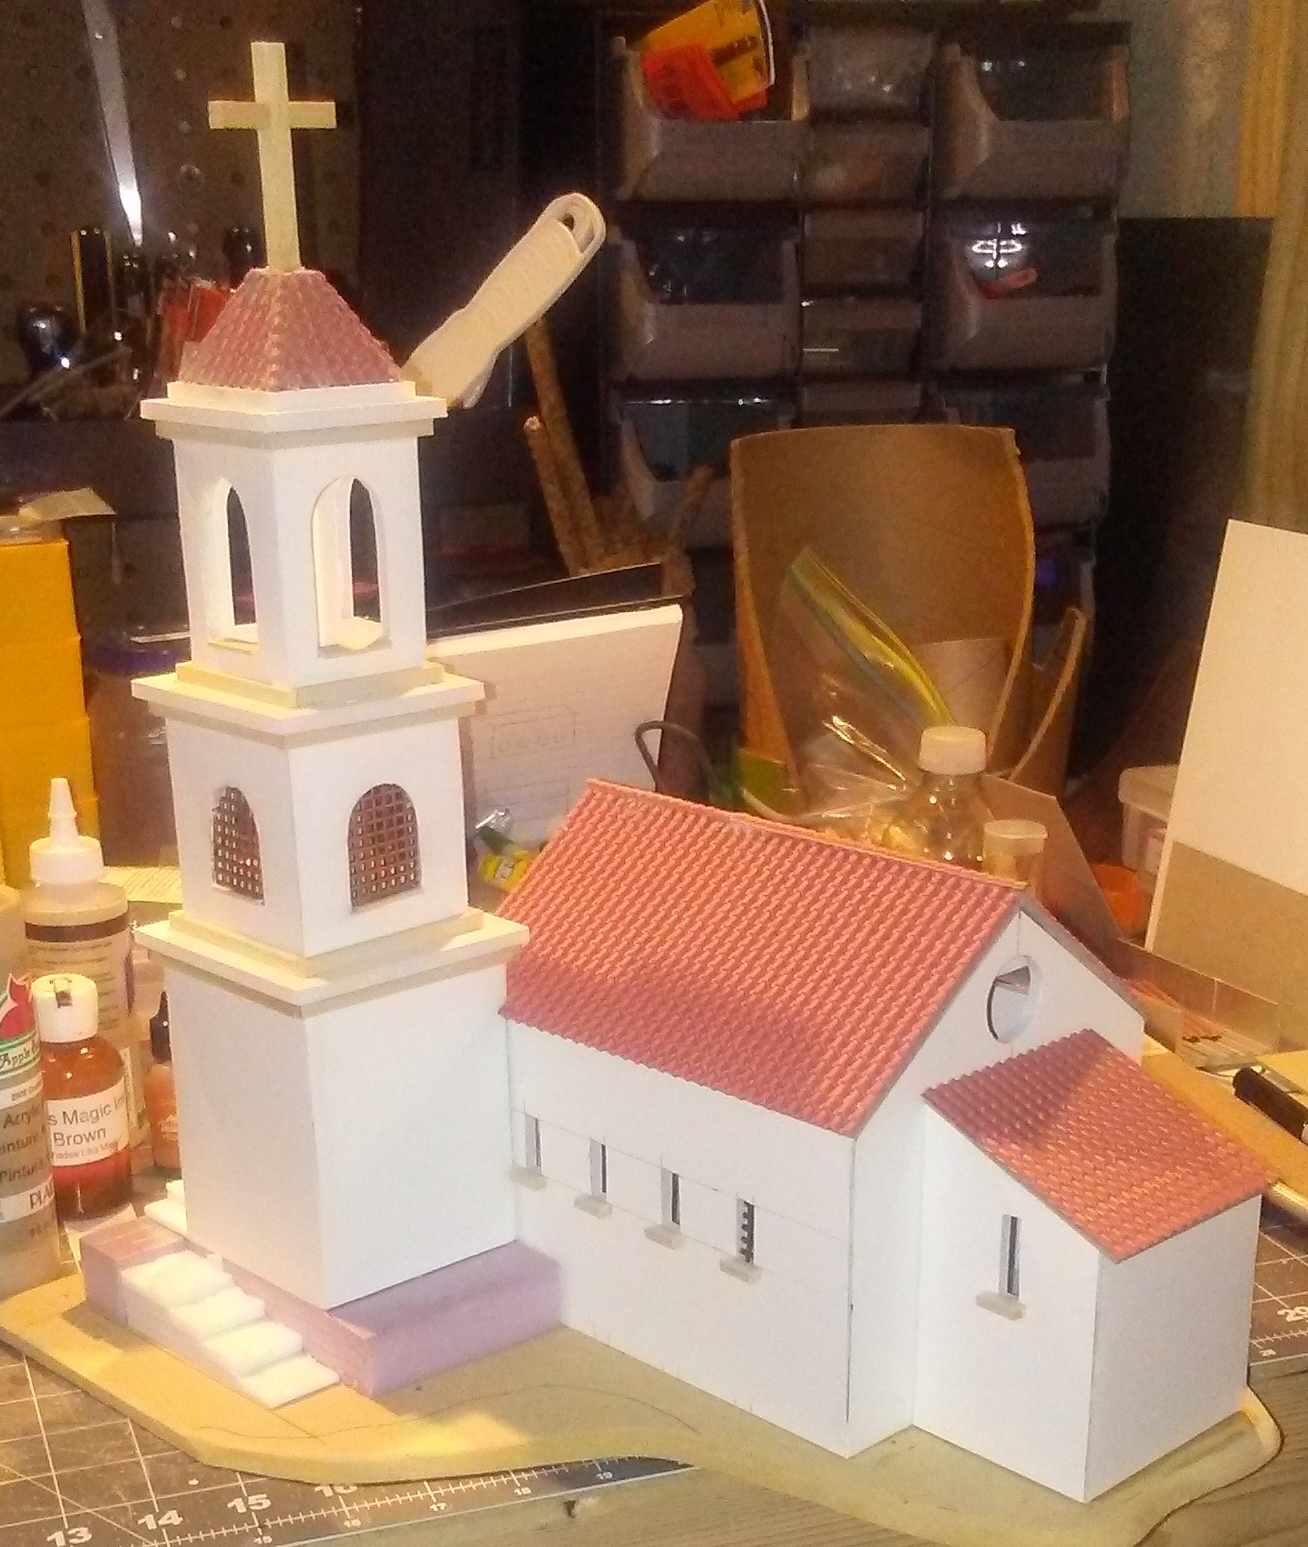
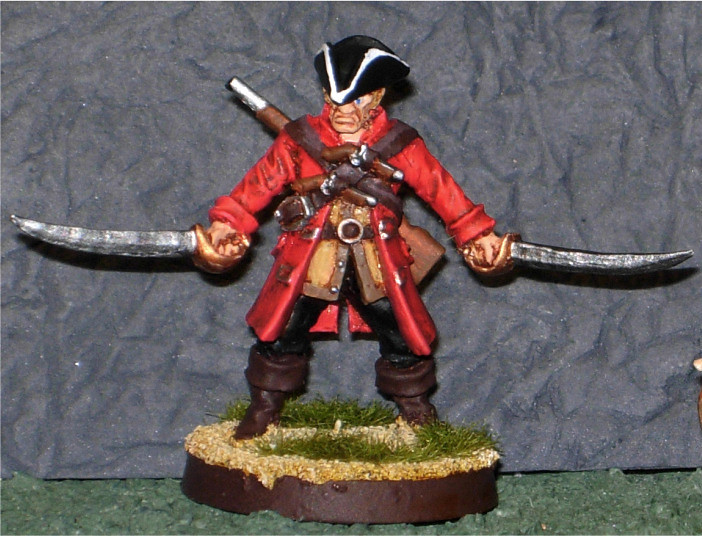
Once this was done, I realized that the tower would need to be elevated in order to fit properly against the side of the church. I cut a piece of pink insulation foam to use as the tower foundation.
 |
| Artizan pirate shown for scale. |
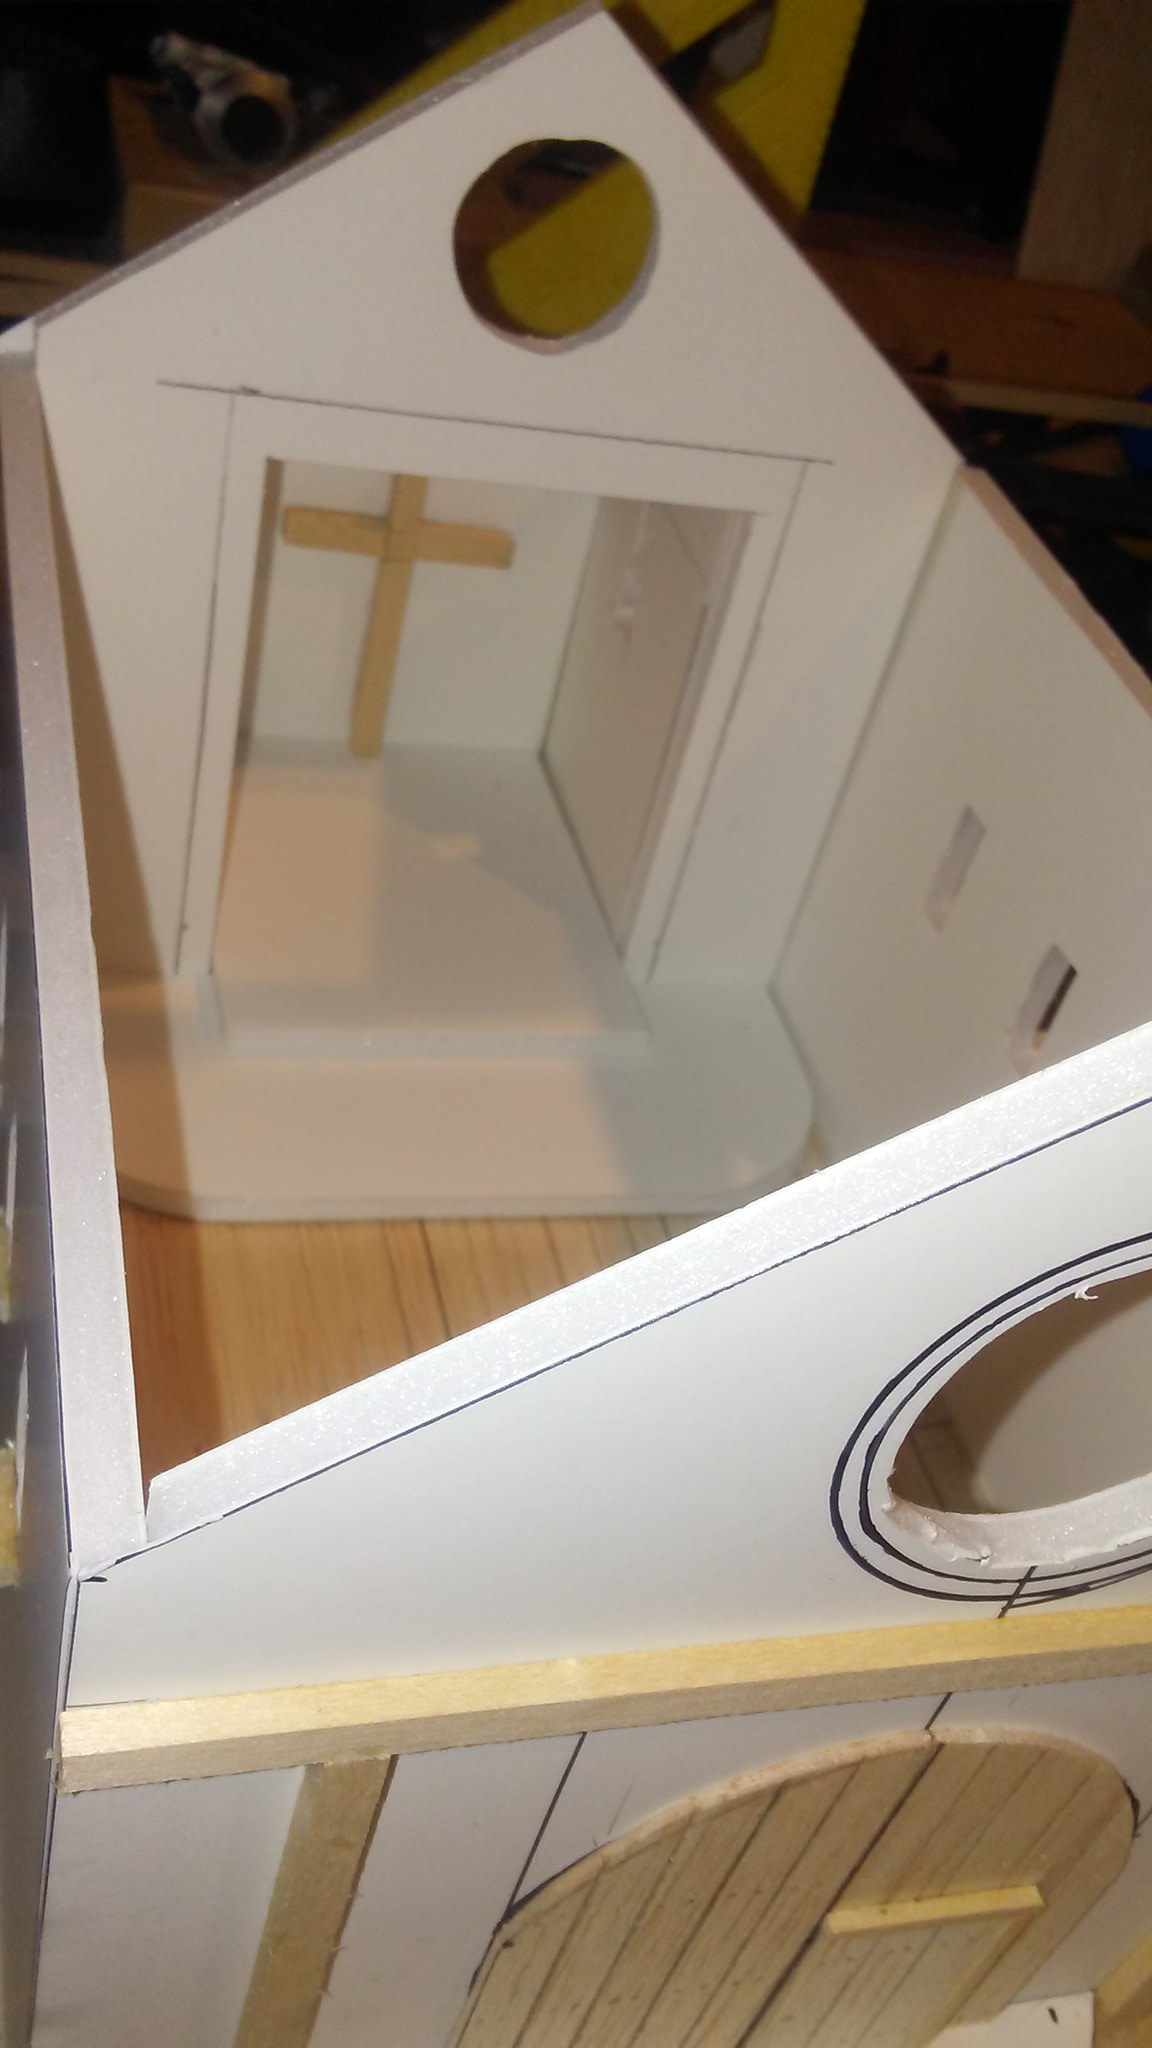
I measured the interior dimensions, and cut balsa wood to fit for a floor, scribing planks along the length of it. I felt the church definitely needed a cross behind the altar, so I built one and glued it in place. I also glued the church down to a thick MDF board that I had cut to size.
 |
| Aerial view of interior. |
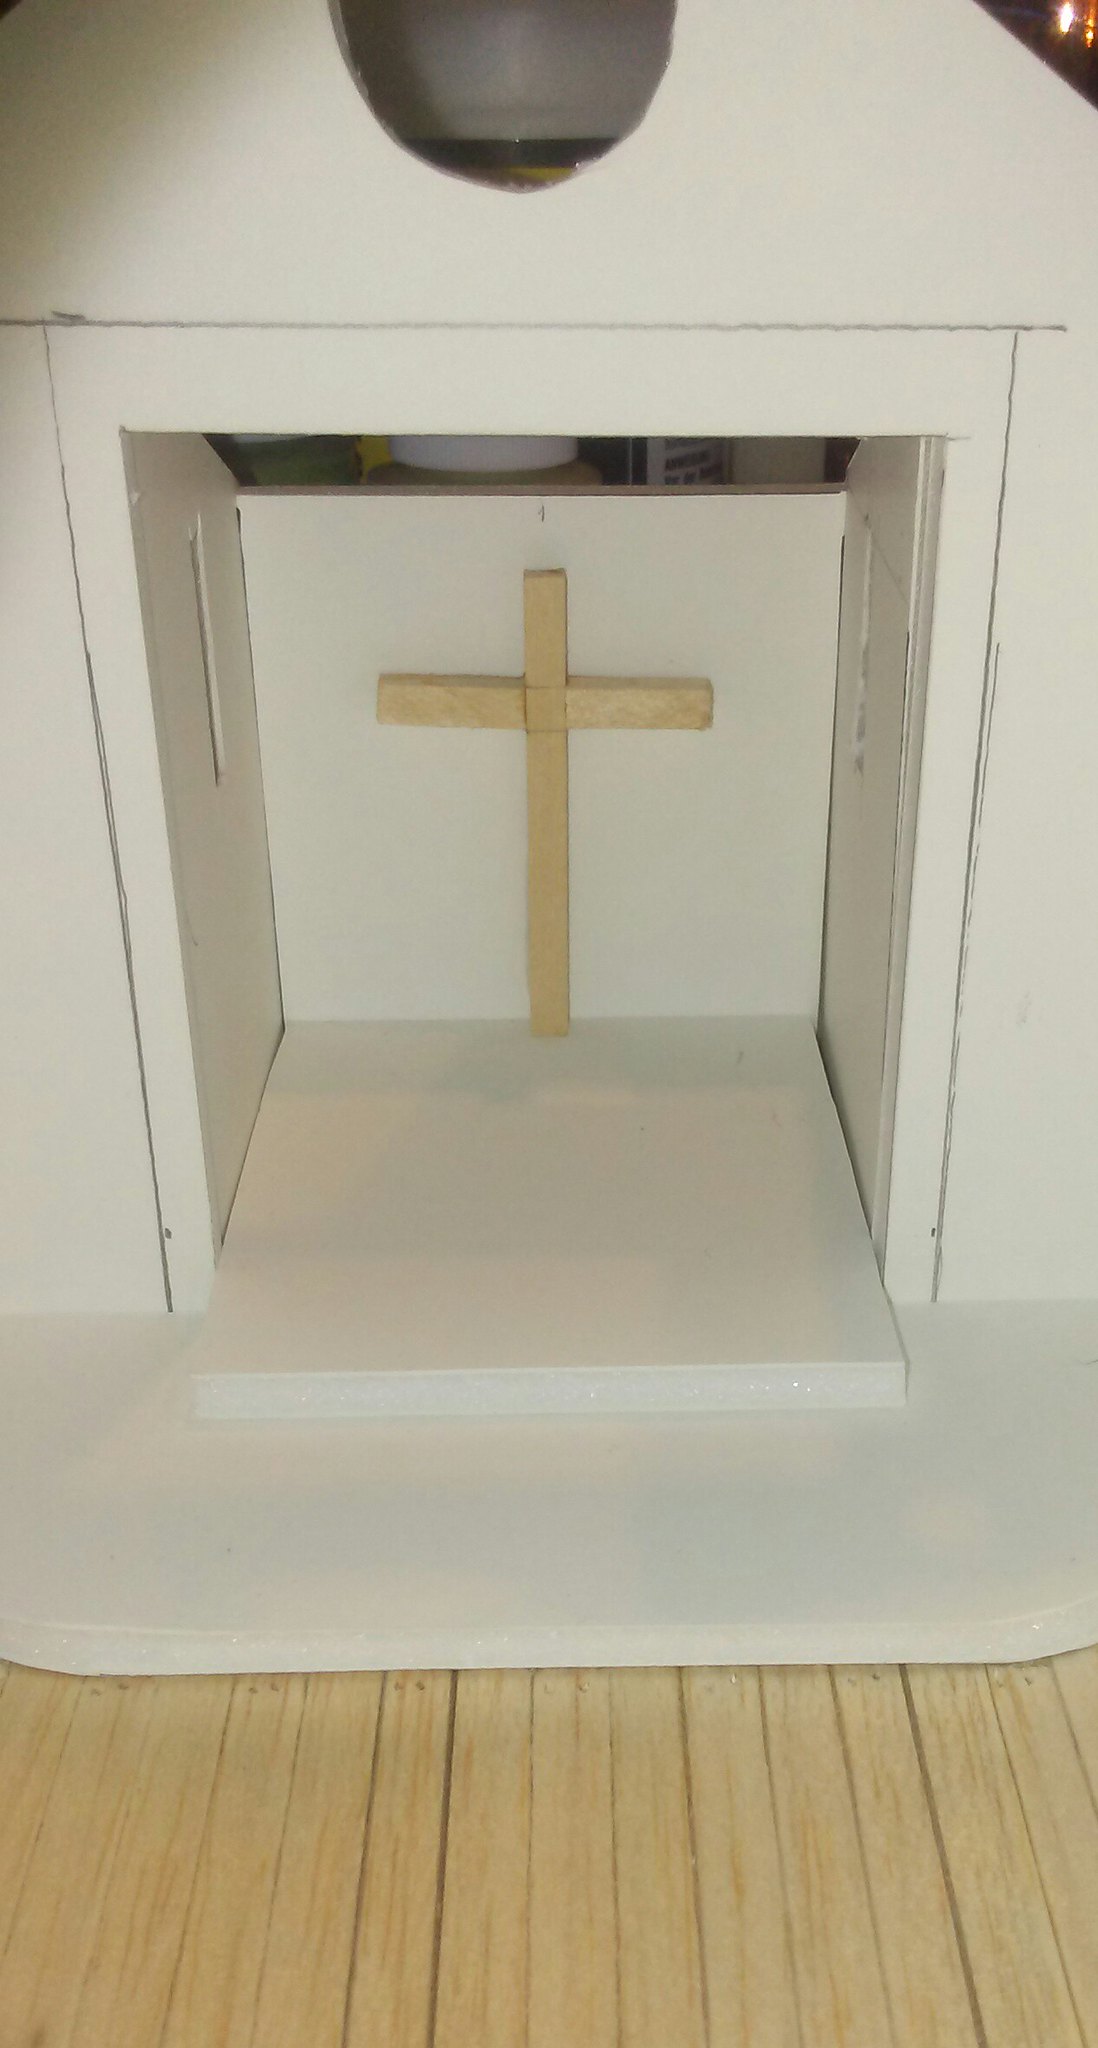 |
| Cross behind the altar. |
 |
| Interior view. |
The roof is made from thick cardboard, onto which I will glue
Plastruct Spanish Tile sheets when it is complete.
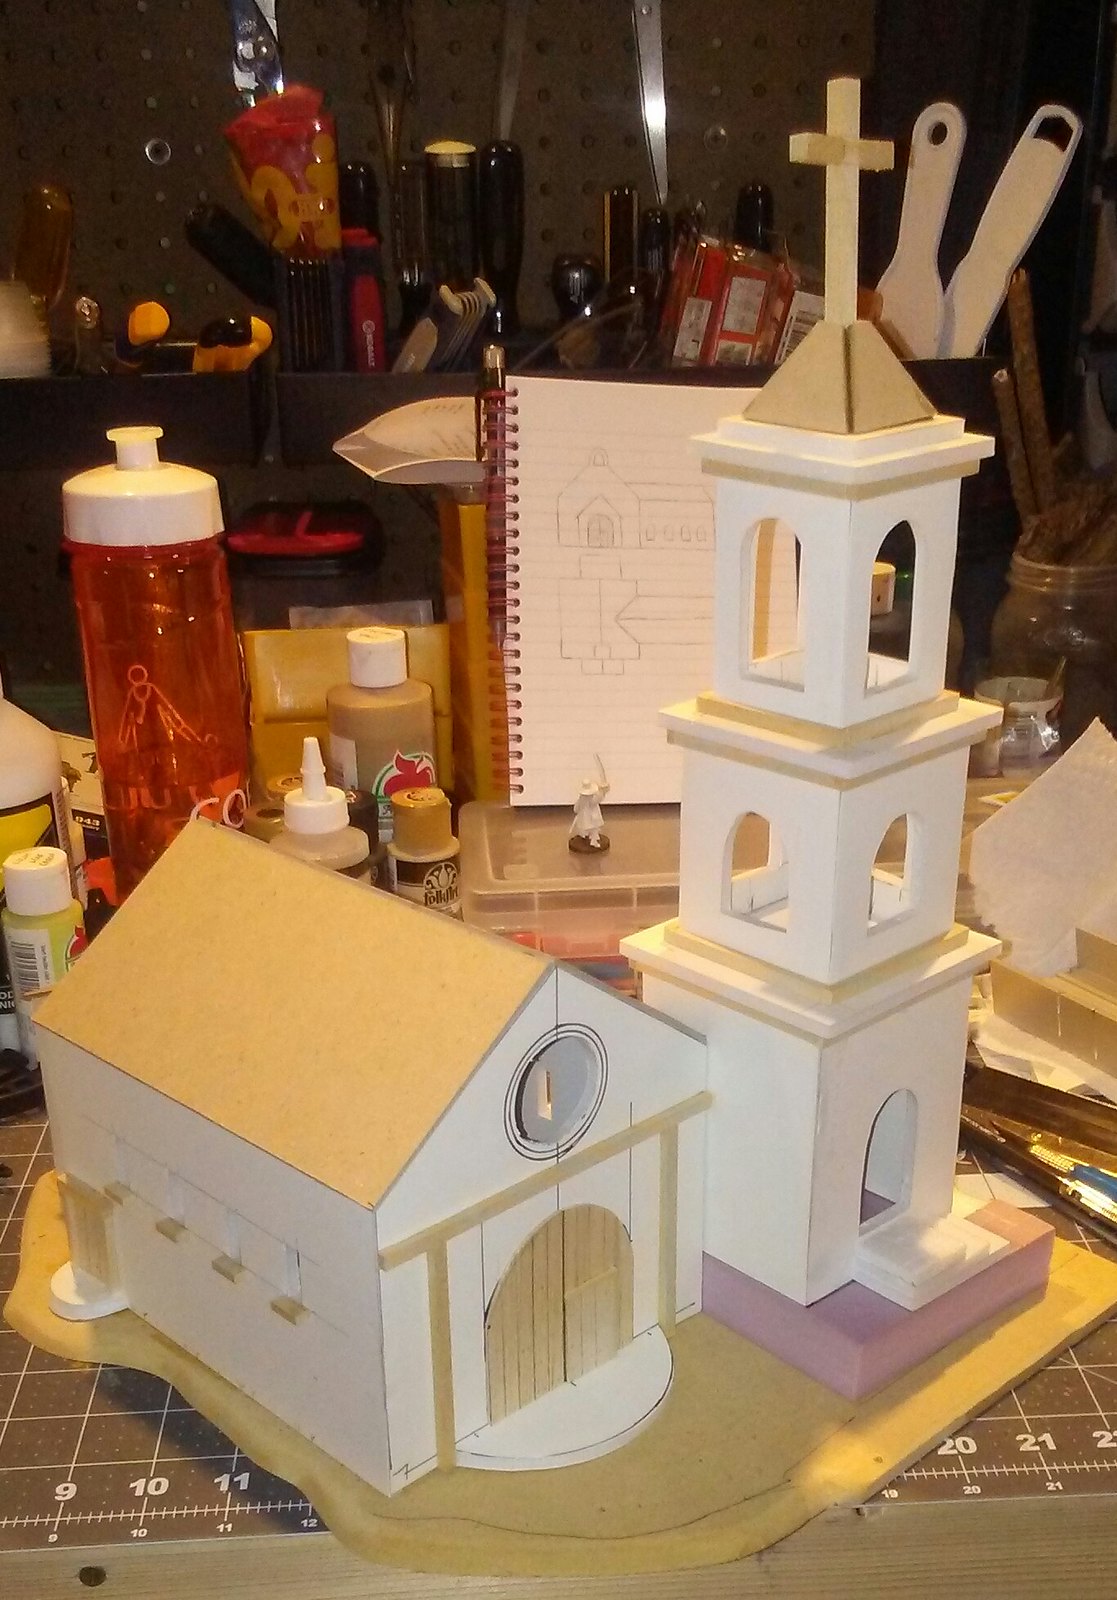 |
| Roof in place. |
 |
| Rear view with roof in place. |
 |
| Side view with roof in place. |
On the top of the bell tower, I cut cardboard triangles and built a pyramid-shaped top. Over that I also glued Plastruct tiles.
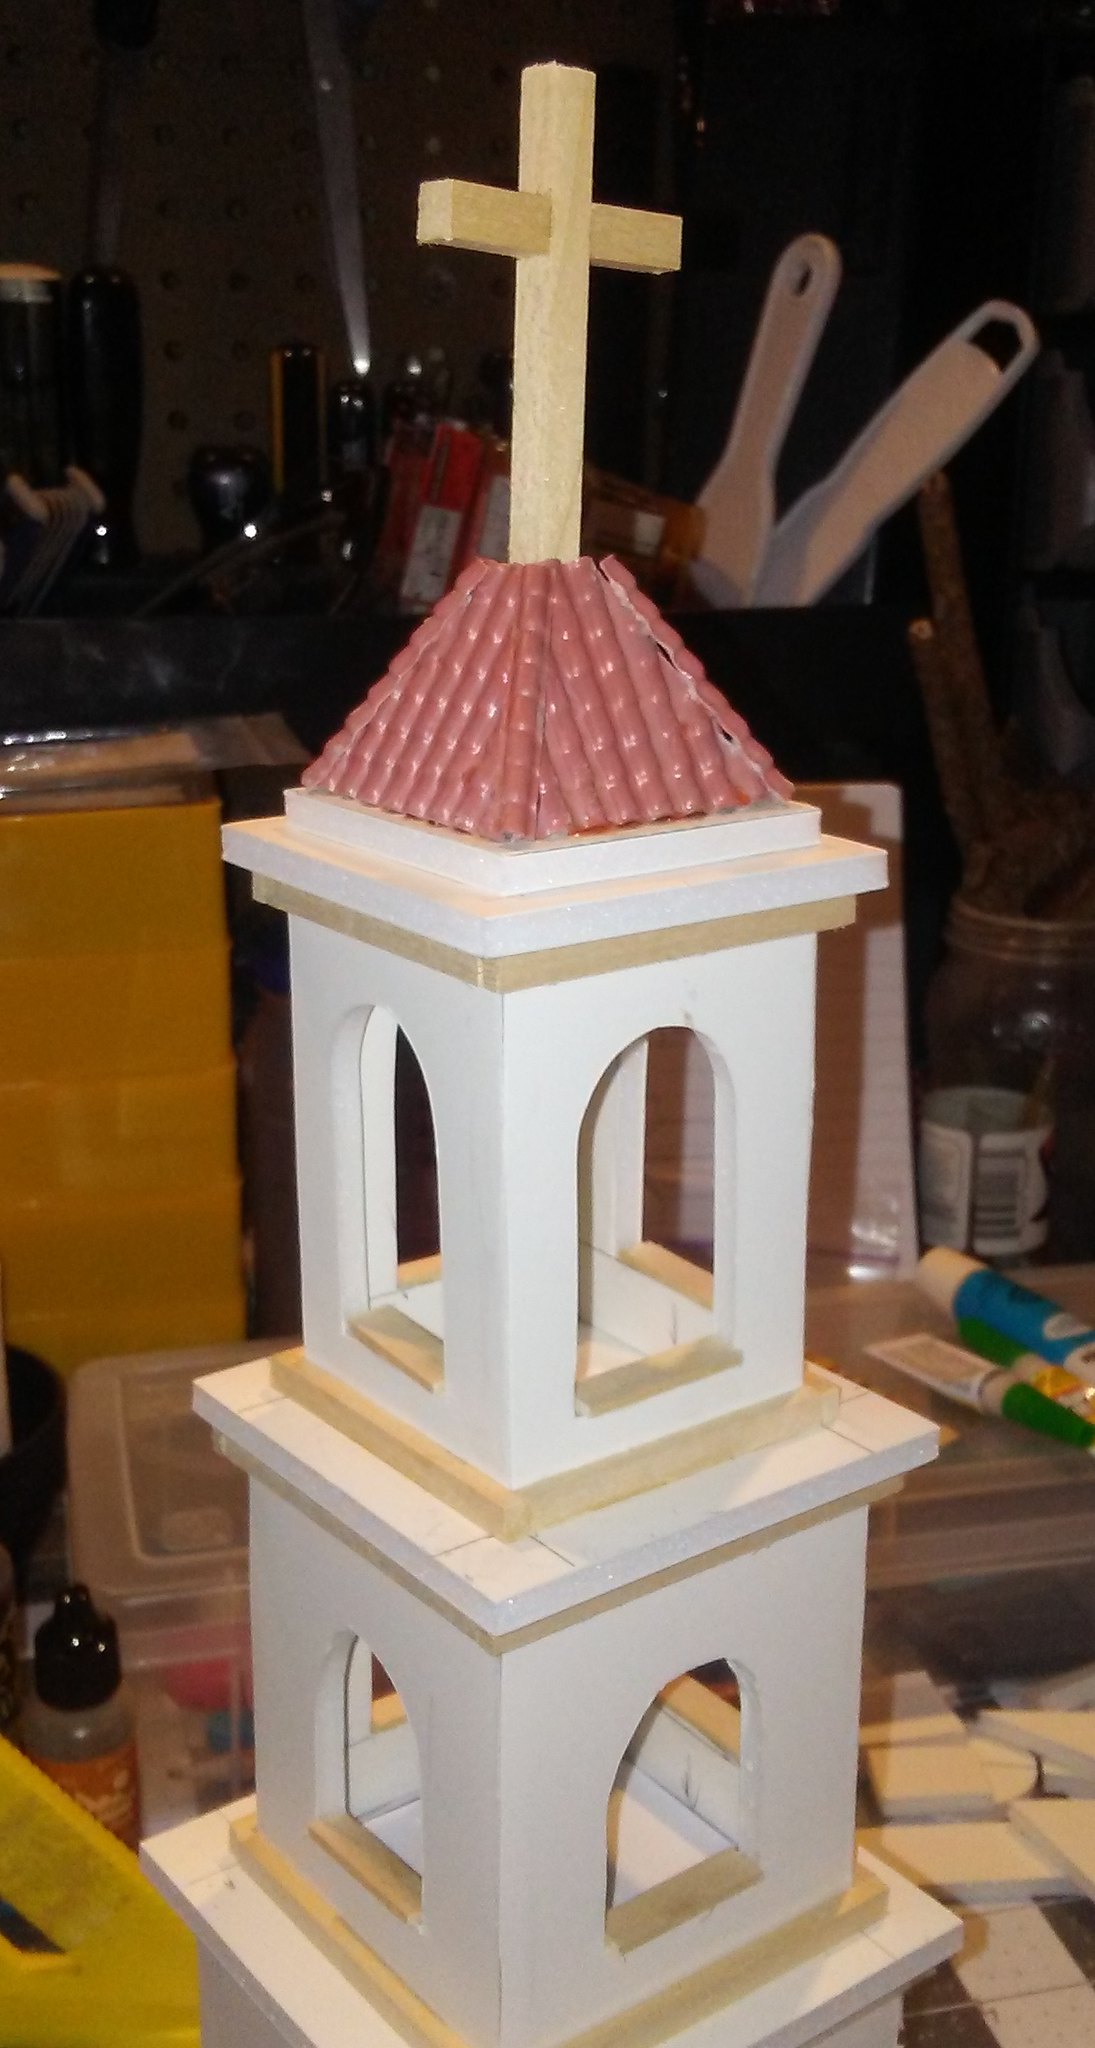 |
| Bell tower roof. |
At this point, I took another look at the overall church, and decided I was not happy with having an open door into the bell tower. So I cut a sheet of balsa to size, scribed planks into it, and glued it over the door opening. I think it looks much better this way.
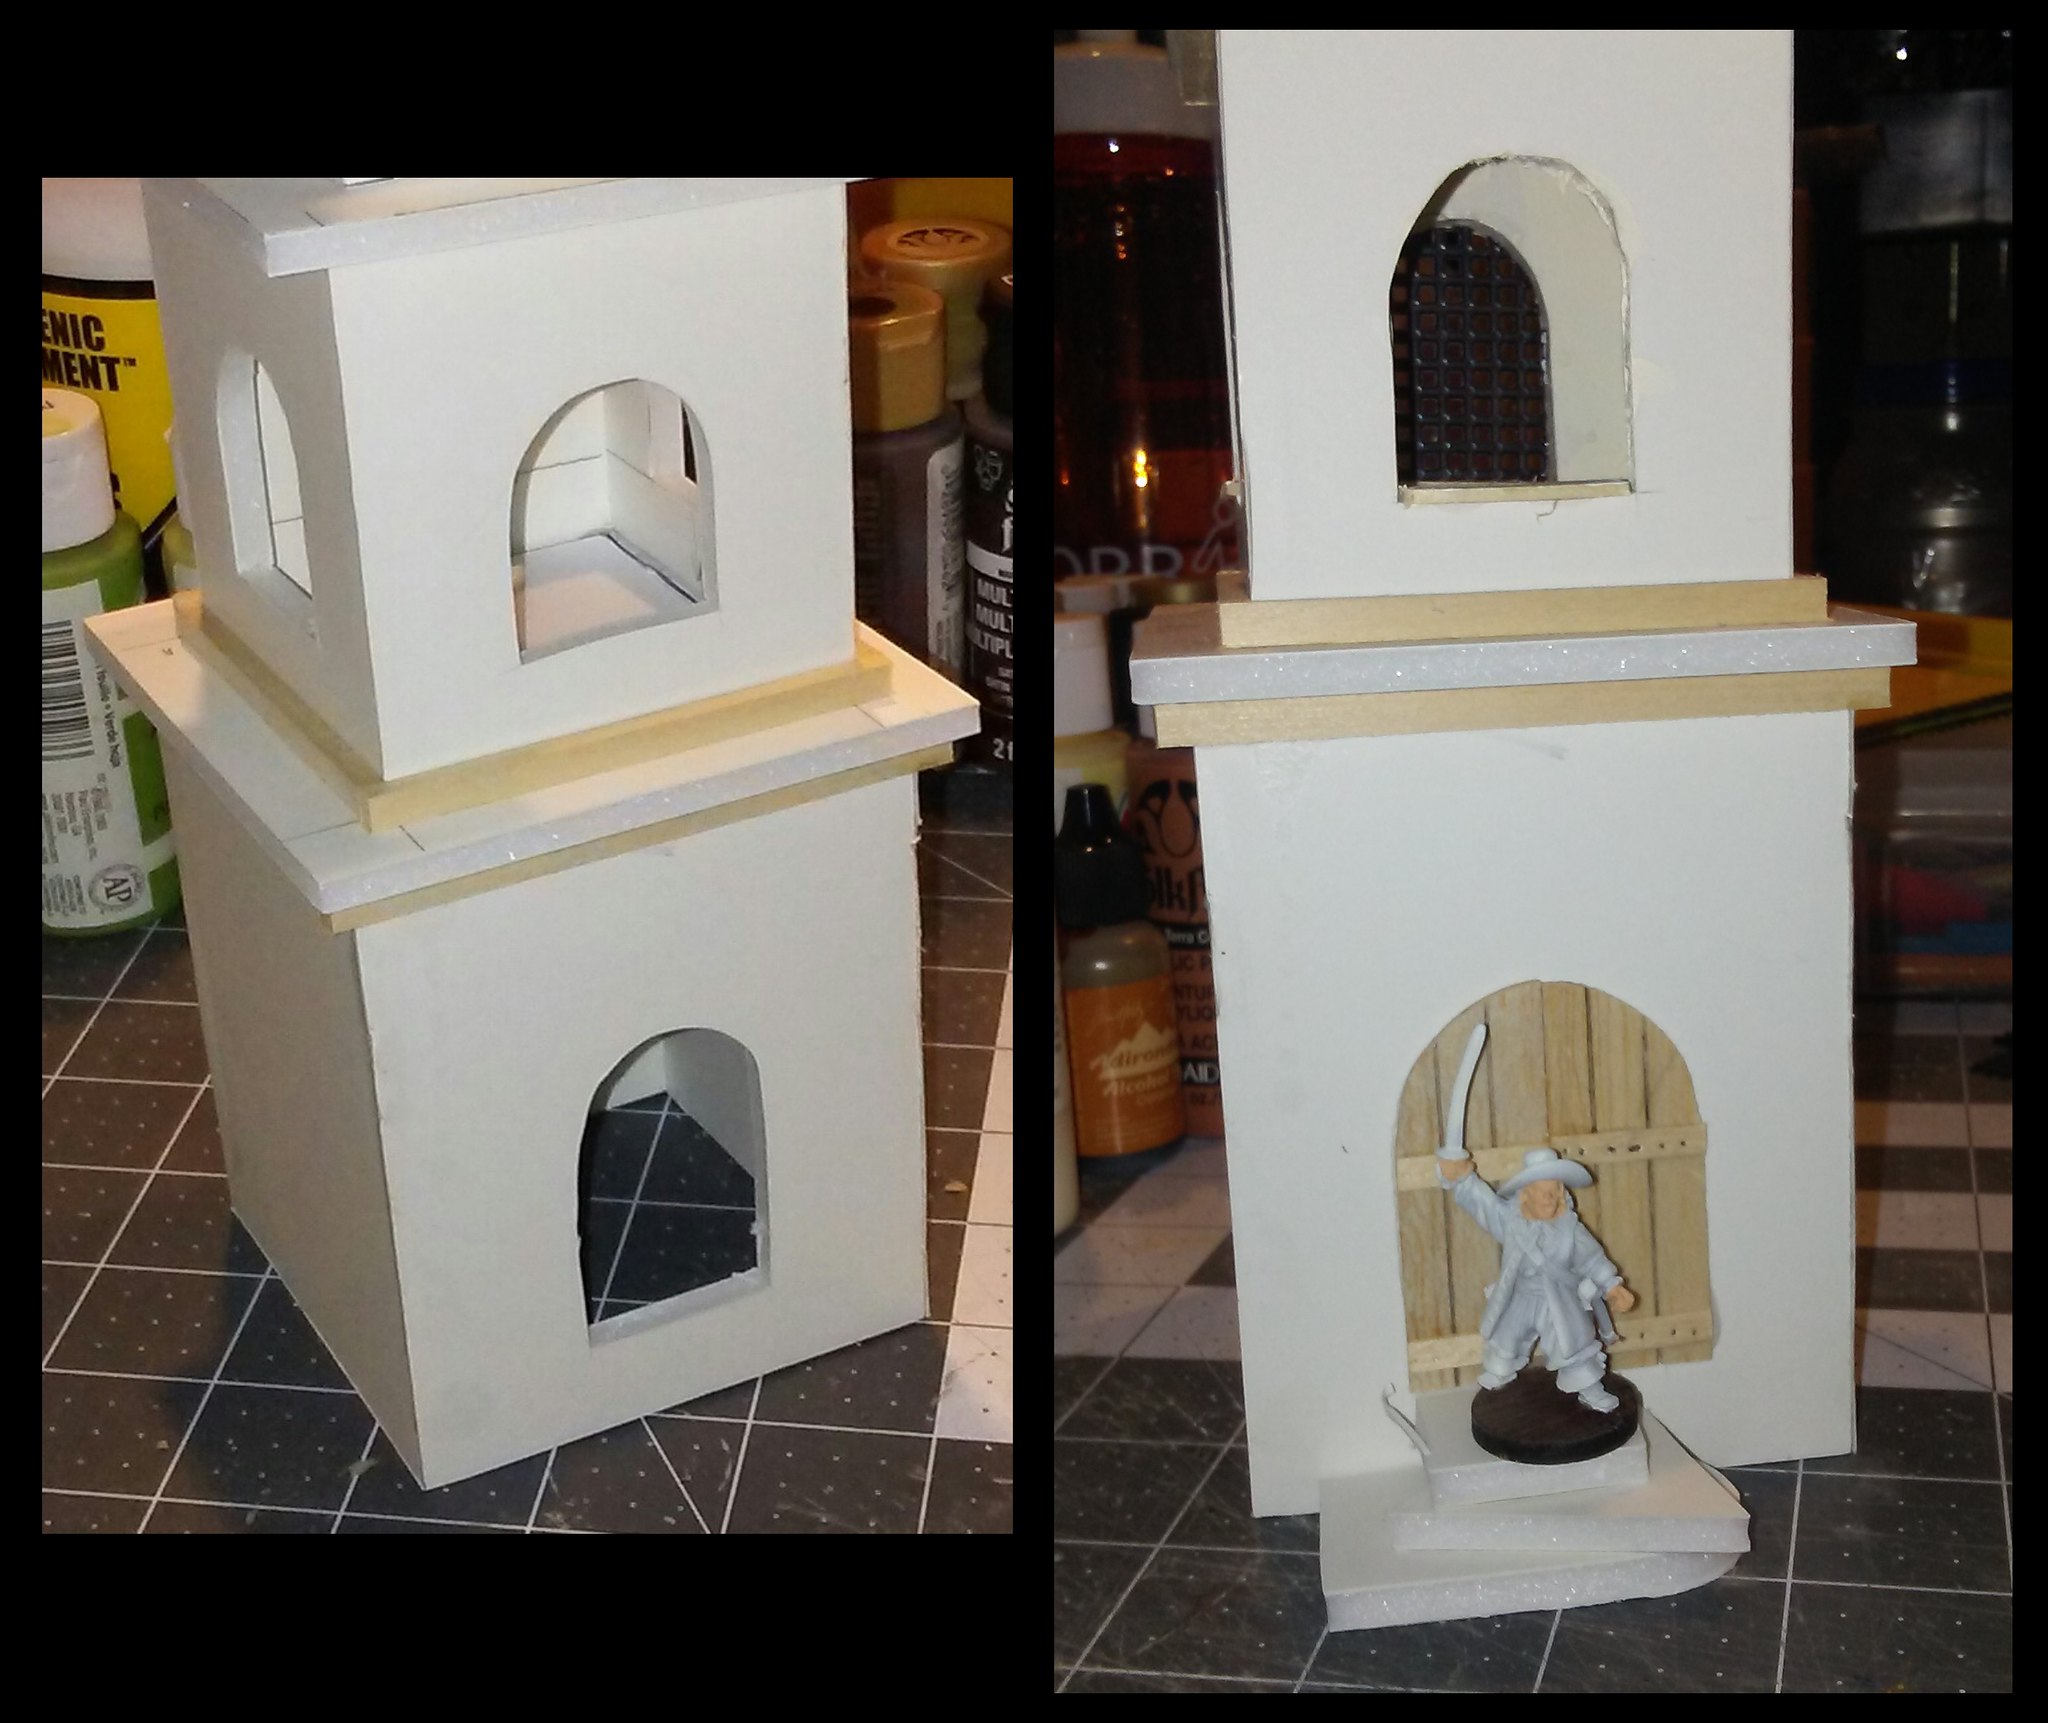 |
| Open door (left); new wooden door (right). |
As you can see, it's a much better match for the main church doors.
 |
| Doors at front of church. |
The Spanish tile applied to the entire roof really made the church stand out, in my opinion, and it began to look like a complete structure.
 |
| Front view, with completed roof. |
 |
| Rear view, with completed roof. |
Now that the structure of the church is finished, that's it for this installment. In the next post, I'll detail the painting and finishing touches that will make this a complete piece of terrain.
'Til next time.


No comments:
Post a Comment