Monday, March 13, 2023

Clash campaign report: A battle of attrition

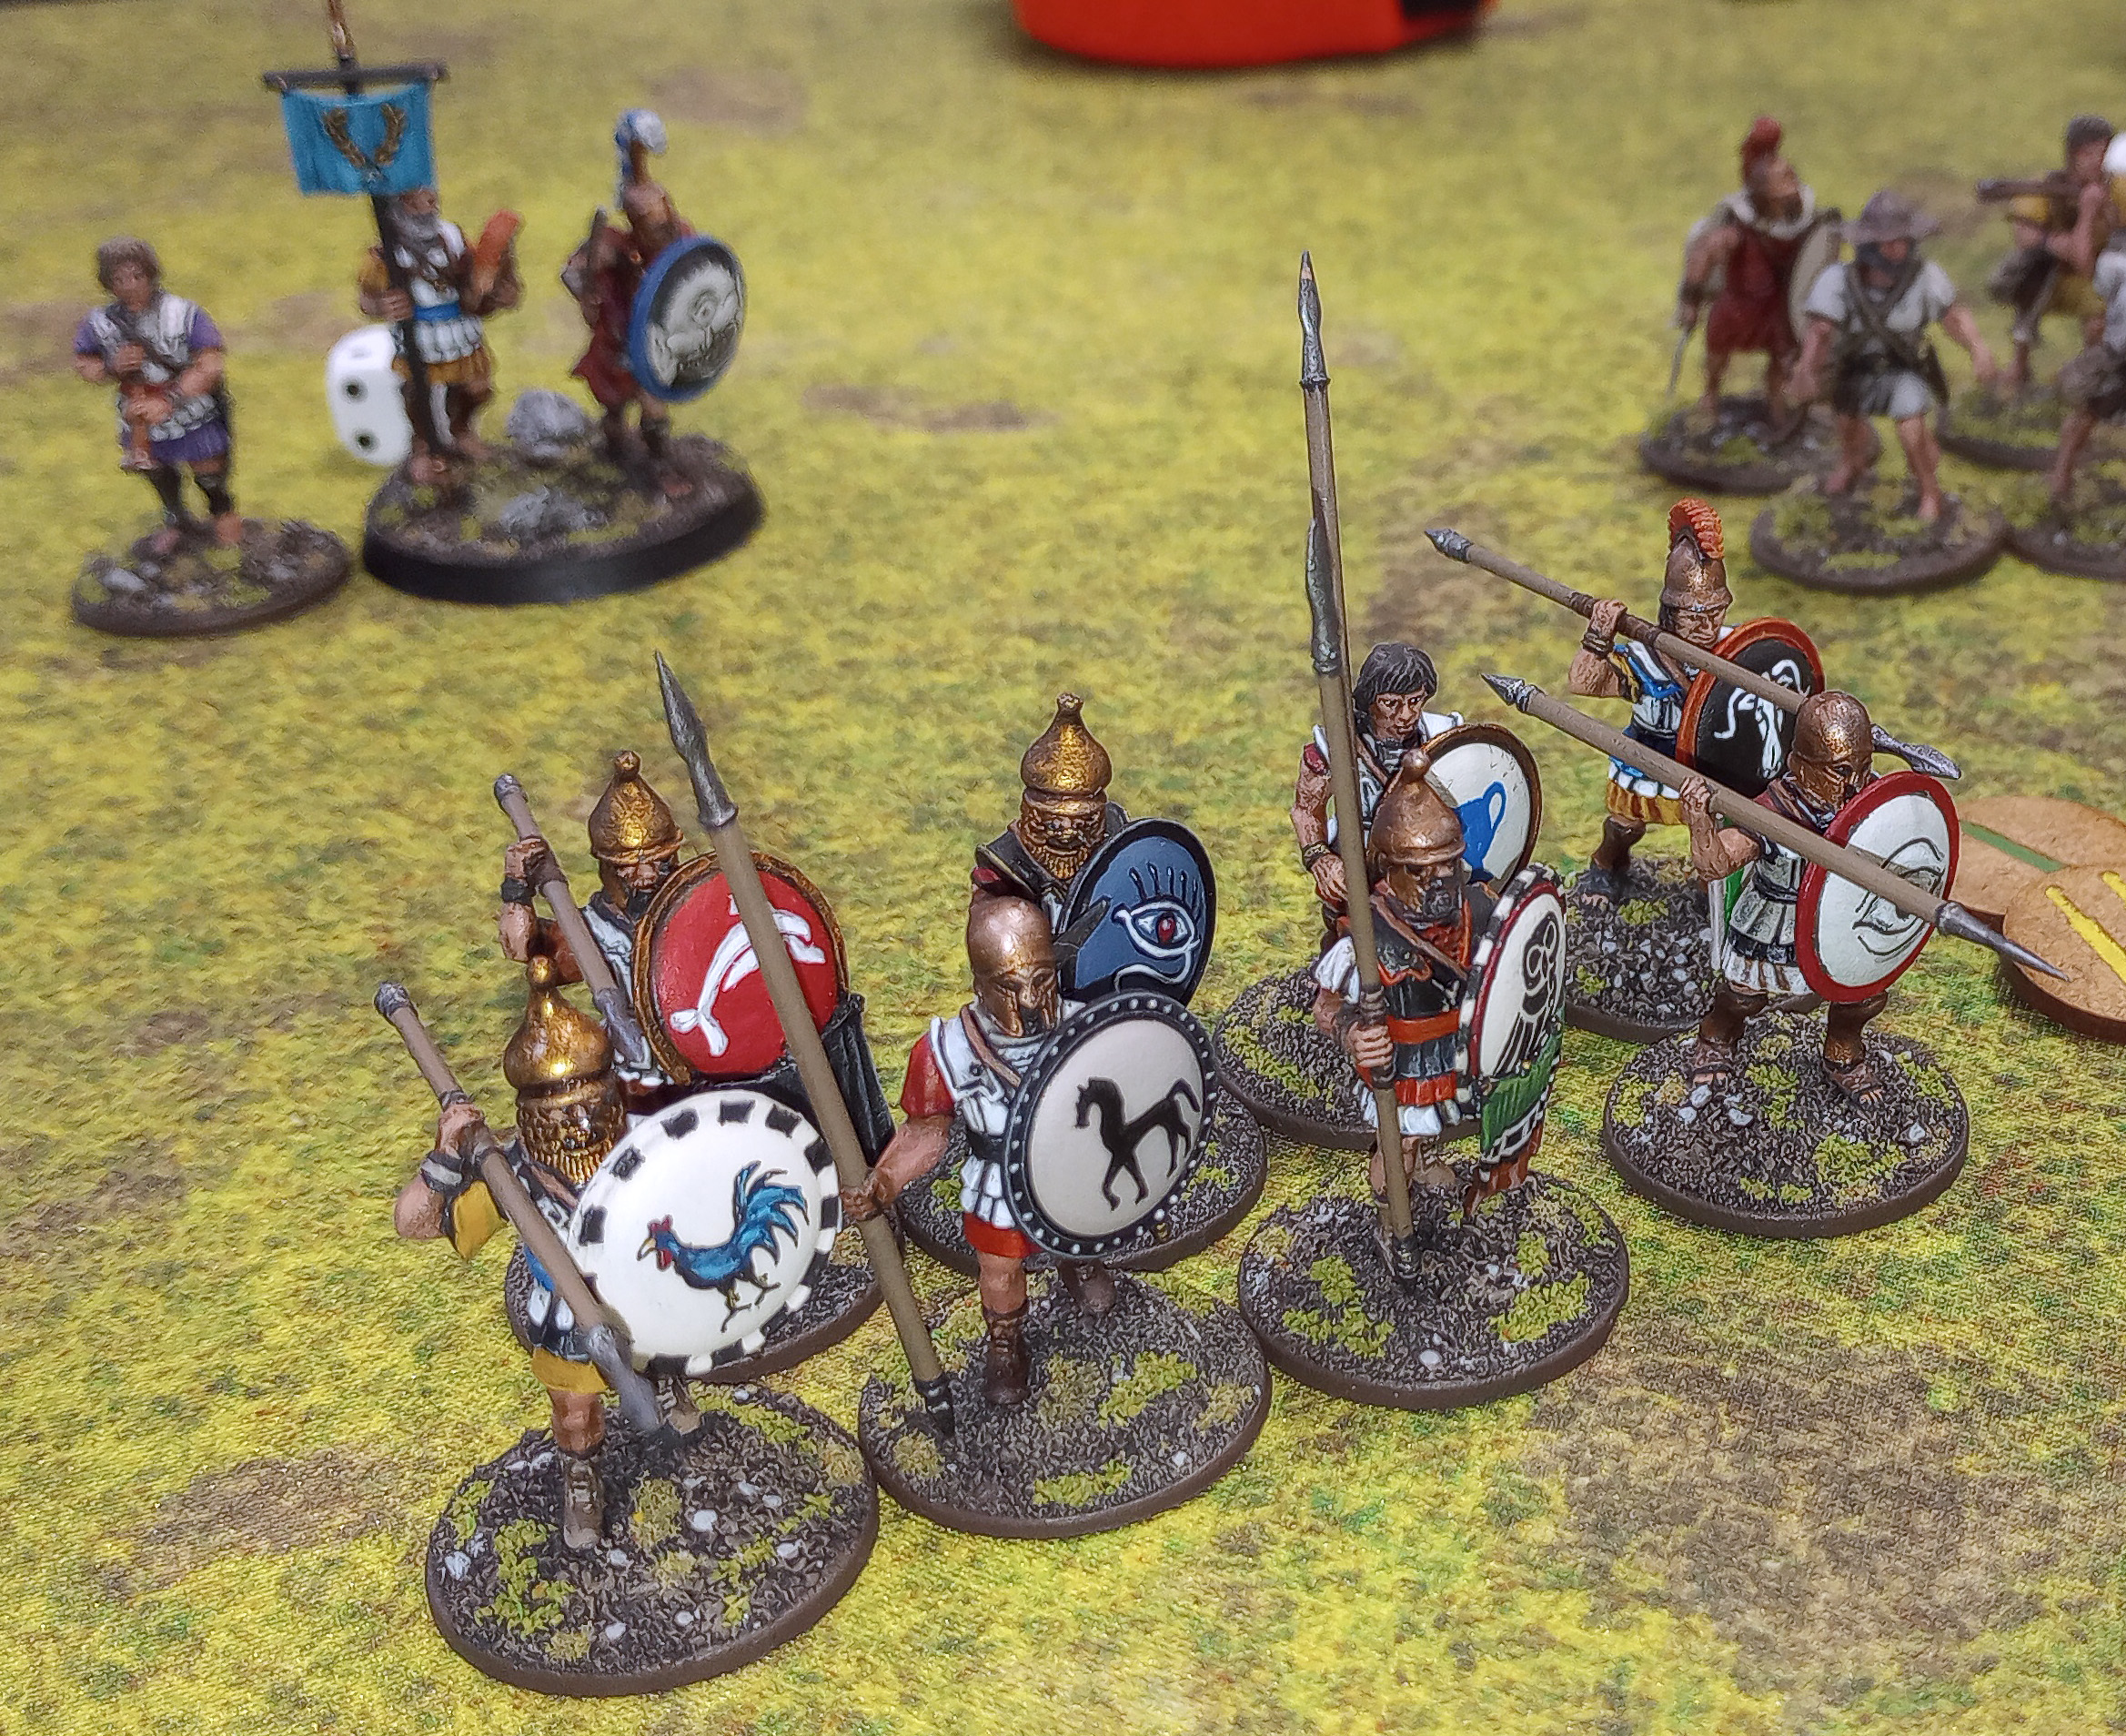
A wall of Carthaginian shields and spears!

Juba sat astride his horse, stretching without dismounting. For three days and three nights he and his Numidians had been almost constantly in the saddle, shadowing a force of Greek mercenaries. His orders from Malchus had been simple - herd them to a place where we can fight them, and destroy them.

The Greeks were wily, and had not allowed themselves to be caught in a disadvantageous position. Nevertheless, Juba's riders had found the occasional opportunity to throw a few javelins their way, just to remind them they were being watched.

The Numidian's mounts afforded them a level of mobility denied to the Greeks. Juba had a detachment of his horsemen trailing the Greeks, looking for openings to attack their baggage. He also had riders out in front, scouting the terrain.

One of them galloped up to him now, reining in his horse at the last moment. "Agellid (chief)," he said, "There is a farmstead ahead about a half day's ride. The Greeks are headed directly for it."

That's what Juba had been waiting for. A place, and a plan. "Excellent," he replied, turning to another rider, this one on a fresher mount. "Ride to Malchus, quickly, and tell him where the trap can be sprung. We will meet him there, and bring the Greeks to heel."

____________________________________________

Turn 3 of the Clash campaign is upon us! After a very busy February work-wise, I was finally able to get a game in against Sean and his Greeks. Without further ado, here's what happened...

Sean and I rolled for choice of scenario, and he won - so much for choosing the recon scenario. Knowing that his armored Greeks would have an advantage when getting stuck in, Sean opted for "This is my Land."

Deployment went well for me, as my lighter troops and cavalry could push forward, locking Sean's units a little further from the objectives than my own troops. Alas, this slight advantage would not mean much during the game itself.

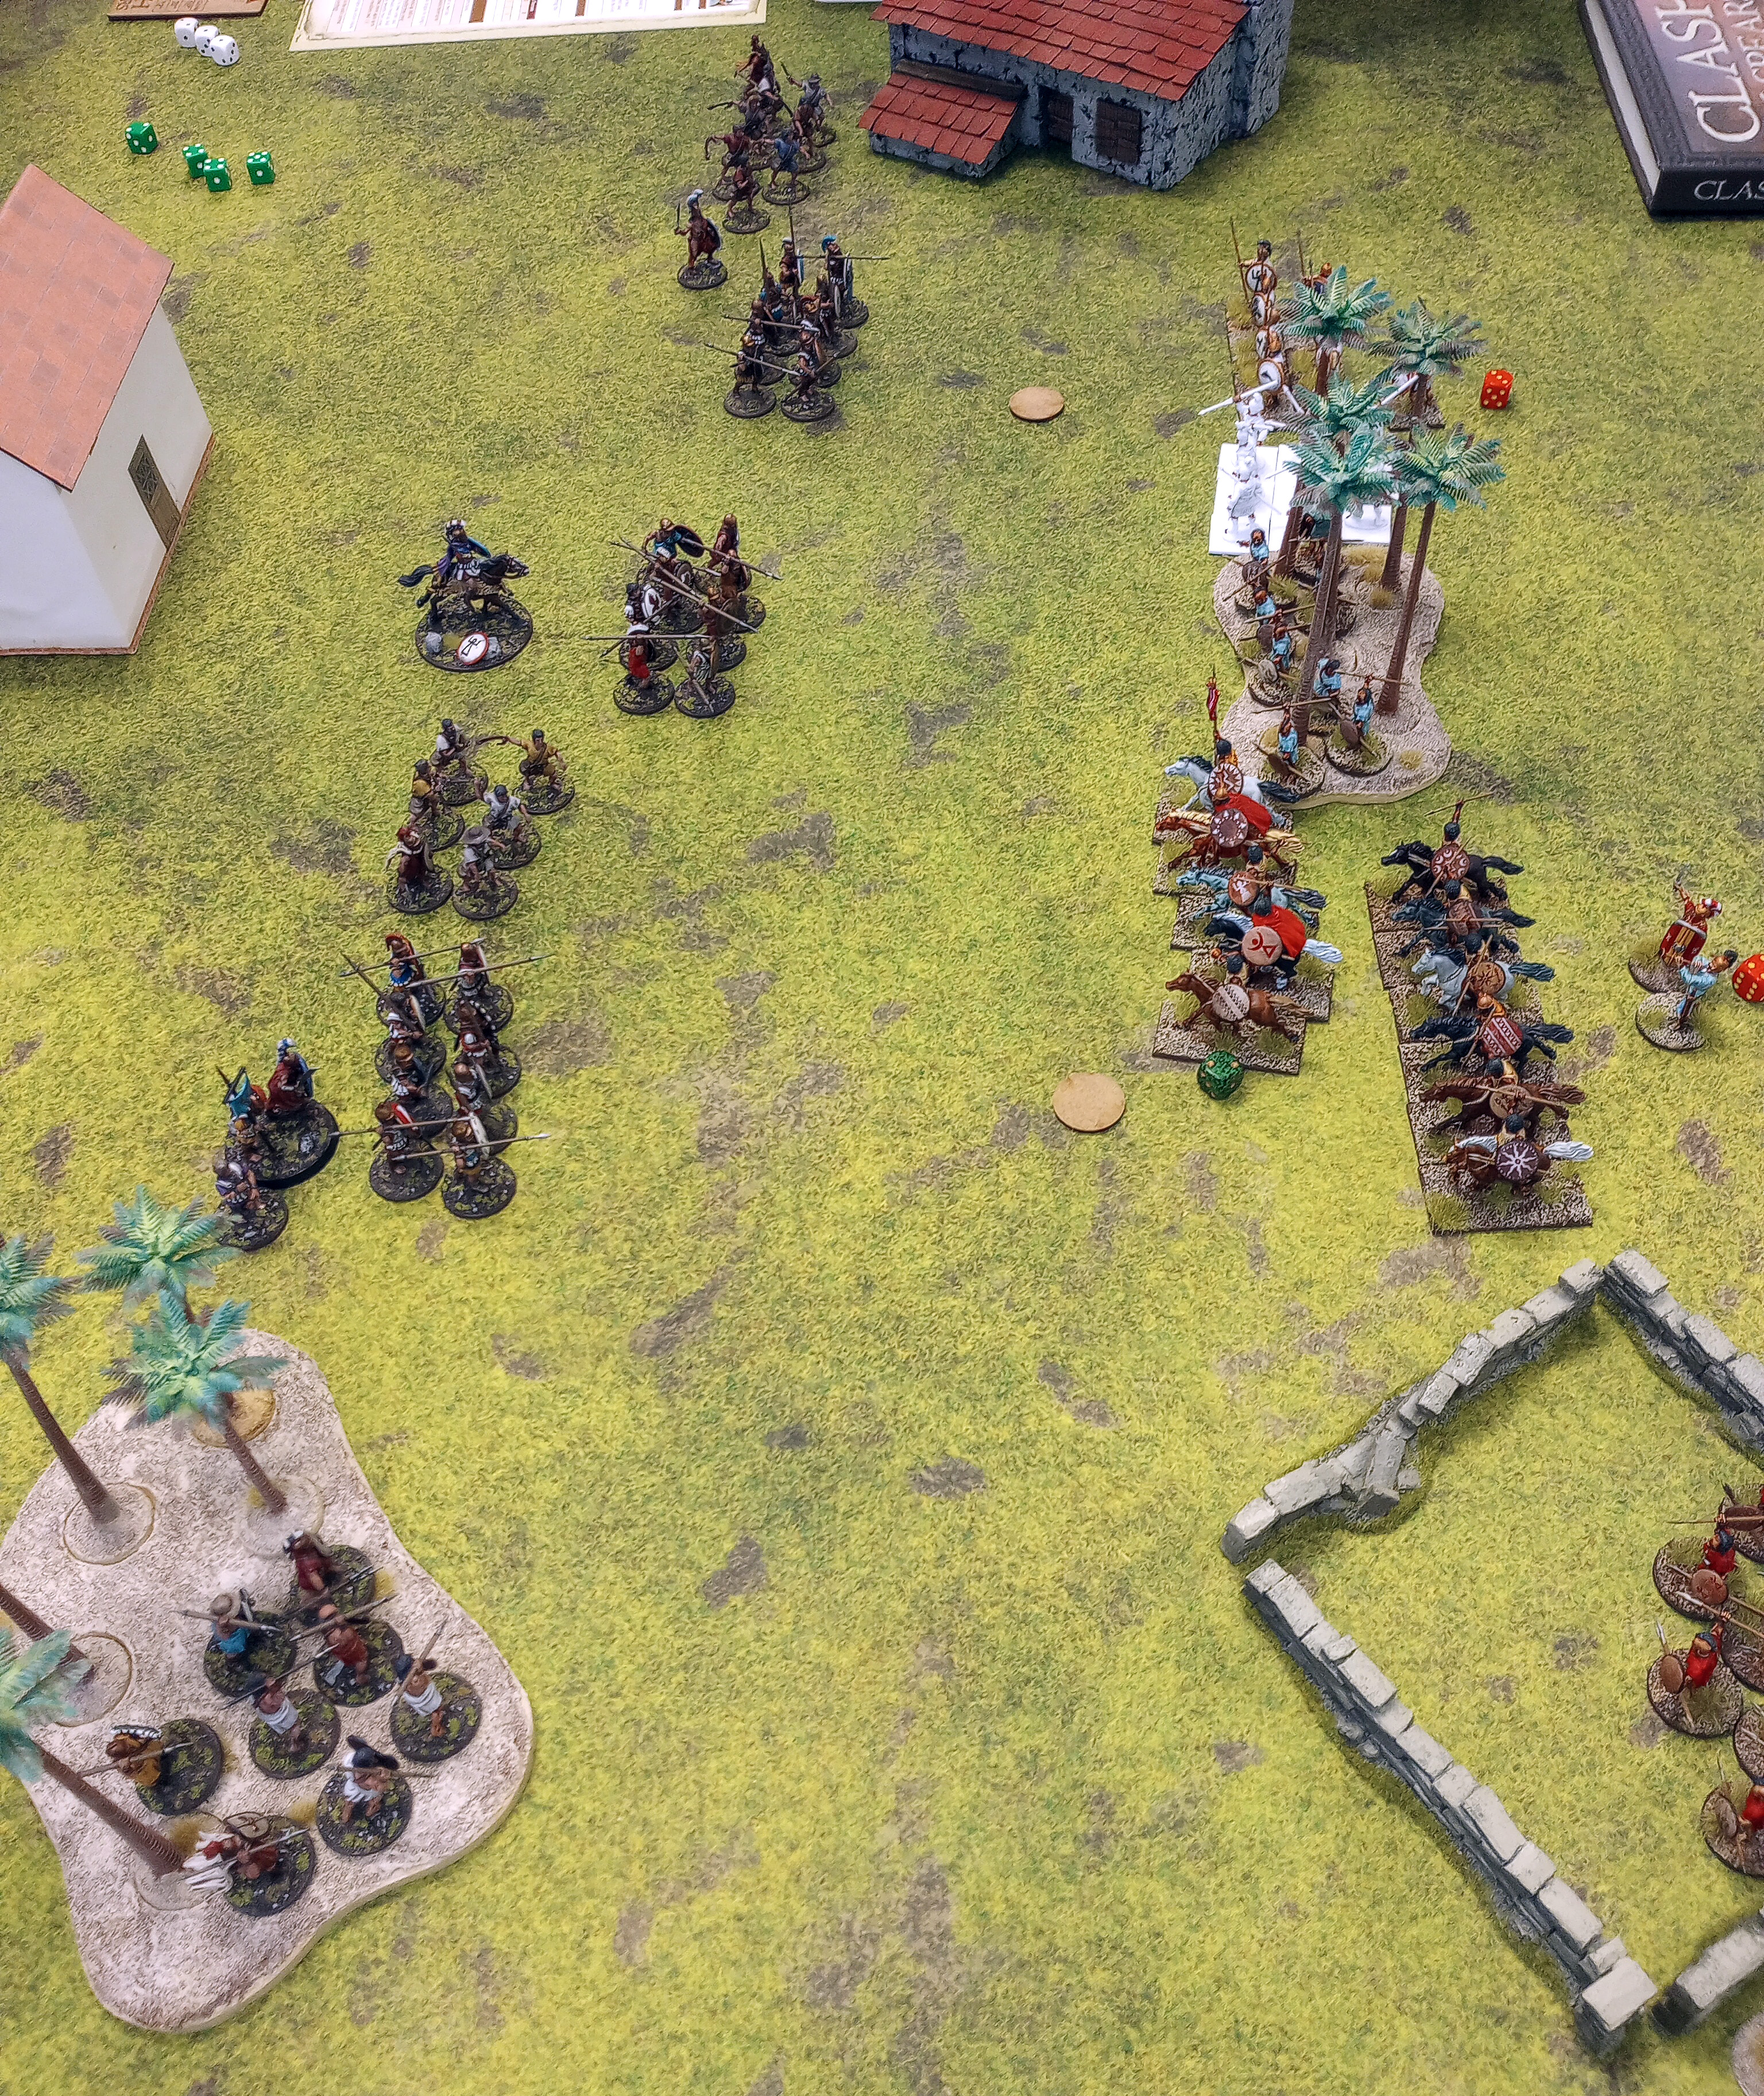
Initial troop positions.
Sean's javelin throwers get comfortable in the woods.
Sean's line.
Libyan javelin men move into a field.
Two units of Numidian horsemen on my right flank.

_____________________________________________

Malchus glared across the battlefield at his foe. That damned Greek gold-grubbing bastard! He had faced him before and been bested by him. But this time would be different!

The opposing forces faced each other across a small farm, with copses of palms and some scattered buildings. Malchus' light, mostly skirmishing troops were at a disadvantage against the Greeks in a stand-up battle. He had tried to catch them on the move, when they would be ill-prepared, but that had not happened.

Nevertheless, he gave his lieutenants and prepared to face the foe.

_______________________________________________

Turn 1 saw fairly routine advances on both flanks. My cavalry was massed on the left, and my infantry ion the right. Sean had a more balanced line, with missile troops flanking and supporting his infantry.

Sean's spearmen advance towards the center.
More javelin men advance into the woods.

Turn 2 began with my cavalry tossing some pointy sticks at Sean's troops, doing some damage, but not enough. On the right side, the heavier infantry positioned themselves for a fight!

Positions at start of Turn 2.
Numidians begin their charge.
First blood, though a trickle, to me!

____________________________________________

Thus far, Malchus could see that his strategy was working. He had massed light troops on one flank, hoping to whittle down the enemy without engaging full-on. On his right, under Bostar's watchful eyes, he had placed his two heavy infantry units where they could support each other as they advanced. 

____________________________________________

I think Turn 3 is when we got seriously involved in a heavy infantry fight on the right flank. Charge, counter-charge, and defend reactions saw both sides slightly bloodied and little change in overall position.
Carthaginian spearmen charge Greek hoplites.
First round of combat was indecisive.
Charge and countercharge begins.
More Clashing of spears.

Turn 4 is when Carthaginian blood started to flow in earnest. Sean was able to flank charge my spearmen, who had just finished charging Sean's hoplites. The charge into the flank wiped the unit out. In the center, my javelin unit had peaked out to toss some of their missiles, to little effect. They lost some men to Sean's counterfire. This, combined with the fatigue that had been accumulated, left them as easy pickings for Aristarchus, who charged in, wiped out the skirmishers, and then bravely advanced rearward back towards his own lines.

Sean's hoplites take advantage of the Carthaginian disorder to flank charge,
The weakened unit is wiped out.
My Romanized veterans are now heavily outnumbered.
Aristarchus charges, wiping out the fatigued javelin men.
Sean's hoplites hold off the cavalry's vain final attempts.

____________________________________________

Damn, those Greeks were tough bastards indeed! Malchus swore, and swore again as he saw his elite infantry cut down. Despite having the advantage, and initially pushing the Greeks back, his men's weapons could not seem to penetrate the Greek shield wall.

The foe was wily, being willing to give ground and wait for an opening. And Bostar, in his haste to push the Greeks from the battlefield, had given him one. The Greek spearmen charged into the flank of his spearmen, scattering them. Curses! His veterans were exhausted from the constant back and forth, and were unable to seize the chance to charge the Greeks in turn. As his fatigued men watched, the Greeks re-formed their impenetrable shield wall.

Suddenly he saw the Greek commander for the first time, charging into the center of the fray, on horseback. He had been hanging back until now, content to send his men into harm's way while staying safely out of danger. Malchus saw that the Greek had noticed an opportunity to burnish his reputation with little danger. The son of a whore charged the remains of a unit of javelin men, scattering them. As soon as they had dispersed, he rode back behind his lines to safety before he could be endangered.

____________________________________________

Turn 5 saw my right flank completely fall apart. My cavalry unit which had redeployed to that side was down to three horsemen. My heavy hitters, the Romanized veterans, had been steadily accumulating fatigue in vain attacks on Sean's line. Aristarchus again bravely charge a weakened unit, wiping them out.
Aristarchus again chooses his target wisely.

____________________________________________

Bostar tried vainly to re-form his men into a line, but it was a futile effort. There were too few remaining, and those that still stood were exhausted. The Greek commander again charged a depleted unit, sending the troops running. And again, before Bostar could challenge him directly, the craven fled back behind his men.

"Malákas!" Bostar yelled, "Come back and face me, coward!" But to no avail, the Greek was safe, protected by a wall of hoplites, and Bostar could do nothing but rage.

____________________________________________

At this point, dusk had fallen across the battlefield. While both objectives were technically still contested, I stood at three breakpoints to Sean's two. He had wiped out both of my heavy infantry units and a unit of javelin men, while I had wiped out a unit of slingers and killed the odd trooper here and there.

This gave Sean a minor victory!

Final troop positions.

____________________________________________

As dusk settled on the farm, Malchus reluctantly gave the order to withdraw. His men, though bloodied and weary, retired in good order. How it galled him to cede the field to that Greek coin counter!

They had hurt the Greeks, that was sure, but not enough. And his own troops had suffered more.

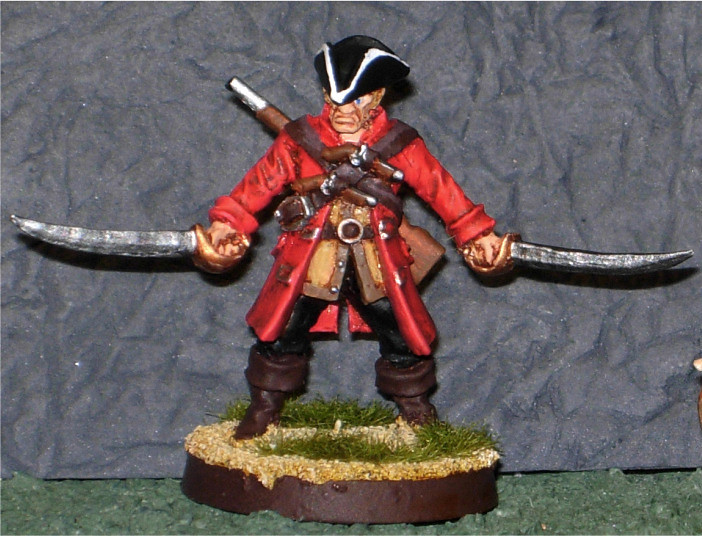
As he walked alongside his men, Malchus and Bostar discussed the skirmish, and its outcome. Malchus analyzed every aspect, looking for a weakness that he had failed to exploit in the moment, but that he could use the next time they faced this Greek scum. They would face him again, he was sure of it. Sicilia was not that large an island. And next time he would be ready. "Juba," he called out to the leader of his cavalry, "I have a new mission for you. Find me a horse!"

____________________________________________

Points of interest:

I love cavalry and will keep using them, but slingers are my bane, handing them light casualties but enough fatigue to render the unit ineffective in the late stages of the game. I had several units fail to activate in the final turn. While this may not have changed the outcome, it certainly didn't help.

My dice seem to roll better when I need sixes. My rolls were decidedly average when needing fours or fives. But on several rolls when needing sixes the dice came up big. Unfortunately, since Sean's elite troops were usually defending, this did not result in as many casualties as I would have wished.

I think that finding Malchus a mount for next turn will be a priority. The ability of Sean's commander to ride up, dispatch a weakened unit, and then slink behind enemy lines was a huge factor in the game. Aristarchus himself dispatched one break point worth of troops, which was the difference in the game.

Sean's javelin men on the right flank got a good view of the battle and a day's rest, not moving once from their initial position. Their jeering and catcalls, I believe, are what turned the tide of battle against me.

Look familiar? Sean's javelin men haven't moved.

As always, a tight game against Sean, and one in which some things went right, some went wrong, some went really wrong, and I was unable to score enough kills to pull out the draw. In short, it was your typical nail-biter fun Clash of Spears game!

'Til next time!

(I am including a link to a totally biased, unfactual, skewed version of events from Aristarchus' point of view on Sean's blog. In all seriousness, it is an excellent representation of what happened, and you know what they say about the victors writing history.)

Friday, January 20, 2023

Making tokens for The Barons' War

As readers of this blog already know, I am getting started with The Barons' War from Footsore. I am at the point where my next step is to actually assemble and paint a retinue. But, as is so often the case, I got slightly sidetracked by an ancillary project.

In addition to the usual stuff (figures, terrain, dice, etc.), the game requires the use of tokens to keep track of actions taken and the status of the troops.

The tokens are available as a free download from Footsore at Warhost Online. You can also buy them pre-printed on MDF.

Because I am a firm believer in "simpler is better," I decided to modify the tokens slightly for my own use.

The modification consists simply of writing on each token what action or status it represents. I know, for most people just seeing the color or the image on the token is enough. But for me, at least initially as I become comfortable with the game, it will be tremendously helpful to have it literally spelled out on the token itself.

The other change I am making is to the size of the token. While a necessary evil in many wargames, I don't like the look of a bunch of tokens besides painted troops and terrain. That is a pet peeve of mine, so I decided to make the tokens just a little smaller (and to match the punch I will use).

The punch I use for bases for 15mm and smaller figures is 3/4" in diameter (I also have a 1" punch I use for bases for 28mm figures). Using Photoshop, I added the text and sized the tokens appropriately. You will notice that I also extended the background colors so that they would look good even if the punch was not lined up perfectly.

Once printed on a sheet of cardstock, all that's left is to punch them out and assemble the tokens. 

The printed token sheet and the hole punch.

I punched the printed tokens out, but I felt they were too thin. I glued a pair of them back to back to make two-sided tokens - still too thin. So, I punched out some thicker cardboard circles.

The tokens and the cardboard filler.

Using a regular glue stick, I pasted the tokens on either side of the cardboard. Perfect! This is tedious, and for many it won't be worth the effort. But I believe that if you're going to do something, you should try to do it right.

Glue stick to the rescue!

Now I have tokens that clearly indicate what they represent, are a bit smaller than the official tokens, and are thick enough to have just a little heft.

Tokens next to a Fireforge sergeant.

Now, I seriously have some figure assembling and painting to get to before I get sidetracked again.

'Til next time!

Thursday, January 19, 2023

Introducing Willan Dourant, my leader for a Barons' War retinue

As mentioned in a previous post, I am learning about and building forces for a new game (new to me at least): The Barons' War by Footsore Miniatures.

Those of you who read my blog (thank you both!), already know that narrative and storytelling is a huge part of the experience for me in terms of wargaming. So it should come as no surprise that I am in the process of creating characters for this game and writing their histories and backgrounds.

I admittedly do not know too much about that era of English history. I am doing a little research and listening to a few podcasts.

I don't want a baron that is historically accurate, just what I call "historically plausible." As long as he and his background are not too outrageous or unbelievable, I will be content.

So far, this is what I have come up with:

Willan and his brother, Charles, are sons of Henri Dourant. The elder Dourant was a knight from Gascony in the service of Richard. He fought with him in the rebellion against Henry II, and escaped with him from Saintes. 

After he became king, Richard granted Pevensey Castle in Sussex to Henri. 

Willan and Charles both took the cross alongside Richard, and both men joined him during the Third Crusade. Willan in particular distinguished himself at the Battle of Arsuf. 

While on crusade, Charles joined the Knights of St. John. 

Upon their return, they learned that Henri had died while they were in the Holy Land. 

Willan, as the eldest, became lord of the castle. Charles was named Knight Preceptor of Poling Preceptory. 

Willan joined the rebellious barons fighting against King John. After John's death, Willan swore fealty to Henry III and fought against Louis. 

I think this will let me field various different types of retinues, and still stay true to the background I have created.

I can add monks or even some Knights Hospitaller, to Willan's retinue to represent the assistance from his brother. I know that the Hospitallers did not actively engage in the fighting of the First or Second Barons' Wars, but I can see Charles lending his support, and at times small numbers of troops, to his brother. Again, I am not looking for strictly accurate, but rather "plausible."

Eventually, once I get the Outremer rules (I just missed the Kickstarter), I can even build retinues to represent the brothers and their men fighting in the Holy Land.

Based on the above, I have designed a shield for Willan. Charles when he appears will be in Hospitaller colors, so that's easy to sort.


Below are some other ideas I worked on before deciding on this final design and colors.


If you see anywhere that I have gone completely off the rails, or have written something that directly contradicts history, please don't hesitate to comment below or contact me directly. I am always willing to learn from those that have more knowledge than I do.

For a starting retinue I think I will go with the Beginner's Retinue by Phillip Druvins on the Footsore website, at least until I'm more familiar with how the game mechanics function together and what kind of retinue will fit my playing style.

The retinue consists of:

4 mounted knights - this includes a veteran lord with sword and shield, a bannerman, and two other knights

6 foot sergeants armed with falchions and shields

8 bowmen

8 spearmen


That's a very manageable four mounted figures and 22 infantry. I'll be converting the sergeants to be armed with falchions, but the rest should consist simply of assembling the models as intended.

In addition, those seem like a pretty decent core of troops around which to build my overall army. I can substitute out some units for specific tasks, or add more units as I play higher-point games.

Now that I've got my list sorted, it's time to assemble and paint the troops.

'Til next time!

Wednesday, January 18, 2023

Making a falchion using broom bristles

Following up on my post from yesterday, I am now using the broom bristles not to repair a weapon, but rather to make a completely new one.

There were several comments, here and in social media, about using the bristles to repair swords as well as spears.

Right now, I am in the process of building a retinue for The Barons' War using plastic figures from Fireforge. I like the figures quite a bit, but I noticed one omission. Falchions are very useful weapons to have in your baronial retinue, but the Fireforge models do not come with them.

A falchion is a single-edged sword, rather than the typical double-edged sword more commonly found on medieval models. In The Barons' War rules, the falchion has a special ability whereby defending units in lighter armor have a penalty to their defense due to the slashing nature of the attack.

I did a little quick internet research, and discovered that Durham Cathedral has a surviving falchion in its collection.

The Conyers Falchion

Looking at the shape of the blade I felt that I could replicate it, or at least get close, using the broom bristles.

Step 1: Flatten a portion of a synthetic broom bristle with the flat pliers.

Sword arm, and flattened bristle.

Step 2: Carefully cut the sword blade off of the arm, leaving the hilt, and drill a hole into the hand for the new blade.

Hole drilled for new blade.

Making sure the hole was centered is crucial.

Step 3: Trim the falchion blade to shape and clip it, leaving a small stub of round bristle to fit into the hole.

Arm and blade ready to be attached.

Step 4: Glue the blade into the hole. Once this was done I took the flat pliers and flattened the bristle all the way down to the hilt.

Falchion blade inserted into hole in sword arm.

Step 5: Assemble the rest of the figure as normal. That's it, that is all there is to it.

The proud owner of a new falchion.

The new blade is clearly distinct from the regular sword.

That should enable you to clearly identify the troops armed with falchions from those armed with normal swords. Now, all that I have to do is repeat the process seven or more times to equip the entire unit.

'Til next time!


Tuesday, January 17, 2023

Unbreakable spears and javelins for wargaming

On Saturday I played, and won, another game in our Clash of Spears campaign.

Unfortunately, though victorious, I did suffer some losses. Among them was a pair of broken javelins on my Victrix models.

I absolutely love the detail of the Victrix figures, and they are some of my favorite figures to build and paint. The only drawback is that often the spears and javelins are quite thin. While this looks great (I hate seeing troops with spears like tree trunks), it does make them rather fragile.

A while back I happened upon a Youtube video about making spears from synthetic brush bristles. On a recent trip to the Dollar Tree, I picked up a $1.25 brush head with that type of bristle in silver to see if I could make it work. The bristles are flexible, yet snap back perfectly straight!


Look at all those spears, err, bristles!

The brush has hundreds, if not thousands, of bristles (I didn't count!), and each one can make several spears and javelins, or even a long pike.


Each bristle will make several weapons.


As mentioned, the bristles are very flexible. They do have a point at which you can bend a crease into them, but I do not think that will ever be an issue in this application.

Flexibility!

When released, the bristles snap back to their original straight glory.


And resilience!

After initially cutting a bristle from the cheap brush, I decided to see if there might be other options. I went to the local Walmart, and discovered that yes, indeed, I had choices. I found a pair of brooms with thicker bristles. These cost a bit more (around $11 to $13) but remember that they will likely provide enough spears to last a lifetime.

I removed a bristle from each brush for comparison:

Detail of the various diameters of bristles I found.

To make the pointed tip of the spear, I started by using a pair of small pliers to crush a flat section into the bristle.

The flat section is at center.


Close-up of the flat section.

I used a regular pair of nippers to cut a wedge shape into the flat section to represent the point. I know the new spears will not have the same level of detail as the originals, but I think their sturdiness will outweigh that fact. Additionally, at tabletop distances I'd be willing to bet most people won't even notice.


Spears cur from the various thickness of bristles.


I think that in most cases, the middle bristles will be the best. They are just a tiny bit thicker than the Victrix javelins, and just about perfect for the spears. I think, though I will need to experiment, that I can use the thicker bristles to fashion sword blades and repair those in the same way, if needed.

Medium bristle compared to a Victrix spear.

So with bristles in hand, I set off to work on one of my unfortunate casualties. This Numidian lost part of his javelin during Malchus's victory over Marcos and his Greeks last weekend.

Broken javelin? I can fix that!

Once I clipped the remaining portion of the javelin and drilled a small hole in the horseman's fist, it was a simple matter to insert the new javelin and secure it with a drop of glue. 

New bendy javelin in place.


The javelin man is no longer just a man, he has a new javelin as well!

After a quick touch of paint, they are good to go. And, bonus, since the bristles are silver I didn't paint the spear tips.

Sorted.

Note, that I do not plan on being proactive about changing out all my javelins and spears. I will replace them when and if they break. Doing this for ALL my figures would be a nightmare for me.

I think this method will be most useful for longer-shafted weapons such as pikes, but it works great for shorter javelins and spears.

I hope you find this information useful.

'Til next time!