Monday, January 16, 2023

Vengeance tastes sweet (Malchus wins another battle, barely)

That's a good-looking army.

Last Saturday I was able to get in a game for our Clash of Spears campaign. I'd already played a couple of games this turn, and fortunately won both, so I did not really need another. But Marcos had not yet played his Turn 2 game, so I accepted his challenge.

Despite my disadvantage of "impetuous," which results in a penalty during the roll to choose the scenario, I won and of course selected "Pre-battle scouting." My cavalry would give me the edge tactically in this scenario, and I would need every advantage I could get against Marcos and his Greeks.

Having determined the scenario, we set up the terrain, and the battle commenced!


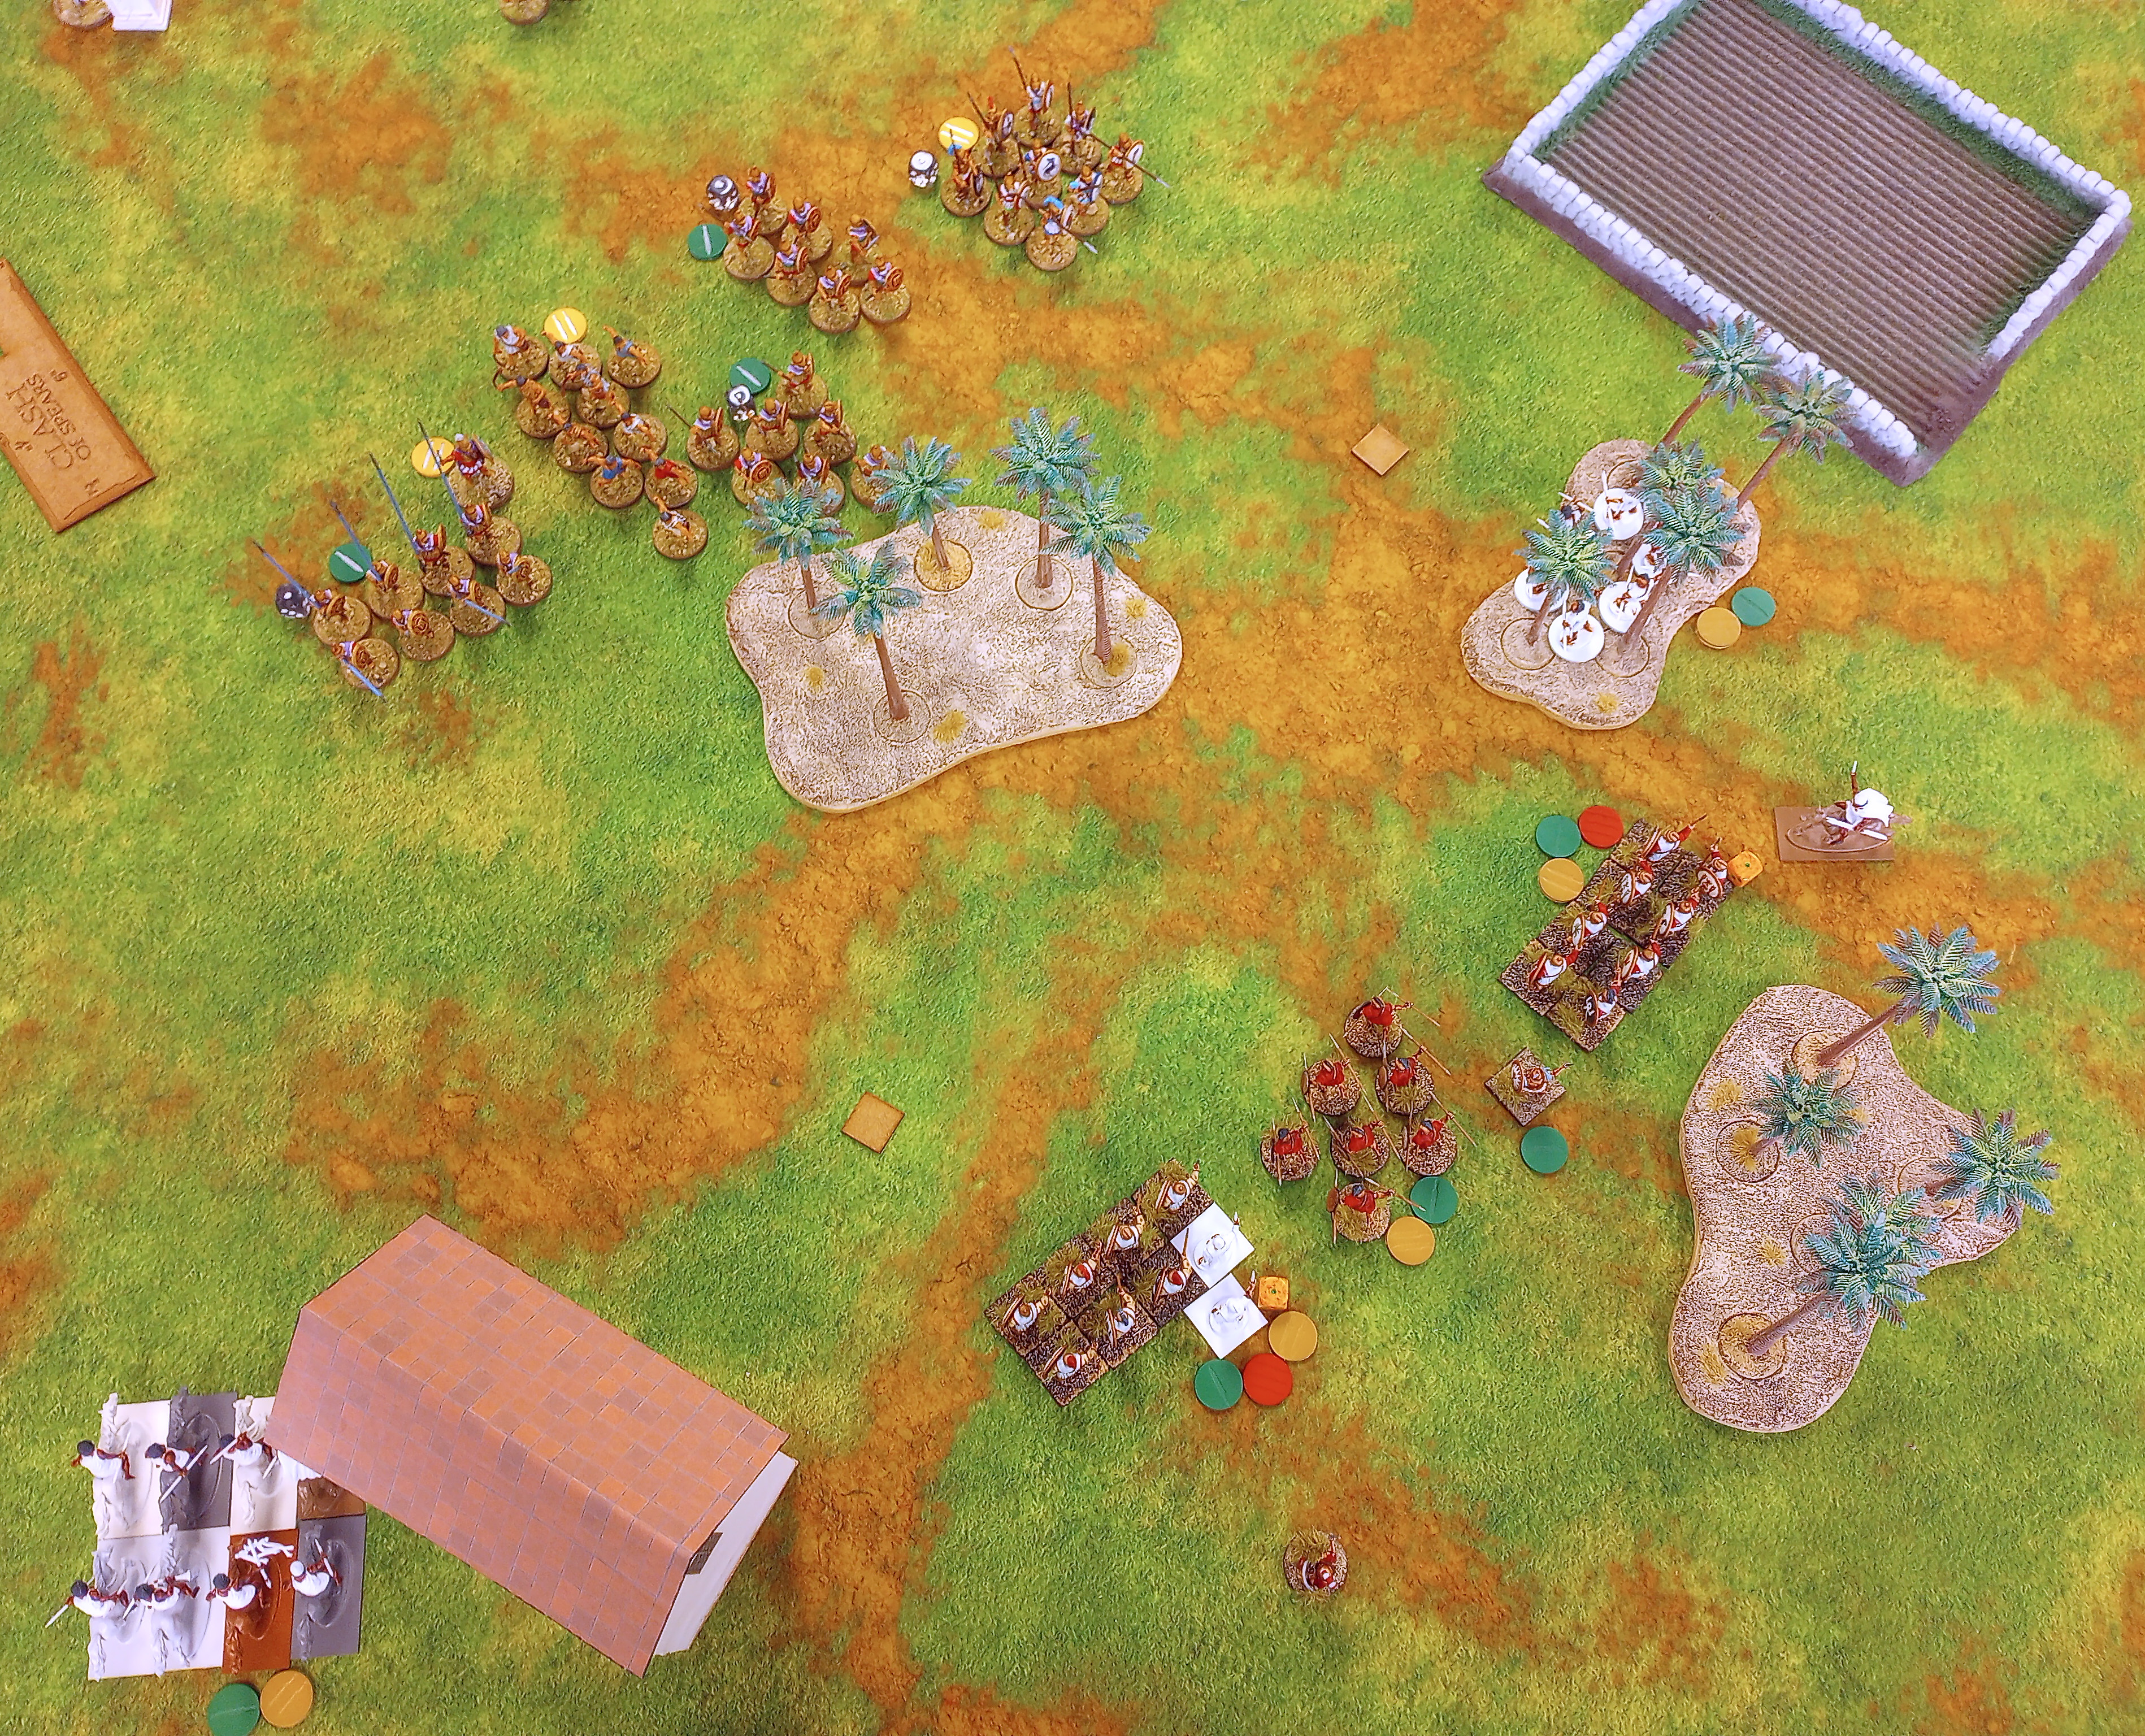
The initial deployment, with the Carthaginians towards the bottom.

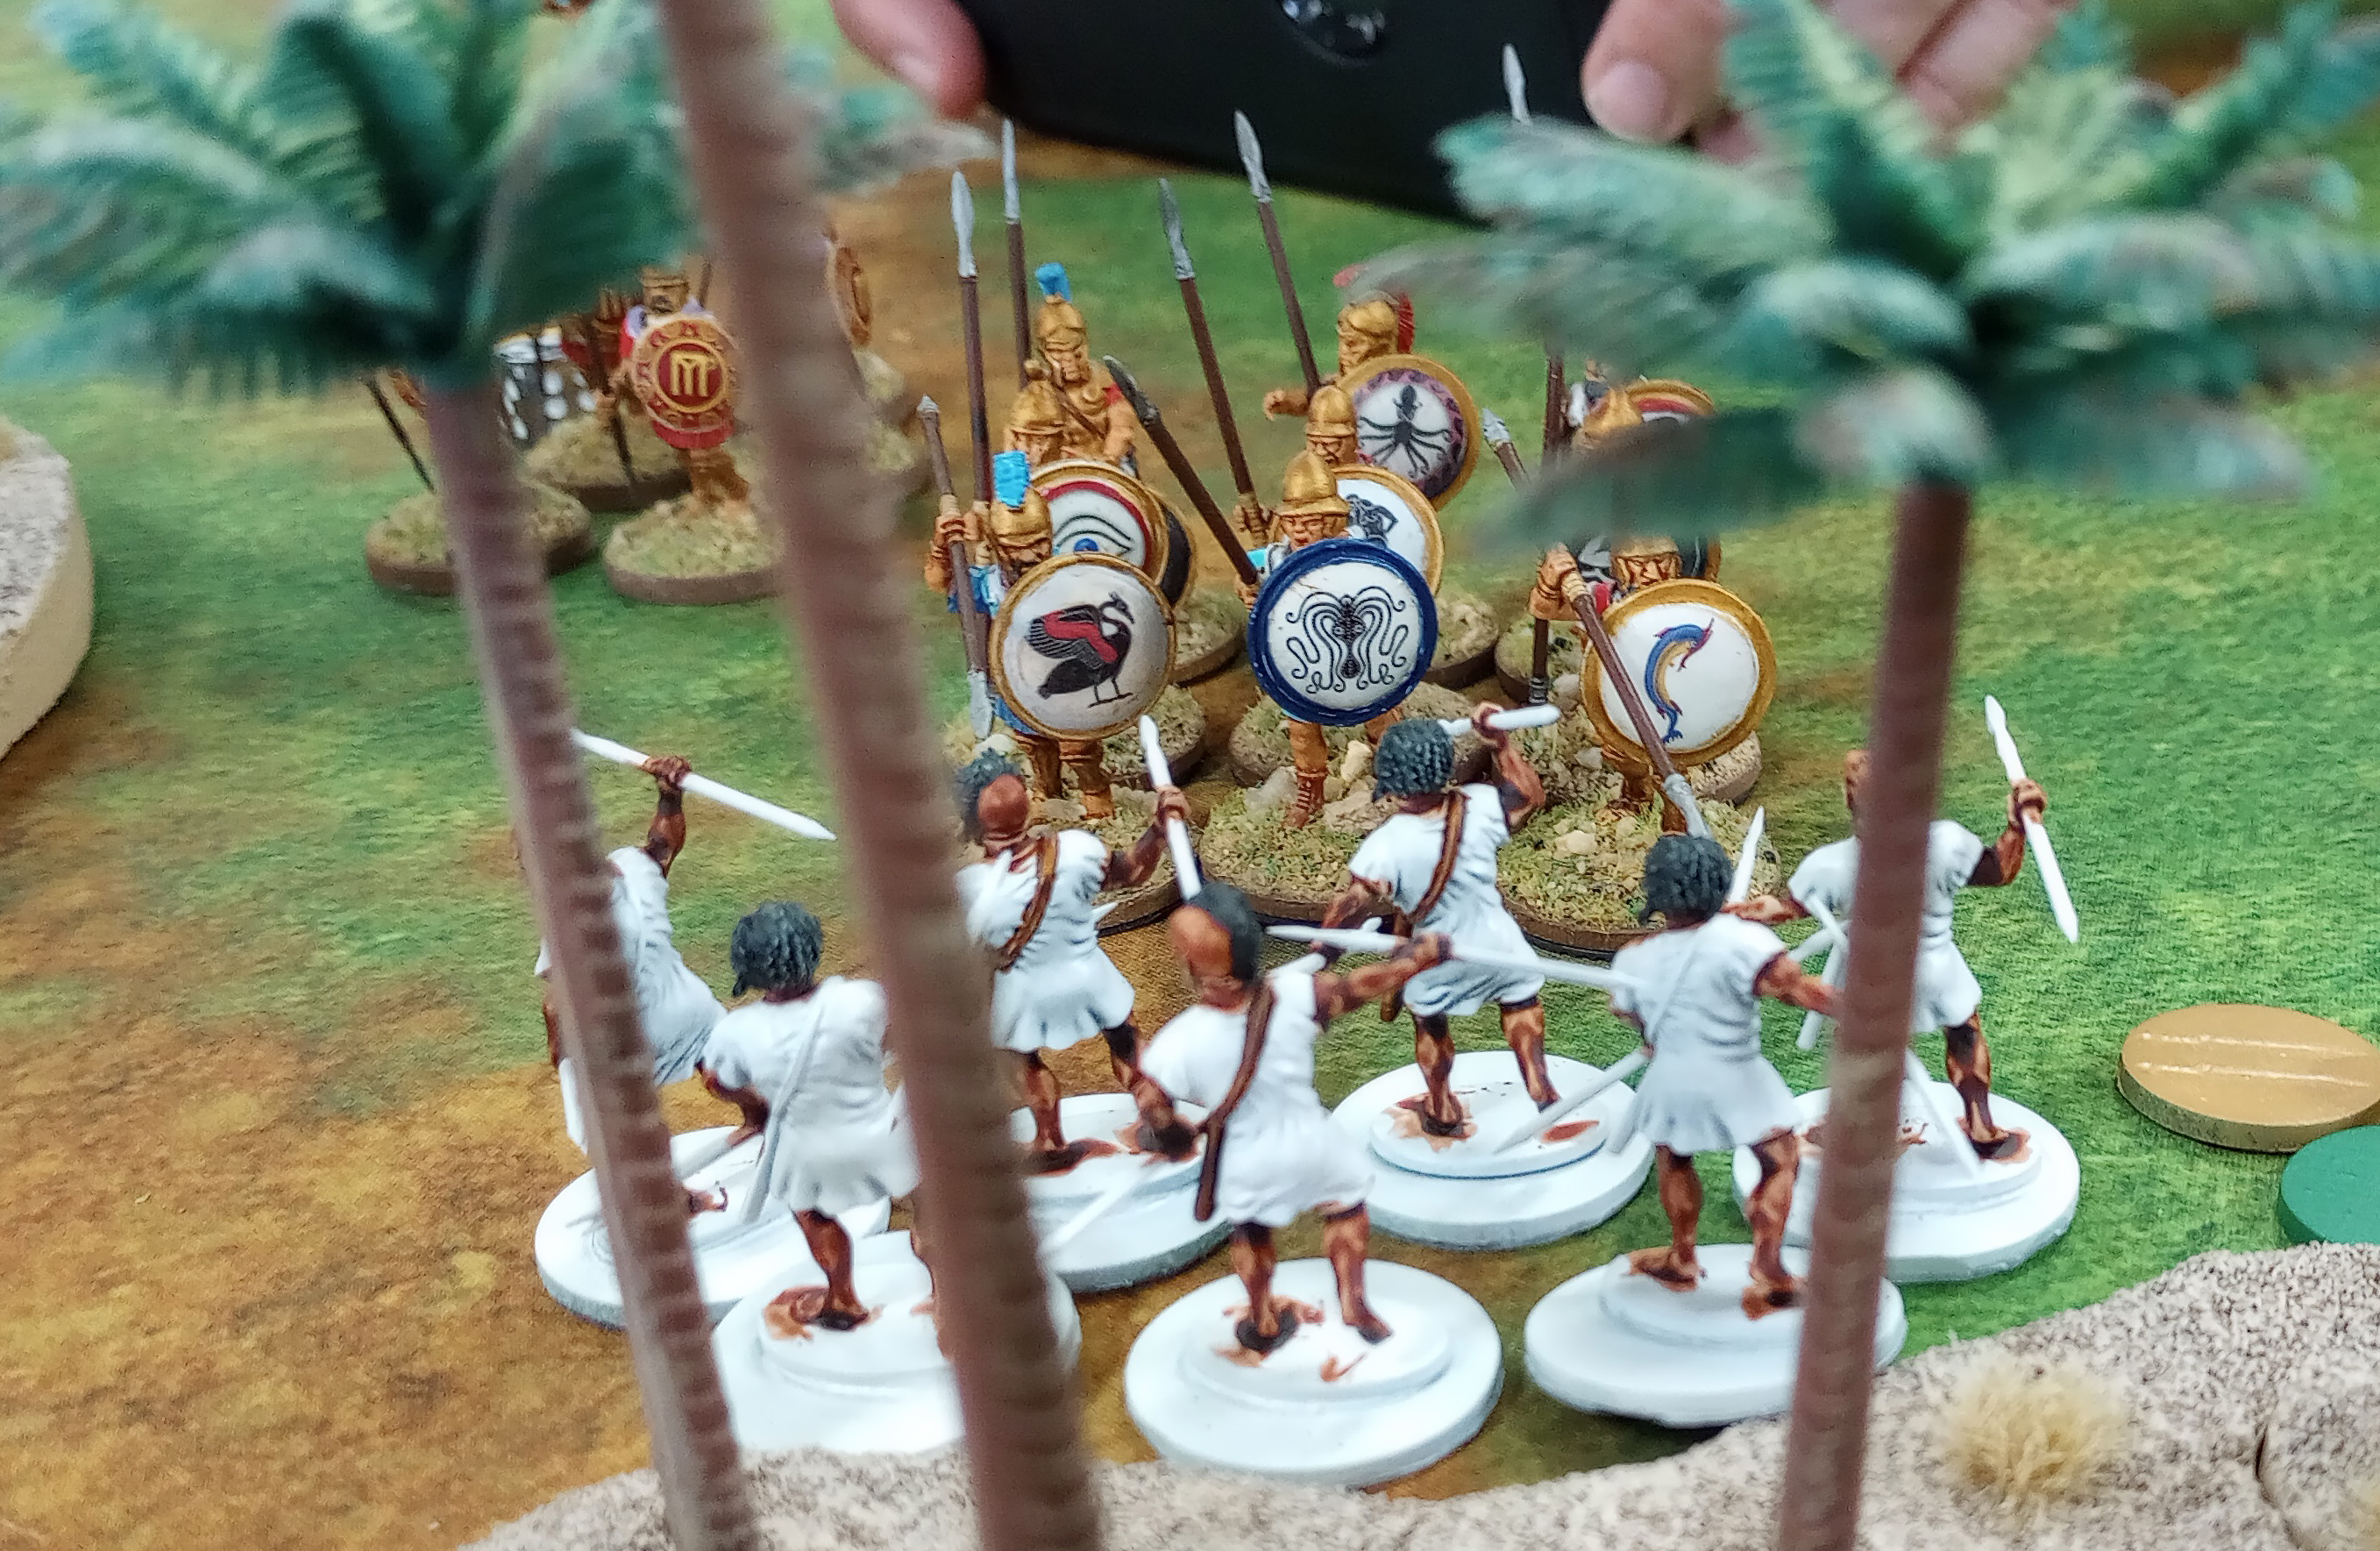
The Greek archers hide in the woods.

________________________________________

The sun was still overhead but had begun its descent towards the horizon as Malchus trotted alongside his troops. 

They were advancing on a small settlement, seeking any sign of enemy activity. Hannibal Gisco, the overall Carthaginian commander, had been impressed with Malchus' success in the last scouting mission, and had ordered him to the front once again.

And once again, Malchus had sought reassurances from his seer, Menestar. And, as expected, the signs had again been cryptic.

"Time to face another foe,

but take care, lest he bring you woe.

Familiar he is, you've clashed before,

Pain he caused, and he seeks more.

Temper your anger, control your rage,

do not recklessly seek to engage.

Win or lose, life or death,

are yours to decide with every breath."

Malchus was annoyed at the vagaries of the prediction, but so far Menestar had been accurate in his visions. And after the battles his ramblings had made perfect sense. The challenge was to decipher them before the combat, so he could take advantage of their wisdom.

"My lord," Juba shouted as he rode up. He had been scouting ahead of the column with his Numidian cavalry. "We have sighted the enemy. They have taken positions along that line of trees behind the buildings."

Malchus strained to see. He could just make out the copse of palms that Juba had described. And yes, he saw movement among the trees.

"Whom do we face? Have you identified them yet?" Malchus asked his scout.

"Oh yes, my lord," Juba replied with a wicked grin. "Greeks, the same ones you fought at Messana!"

Malchus looked at Juba before responding with the same expression. "Excellent," he said, "Now we can teach those bastards a lesson."

____________________________________

Marcos deployed his forces conservatively, in a line along a stand of forest behind the houses. From there it would be difficult for him to break past and accomplish the scouting objectives. Meanwhile, my Numidians should be able to score at least one scouting marker. Assuming then that I could withstand Marco's attacks and keep my army from breaking, that should be enough for the win.

____________________________________

Malchus strode along the line behind his spearmen, He had countered the Greek's deployment with a conservative formation of his own. Apart from his Numidians, his men were in a line with the spearmen screened by the javelin men.

Juba and the Numidians had their orders. They were to race around the flanks to scout the rear, and then return. He had been absolutely clear on that. He would not allow a repeat of the last scouting mission, where the Numidians, in their overconfidence and exuberance, had allowed themselves to be picked off by the enemy missile troops. Juba knew that a repeat of that fiasco would result in dire consequences.

Speaking of missile troops, he could see a unit of archers, some slingers, and some peltasts armed with javelins. Damn. Malchus' spearmen were formidable once they got into close combat, but the would suffer losses as they advanced.

So be it, he thought. We are in Rasap's hands. Now it's time to shed some blood.

Troop positions after Turn 1. Marcos's troops are still mostly in the shadow of the woods, while the Numidians make a run for the opposite table edge.

____________________________________

My Numidians accomplished their task with ease. They were threatened by the slingers, but were able to react to the enemy's activation and move out of range, forcing the slingers to use another action to close before shooting. One cavalryman fell to the stones, but no more.

At the end of the turn, the Numidians were still within range of the slingers. I definitely did not want Marcos to win initiative, knowing that he would attack them again. So I bid two command points on the initiative roll to improve my chances of winning, and it worked.

Thus, with the scouting token in hand, the horsemen raced back behind the Carthaginian lines.

_____________________________________

On his left, Malchus could see the Numidians make their run for the opposite side of the battlefield. Though the enemy slingers tried to stop them, the bulk of his horsemen survived and turned to race back with their prize: valuable information on the enemy deployment.


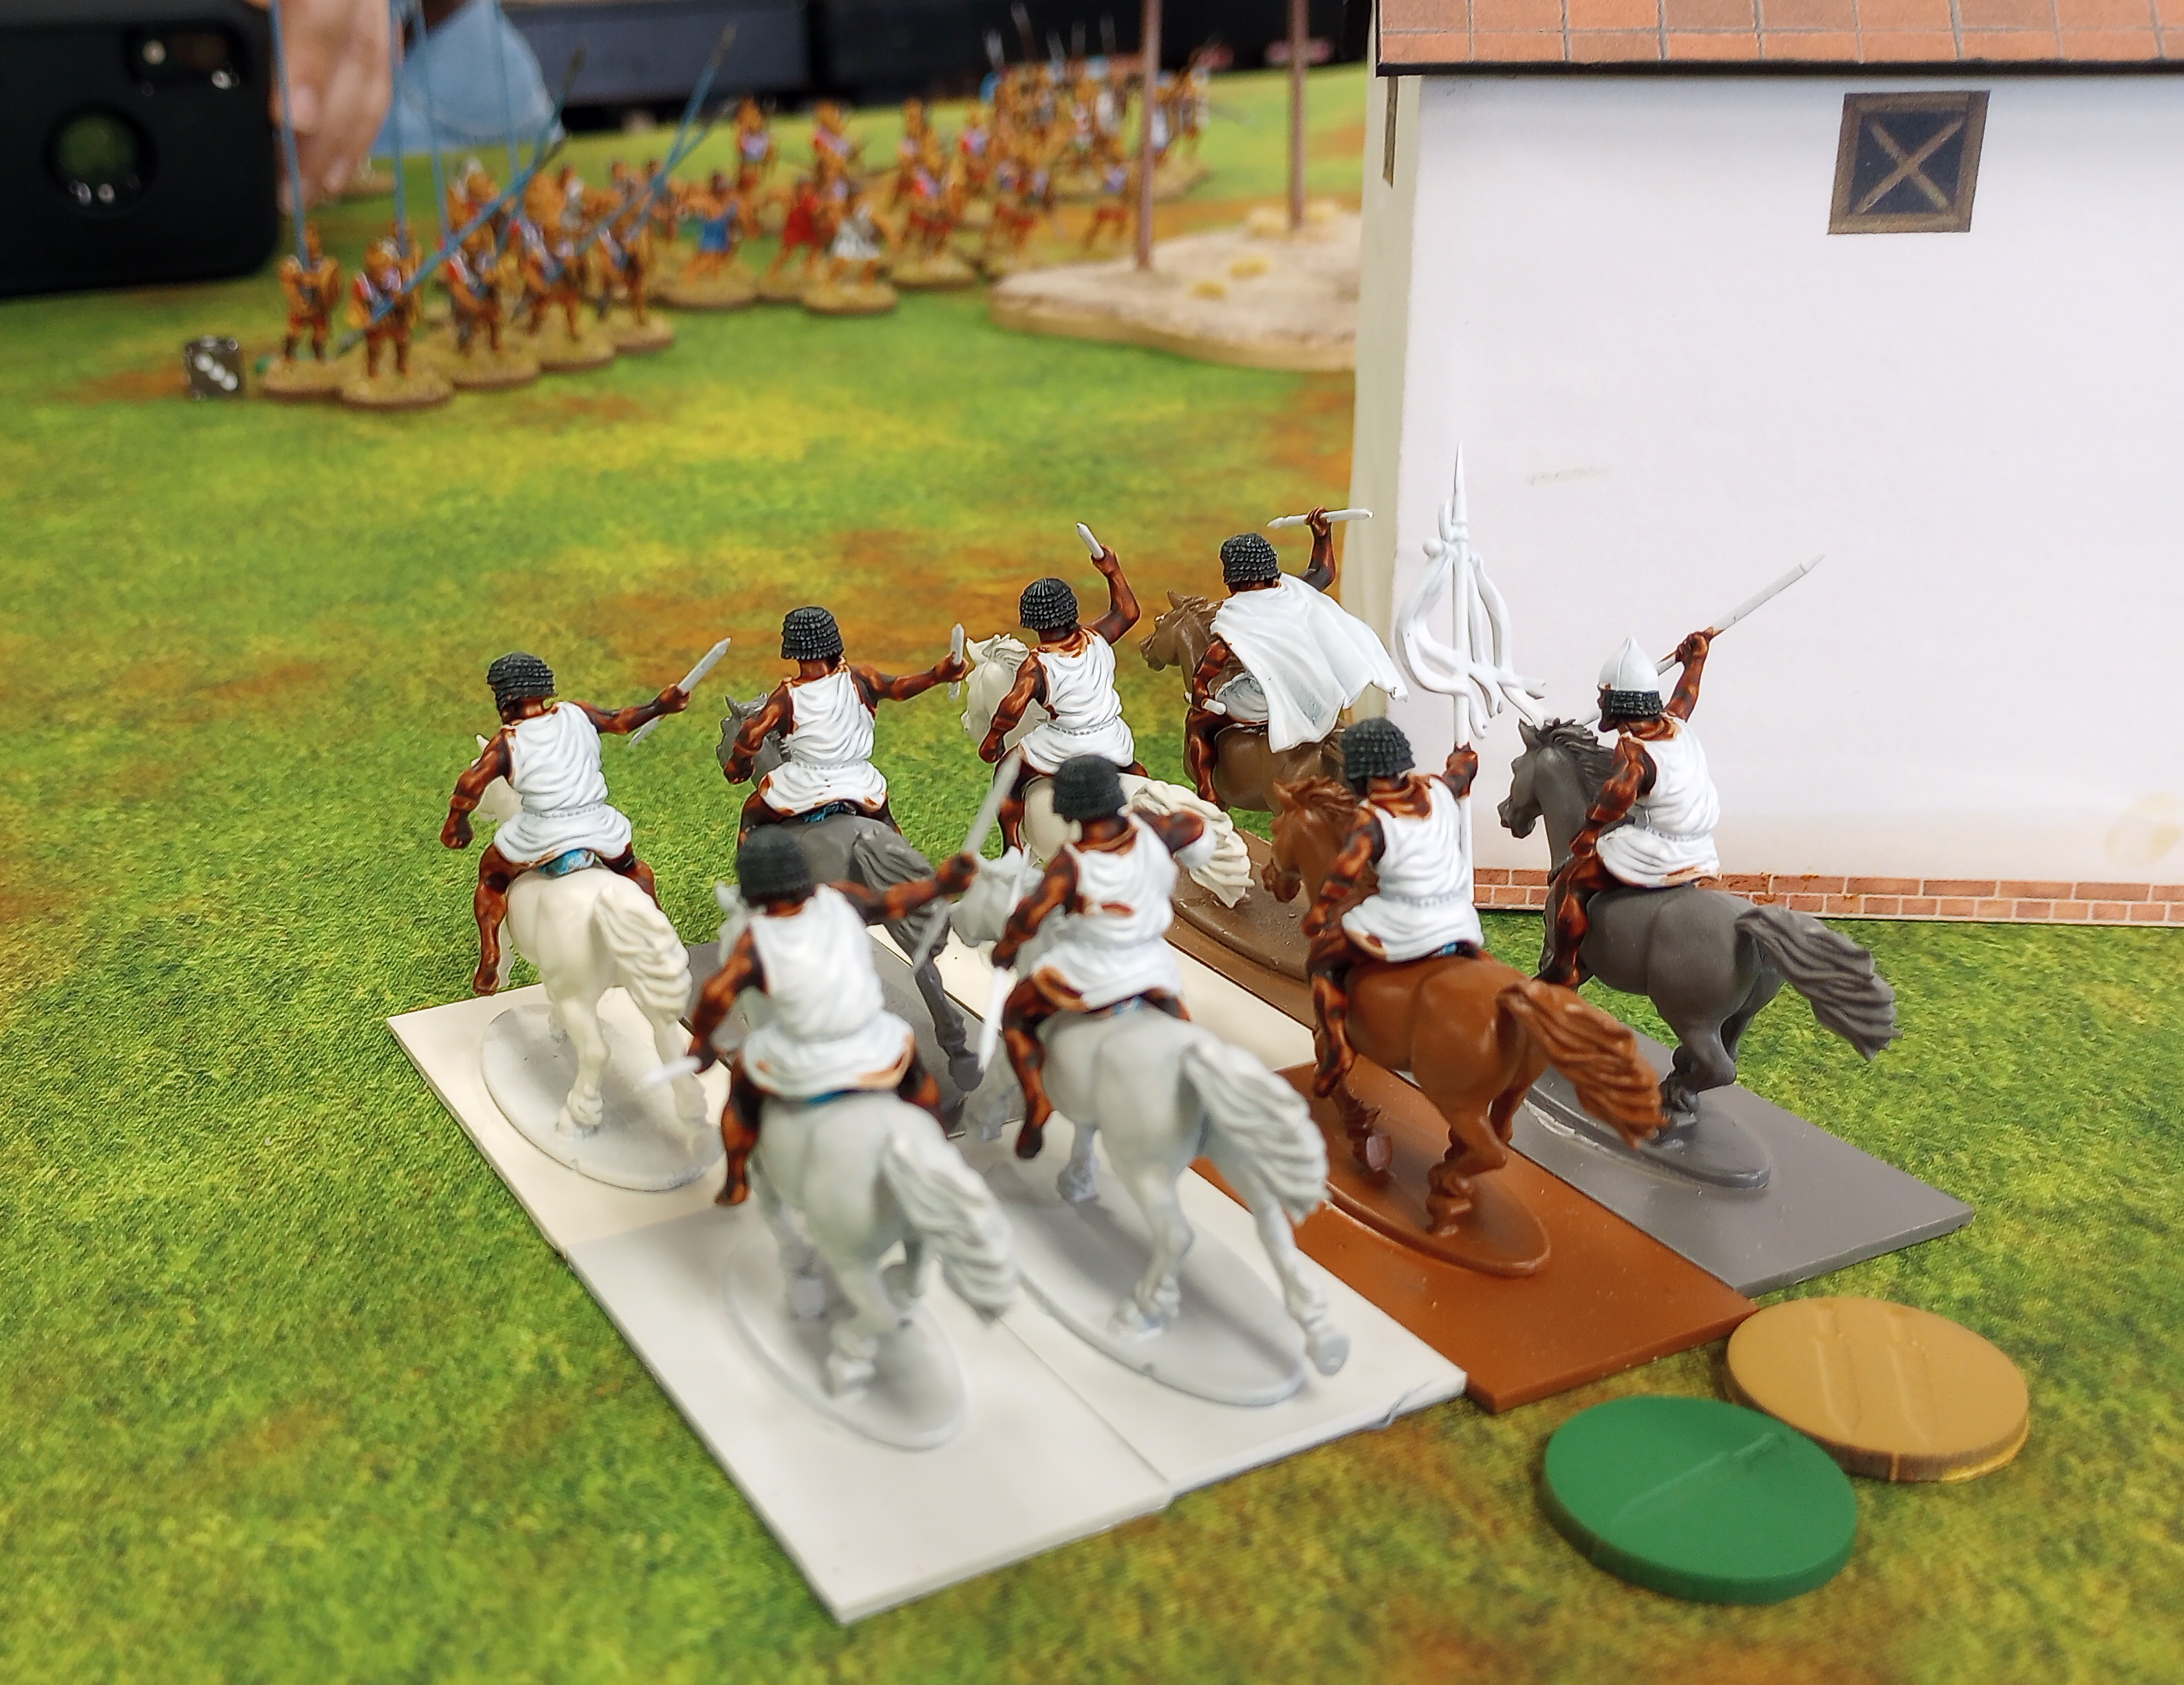
Despite losing a man, the Numidians skirt back past the slingers to safety.

The cavalry safely back behind their lines.

In the center, the enemy commander seemed content to wait and allow Malchus to make the first move. Knowing that he had the advantage since none of the enemy troops had gotten past his own lines, Malchus was content to try and wait out the foe.

______________________________________

In turns two and three, Marcos passed early on, hoping I think to draw me in and then use his remaining command points to attack me when I would not be able to react. I called his bluff and passed as well, ending turns 2 and 3 very quickly. 

At this point, Marcos realized that I had the advantage since I had a scouting token, and he began to move his troops forward some.

_____________________________________

Finally, movement ahead! Malchus could see the enemy start to stir.

"Bostar! Send in the javelin men," he called out.

"Yes, sir, right away," Bostar responded instantly.

The Libyan tribesmen began to move forward and started launching their missiles. They had little effect on the enemy, many of whom were still in the shadows of the woods. A few of the damned archers fell, but not enough, dammit, not enough!

The foe accepted the challenge, and the Greeek archers and hoplites responded. The javelin men were soon chased away by their Greek counterparts, fleeing back towards the Carthaginian lines.

On the left, he saw Juba.

"Numidians!" Malchus cried out. "Kill those damned slingers!"

Immediately Juba ordered the horseman to attack. Time after time they threw their javelins, causing some casualties, but not enough to break the enemy unit

He'd watched enough! Malchus ordered his spearmen to advance in close order, shields forming a wall against the enemy missiles.

______________________________________

I misplayed the last two turns. Marcos has an affinity for missile-armed troops. Apart from two small units of hoplites (six men each), all of his troops have missiles of some sort. The slingers and archers in particular, with their longer range, are a special threat.

I tried to engage his missile troops with my own, but I was woefully outclassed. The better range of the archers, coupled with the better shooting score of the peltasts, meant that I took a lot of casualties. Both javelin men units quickly were routed.

In my mind, I see skirmish units as ranging ahead of the main line of troops, engaging and weakening the enemy before fading back.

Perhaps it is best to keep them behind the shield wall, wait until the spearmen have (hopefully) disrupted the enemy line, and then attack with them to finish off the foe. I may have to try that next time to see how it works.

But for now, onto Turn 5...

_________________________________

With their screening skirmishers gone, the spearman advance in ordered ranks.

One unit of spearmen charges into the peltasts, breaking formation. They did not kill enough Greeks to break the enemy unit.

With their screening skirmishers gone, the spearmen moved ahead. Despite their heavier armor, the spearmen on the left were unable to break the peltasts. Charged in turn by the hoplites, they broke as well, running past Malchus as they fled.

"Dogs! Curs! Bastard sons of bastard fathers!"

Despite his curses, the men would not stand and fight.

One detachment of spearmen remained to hold the rapidly disintegrating Carthaginian line, and the Numidians still posed some threat on the left. But, by the gods, things looked grim.

The sun was low in the sky at this point, the tall trees casting even longer shadows across the field. Visibility was worsening, it was obvious that despite his successes, the Greek commander had no stomach for further bloodshed.

Accepting the respite, Malchus ordered his remaining troops to fall back. Victory, no matter by how slim a margin, was sweet. Especially against a foe that had bested him in their last encounter.

More importantly, the intelligence on enemy troop dispositions would be valuable, and Hannibal Gisco would be grateful. Malchus began to ponder how he could capitalize on that gratitude.

The Numidians taunt the enemy. They only got away with it because the game ended!

_________________________________

With my army falling apart at the seams, I failed my break test at the end of Turn 5. Thanks to my Zeal asset, I automatically pass the first test of the game despite the actual roll. But another turn would almost certainly cost me the game. The outcome of this game would literally rest on the end of game roll...

Marcos rolled a 6, and I rolled a 1... an odd total, so the game ended!

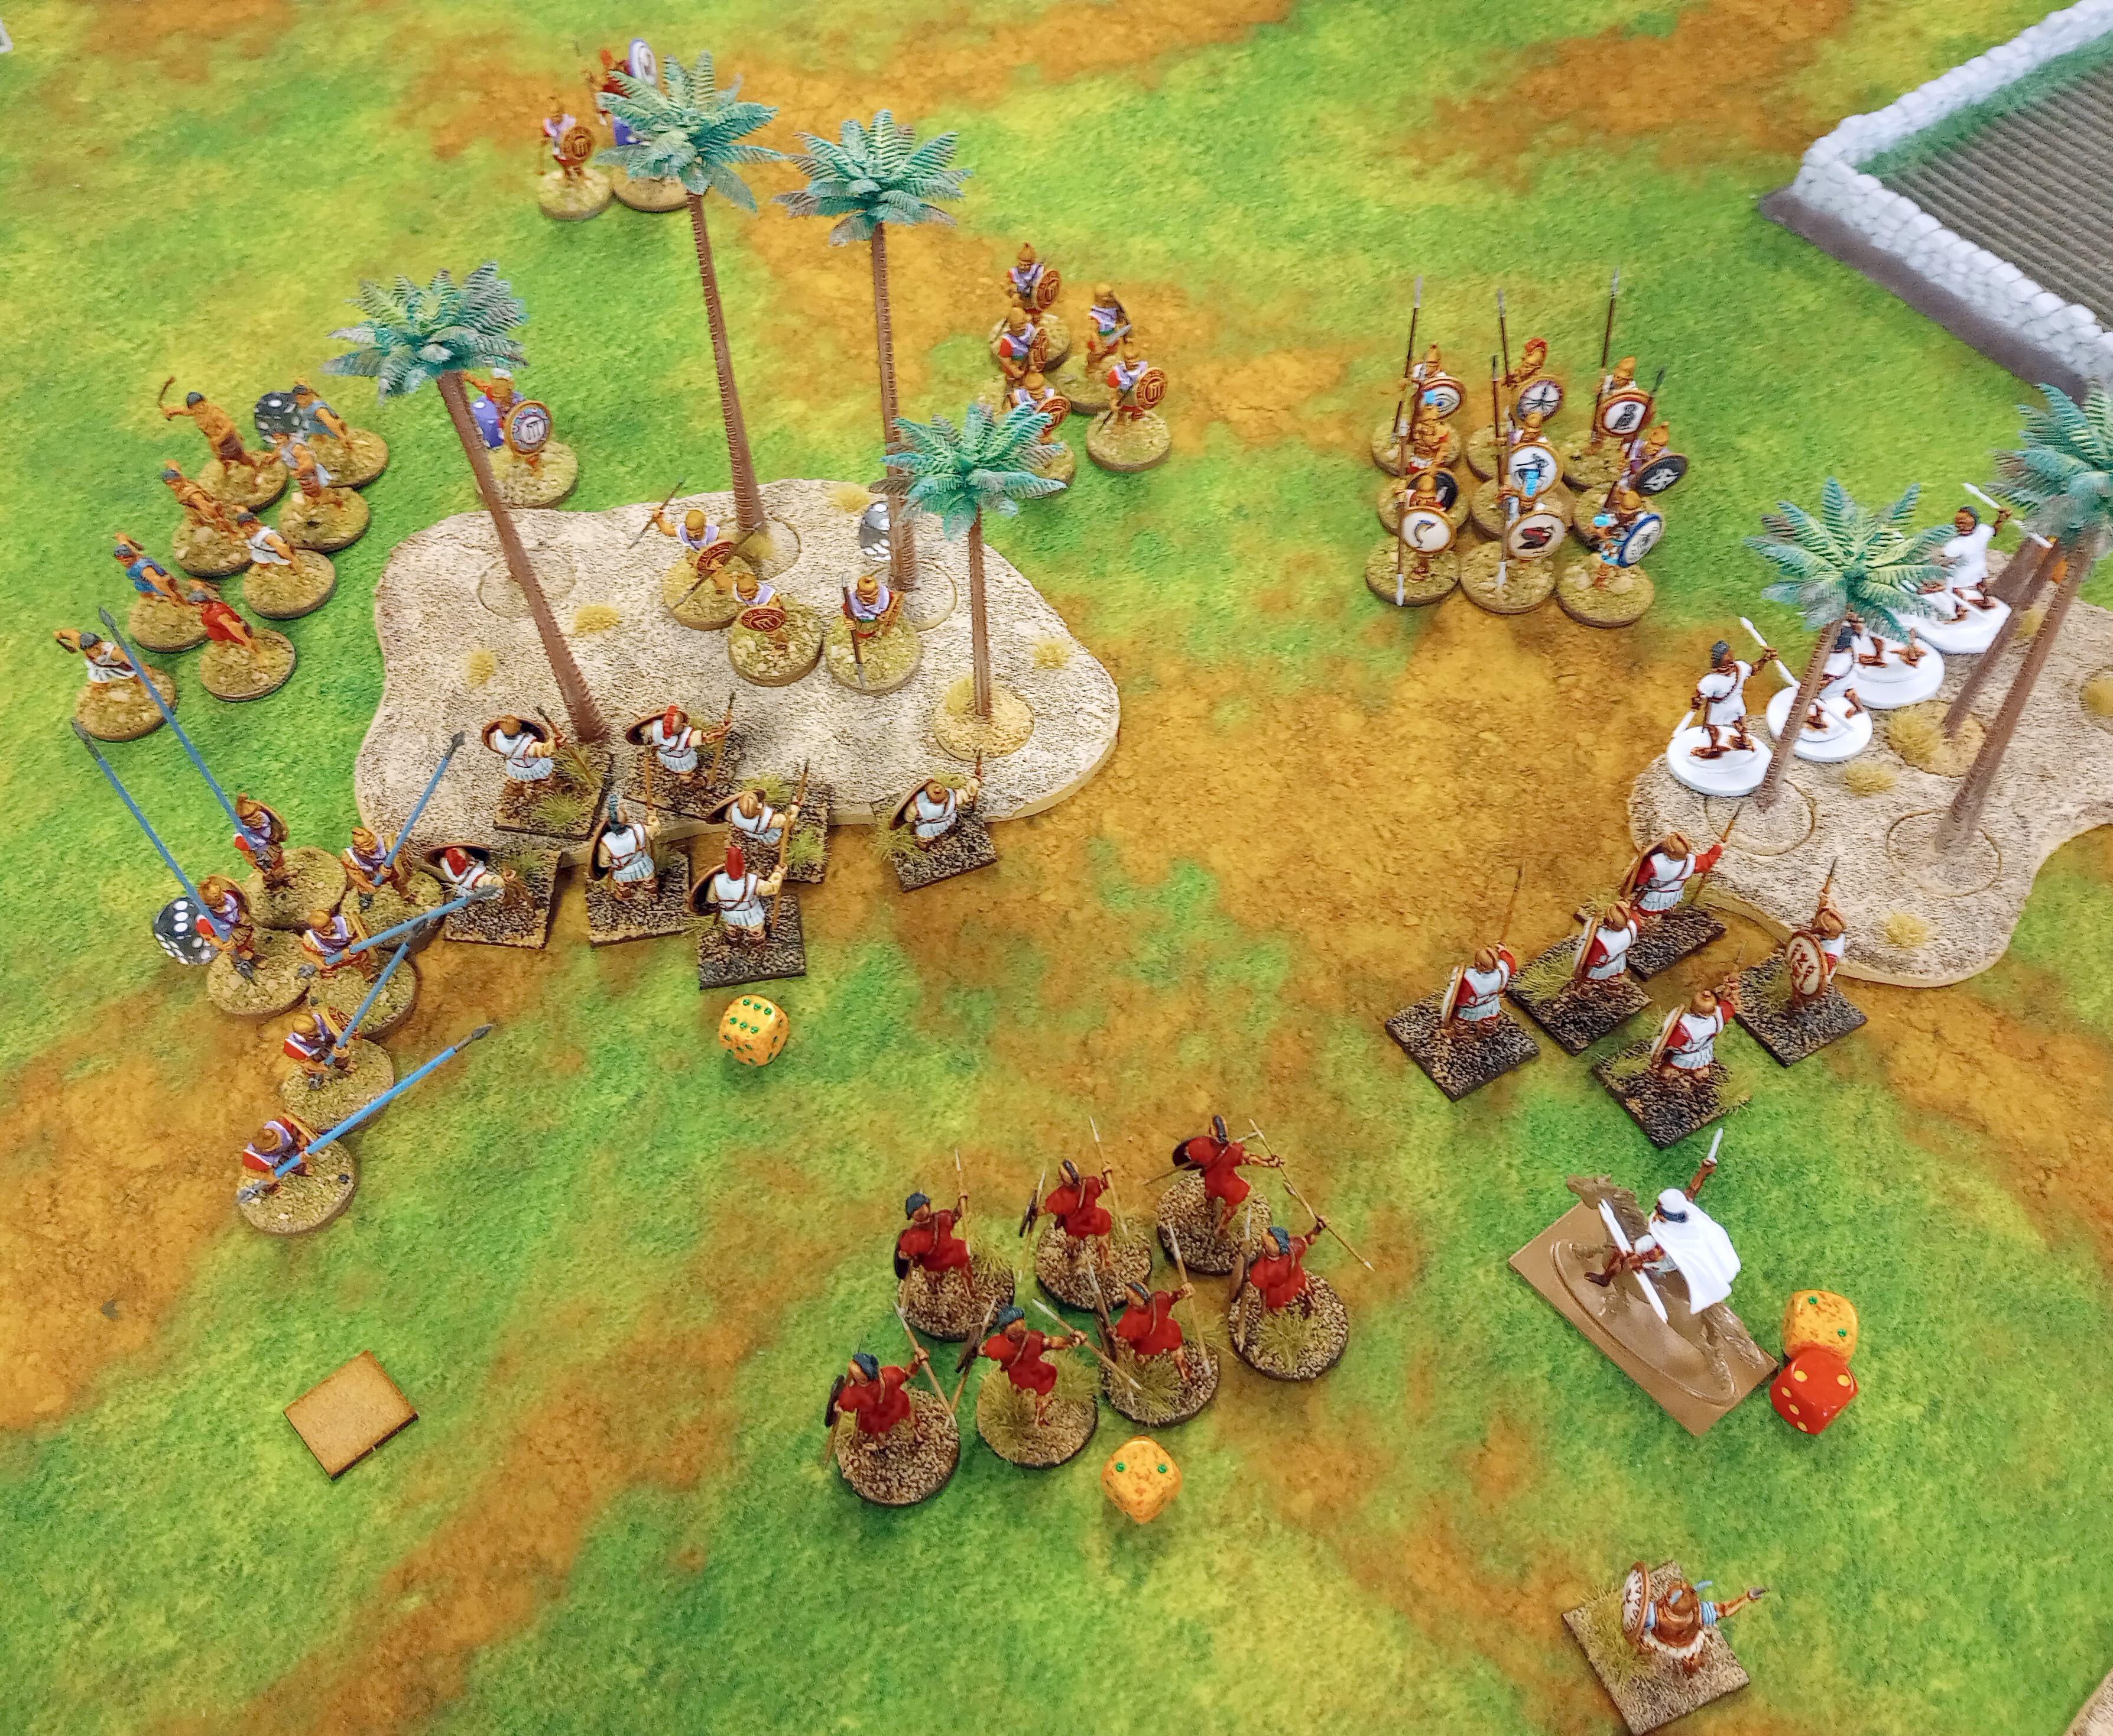
Troop positions at the end of the game.

Despite having accumulated more break points (3 to Marcos's 2), I achieved a minor victory because I held a scouting token.

Marcos and I each made mistakes during the game. He played very conservatively the first few turns, content to sit back. This allowed me to secure the scouting token and then keep passing, advancing the game turns towards a conclusion. A conclusion that benefited me since I held a token.

I should have not attacked his slingers with my Numidians. I got away with it, because Marcos fixated on my javelin men and spearmen and used his hoplites to attack them. Had he sent them into my Numidians, they likely would have routed, costing me the scouting token that was the key to victory.

In the center, as mentioned, I misplayed my combination of troops. I played them the way I envisioned them working, and not the way they actually work in the game. Large concentrations of enemy missile troops are a very tough nut to crack, in my opinion.

All of Marcos's missile troops consist of nine models, so he only has a dozen hoplites without a ranged attack. And 18 of those troops have a range of 12" or greater. That's a well-designed force that thrives on causing casualties at a distance and weakening the enemy for the coup de grace by the heavy hoplites.

Once he began to attack, Marcos started beating me. As I said, I doubt I could have withstood another turn of combat.

Sometimes it really is better to be lucky than good.

'Til next time!

Saturday, January 14, 2023

Getting started in "The Barons' War"


Lately I've been reading a lot of online buzz about a game from Footsore Miniatures called "The Barons' War." The game has been out for a while now, and there have been, I think, four very successful Kickstarters for it.

I became more intrigued recently after seeing some posts on Facebook. The basic "retinue," which is what a force is called, can run from about 25 to 50 figures depending on the point level of the game. That's right in my comfort zone in terms of number of figures.

I don't know too much about the time period covered by the game, apart from having watched several iterations of "Robin Hood." But that can be remedied with a few good books.

There is a main rulebook for the game, The Barons' War, that contains the basic rules for playing out battles, creating your retinue, etc.

There are also a pair of supplements, Death & Taxes and Outremer. The first contains a campaign and rules for outlaw bands. The latter, of course, deals with the Crusades. Outremer has just released, so I've not yet had a chance to read it. I have always wanted a Hospitaller force, so I'll be looking to pick this up soon.


Footsore has also produced four mini campaign books along with accompanying figures of the main characters in each. These look like a lot of fun, though I've not yet gotten my hands on any.

Footsore produces a line of figures for the game, of course, and they are beautiful. They come as individual figures for the characters, or packs of four for the troops. You can also get a whole basic retinue.

You can use any figures you wish, however, and there are some other good options. Fireforge produces a line of plastic figures that are suitable, and more economical.

There are also some 3D print designers that have models appropriate to this era. You can spend as much or as little as you wish.

For myself, I will probably mix and match from several sources to complete my retinues.

In order to "get my feet wet" with this game, I picked up a box of Fireforge Foot Sergeants at Gigabytes. At $50 for 48 figures it's about as inexpensive as you can get, per figure.


Each of the six sprues contains eight bodies and an assortment of weapons. There are six hand weapons (two swords, two axes, two maces), six spears, and four crossbows on each sprue. You also get a selection of heads and shields.

Sergeants seem to be a fairly basic building block in most retinues I've seen. I've decided to start by assembling four figures with hand weapons. That's enough to experiment on and try to get a paint scheme that I like. 

I'm sure that as I read and become familiar with the rules I'll figure out how best to equip them to have a decent core of troops. I'll be looking to add some knights, mounted and on foot, to add some punch, as well as some more common folk to bulk up the numbers.

I have always been fond of skirmishing cavalry armed with missile weapons. I am not sure which troops best fit that role in The Barons' War (perhaps mounted Sergeants with crossbows?) but I am sure I will figure it out.

As I've mentioned, I don't really know much about this time and place in history. Heraldry is a mystery to me so I don't really know in which direction to go. Because I'm generally not a stickler for strict accuracy, I'll probably invent my own character to lead the retinue and just design a heraldry and color combination that looks decent. From my reading, I'll try to come up with a background that makes sense.

Here are the first four figures I assembled, awaiting basing and priming:

Hopefully they'll have some color to them for my next post on The Barons' War.

Don't worry though, fans of Malchus, despite a holiday- and COVID-induced hiatus, the Clash of Spears campaign is still in full swing, and your favorite intrepid Carthaginian madman will be back with more adventures soon!

'Til next time!

Thursday, December 22, 2022

A close-run thing (or, how Malchus finally beat Fabio)

A crucial moment in the battle during turn 3 - read on for details!

Bryan and I met to fight the second battle for each of us this campaign turn. As such, it is what the campaign calls a "pressed battle." That means that rewards and risks are minimized from the first battle of each turn. But, since I am not doing this for the glory, but rather as an excuse to play games with friends, that is more than enough incentive for me.

Bryan won the scenario selection roll, and chose "This is my land!" For us older guys, I call it "Get off my lawn!"

I was really hoping to win the roll so I could select pre-battle scouting, in which my cavalry would have a tremendous advantage. However, I rolled poorly and having the "impetuous" disadvantage didn't help.

For variety, we chose to use diagonal deployment zones. Our warbands wouldn't fit within the deployment area, so we used the engagement phase rules for deployment.

This was going to be a slugfest, not the type of engagement my warband was necessarily built to excel at. But my lighter units did give me an advantage in that I was able to push them up quickly, "locking" Bryan's unit further from the objectives than I was. The trick would be to hold him off long enough to win...

______________________________________

Malchus surveyed the farmland before him. This miserable little Sicilian farm held little value, other than its location. It sat close by a ford on the Assinus River south of Messana. Many troops headed to the city to contain the Romans, or Roman troops seeking to break out south into the island, would find the ford useful, and Hanno had ordered Malchus's band to seize and hold the farm until he arrived with greater numbers of troops.

His Numidian scouts had returned earlier that morning and reported the presence of Greek soldiers advancing on the farm from the north. They had gotten a close look at the enemy, and remarked on the beauty of the Greek commander!

"Yes," Malchus thought. "Rasap be praised." It had to be that gorgeous Greek bastard that had already bested him twice. This would be his chance to avenge himself upon the Greek (he hadn't learned his name, though Malchus's men were calling him "Fabio" - he didn't know why) and settle the score!

Malchus had ordered his men to advance quickly and close on the central area of the farm. This was where the battle would be decided, and he chose to risk tiring his men in order to get there first.

On the left flank, his Numidians sat astride their mounts. The horses whickered and pranced, eager to run. They would get their chance. In the center, he had formed a line of alternating spearmen and tribesmen. He hoped the volleys of javelins would weaken the enemy as they approached, so he could order his disciplined spearmen into the fray to finish them off. At least, that was the plan...


Unit positions at the end of the engagement phase.

The Carthaginian line faces its Greek foes.

I was pretty pleased with my deployment. I had pushed my lighter troops with five and six moves, even though it meant they would start the game with a fatigue, in order to freeze Bryan's troops as far as possible from the objectives. Of course, that meant I would have to test to activate those units, so we would see if my gamble paid off.

____________________________________

The Greeks moved forward in an orderly fashion, their own javelin-armed troops covering the ranks of more heavily-armed soldiers. On the left, Malchus could see pikemen. And behind them, damn their eyes, slingers! Slingers had hurt his cavalry badly in the last engagement, and he hoped history would not repeat itself.

In the center, Bostar led the advance. The ranks of spearmen flanked his veteran javelin men. On the right, the newly recruited Libyan tribesmen ran ahead into a stand of palms from which they taunted the advancing Greeks.

Unit positions at the end of turn 1.

Malchus's view.

The Numidian horsemen wait for their opportunity.

Juba commands the right flank.

The new recruits taunt the enemy.

Turn 1 was uneventful, as Bryan and I both maneuvered our troops into position for when combat would actually be joined. The Numidians were my wild card. I was hoping to be able to use them aggressively as I had in the last game.

________________________________

The Numidian horsemen charged out from behind the building that had shielded them from the slingers and threw there javelins. Despite their flimsy armor, only two slingers fell.

The junior Greek commander (Malchus did not recognize the younger man, he was not the same as had been present at the earlier encounters) responded quickly. The Greek pikemen moved up to shield the vulnerable slingers before they suffered more casualties.

The Numidians make their move.

The javelin men on the right charged and threw their missiles, with little effect on the enemy. Rather than retreat back into the palms, they stood their ground and threw again. Once more, few foes fell to their missiles.

There was little other contact with the enemy, as both commanders maneuvered their troops, seeking a decisive advantage when combat was finally joined in earnest.

The tribesmen throw their javelins.

Unit positions at the end of turn 2.

Turn 2 saw our troops finally engage. There was no melee combat, though a lot of javelin-throwing. My tribesmen were singularly ineffective against Bryan's hoplites, though my Numidians saw limited success against the slingers. Bryan's pezhetairoi scored just enough hits to disorder my spearmen on the right.

________________________________________________

Malchus was concerned that his green tribesmen on the right had overextended themselves. They could not withstand a charge from a formed unit of heavy infantry. He wondered about his cavalry on the left flank. Apart from a desultory charge, they had been quiet.

Nevertheless, he was mostly content with his formation thus far. His troops held most of the open space before the farm's lone small building.

The Greek javelin units peppered his formations of spearmen with incoming missiles, causing few casualties, but breaking up their formation. His javelin men responded, killing some of the opposing troops among the palms.

Malchus ordered his spearmen into the trees, hoping to crush the enemy decisively. The rough terrain forced his men to break their ranks, and the attack was less successful than he had planned. In fact, the advance of the spearmen had left them vulnerable to a flank attack by the Greek pikemen!

Fortunately, his men's armor protected them from the brunt of the attacks and their discipline held.

Meanwhile, on the far right, the javelin men were suffering at the hands of the Greek spearmen and were falling back into the trees.

And on the left, there was no sign of his cavalry. He would have words with Juba when this was over.


Malchus's line holds firm.

Tribesmen clad only in tunics face the pride of the Greek infantry.

A volley of incoming javelins does little damage, but breaks up the formation of the spearmen.

The Greek infantry charges!

Javelin men cause some casualties among the Greeks in the palms.

The spearmen charge into the trees...

... and are in turn charged by the pikemen.

Unit positions at the end of turn 3.

Overview of the center of the battlefield.

Turn 3 was when things got "real." Bryan's hoplites engaged my exposed javelin men and did heavy damage. In the center, the highlight was the charge of my spearmen and their ability to withstand Bryan's counter-charge by the pikemen.

My Numidians failed their activation test, and so just sat this turn. I was also hampered by having fewer command points than normal. I had really wanted initiative this turn, so I had bid two command points. I won, but I felt it when it was time to give my troops orders as I was limited in actions and reactions.

______________________________

On the left, Malchus finally saw some signs of life from the Numidians. They charged forward, hitting the pikemen in the rear with javelins. He could see some of the enemy fall from the missile attack. 

However, before they could strike again, the slingers turned their attention to the horsemen, knocking one from his mount.

This seemed to disorient the Numidians. They wheeled their horses and fled behind the cover of the farm building! Oh yes, Malchus would need to "discuss" this failure with Juba. But first, there was still a battle to be won.

On the right, The Greek hoplites had made short work of the remaining javelin men, and the Libyans had fled, fading into the palms. Rather than press their advantage immediately, they chose to re-form their ranks, presenting a solid front of shields and spears to their Liby-Phoenician counterparts.

While his Greek opponent concentrated on the right, Malchus turned his attention to the center. Bostar had noticed the disarray of the pikemen and ordered the veteran javelineers to unleash volley after volley against them. The casualties they suffered, combined with their fatigue from the earlier charge against the spearmen, saw the unit of pikes dissolve and flee the battlefield.


The ineffective charge of the Numidians.

Having dispatched the javelin men, the Greek spearmen turn their attention to their Libyan counterparts. 

The veteran Libyan tribesmen unleash a volley against the pikemen.

At the end of turn 4, Malchus's men hold the left center, though the right is still disputed.

The Numidians charged out, did little damage, and lost a rider when the slingers countered. They failed the two morale tests and stalled. 

The javelin men on the far right were destroyed, but with his unit already fatigued, Bryan chose to re-form ranks rather than attack again into my spearmen. They would do so next turn. but I feel that Bryan lose some momentum in not pressing the attack.

The Libyan tribesmen in the center were deadly! Bryan's pikemen last turn had used three actions, so they did not recover any fatigue. The Numidian attack did add a little more, so when the javelins hit and did just enough damage to kill a couple of pikemen, the unit dissolved. Bryan considered using a fate point to re-roll the results, but with the odds stacked against him because of fatigue modifiers, he chose to let the rolls stand.

As an aside. earlier in the game I cleverly used my fate point to turn two hits on the enemy into just one. Enough said about that.
_________________________________

This was the decisive moment! All of Malchus's plans and counter plans were for naught as the battle was to be decided by vicious combat. At this point, no quarter would be given or taken, as the climax of the battle raged!

The re-formed hoplites charged the remnants of the Libyan spearmen, and the already weakened unit broke and fled, leaving Malchus's right flank dangerously exposed.

The wily Greek ordered his petzhetairoi into the scrum, and they engaged the remaining unit of spearmen. Malchus could see that they had little effect on the disciplined troops.

As the Greek javelin troops advanced, Bostar commanded his tribesmen to once again launch their missiles. Though weary, the Libyans responded. The javelins struck the pezhetairoi with devastating effect. The Greeks fell before the onslaught of missiles, and the few survivors ran.

At this point, with his line dissolving and Malchus's troops firmly in control of the left side of the field, "Fabio" ordered his troops to withdraw.

Malchus smiled grimly. It had been bloody, and a very close-run thing, but it was a victory!


The Libyans again launch missiles against the Greeks.

Unit positions at the end of turn 5.

At this point, the battle was still very much up for grabs. Bryan's hoplites did indeed charge into my spearmen and saw them off with little effort or drama. Fortunately, the surrounding units were not affected by their disintegration.

Bryan's pezhetairoi attacked with javelins and did not do much damage. But the counterattack by my javelin men was brutal and Bryan's unit was destroyed.

On the left, knowing that I could not afford to lose the Numidians like I did last game, I was perhaps overly cautious and chose to keep them safe rather than charge wildly to glory. With a range of 12 inches, slingers are a huge deterrent to unarmored cavalry in my mind and I was concerned that they would be able to do much damage to my horses. The possibility of having the unity stall within range of the slingers led me to keep them behind cover.

When Bryan failed his force break test, the victory was mine!

This battle had huge swings of momentum. In the middle turns, it seemed like I could not activate my units at all. As mentioned, in turn 3 I bid two command points and hampered my ability to command my warband.

So, in turns 4 and 5 I bid zero and kept all my command points. Combined with having fewer surviving units, this meant I had enough to buff my activation rolls in the crucial moments. For example, when ordering the javelin men to launch that last fatal volley against the pezhetairoi, I need a 6 to activate them. I used a command point to roll an extra die, and fortunately one of the three came up with a "6!" 

This was indeed a very close affair.  In the end, it came down to a couple of clutch dice rolls at just the right time. Had they gone differently, the outcome could have been a Greek victory. Bryan and I always seem to be evenly matched, and our battles seem to come down to one or two crucial moments. 

In this case, I was victorious. Malchus is on a roll!

'Til next time!


Sunday, December 18, 2022

Villa rural Romana en 3D

La casa en la mesa de juego (Foto/Beren)

En una publicación anterior, escribí sobre algunas ideas que tuve para construir una selección de estructuras rurales para representar una villa o granja romana. A diferencia de los edificios de la ciudad, quería algo más pequeño y modesto.

El propósito del terreno, en un juego típico de Clash of Spears, es simplemente crear interés escénico y táctico al darles a las tropas algo a tener en cuenta mientras maniobran y atacan. Beren vio mi publicación y diseñó un modelo 3D imprimible basado en uno de mis diseños. ¡Creo que hizo un trabajo estupendo! Y lo que es mejor, ¡ha puesto los archivos a disposición de cualquiera que desee usarlos de forma gratuita!

El edificio en 3d (Foto/Beren)


Los archivos están disponibles en mi unidad de Google en este enlace. Lo único que pido es que si descargas e imprimes el edificio, me envíes una foto de él en uso.

El edificio en la mesa de juego (Foto/Beren)

¡Gracias Beren, por darle vida a mi boceto! No puedo esperar para tener mi propia versión de esto en la mesa de juego.
¡Hasta la próxima!

3D Small Roman Rural Villa

The printed villa on the tabletop. (Photo/Beren)

In a previous post, I wrote about some ideas I had to build a selection of rural structures to represent a Roman villa or farm. As opposed to city buildings, I wanted something smaller and more modest.

The purpose of the terrain, in a typical Clash of Spears game, is simply to create scenic and tactical interest by giving the troops something to take into account as they maneuver and attack.

Beren saw my post, and designed a printable 3D model based on one of my designs. I think he did a terrific job! And what is better, he has made the files available for free to anyone who wishes to use them!

3d render (Photo/Beren)

The files are available on my Google drive at this link.

The only thing I ask is that if you download and print the building, you please send me a photo of it in use.

The printed villa on the tabletop. (Photo/Beren)

Thank you Beren, for bringing to life my sketch! I can't wait to get my own version of this on the gaming table.

'Til next time!

Tuesday, December 13, 2022

¿Cuáles griegos? Eligiendo mi próxima facción para Clash of Spears


Si han leído mis publicaciones anteriores, ya saben que hasta ahora en la campaña de Clash of Spears no me está yendo muy bien, al menos en términos de victorias.

No me malinterpreten, lo estoy disfrutando mucho y me ha dado una razón para reunirme con personas con las que amo pasar el rato (¡ya saben quienes son!). He jugado más juegos en el último mes que en los 10 anteriores combinados. Y la campaña me motiva a construir y pintar tropas. Para mí, esos factores por sí solos me llevan a la columna de victorias en la campaña, independiente de los resultados del combate. Para mí la narrativa es todo. Juego ante todo para tener una experiencia agradable. Y eso generalmente depende de contra quién estoy jugando. Tengo la suerte de que hay muy pocas personas en la tienda local con las que no me gusta jugar. Pero también tengo un lado competitivo. Esa es, después de todo, la razón por la cual juego. Disfruto la camaradería, la pintura y el modelado, y la investigación que implica crear un ejército. Pero es bueno ver a mi ejército (generalmente) completamente pintado, históricamente preciso (o al menos históricamente plausible) disfrutar del éxito en el campo de batalla. Y últimamente, eso me ha estado eludiendo. A medida que aprenda más sobre Clash y las matemáticas detrás del juego, estoy seguro de que esas victorias llegarán. Pero, ¿puedo ayudar en ese proceso mirando más allá de la "regla de la genialidad" y haciendo elecciones de ejército y tropas basadas no solo en lo que me gusta, sino en lo que es más efectivo? Creo que puedo, mientras que al mismo tiempo no pierdo lo que más me atrae al juego. Por ejemplo, prefiero las tropas de escaramuzas con misiles en lugar de las tropas de "formación". Solo una preferencia personal. Prefiero sangrarte de mil cortes que molerte bajo los pies.
En Clash, el rasgo de especialista en escaramuzas te permite tener una reacción libre cuando el enemigo te carga, por lo que es posible correr dentro del rango de tiro de un enemigo, lanzar una andanada de jabalinas y estar listo para huir cuando el enemigo lo ataque en su turno. Las posibilidades de activar la unidad se basan en su determinación (básicamente liderazgo). Las tropas especialistas en escaramuzas con una determinación de 5 son baratas, pero en el futuro busco construir ejércitos alrededor de hostigadores con una determinación de 4. Menos miniaturas para los puntos, pero una probabilidad mucho mayor de reaccionar cuando quiero que lo hagan, así que sospecho que serán mucho más efectivos en general. (Descanso matemático: el especialista en escaramuzas te permite intentar una reacción gratuita, lanzar un dado y necesitar obtener tu determinación o más. Para determinación 5, eso es, por supuesto, una probabilidad del 33 %. Si gastas un punto de mando, obtienes dos dados y se necesita un solo éxito de 5 o más. Esa es una probabilidad del 55 %. Para los escaramuzadores con valor 4, esas posibilidades aumentan al 50 % y al 75 % si gastas un punto de mando y tiras dos dados. Ese es un aumento estadístico significativo. En mi opinión, vale la pena el costo adicional. Las tropas adicionales son buenas, pero si no se activan de manera confiable cuando las necesitas, son inútiles. Y, al menos con mi suerte, mis escaramuzadores tienden a acercarse demasiado y luego ser masacrados cuando no reaccionan y se retiran. Eso significa mirar las listas de ejército y darme cuenta de que los cartagineses que he elegido, si bien son mi preferencia histórica y de modelado, posiblemente no se adapten mejor a mi estilo de juego. Los únicos hostigadores que tienen que son civis (tropas comunes) son determinación 5. La fuerza griega pírrica que iba a construir a continuación (porque quiero elefantes) tiene el mismo problema. Pero mirando las listas, la lista de los griegos de Magna Graecia incluye una opción para los escaramuzadores de determinación 4 (peltastas) que cuestan solo 13 puntos en comparación con los 8 de los hombres de jabalina de determinación 5 (psiloi). Además, vienen con un escudo que los hace más resistentes a las bajas en combate. Por eso, voy a cambiar mis planes y construir una fuerza de griegos de la ciudad de Taras. Afortunadamente, todas las tropas griegas de Victrix que adquirí recientemente se adaptarán a un ejército de Magna Graecia, así como a uno pírrico. Los escaramuzadores los armaré como peltastas en lugar de jabalineros. Los honderos y arqueros (tanto regulares como cretenses) están cubiertos. Los diversos hoplitas serán todos útiles. Me gustan las unidades de caballería por su versatilidad y movilidad. Un inconveniente de la lista de griegos en Italia es que puedo desplegar caballería con armadura pesada o caballería sin armadura, pero no ambas al mismo tiempo. Puedo trabajar con eso. Ah, pero sin elefantes. (¡No se preocupen, mis cartagineses aún pueden usar elefantes!) Ahora estoy investigando la historia, las costumbres y las armas de los griegos en Italia. Y me enteré de que esos griegos en realidad se aliaron con Pyrrhus, por lo que aún podría incluir algunos hoplitas epirotas en mi ejército... No tengo prisa. Todavía tengo que completar las unidades que necesito para la fuerza cartaginesa que estoy desplegando en la campaña. También tengo el resto de mis celtíberos para pintar. Así que no esperen ver publicaciones de griegos pintados inmediatamente.

Solo estoy pensando en mi próximo proyecto y compartiendo un poco del proceso de pensamiento que usé en su selección. Quizás construya los griegos de Taras para la próxima campaña o torneo de Clash. ¡Hasta la próxima!

Which Greeks? Choosing my next Clash of Spears faction

If you’ve read my previous posts, you already know that so far the Clash of Spears campaign isn’t going very well for me, at least in terms of victories.

Don’t get me wrong, I’m enjoying it very much and it’s given me a reason to get together with people I love hanging out with (you know who you are!). I’ve done more gaming in the past month than in the previous 10 combined. And the campaign motivates me to build and paint troops.

To me, those factors alone move me into the win column in the campaign, regardless of the combat results.

You see, I’m all about the narrative. I game first and foremost to have an enjoyable experience. And that’s usually dependent on who I’m playing against. I’m fortunate that there are very few people at the local shop that I don’t enjoy playing against.

But there is a competitive side to me as well. That is, after all, why I play games.

I enjoy the camaraderie, the painting and modeling, and the research that goes into creating an army. But it’s nice to see my (usually) fully-painted, historically accurate (or at least historically plausible) army enjoy success on the field of battle. And lately, that’s been eluding me.

As I learn more about Clash and the math behind the game, I’m sure those victories will come. But, can I help that process along by looking beyond just the “rule of cool” and making army and troop choices based not just on what I like, but what is most effective? I think I can, while at the same time not losing what appeals to me most about gaming.

For example, I prefer skirmishing missile troops rather than “formation” troops. Just a personal preference. I’d rather bleed you from a thousand cuts than grind you underfoot.

In Clash, the skirmish specialist trait allows you the potential to have a free reaction when charged by the enemy, so it is possible to rush to within throwing range of an enemy, launch a volley of javelins, and be ready to scamper away when the foes charge on their turn. 

The chances to activate the unit are based on its grit value (basically leadership). Skirmish specialist troops with a grit of 5 are cheap, but going forward I’m looking to build armies around skirmishers with a grit of 4. Fewer models for the points, but a much greater chance of reacting when I want them to, so I suspect they’ll be much more effective overall. 

(Math break: Skirmish specialist lets you attempt a free reaction, rolling one die and needing to score your grit or higher. For grit 5, that is of course a 33% chance. If you spend a command point, you get to roll two dice and only one success of 5+ is needed. That is a 55% chance. For skirmishers with grit 4, those chances increase to 50% and 75% if you spend a command point and roll two dice. That is a significant statistical increase and, in my opinion, is well worth the additional cost. Extra troops are nice, but if they don't reliably activate when you need them to they are useless. And, at least with my luck, my skirmishers tend to charge too close and then get butchered when they fail to react and withdraw.)

That means looking at the army lists, and realizing that the Carthaginians I’ve chosen, while being my historical and modeling preference, possibly aren’t best suited to my style of play. The only skirmishers they have that are civis (common troops) are grit 5.

The Pyrrhic Greek force I was going to build next (because elephants) has the same issue. But looking at the lists, the Greeks of Magna Graecia list includes an option for grit 4 skirmishers (peltasts) that cost only 13 points compared to 8 for the grit 5 javelin men (psiloi). In addition, they come with a shield which makes them more resistant to casualties in combat.

Because of that, I'm going to pivot and build a force of Greeks from the city of Taras. Fortunately, all of the Victrix Greek troops I recently acquired will fit a Magna Graecia army as well as a Pyrrhic one.

The skirmishers will be assembled as peltasts instead of javelin men. Slingers and archers (both regular and Cretan) are covered. The various hoplites will all be useful.


I like cavalry units for their versatility and mobility. One drawback to the Greeks in Italy list is that I can field either heavily armored cavalry or unarmored cavalry, but not both at the same time. I can work with that. Oh, and no elephants. Sigh. (No real worries, my Carthaginians can still use elephants!)


Now I am researching the history, customs, and arms of the Greeks in Italy. And, I learned that those Greeks actually allied with Pyrrhus so I might still include some Epirote hoplites in my army…

I'm not in a hurry. I have yet to complete the units that I need for the Carthaginian force I am fielding in the campaign. I also have the rest of my Celt-Iberians to paint. So don't expect to see posts of painted Greeks here immediately.

I'm just thinking ahead to my next project, and sharing a little of the thought process I used in its selection. Perhaps I'll build the Greeks of Taras for the next Clash campaign or tournament.

'Til next time!