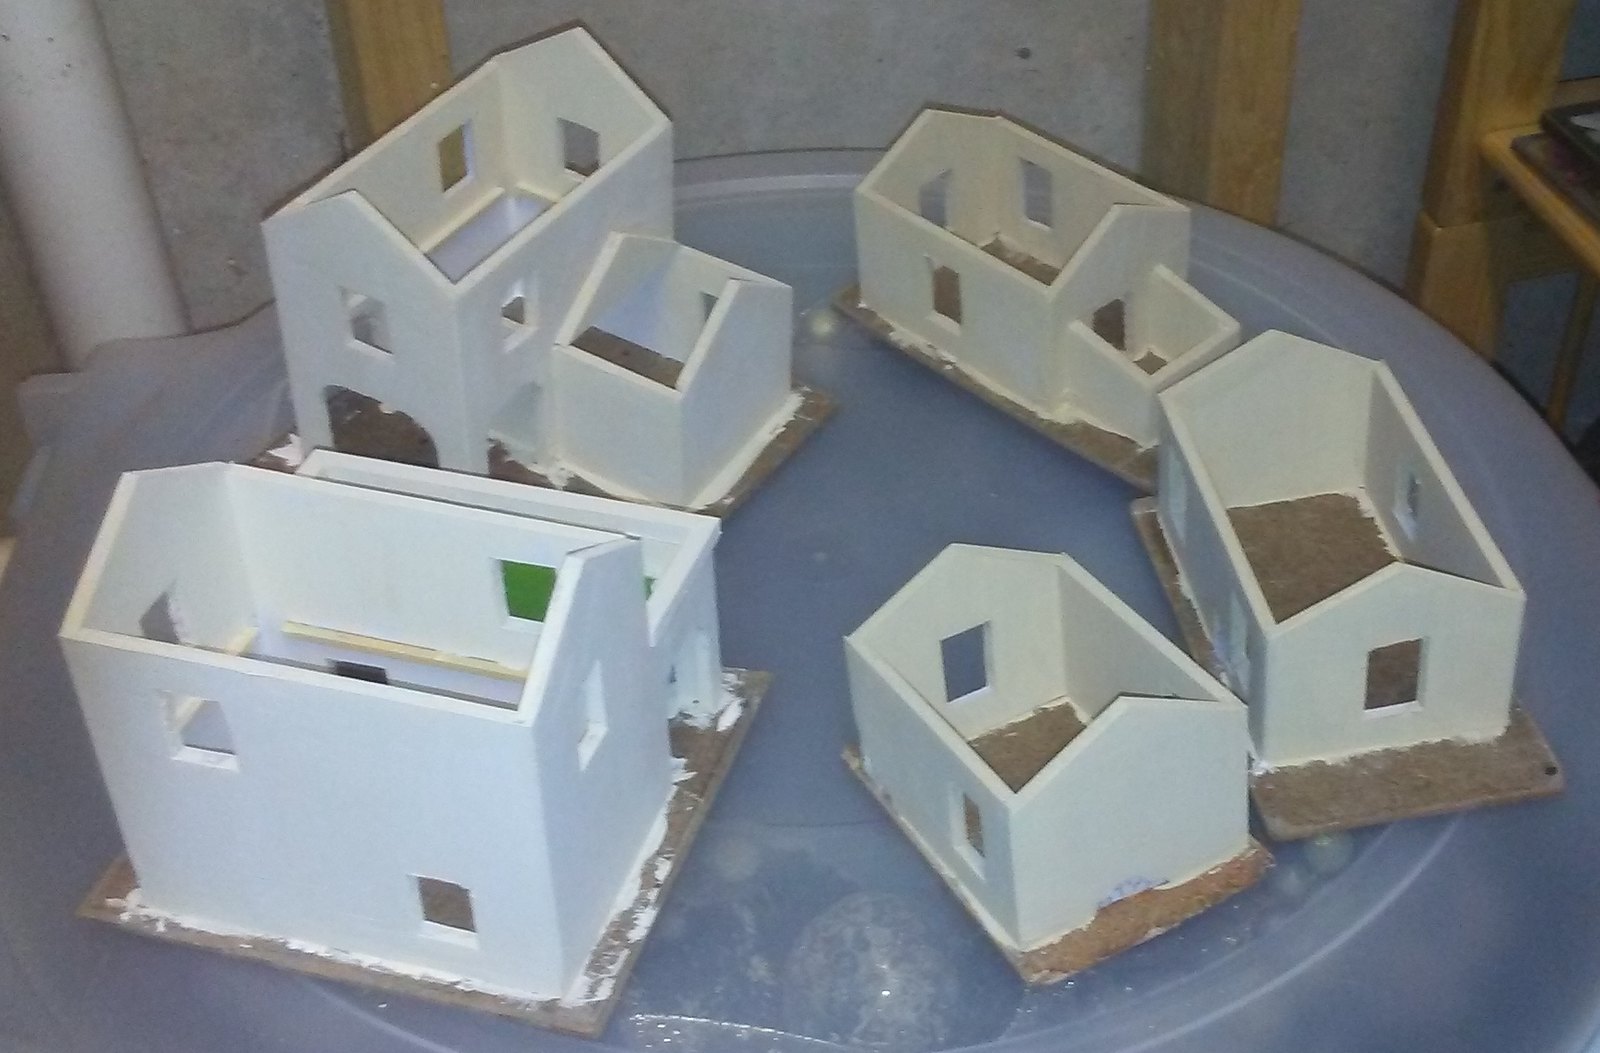
I had a very busy week, both personally and in terms of my hobbies, which made it a tight fit to get this project completed - but I made it. My goal for this week was to finish the odd little miscellaneous buildings I had started to flesh out my Spanish colonial town. It can't be made up exclusively of large, imposing churches - there has to be a balance with smaller, more utilitarian buildings.
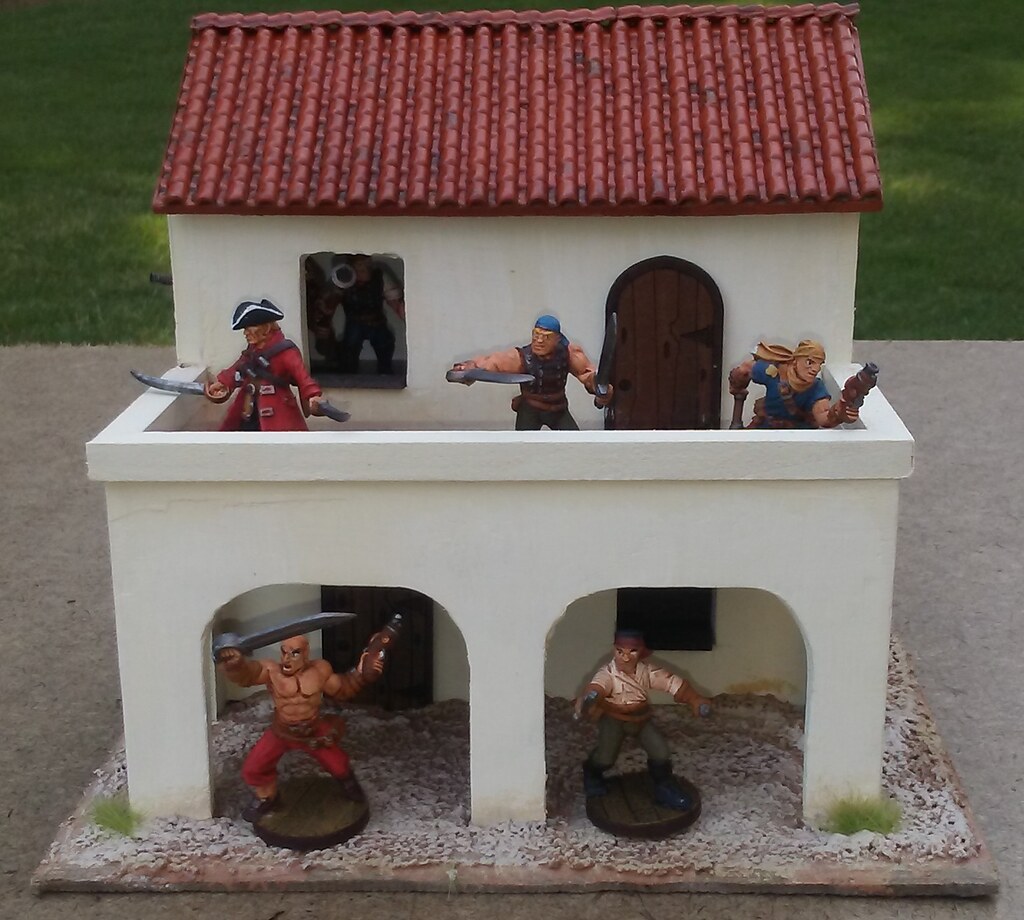
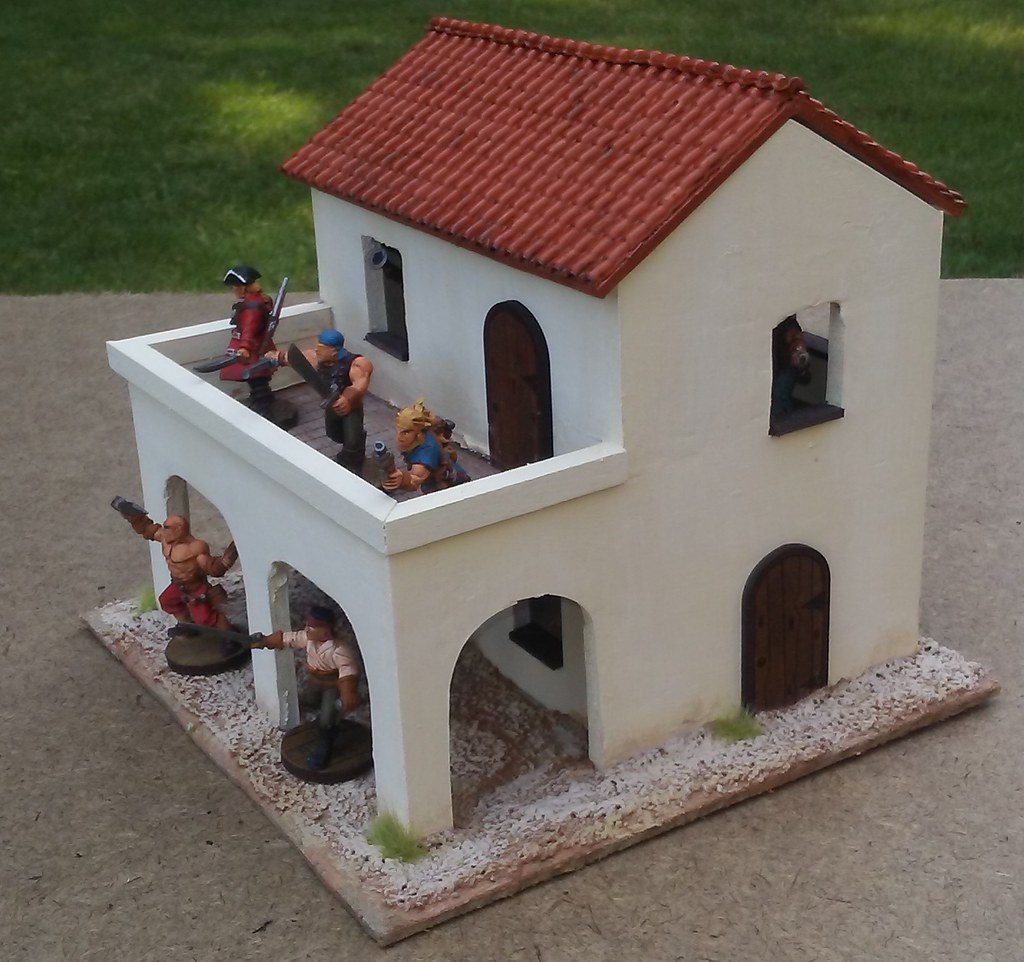
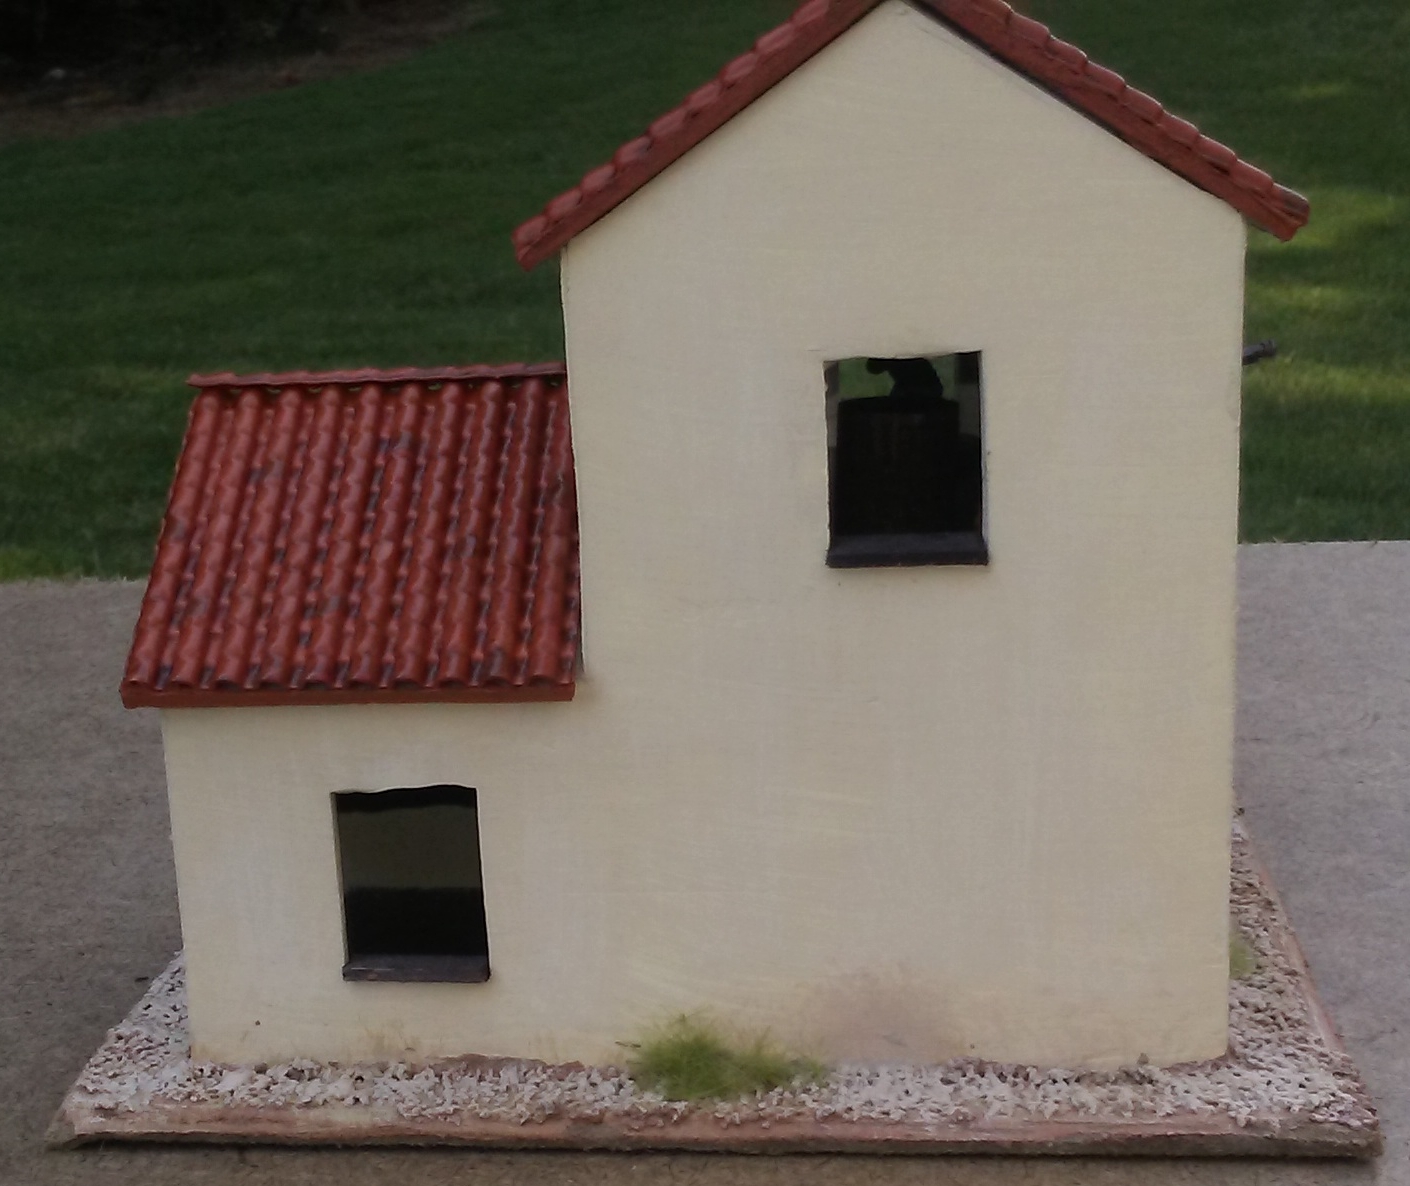
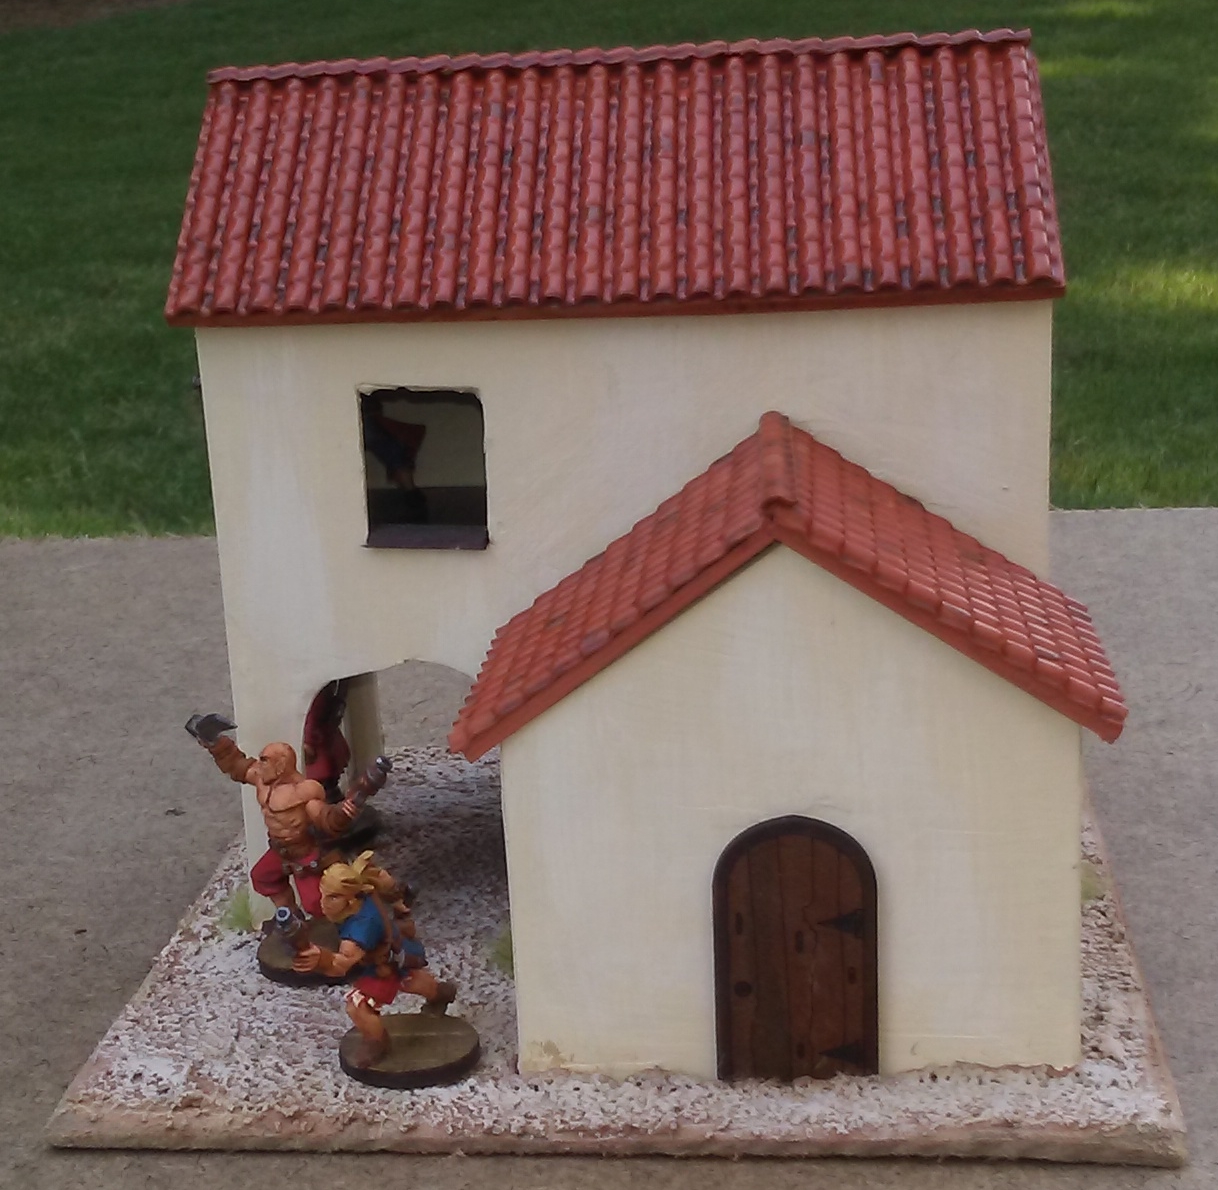
I made five buildings - three smaller single-story dwellings that might suit servants or peasants, and a pair of two-story buildings. Since I am a former role-player, all my buildings have to have a story (plus that way I can identify them apart from calling them building one, building two, etc.). I imagined one of the two-story buildings to be the quarters for the officers and commander of the militia, with a large balcony from which they can review the troops assembled below them in the square. The other was to be a tavern or bodega, with the living quarters for the proprietor upstairs.
In the case of the two larger buildings, I decided to sketch them out before cutting any parts. The smaller ones are simple rectangles, so they did not need to be drawn first.
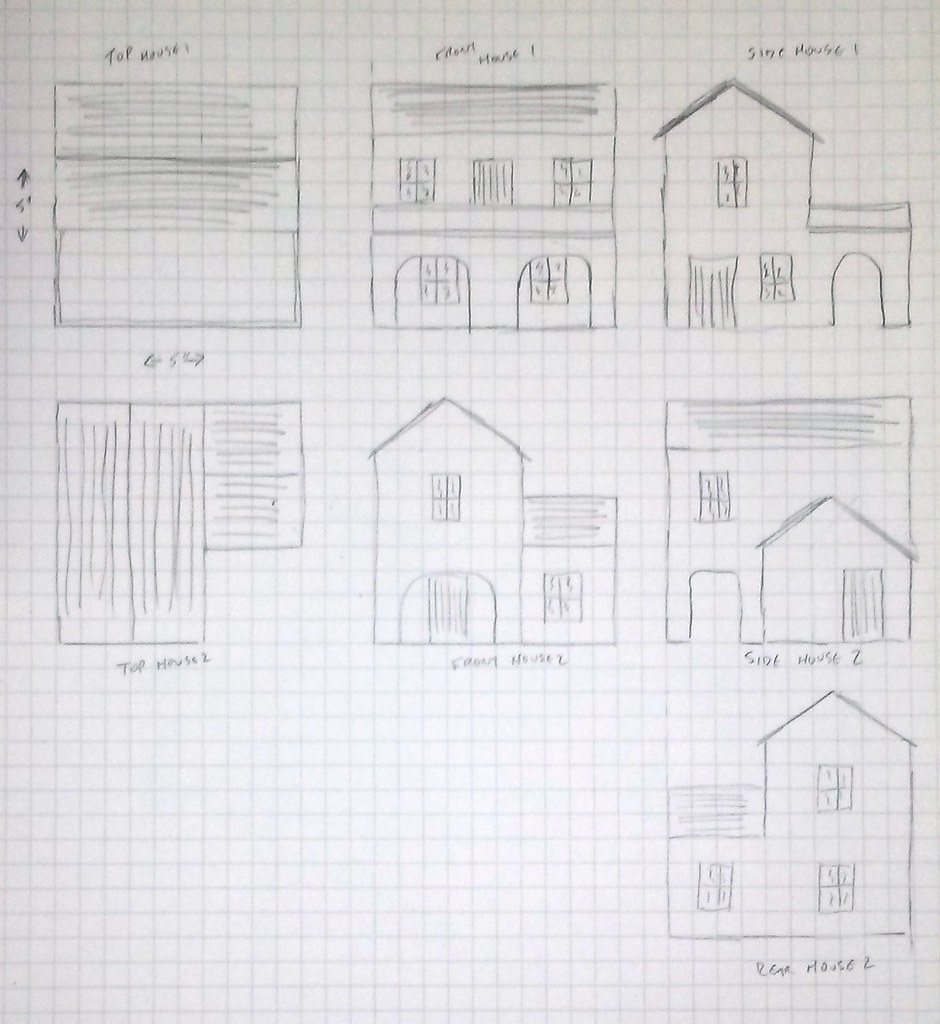 |
| Sketch of officers' quarters (top) and bodega (bottom) |
My sketches are not detailed architectural plans, simply concepts to help me know what walls I need and how to cut them.
I start any building by cutting out the walls, and fitting them together loosely to make sure they're going to fit when I am finally ready to glue them in place.
 |
| Officers' quarters first walls cut. |
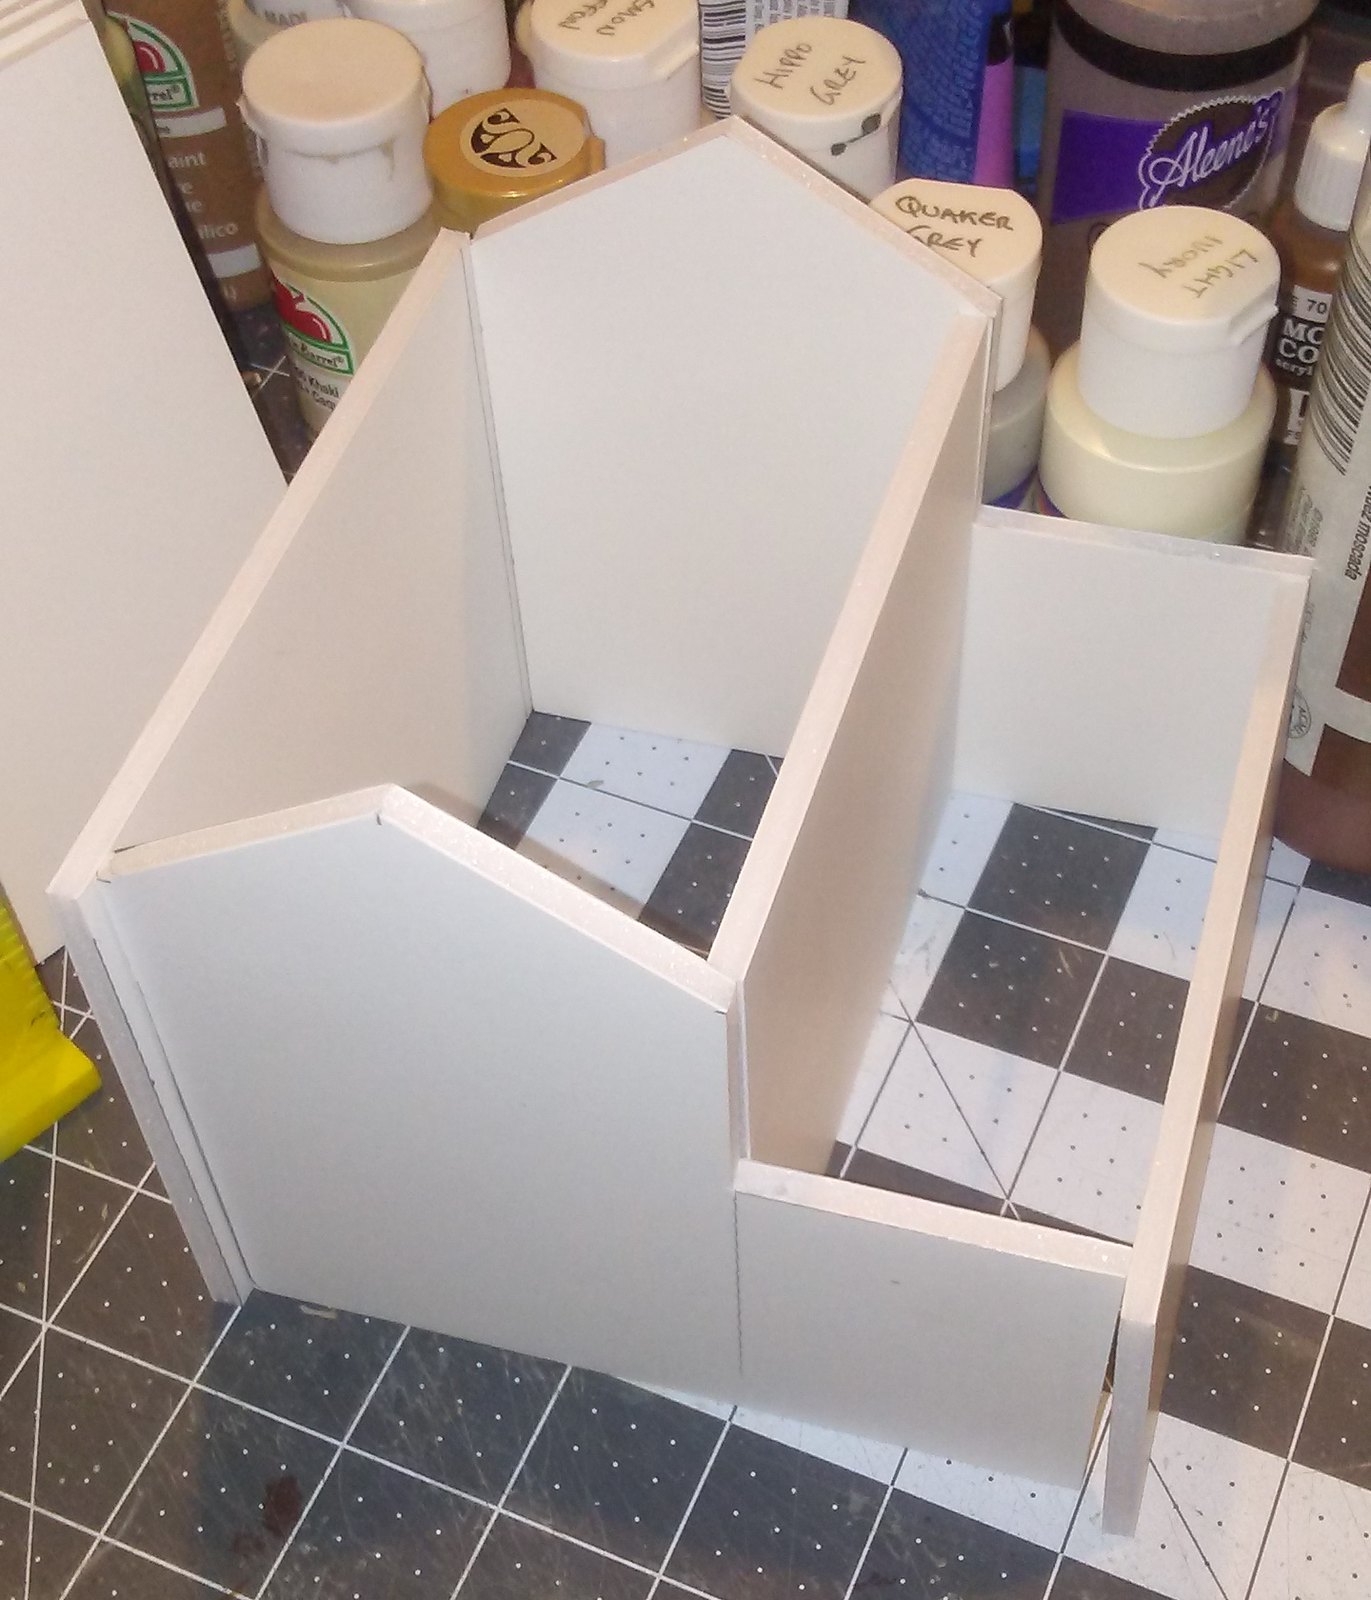 |
| Officers' quarters additional walls cut. |
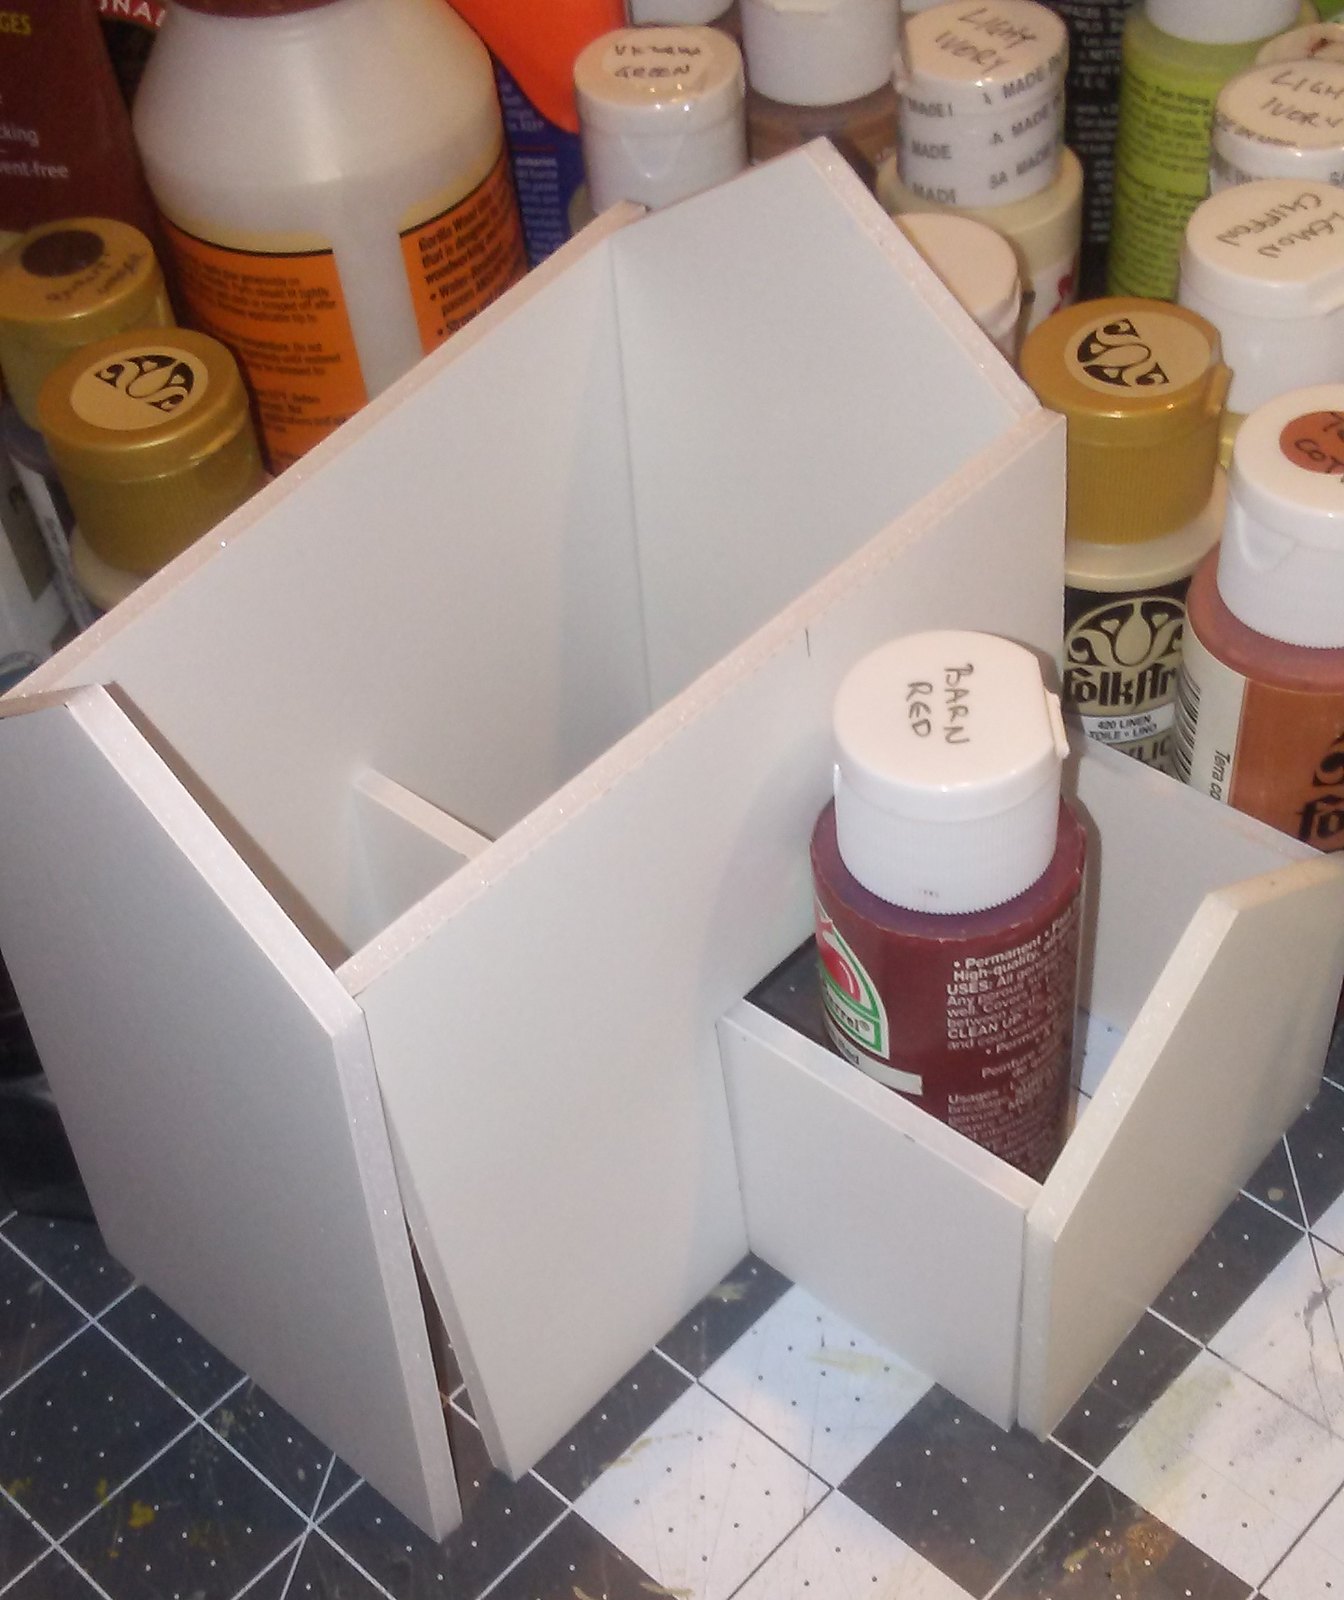 |
| Bodega walls cut (the paint bottle is there to help hold them in place). |
Once the walls are cut to the right size and shape, I begin to lay out windows, doors, arches, etc. My method of making arches is quite simple. I draw the width and height, then place a quarter or 25mm base in the corner and trace the curve. Then I simply cut along the line with a sharp new X-acto blade.
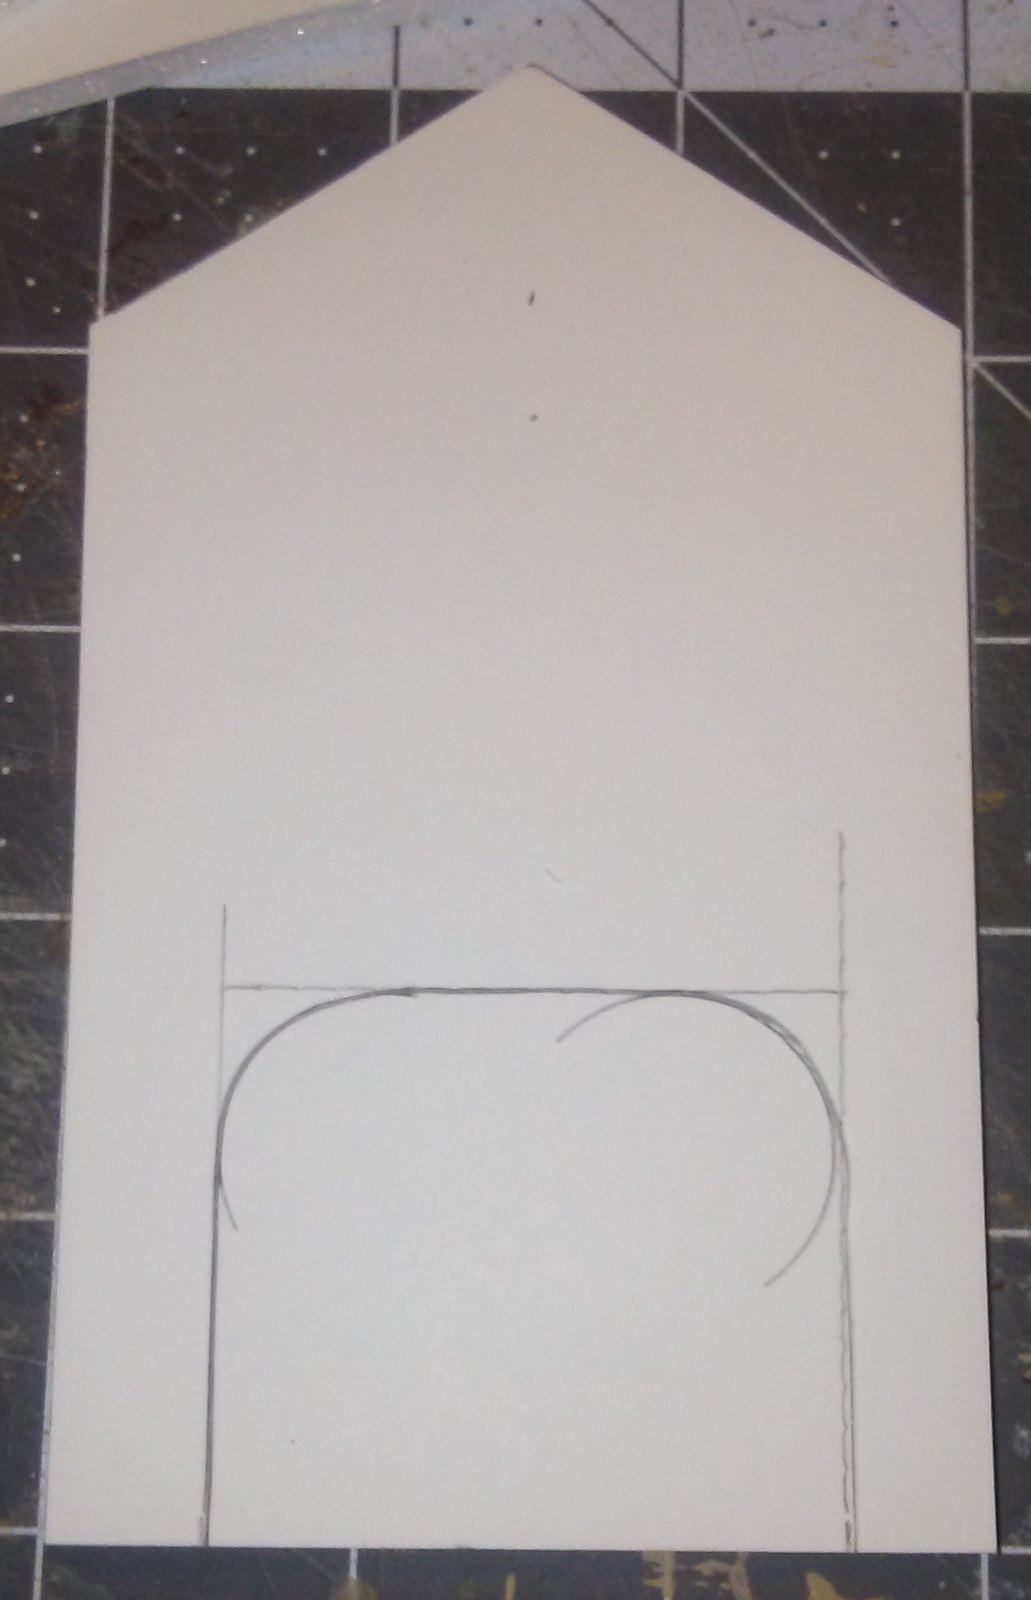 |
| Arch traced before cutting. |
 |
| Arch cut out. |
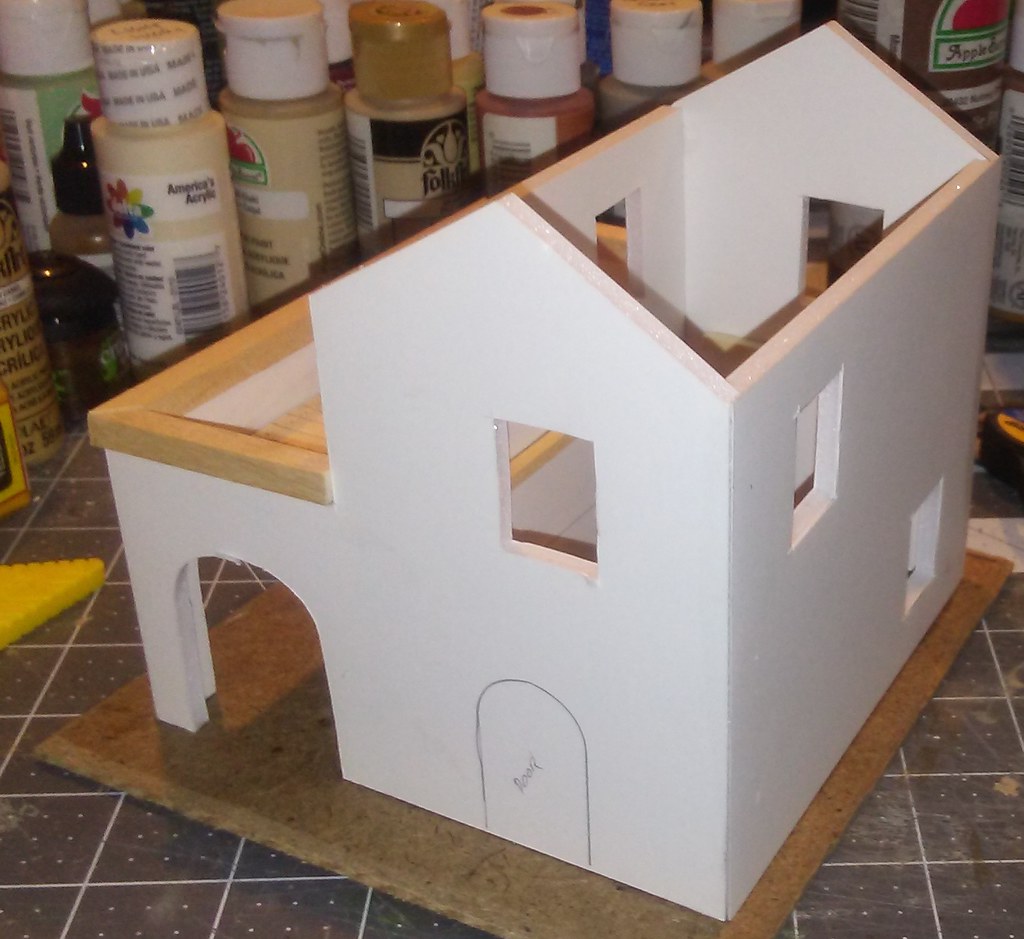
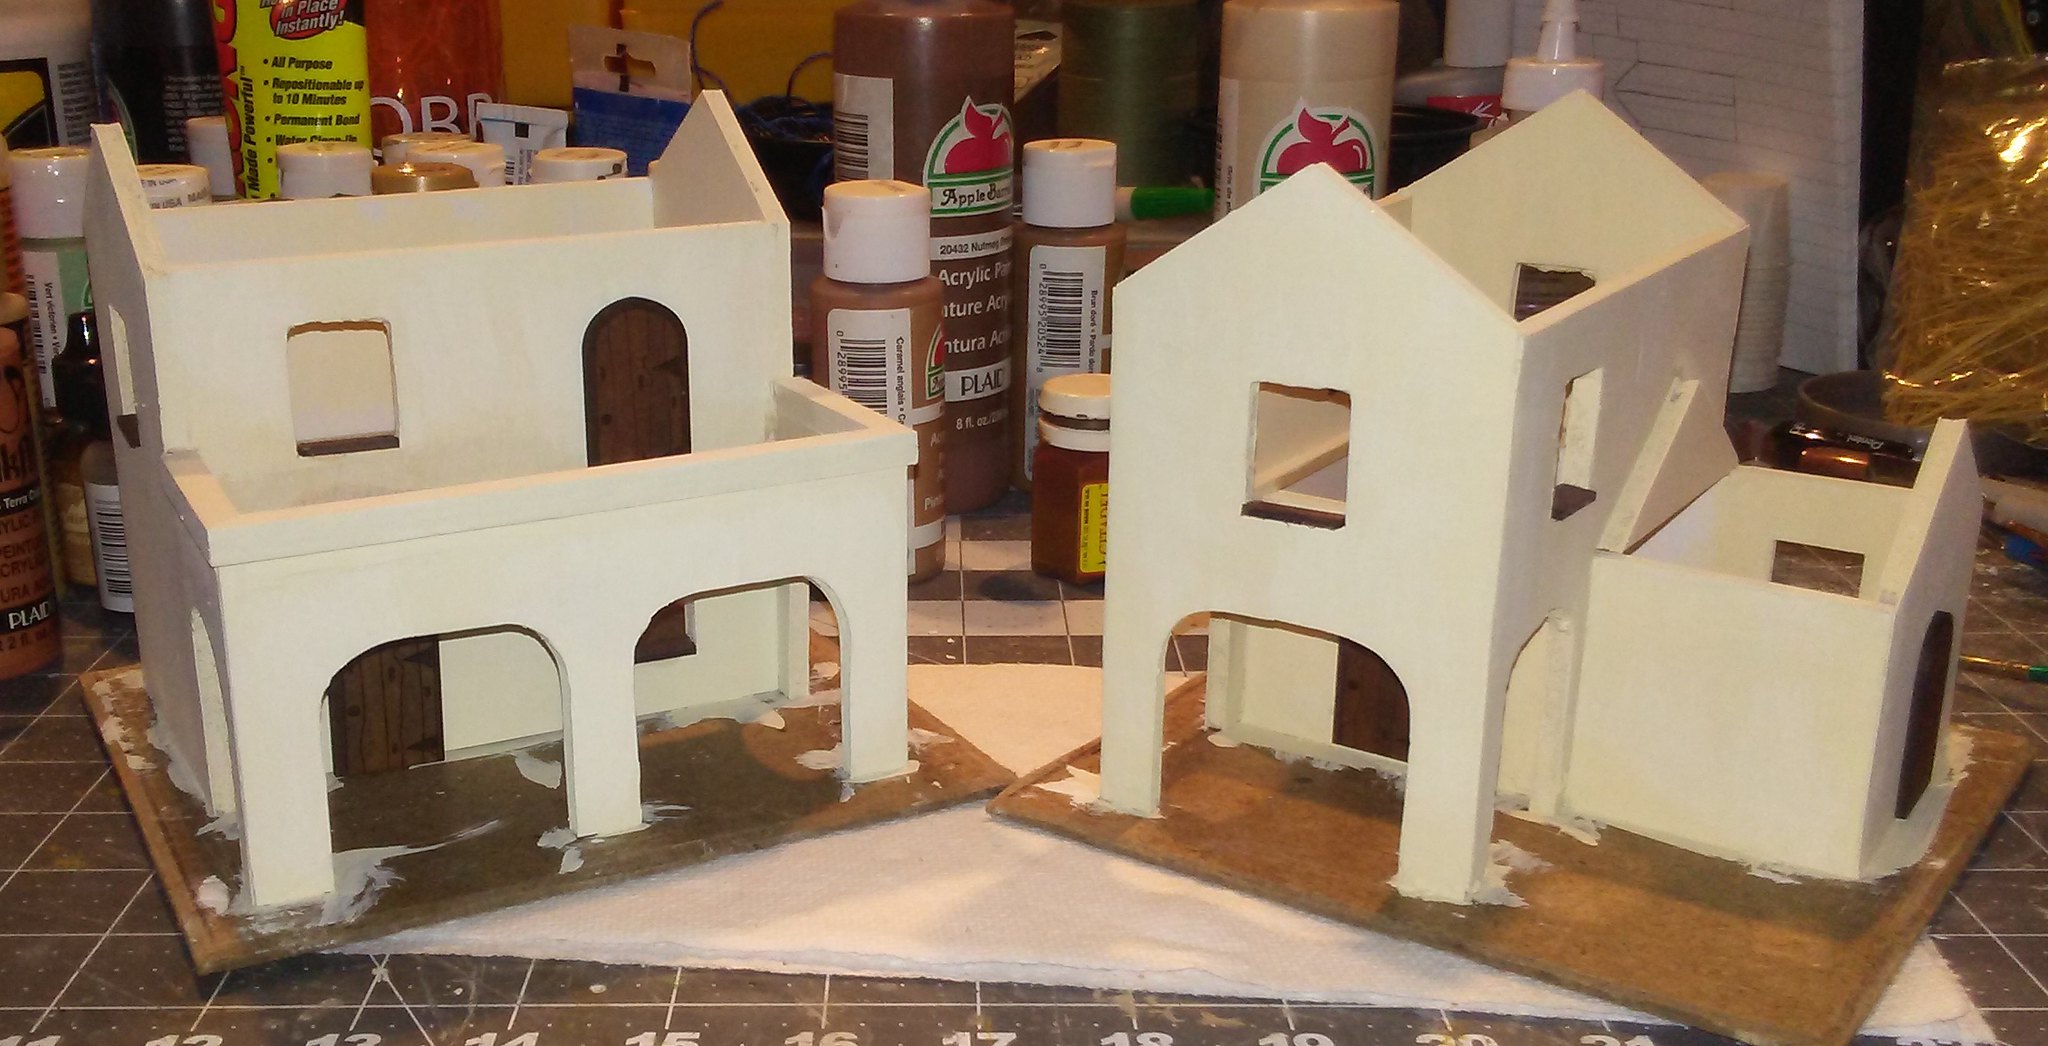
Once all the openings are cut out I test fit everything again to make sure it looks good. For these buildings, I decided not to cut any doors. Instead I used pre-made
doors from Warbases. I bought the single doors for the poorer dwellings, and the single arched doors for the others. I marked where they would go to make sure I was pleased with the location.
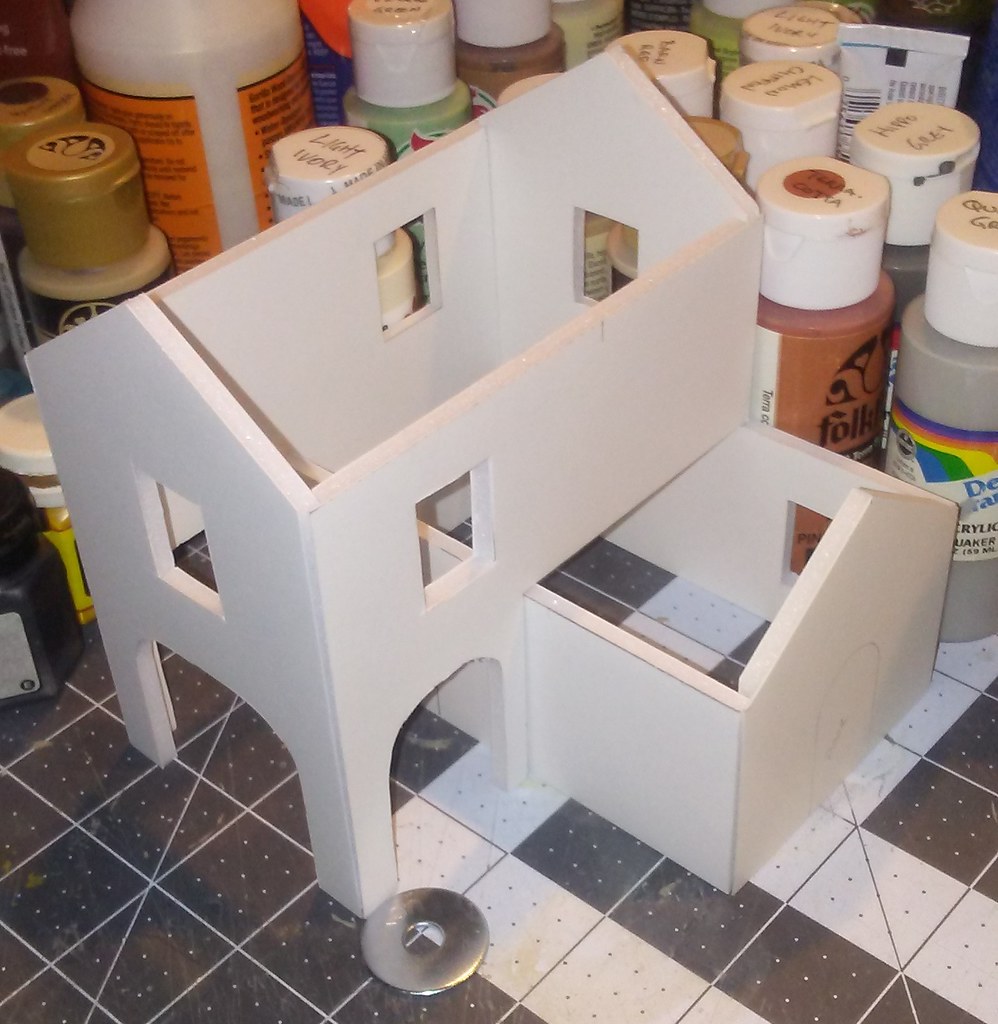 |
| Bodega with windows and arches cut out. |
 |
| Officers' quarters with arches and doors cut out. |
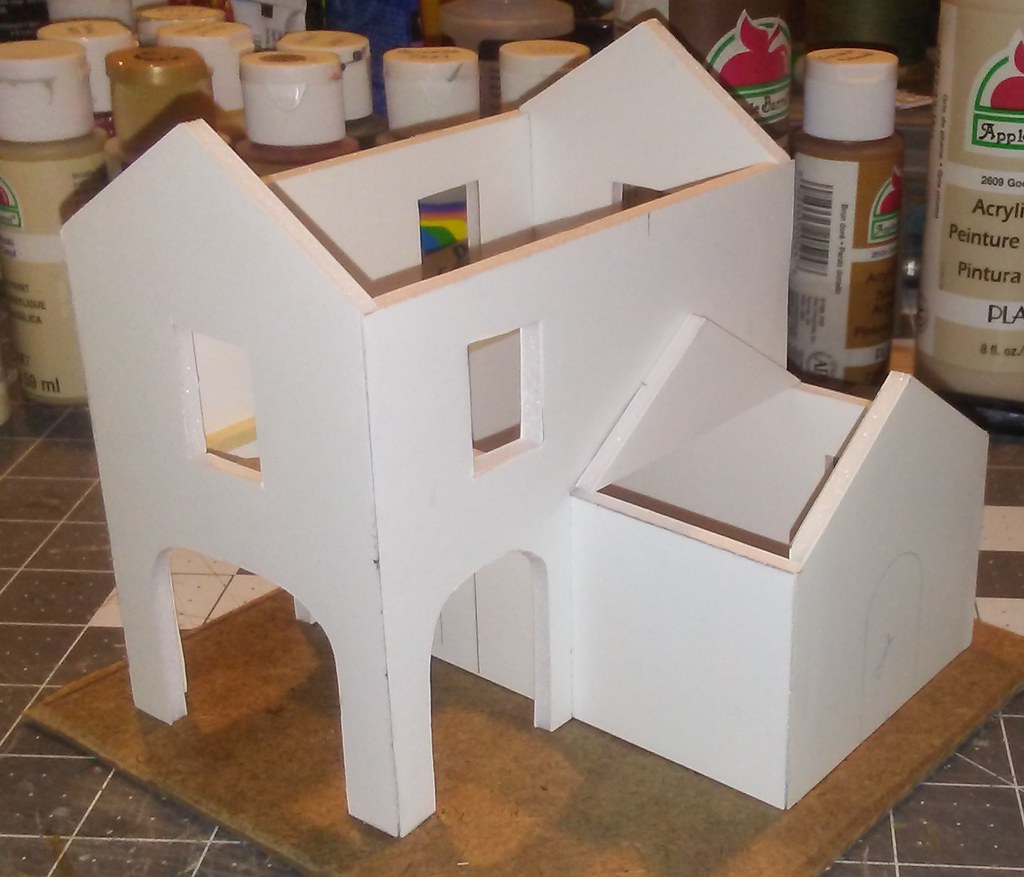
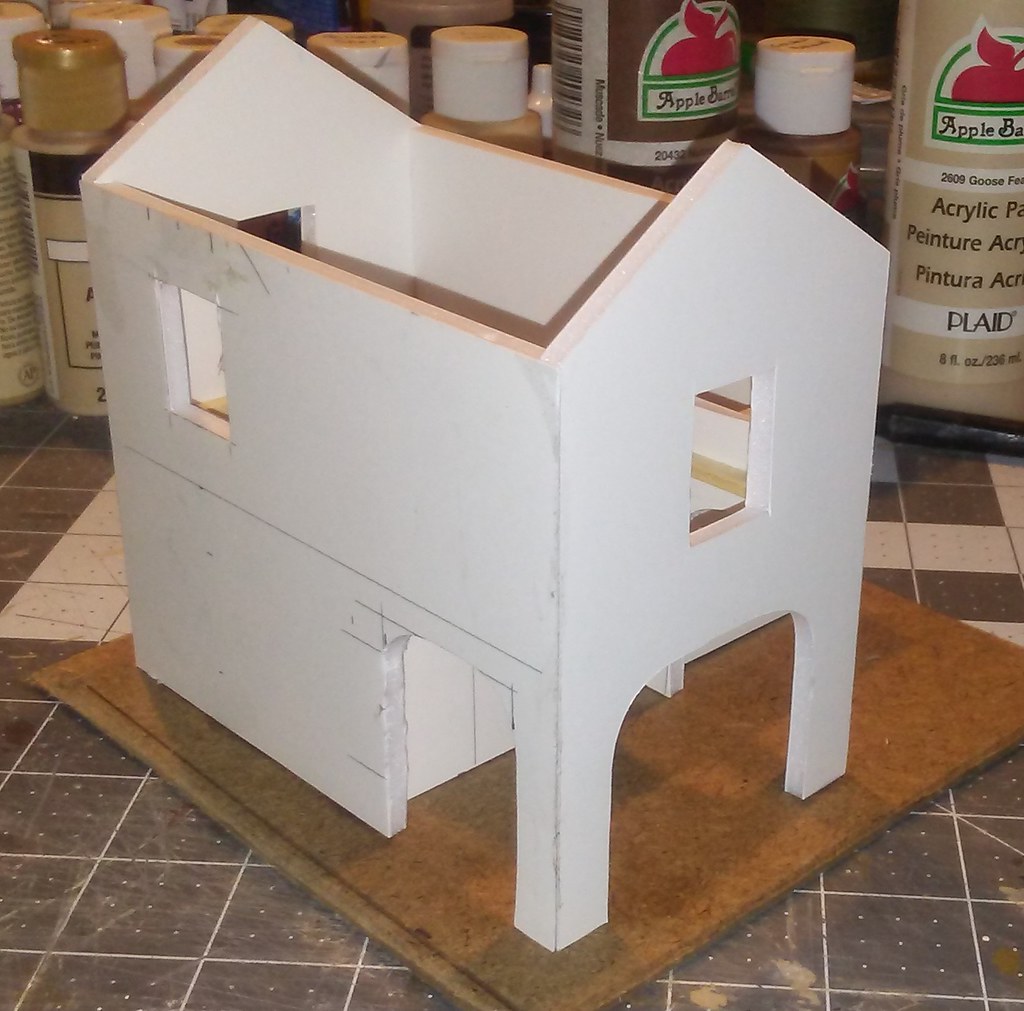
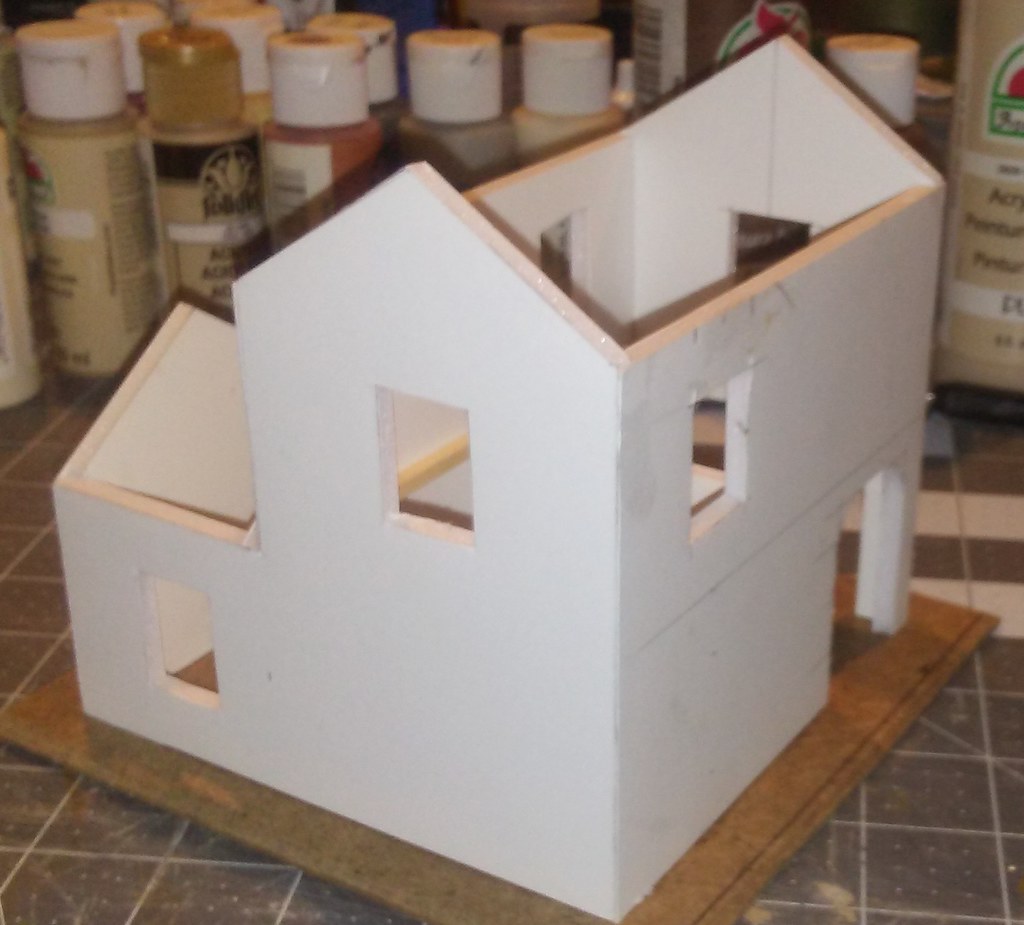
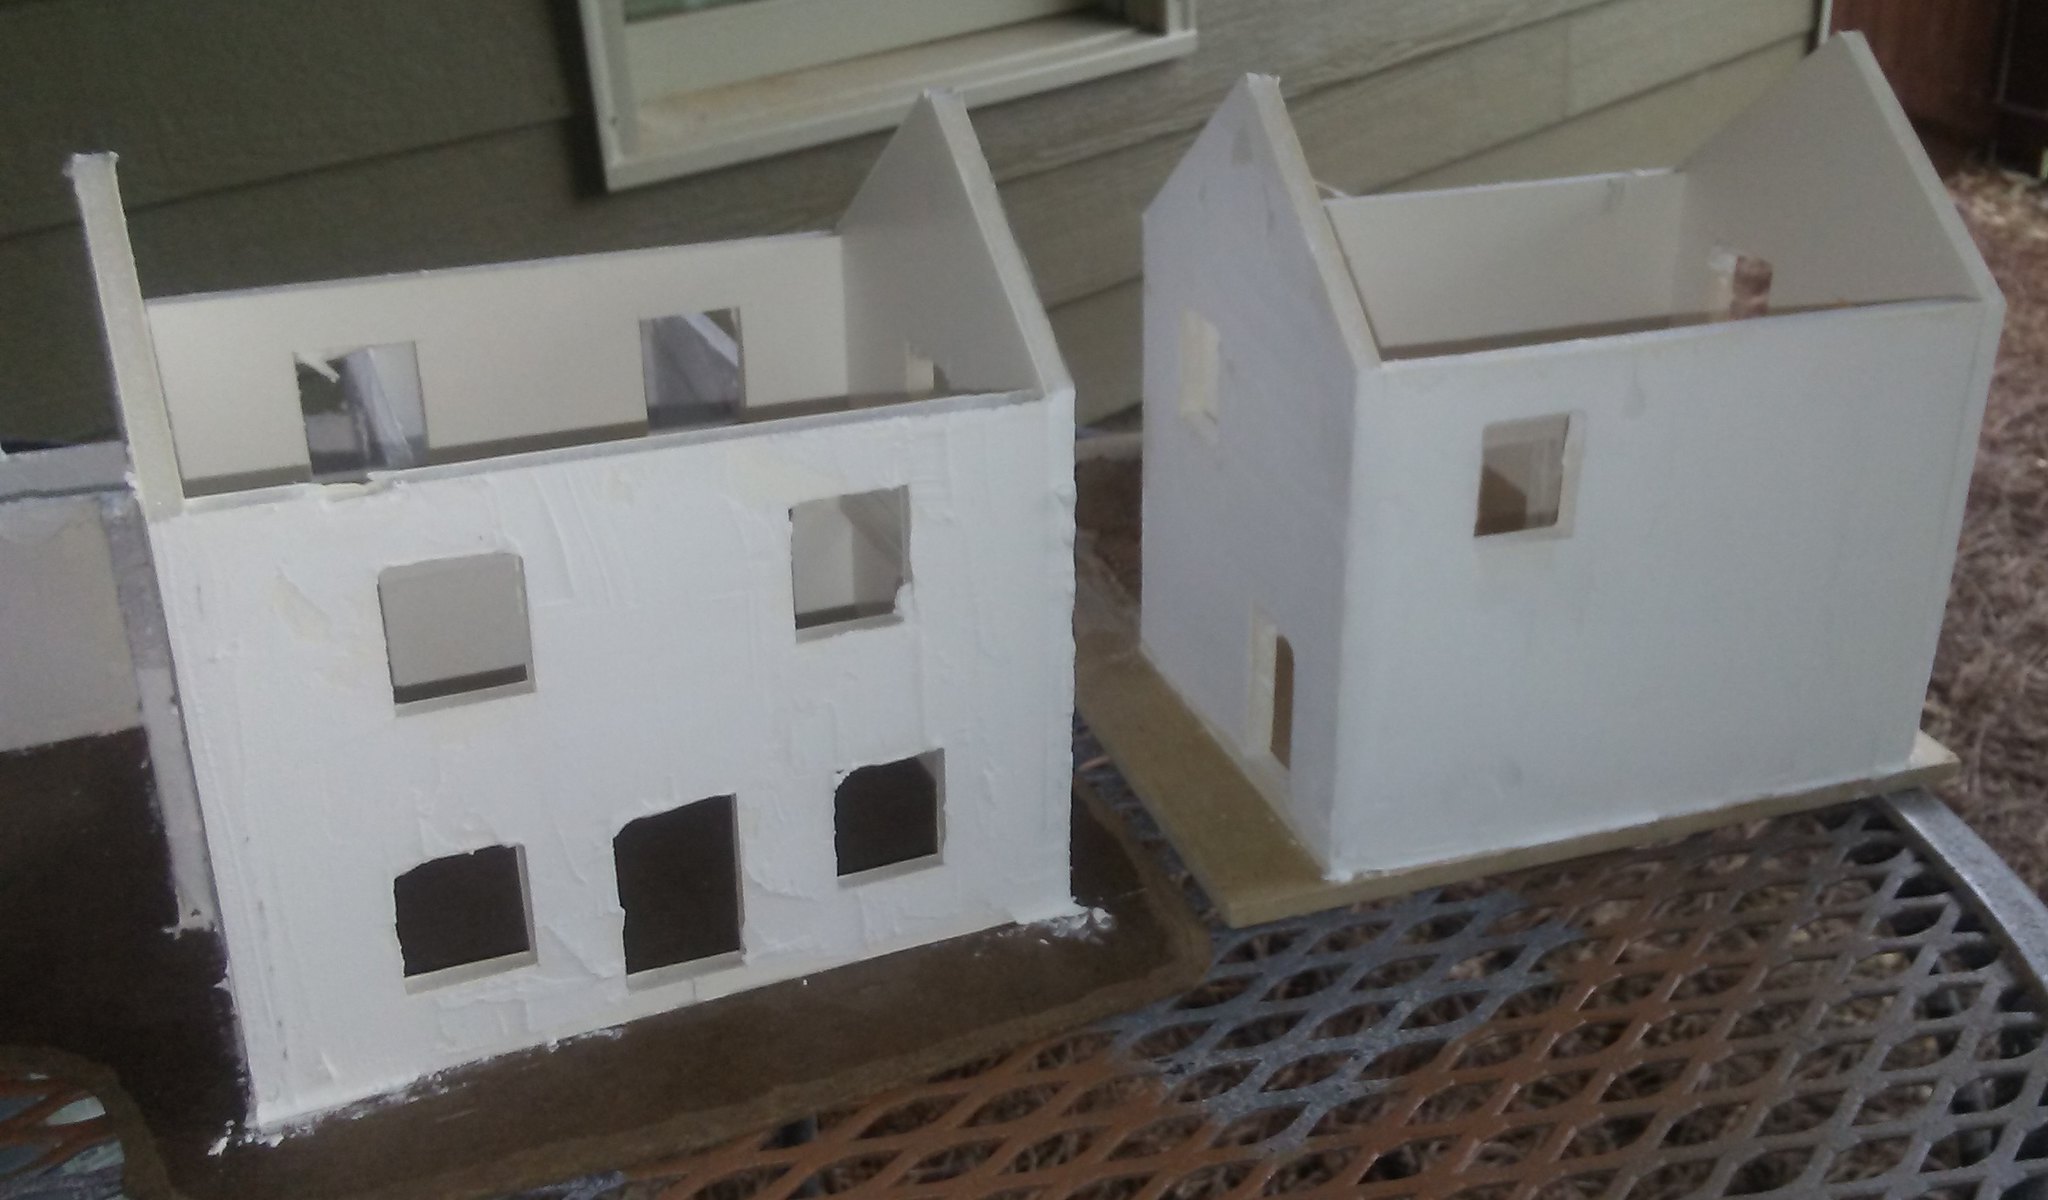
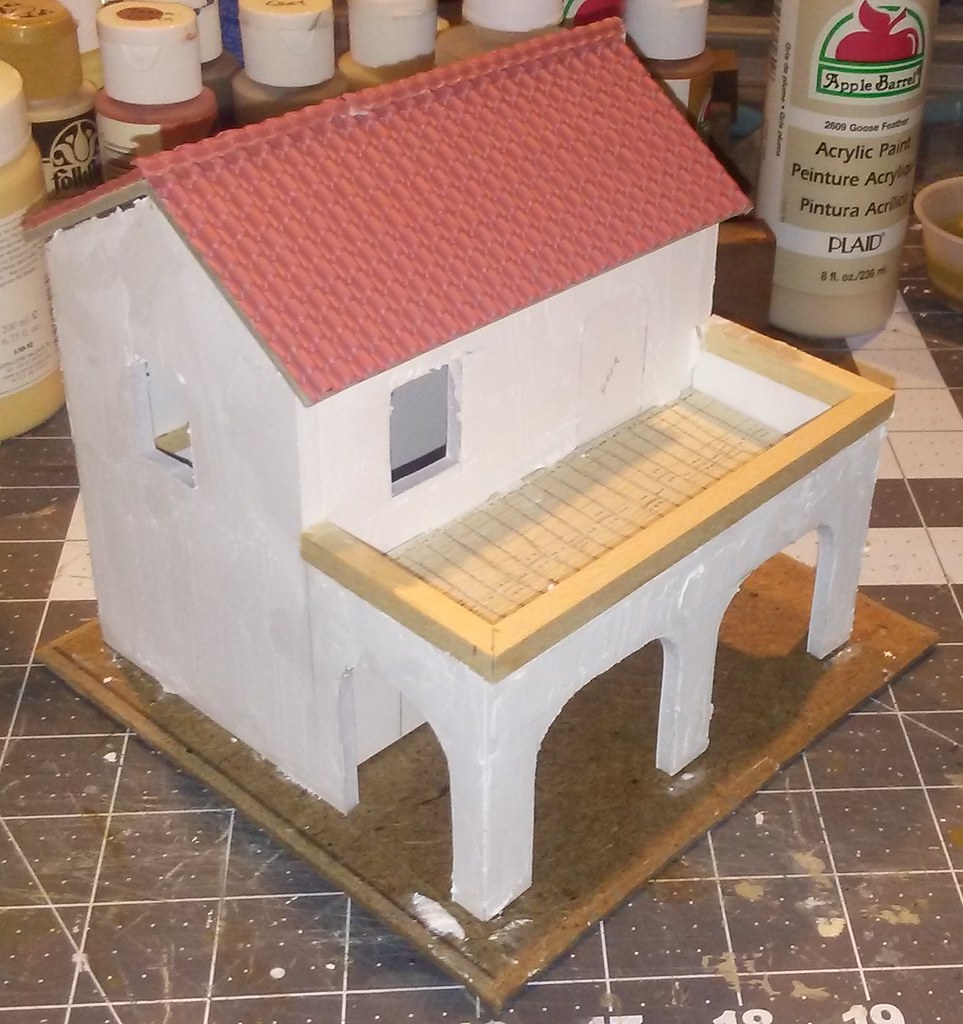
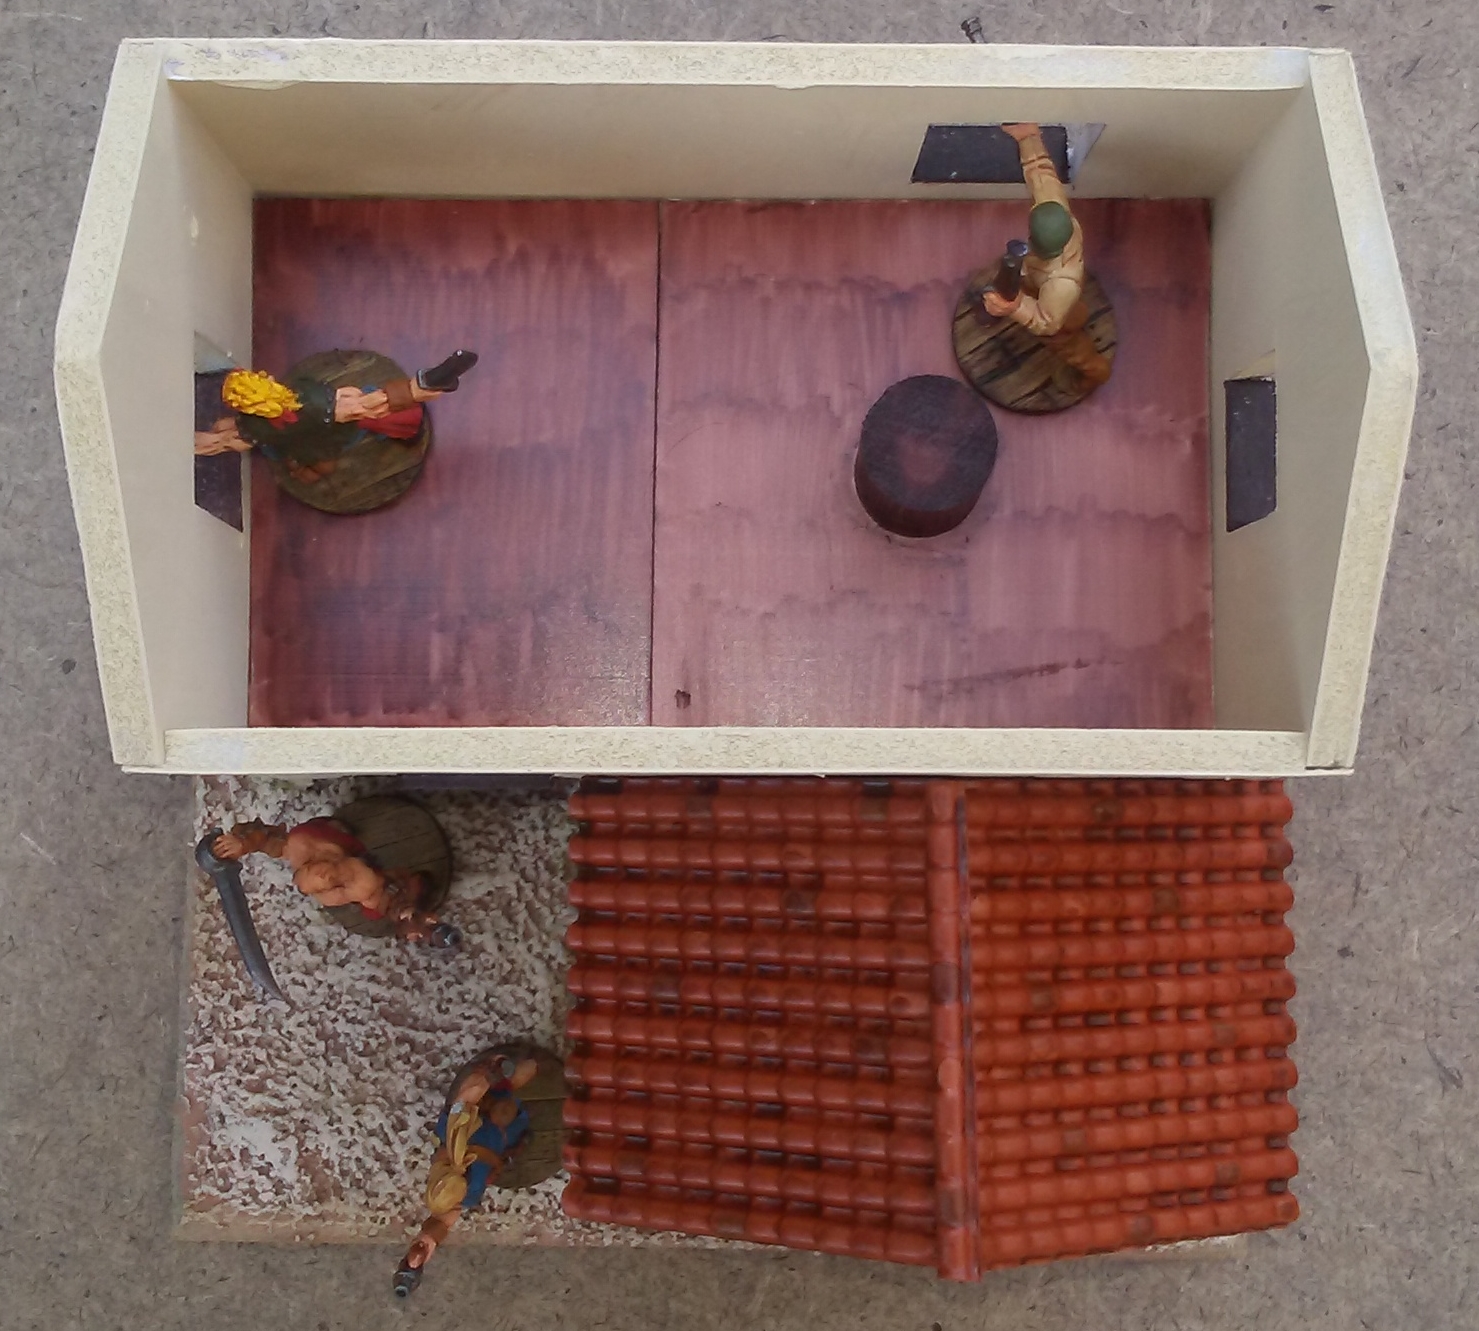
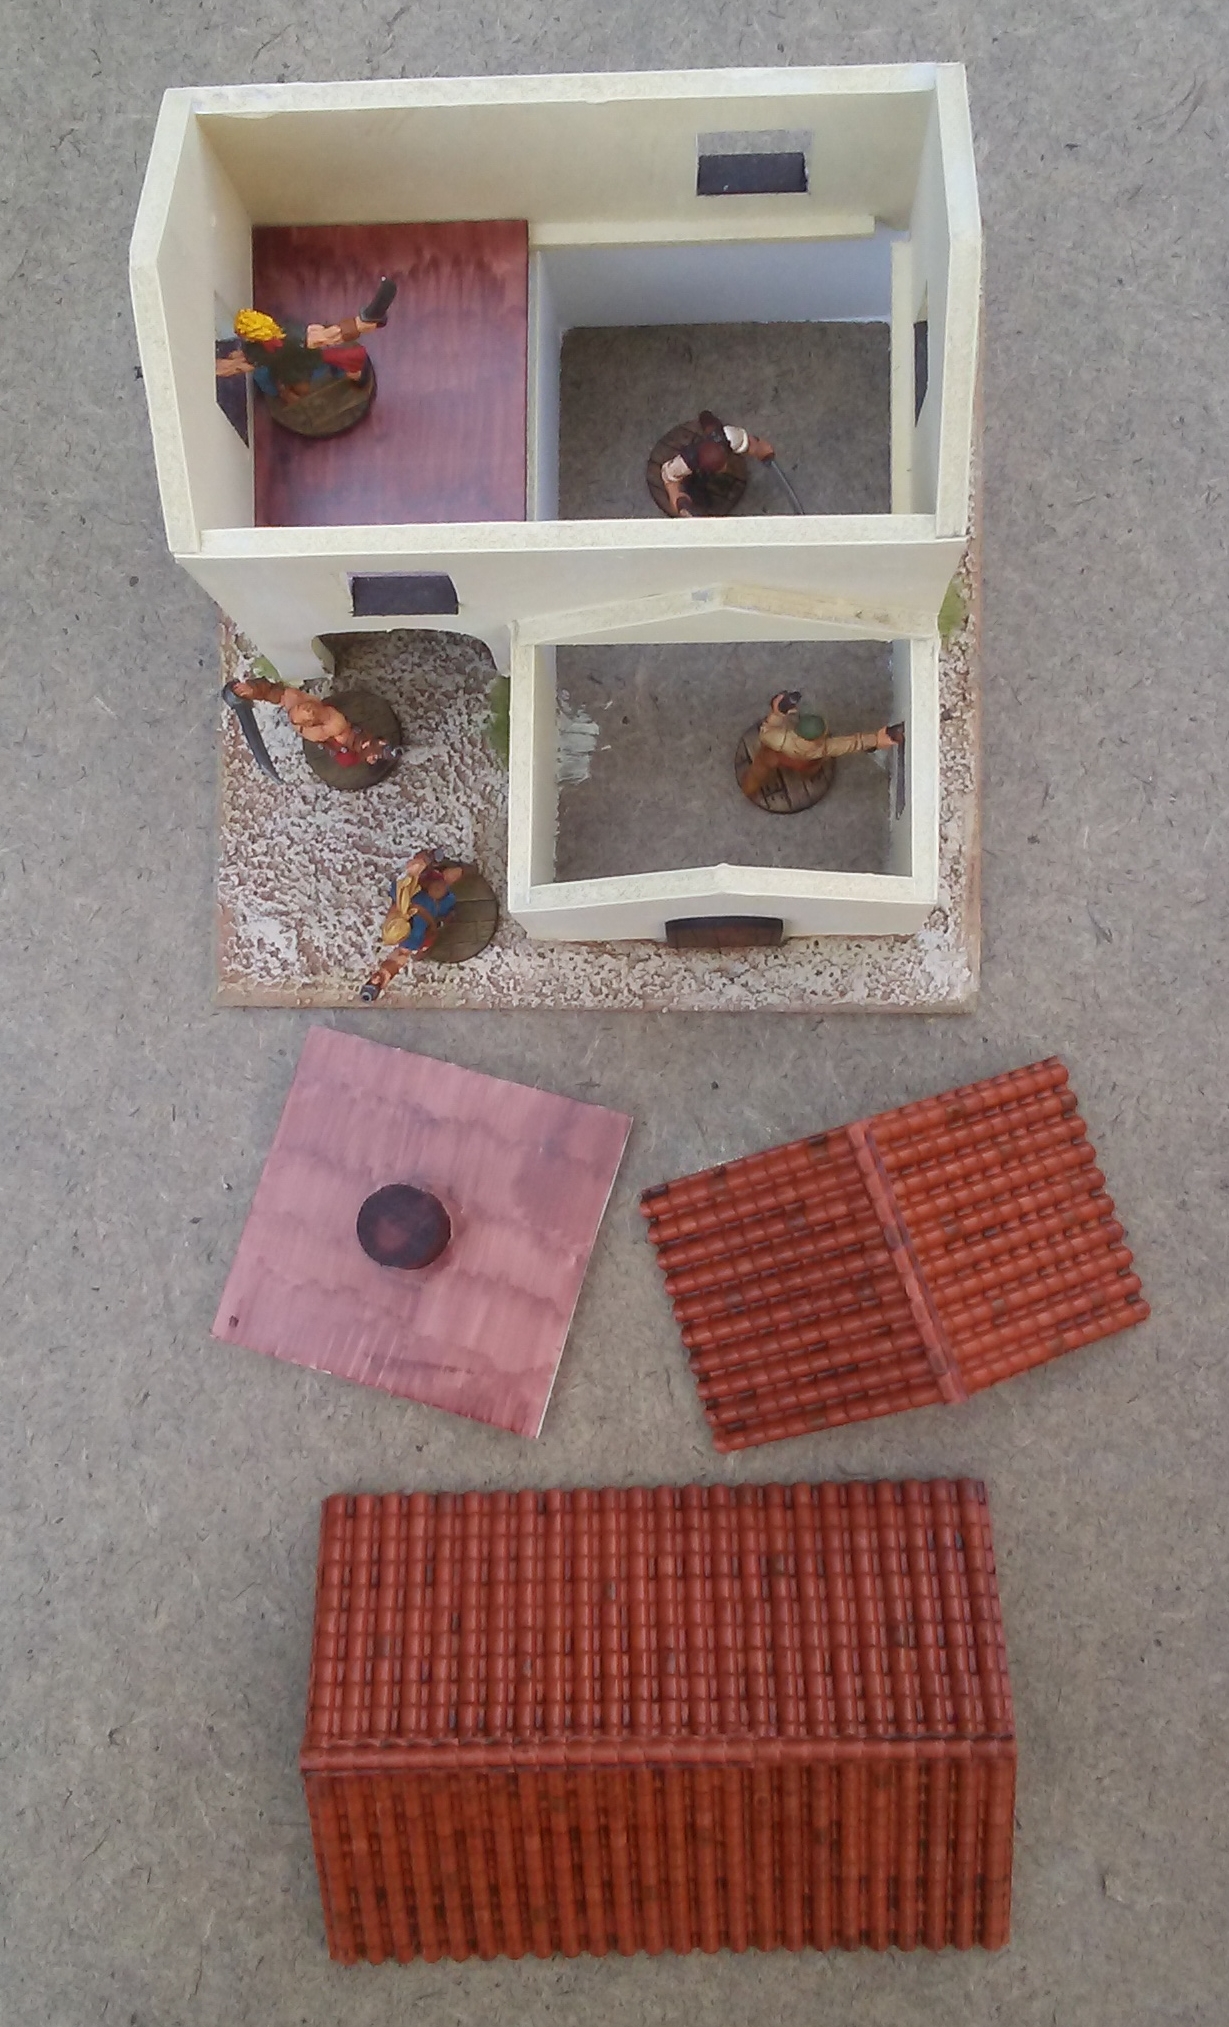
Once I was totally satisfied, I glued the walls to each other, and to a base. I also added the interior supports which would hold up the removable second floors.
 |
| Bodega assembled. |
 |
| Bodega 3/4 view. |
 |
| Bodega rear 3/4 view. |
 |
| Officers' quarters front view. |
In the case of the officers' quarters I also added the floor for the balcony, which I made from a piece of balsa wood scribed to look like planks. I added a thick railing, also made from balsa wood.
 |
| Officers' quarters balcony view. |
 |
| Officers' quarters rear 3/4 view. |
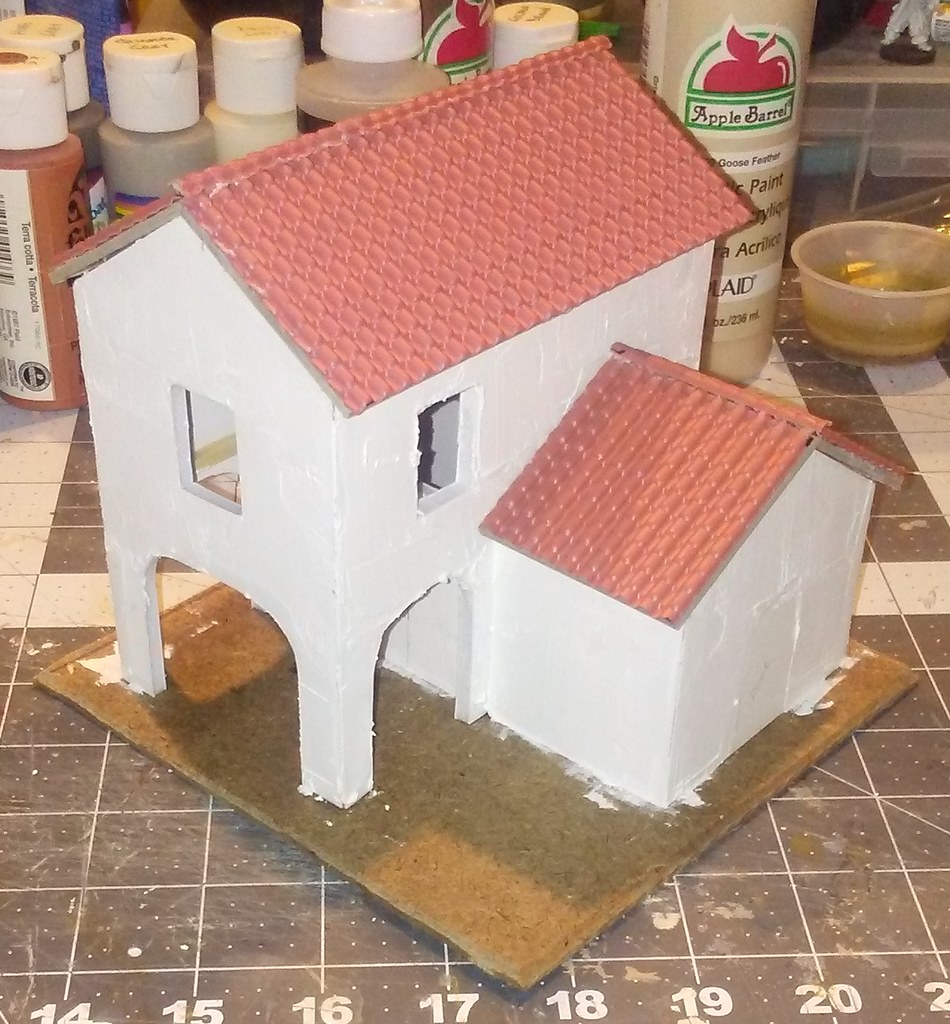
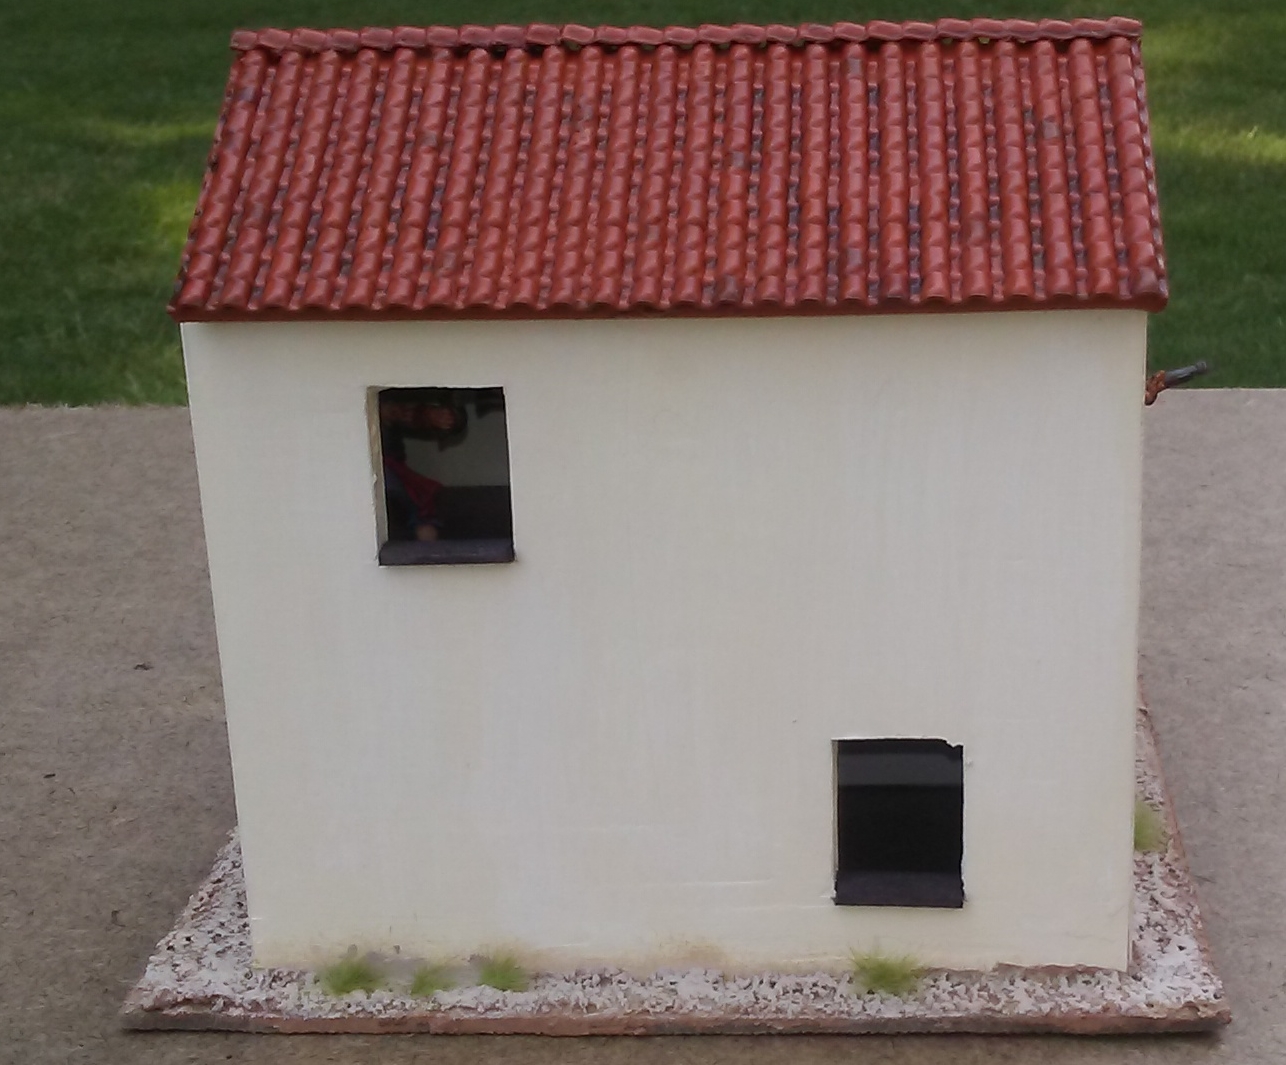
Once all the glue was dry, it was time to give the boring exterior walls some texture. As I've mentioned before, I use spackle. I just spread it on, intentionally leaving areas that are not smooth. After it completely dries, I sand it to remove the sharper edges but I make sure not to sand off all the detail.
 |
| Spackled buildings before (left) and after (right) sanding. |
I make the roof sections from cardboard, and I glue down
Plastruct Spanish tile sheets over it. I've tried several adhesives, and the one I like most for this application is
StrongStik by DAP. It goes on like caulk, and I spread a coat of it over the entire surface of the cardboard, before pressing the tile sheet down onto it. I also cut a thin strip of a single row of tiles and glue it to the very top of the roof to cover the joint between the two slopes.
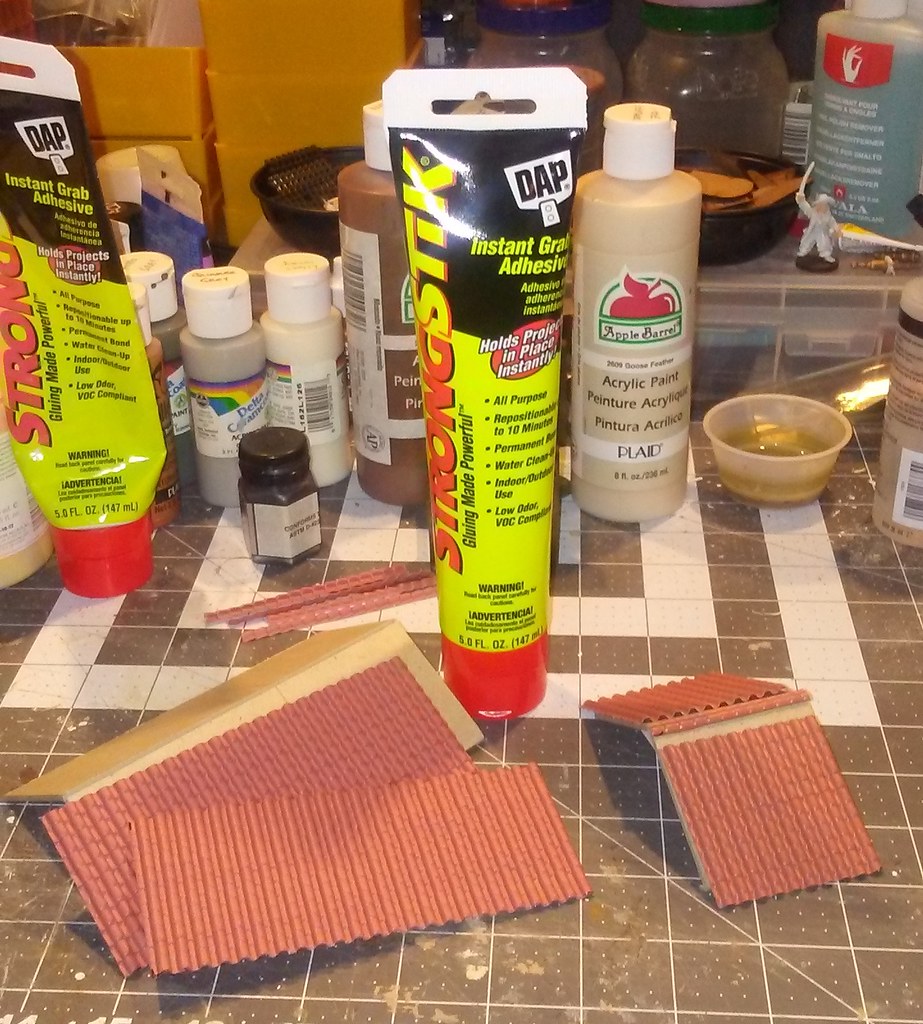 |
| Roofs ready to be glued. |
I always test fit the roofs at every stage to make sure the pitch is correct and that they fit. There's usually a little warping when the cardboard is glued and painted, but if the roof fit properly in the first place it is hardly noticeable.
I blended several shades of cream and painted the walls of the buildings. I made the smaller houses a little darker, and the larger ones cleaner and brighter.
 |
| Houses drying. |
I stained the doors from Warbases using my usual
Adirondack alcohol inks. I mixed a lighter color (Caramel) and a darker one (Latte), to make the doors look less uniform. Then I painted the outer frames in a darker brown after the inks had dried (OK, I admit it - I cheated. I did not paint the frames, I colored them in using a brown Sharpie. But it works, and it looks good!). Lastly, I gave them a clear matte spray to seal them.
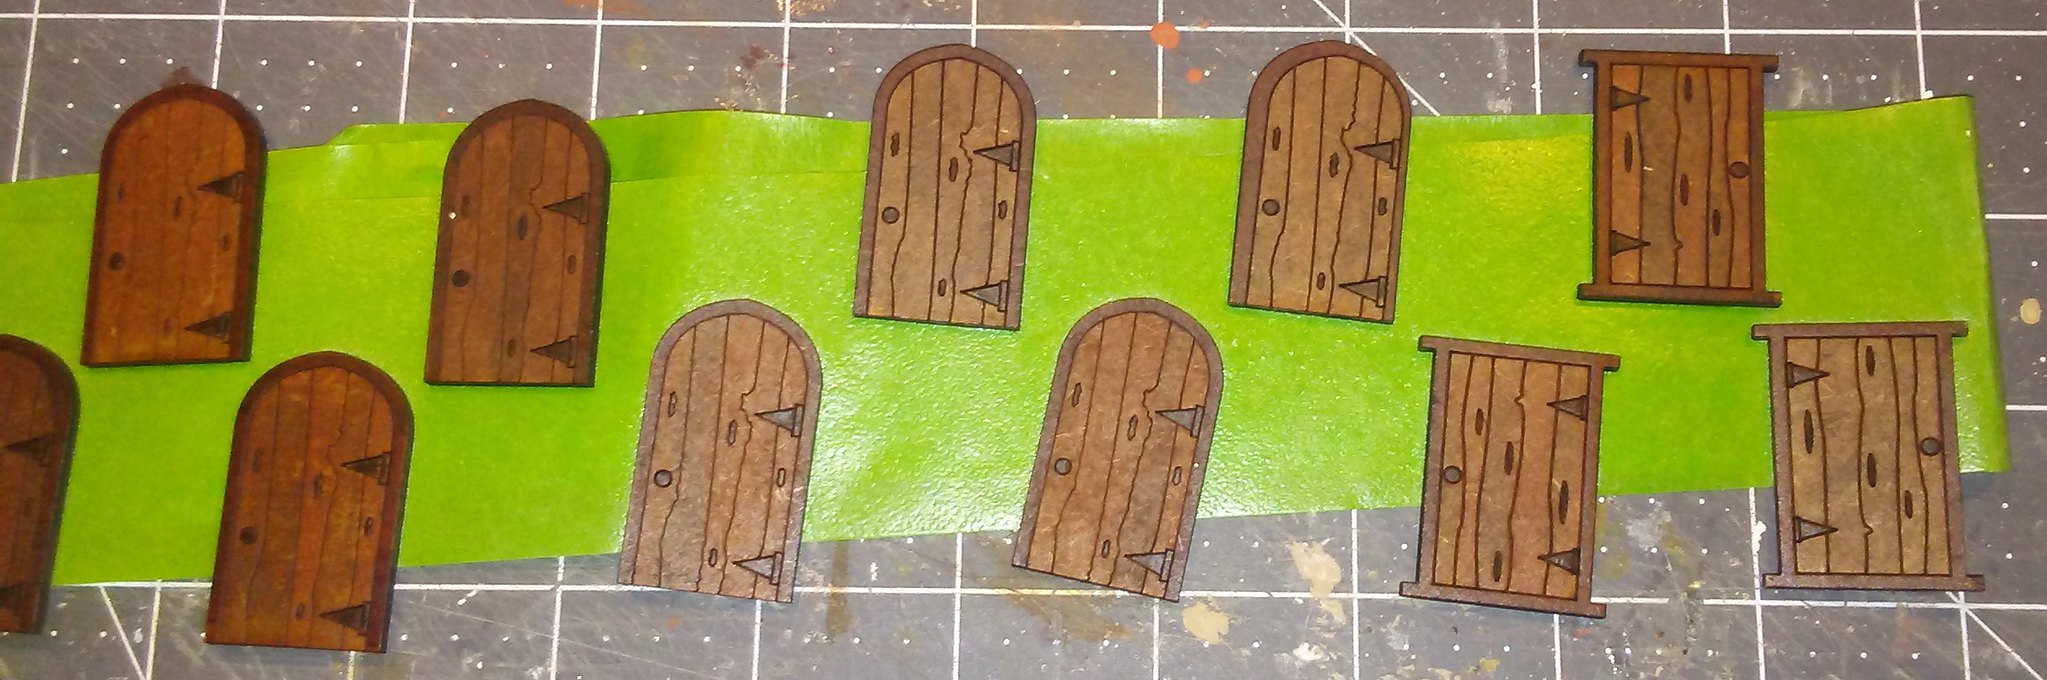 |
| Doors ready to be applied. |
I glued the doors in place, and left them to dry.
For the roofs, I first painted them with a terracotta-colored craft paint. I wanted the roofs of the smaller houses to look older, and dirtier, so I blended some dark brown in with the terracotta. Then I mixed a lighter and darker blend of that and painted individual tiles at random to add visual interest. I followed that with a dark brown wash and a coat of clear matte.
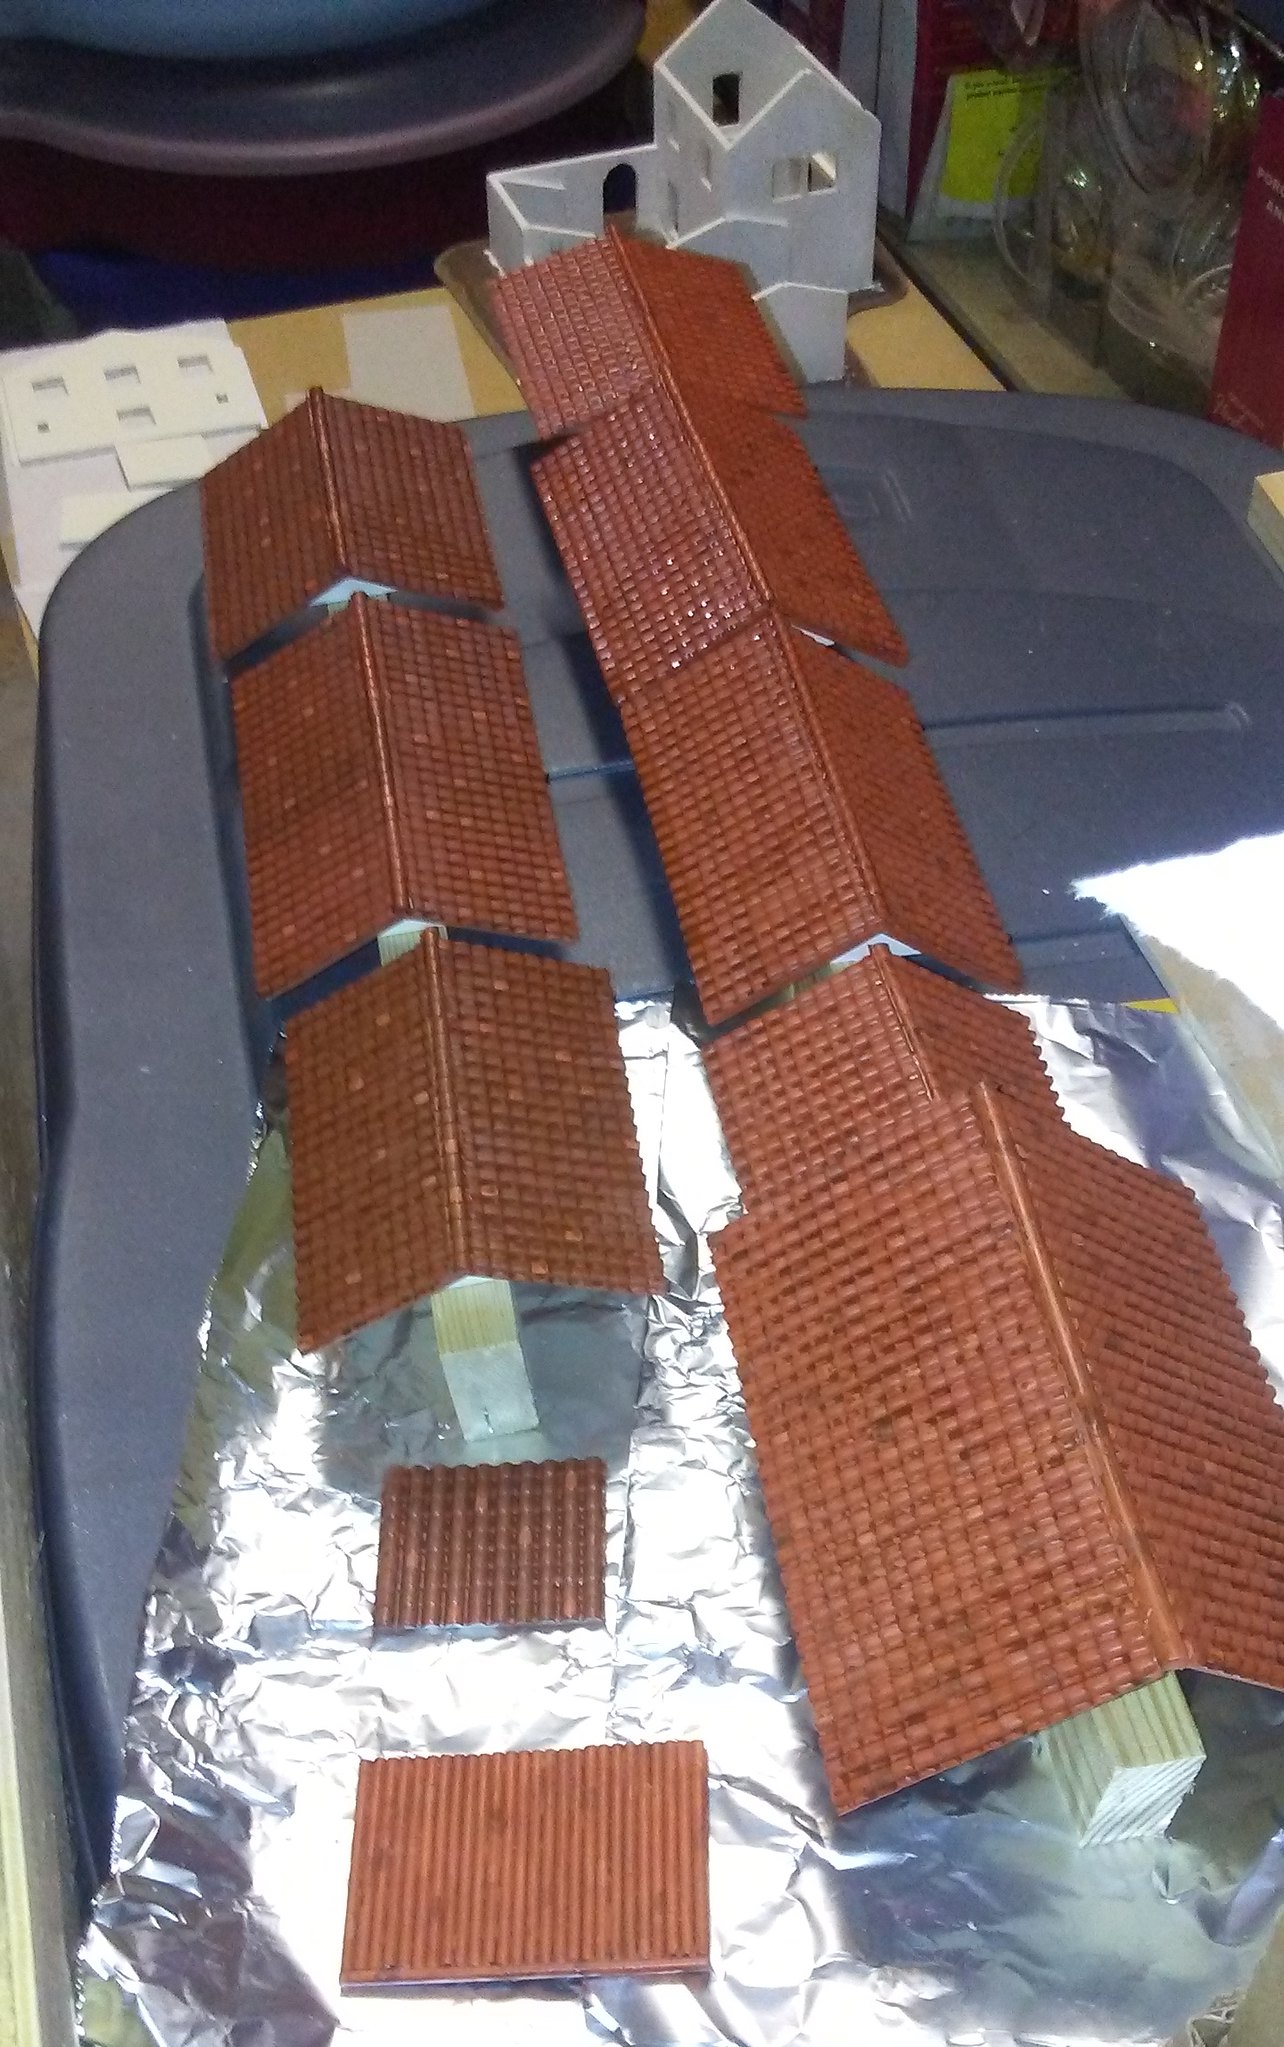 |
| Roofs drying. |
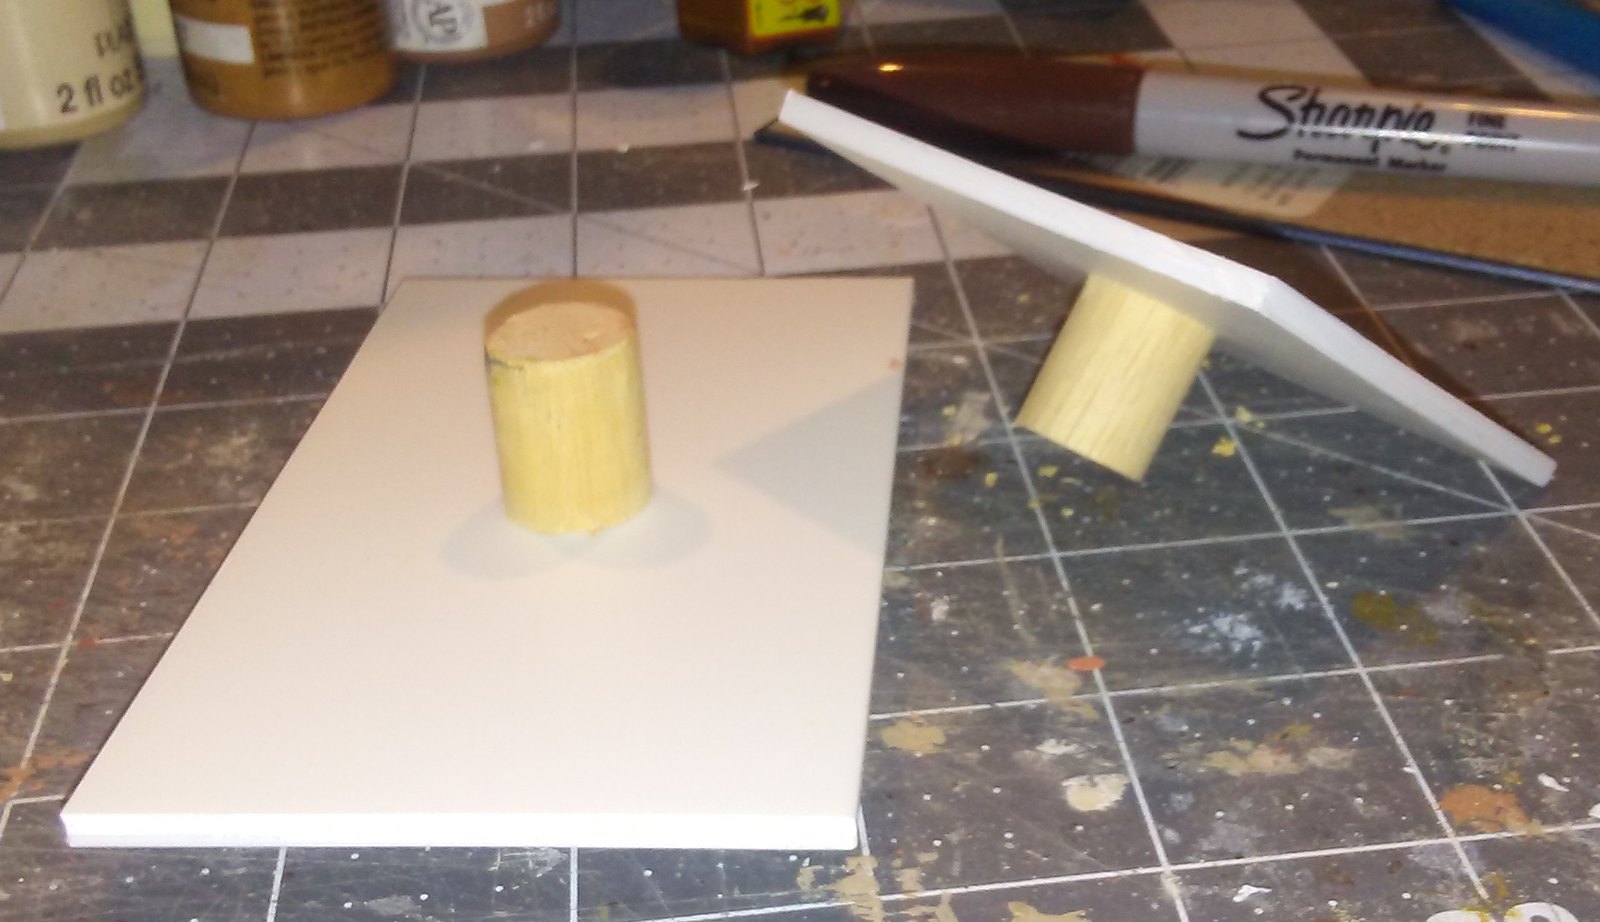
I had some thick styrene sheet that I wanted to use for the interior floors. In order to be able to remove them easily, I attached a small knob cut from a large round dowel. Nothing to it - I just cut the dowel to size and screwed it in place. If anyone asks, I can say it is a table in the middle of the floor! Then I took my brown Sharpie to it and checked to make sure they fit.
 |
| Second story floors. |
 |
| Second story floors. |
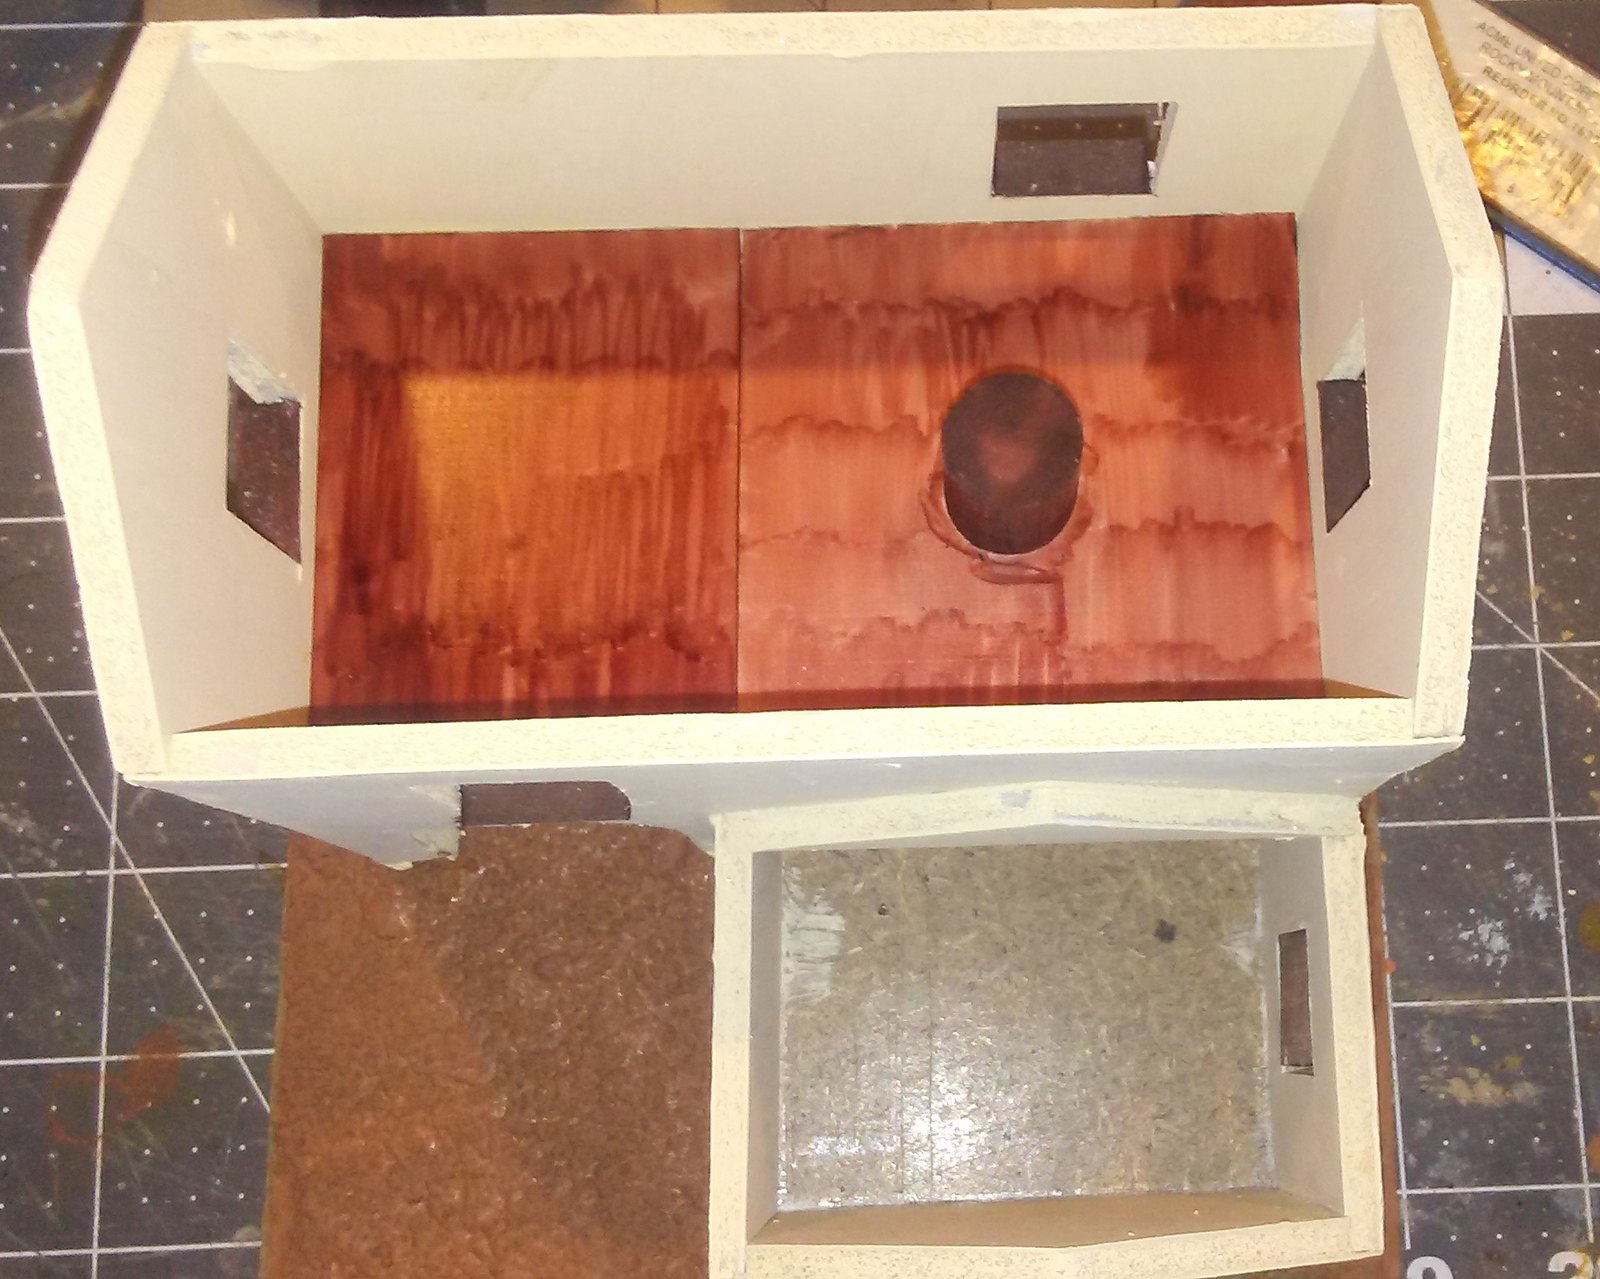 |
| Floor in place in the bodega. |
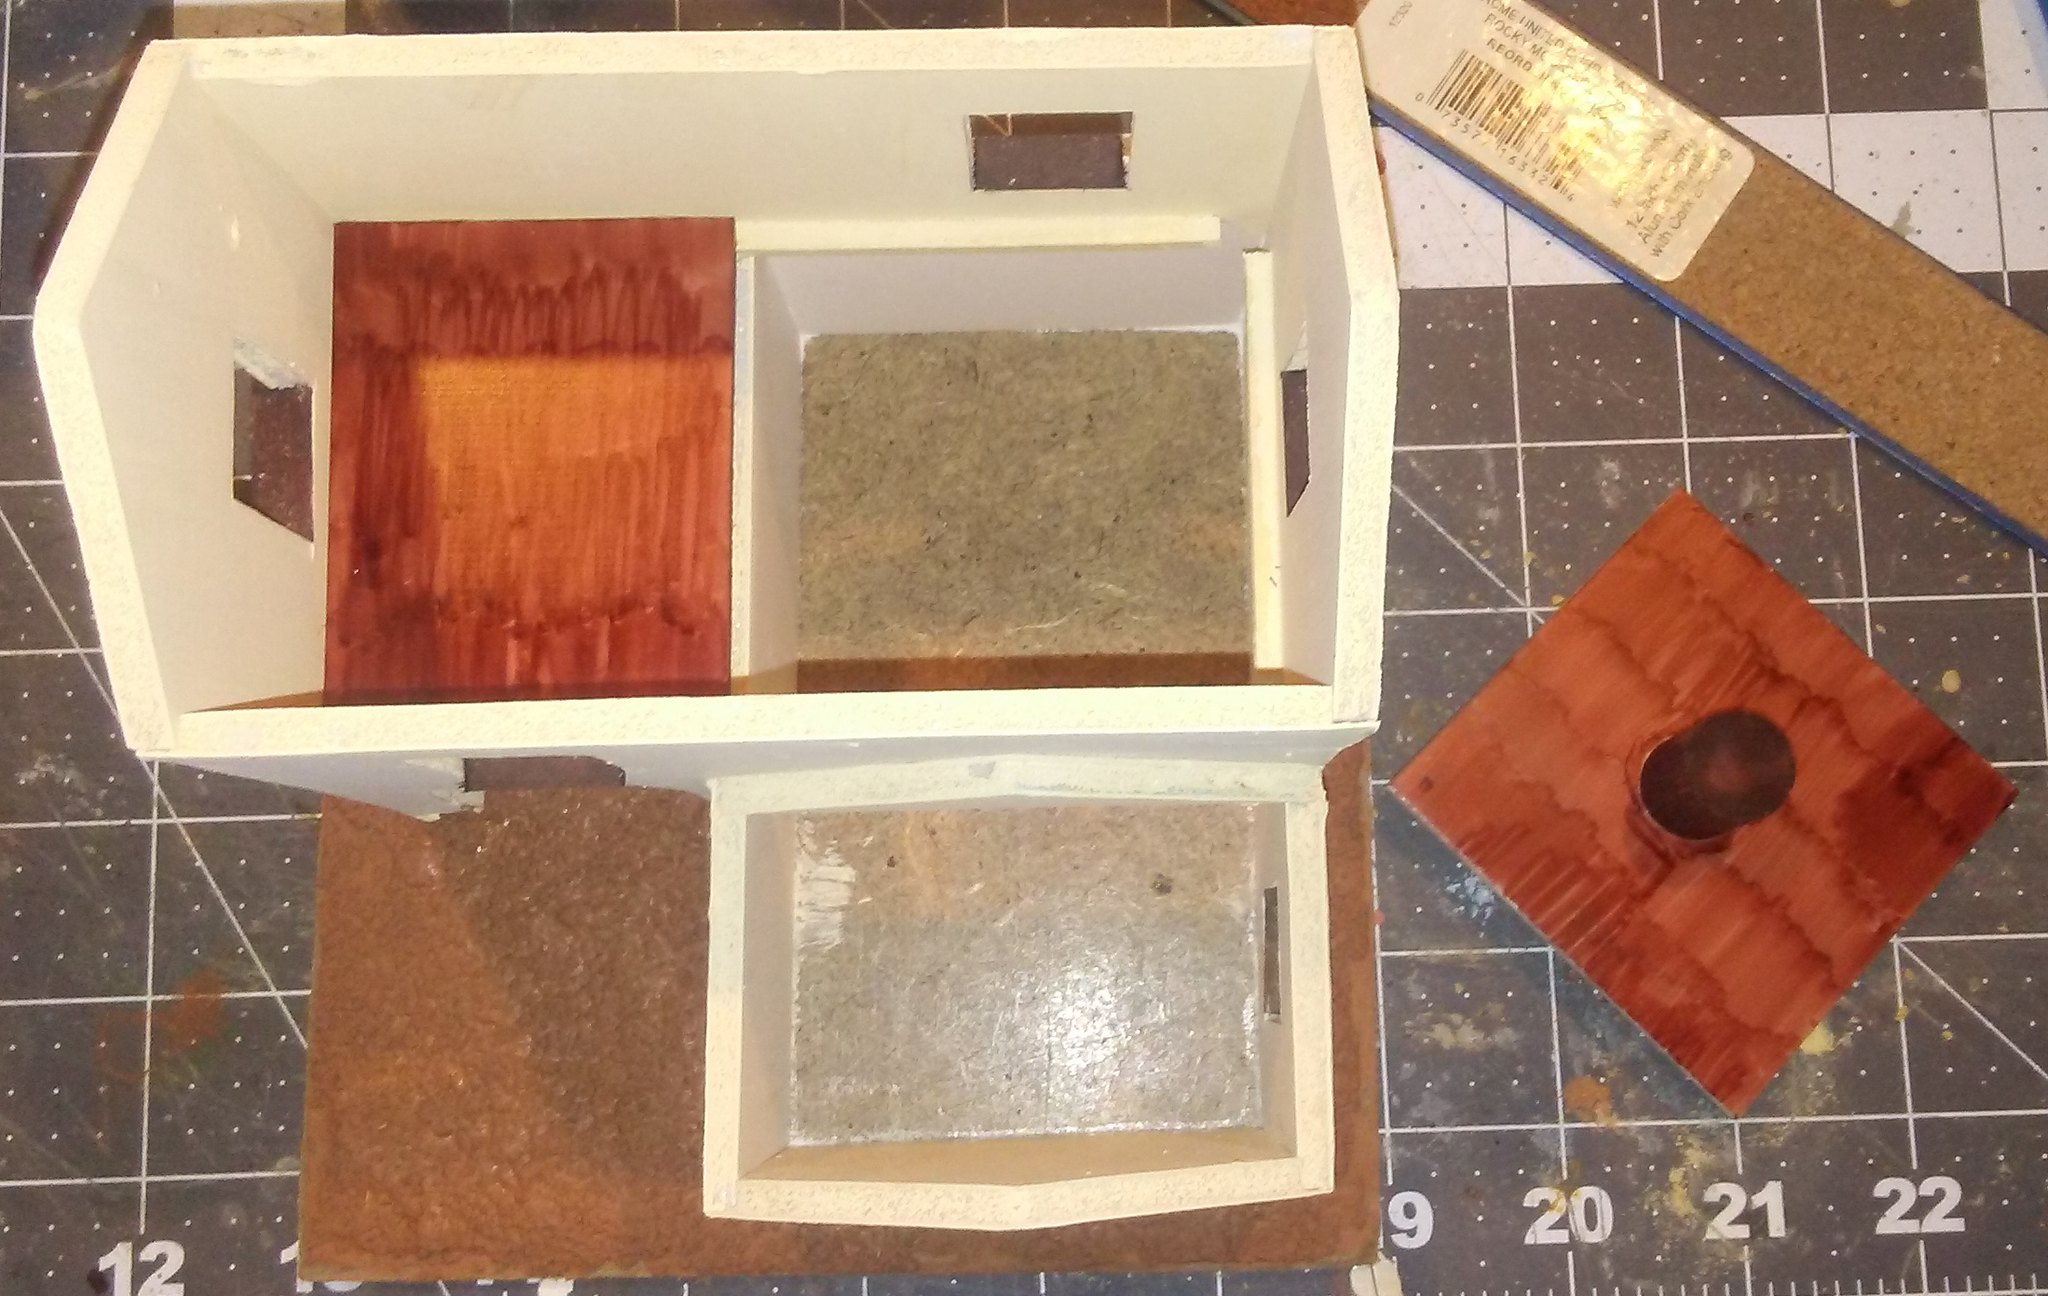 |
| Bodega with floor removed. |
On the bases I used my usual terrain "goop" mixture - it's a blend of paint, filler and sand. Nothing fancy or special, but it works great and leaves a very nice ground texture which takes a drybrush nicely.
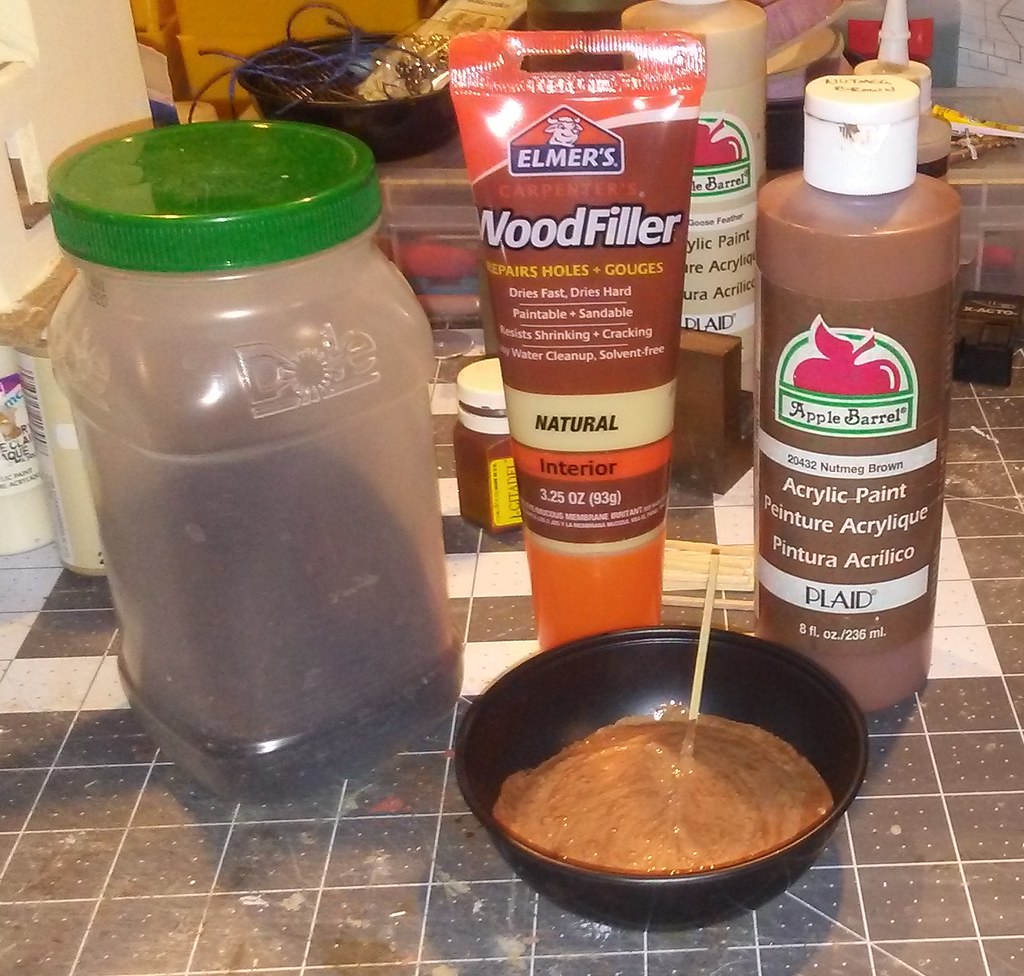 |
| Ingredients for "goop." |
After the terrain goop was dried, I drybrushed it - a heavy coat with a dark tan, and a lighter coat with a lighter tan. I added some
Army Painter tufts, and the buildings were done!
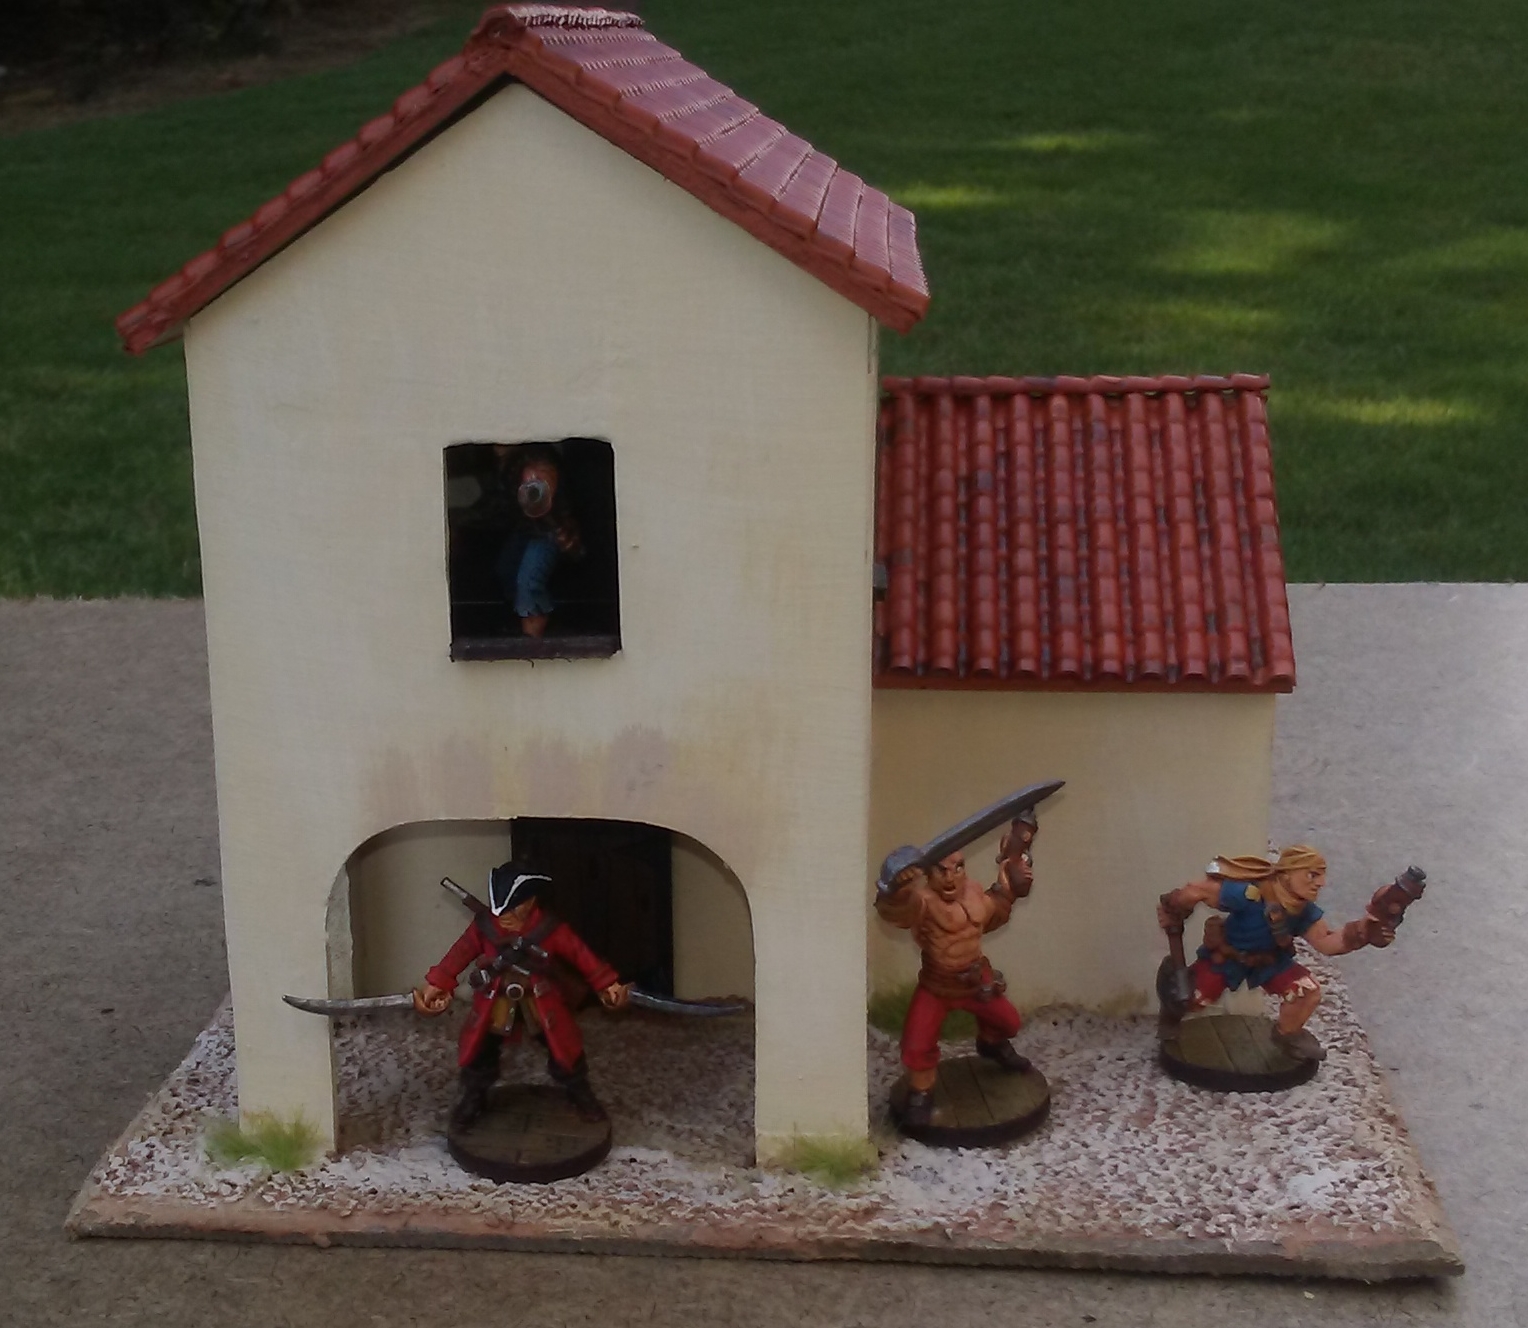
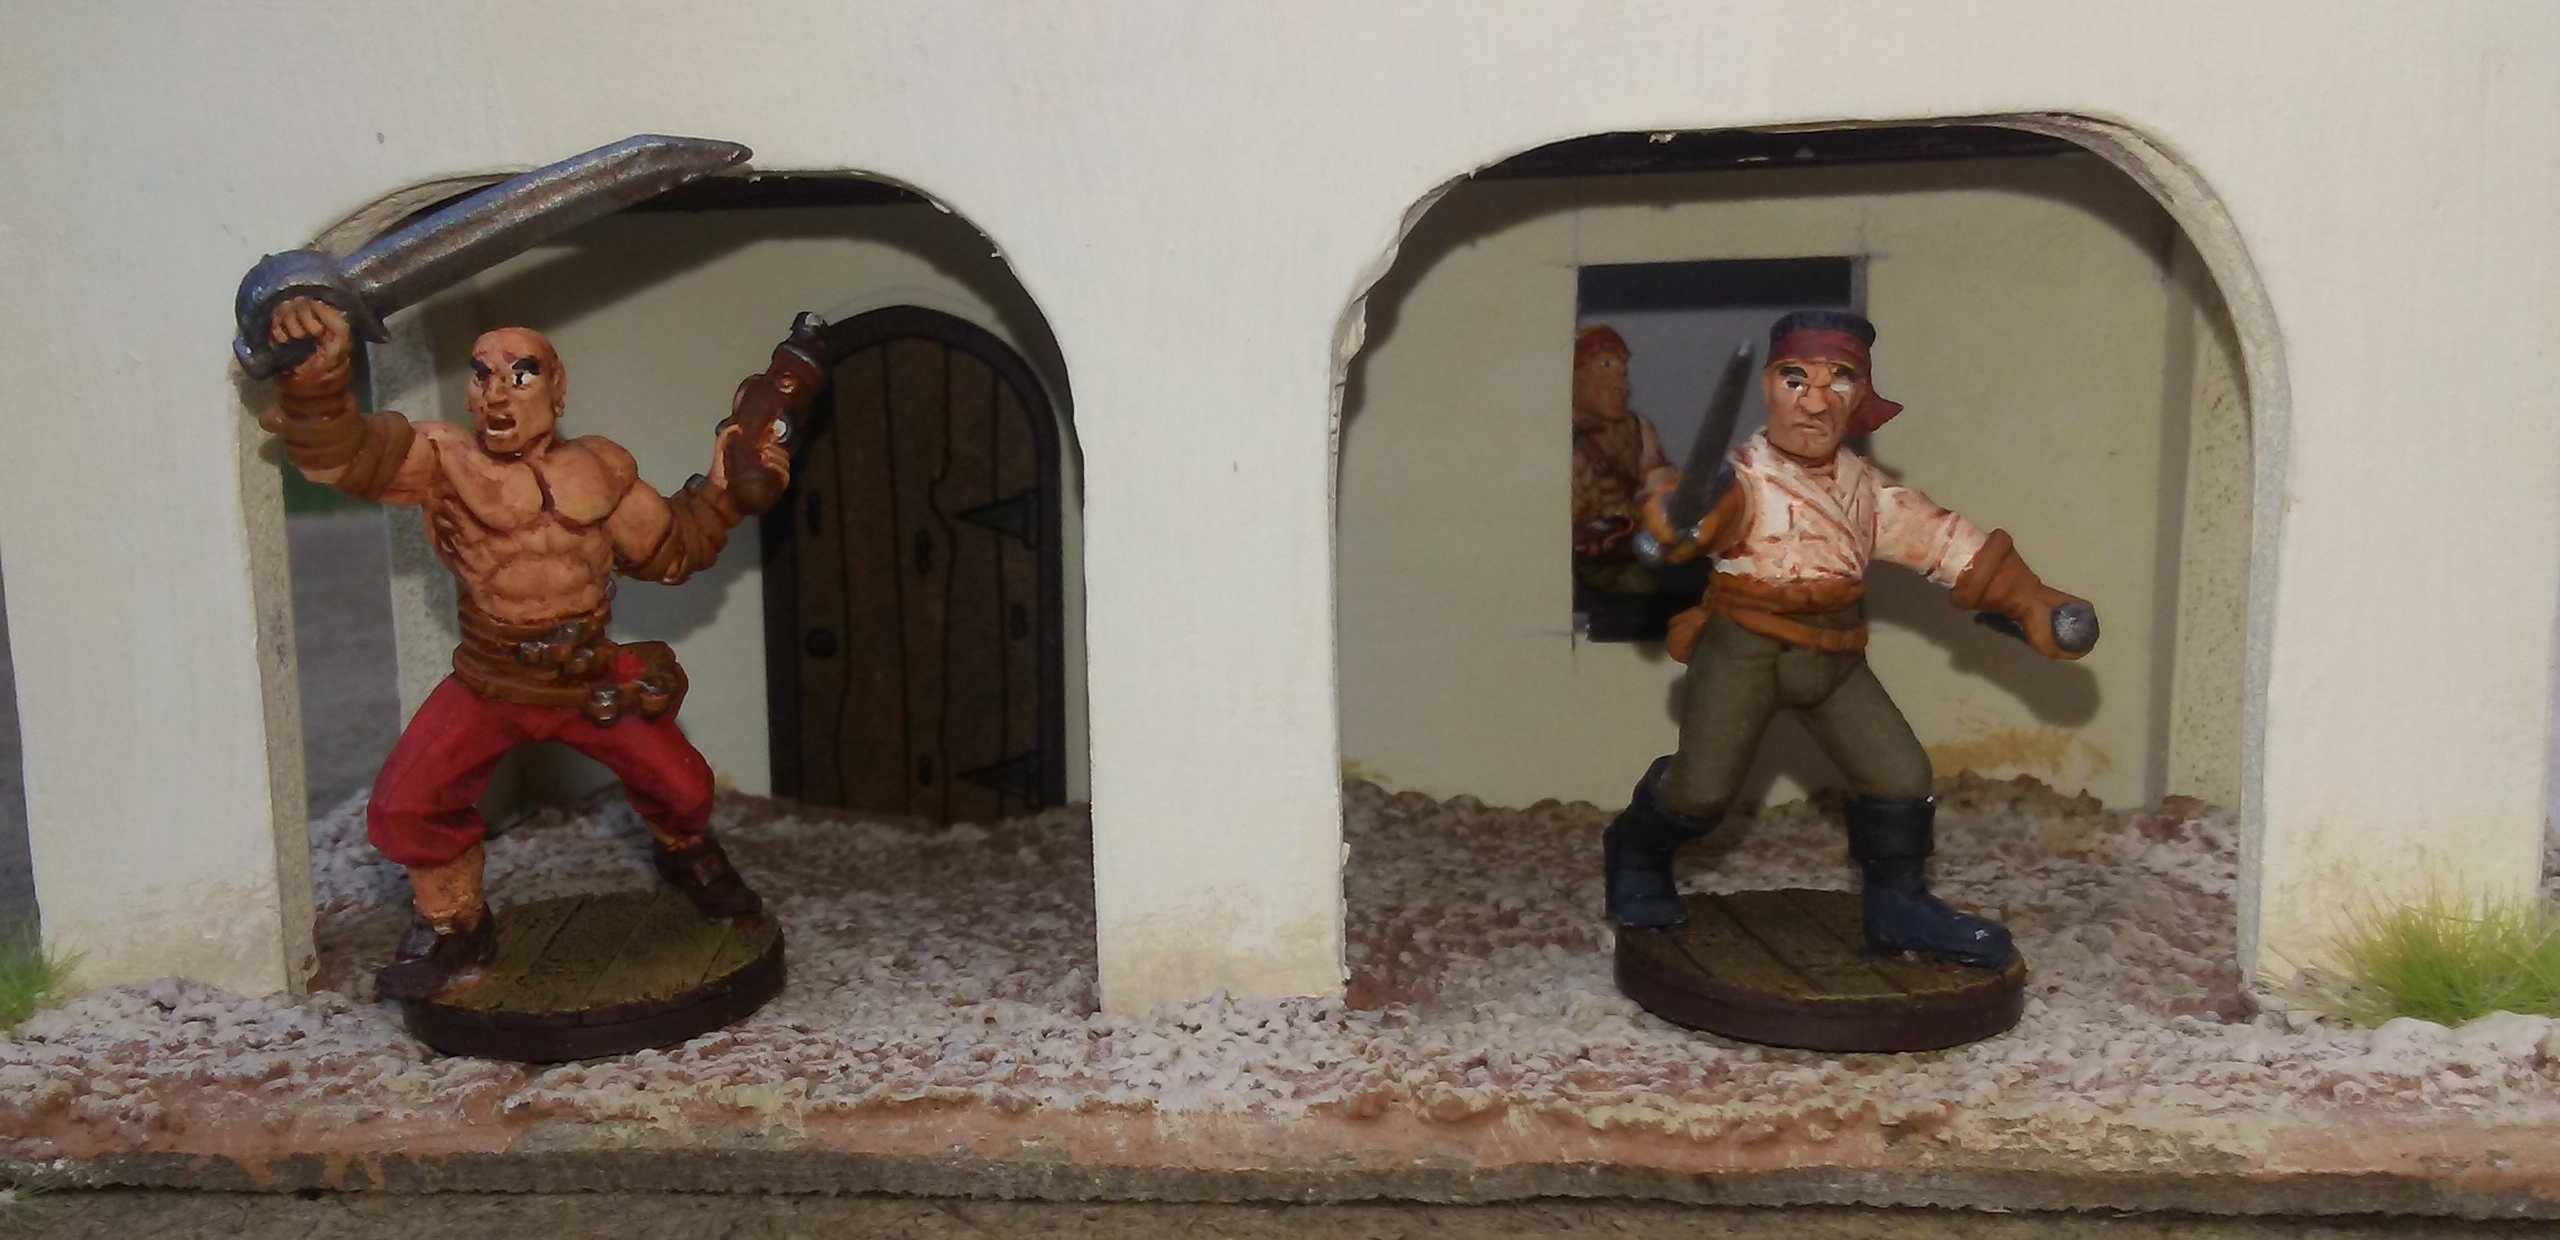
Here's a gallery of pictures of the officers' quarters:
And here's the bodega:
So what do you think? How do the final versions compare to the original concept sketches? I think they're pretty close, and I am quite pleased with the final product!
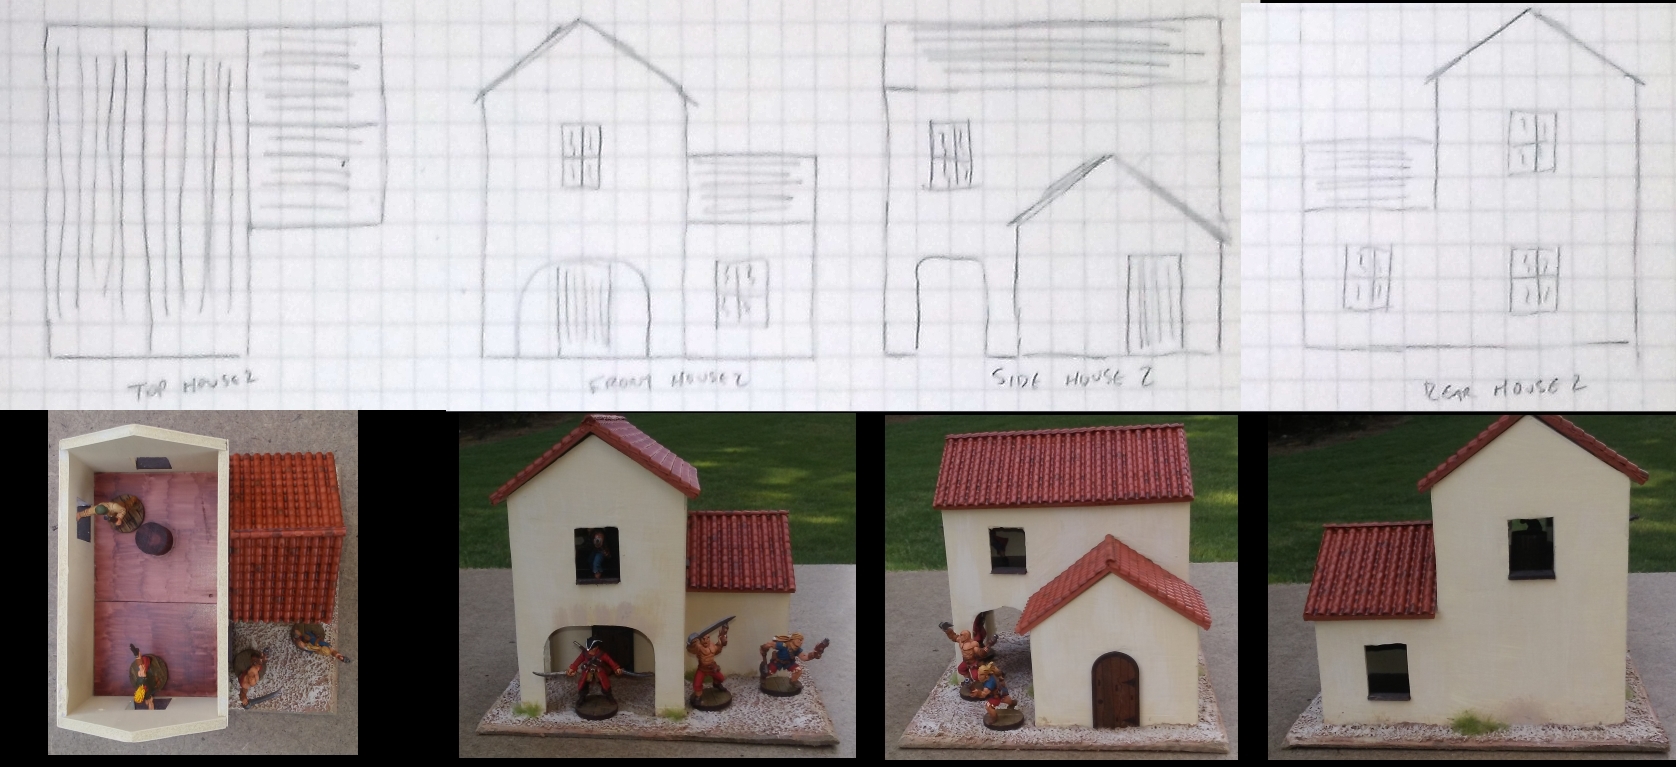 |
| The bodega - sketches and model. |
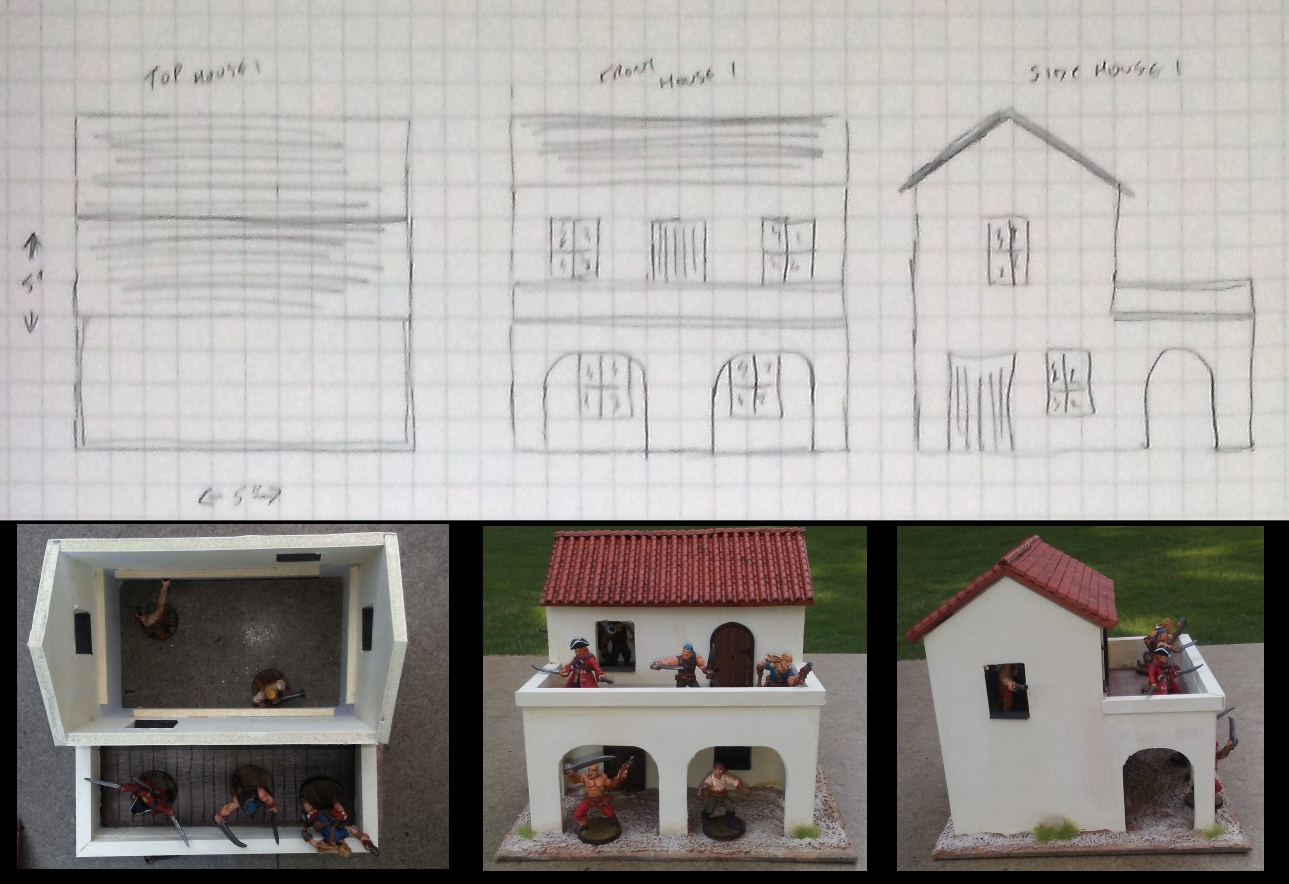 |
| The officers' quarters - sketches and model. |
That's it for this post - it's been a long one with all the pictures. Up next, the three small dwellings.
'Til next time!


No comments:
Post a Comment