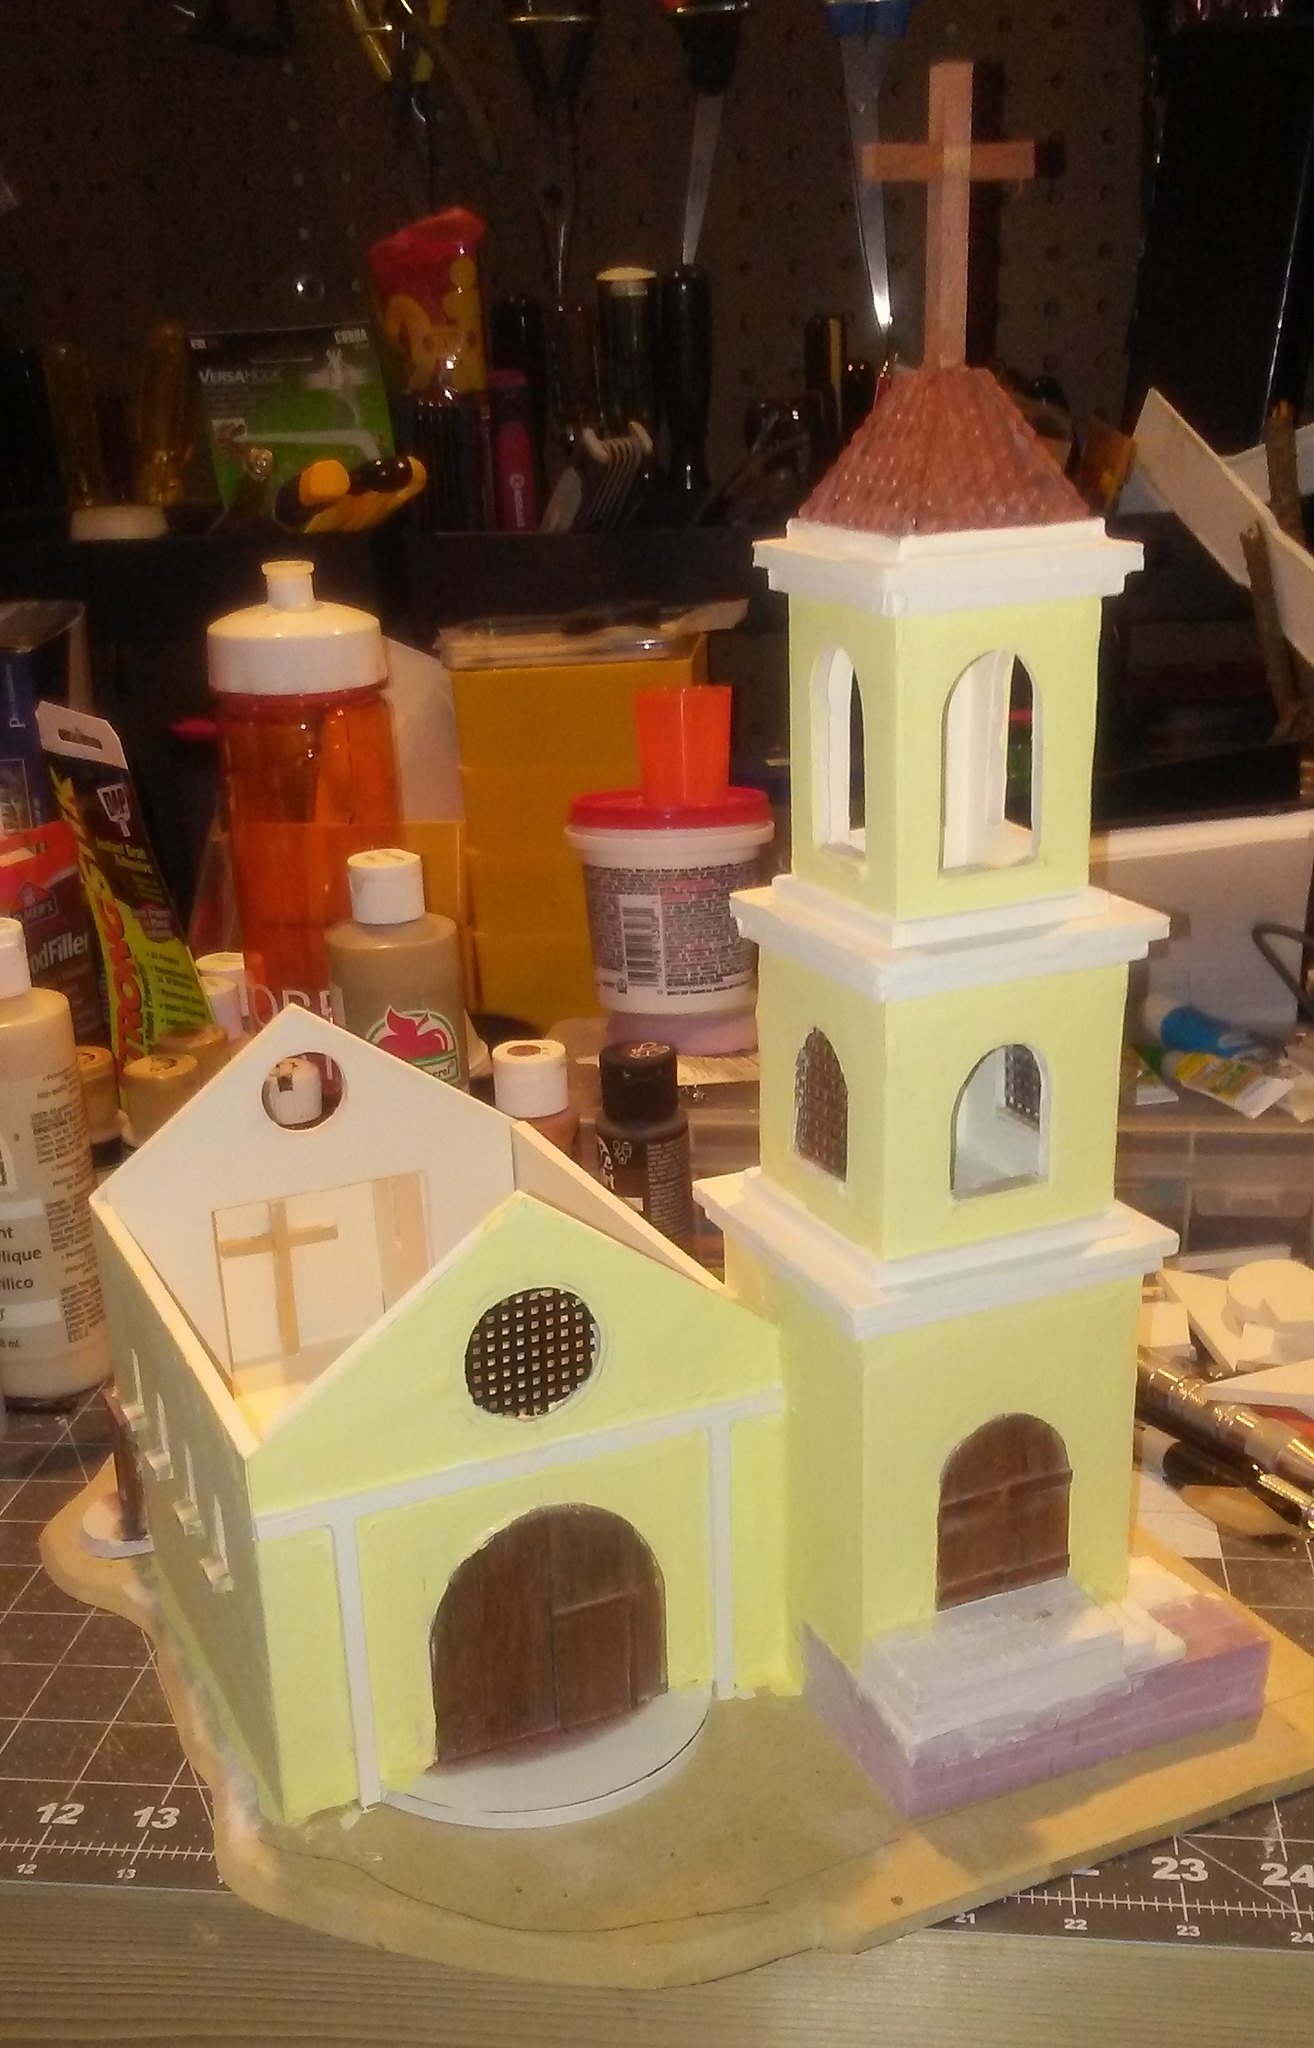
In my last post (
here), I completed the basic structure of the church. In this entry, I am going to explain how I detailed and painted it to give it character.
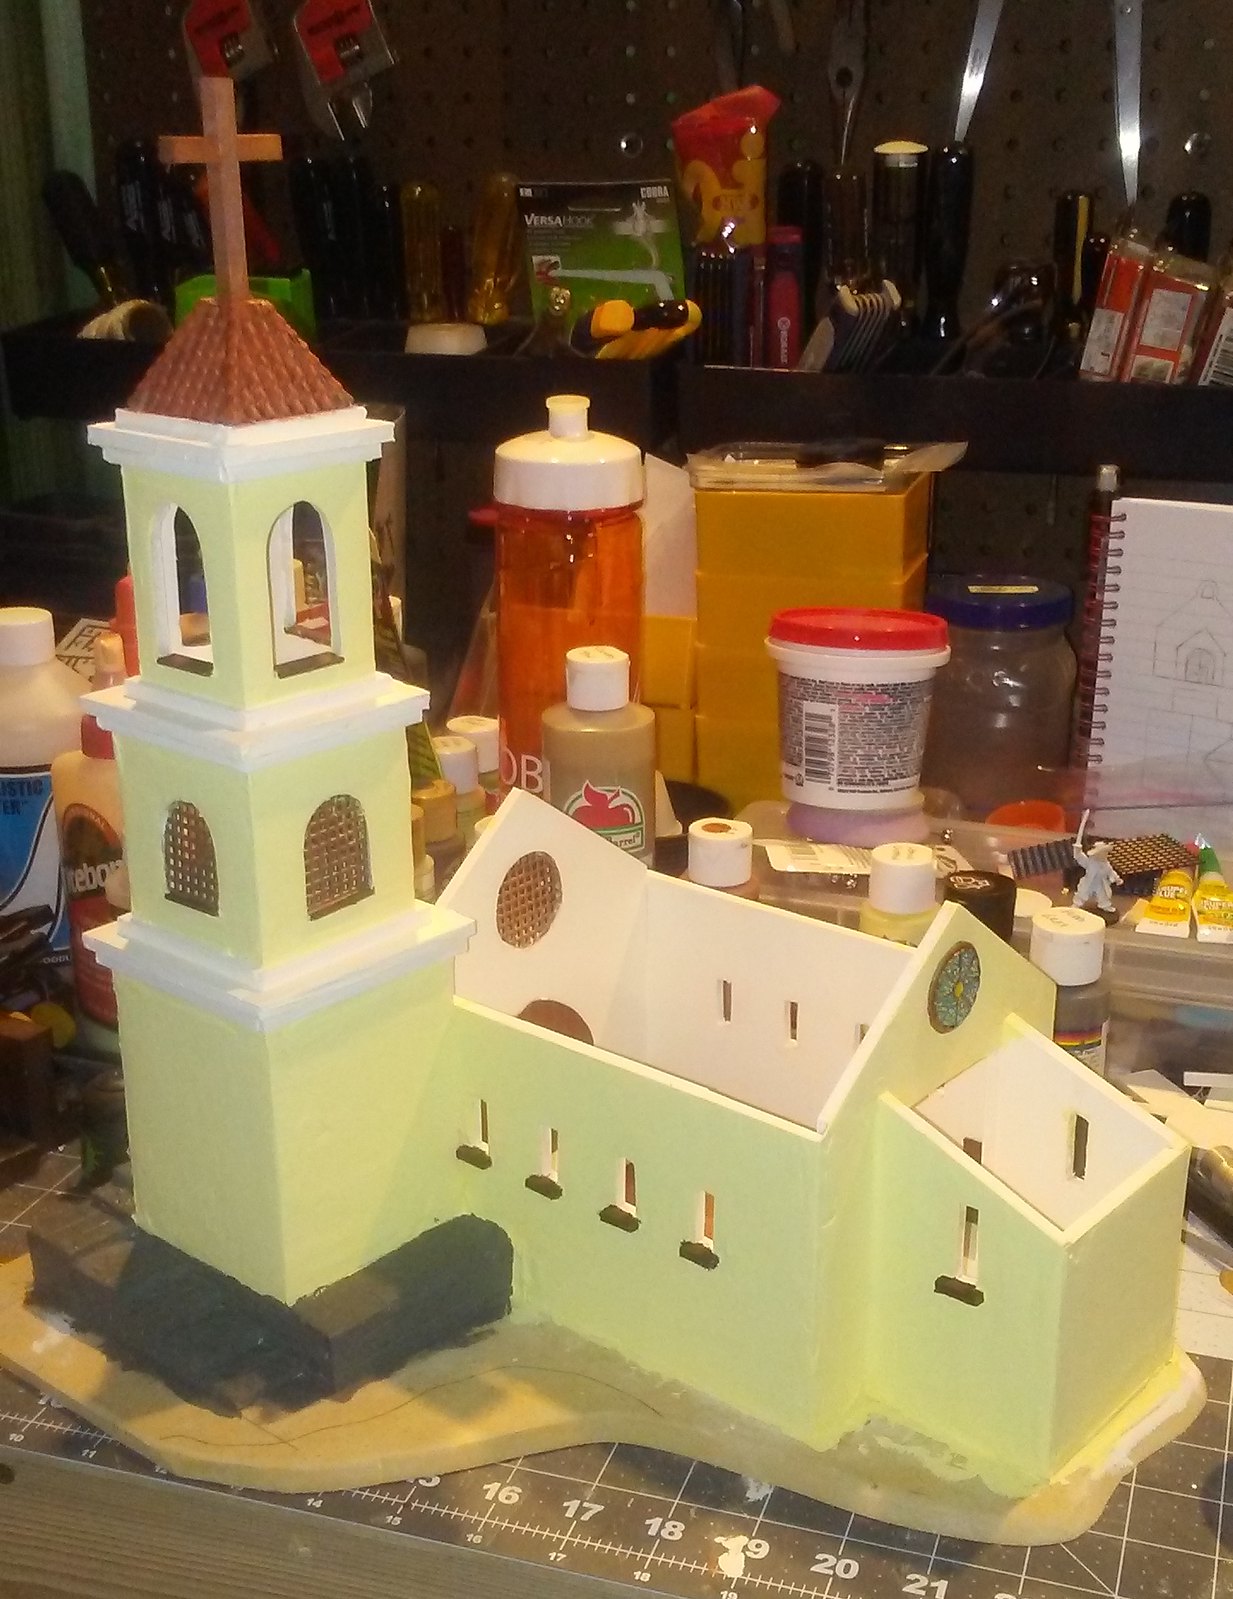
The first thing I want to make clear, is that this is not a showpiece museum model. Yes, it will be the centerpiece of a wargaming table due to its stature, but it is meant to be used for gaming. It will receive a certain amount of wear and tear because of this. So while I want it to look good, I am not going to go nuts over details, or worry if some of the painting is not as neat as it should be. It's the same philosophy I use when painting my wargaming figures as gaming pieces, and not as display models. The church is meant to be used and abused as conflicting factions fight over it.
The first thing I do is stain the wooden parts of the church. I use
Adirondack Alcohol Inks. The inks come in dropper bottles, and I just drip the ink over the wood. It soaks in and gives it a nice, rich color. I prefer to use the caramel color, but you get three shades to pick from in the package. The only caveat is that if glue gets on the wood during assembly, it will keep the ink from soaking in. So you need to be very careful when applying glue to the wood parts to avoid overdoing it, or stain the wood before gluing it. I am usually too impatient to stain it first, so I almost always end up with some parts of the wood that don't stain evenly due to sloppy glue application.
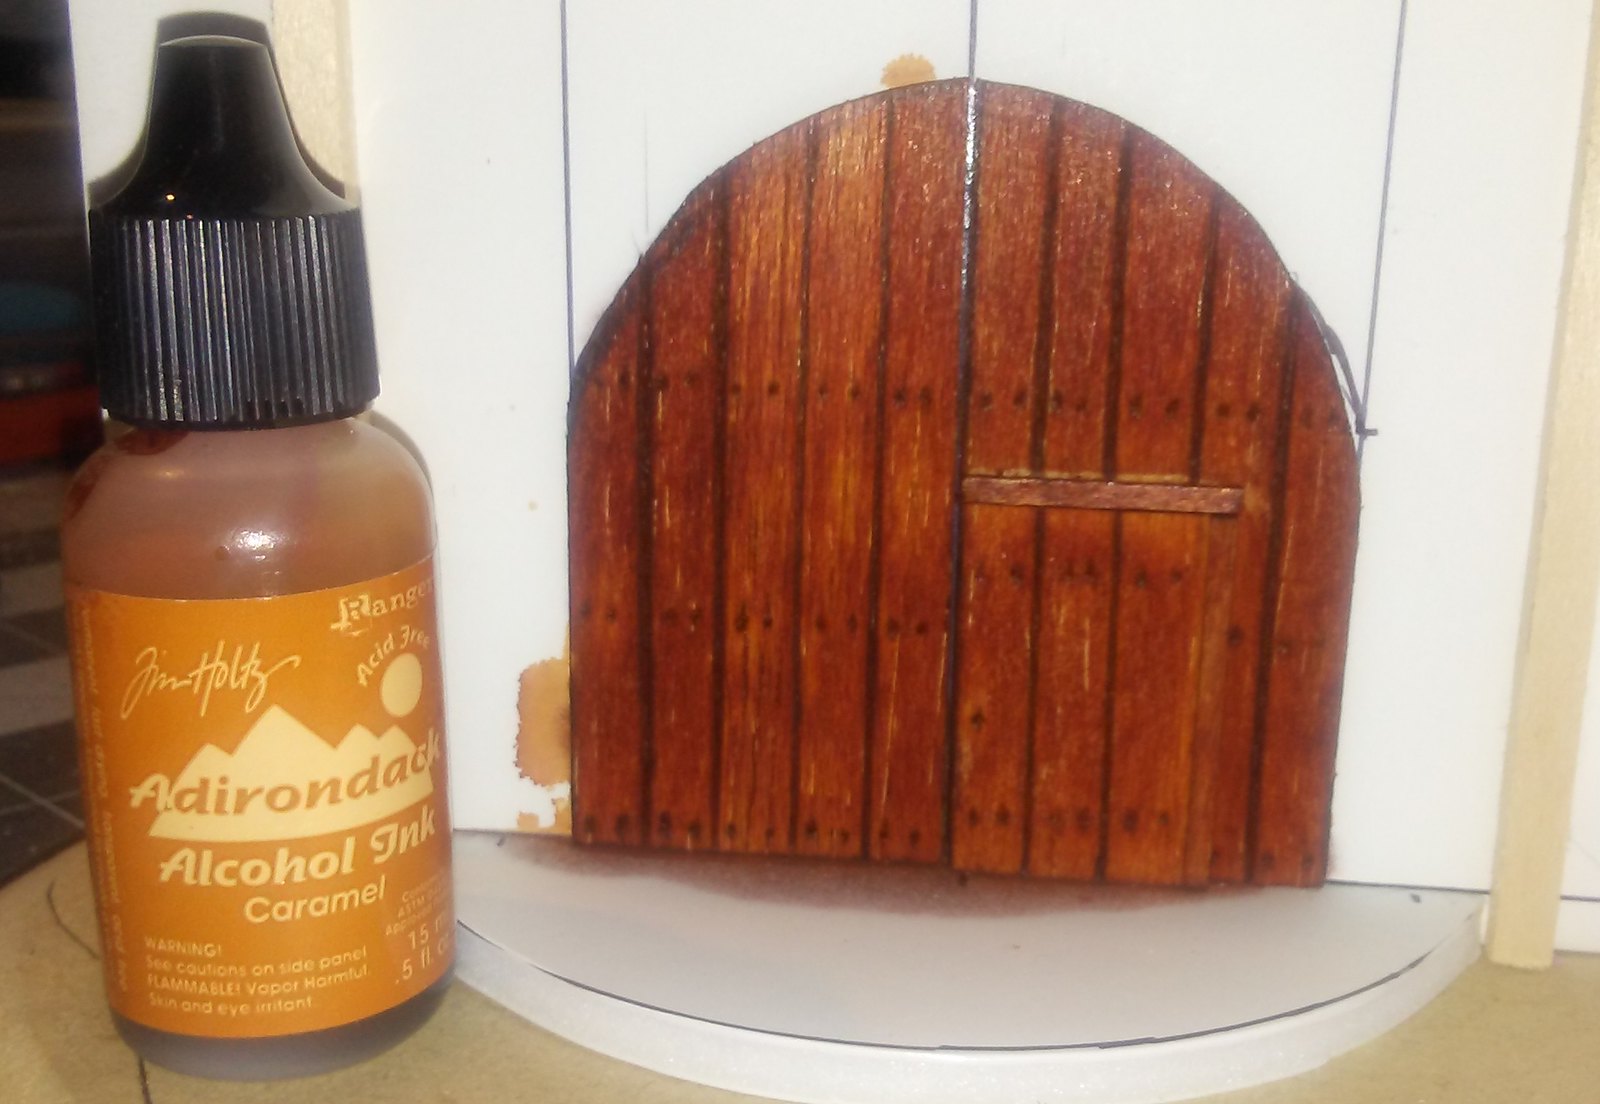 |
| Main door after inking. |
Next up, the roof needs a little work. The
Plastruct tiles are great, and make building a tiled roof quick and easy. All I do is cut the sheet to size, and glue it to the cardboard roof.
The one drawback is that all the tiles look completely clean and uniform. In order to mix it up a little bit, I paint some in a lighter shade, and some in a darker shade. I just mix up a batch of paint as needed. I start with a
terracotta colored paint, and I add a cream color (
Light Ivory) to make a lighter shade, and a dark brown (
Burnt Umber) to make a darker shade. For most of my terrain painting, I use cheap craft paints. They are available inexpensively in many stores, there are several different brands, and they come in a great variety of shades and colors. I've used Delta Ceramcoat, Folk Art and Apple Barrel. They're also easy to clean up with water. (I have so many that I use interchangeably that it makes it difficult to remember, unless I wrote it down, exactly what colors I use. Whenever possible, I will include the name of the actual color in the description.)
 |
| Mixing darker and lighter shades of terracotta. |
Then I just randomly pick out different tiles to paint. After that is done, I give it a dark brown wash to highlight the grooves between the tiles. I follow that with a coat of clear matte spray paint, as the wash tends to have a slight shine to it.
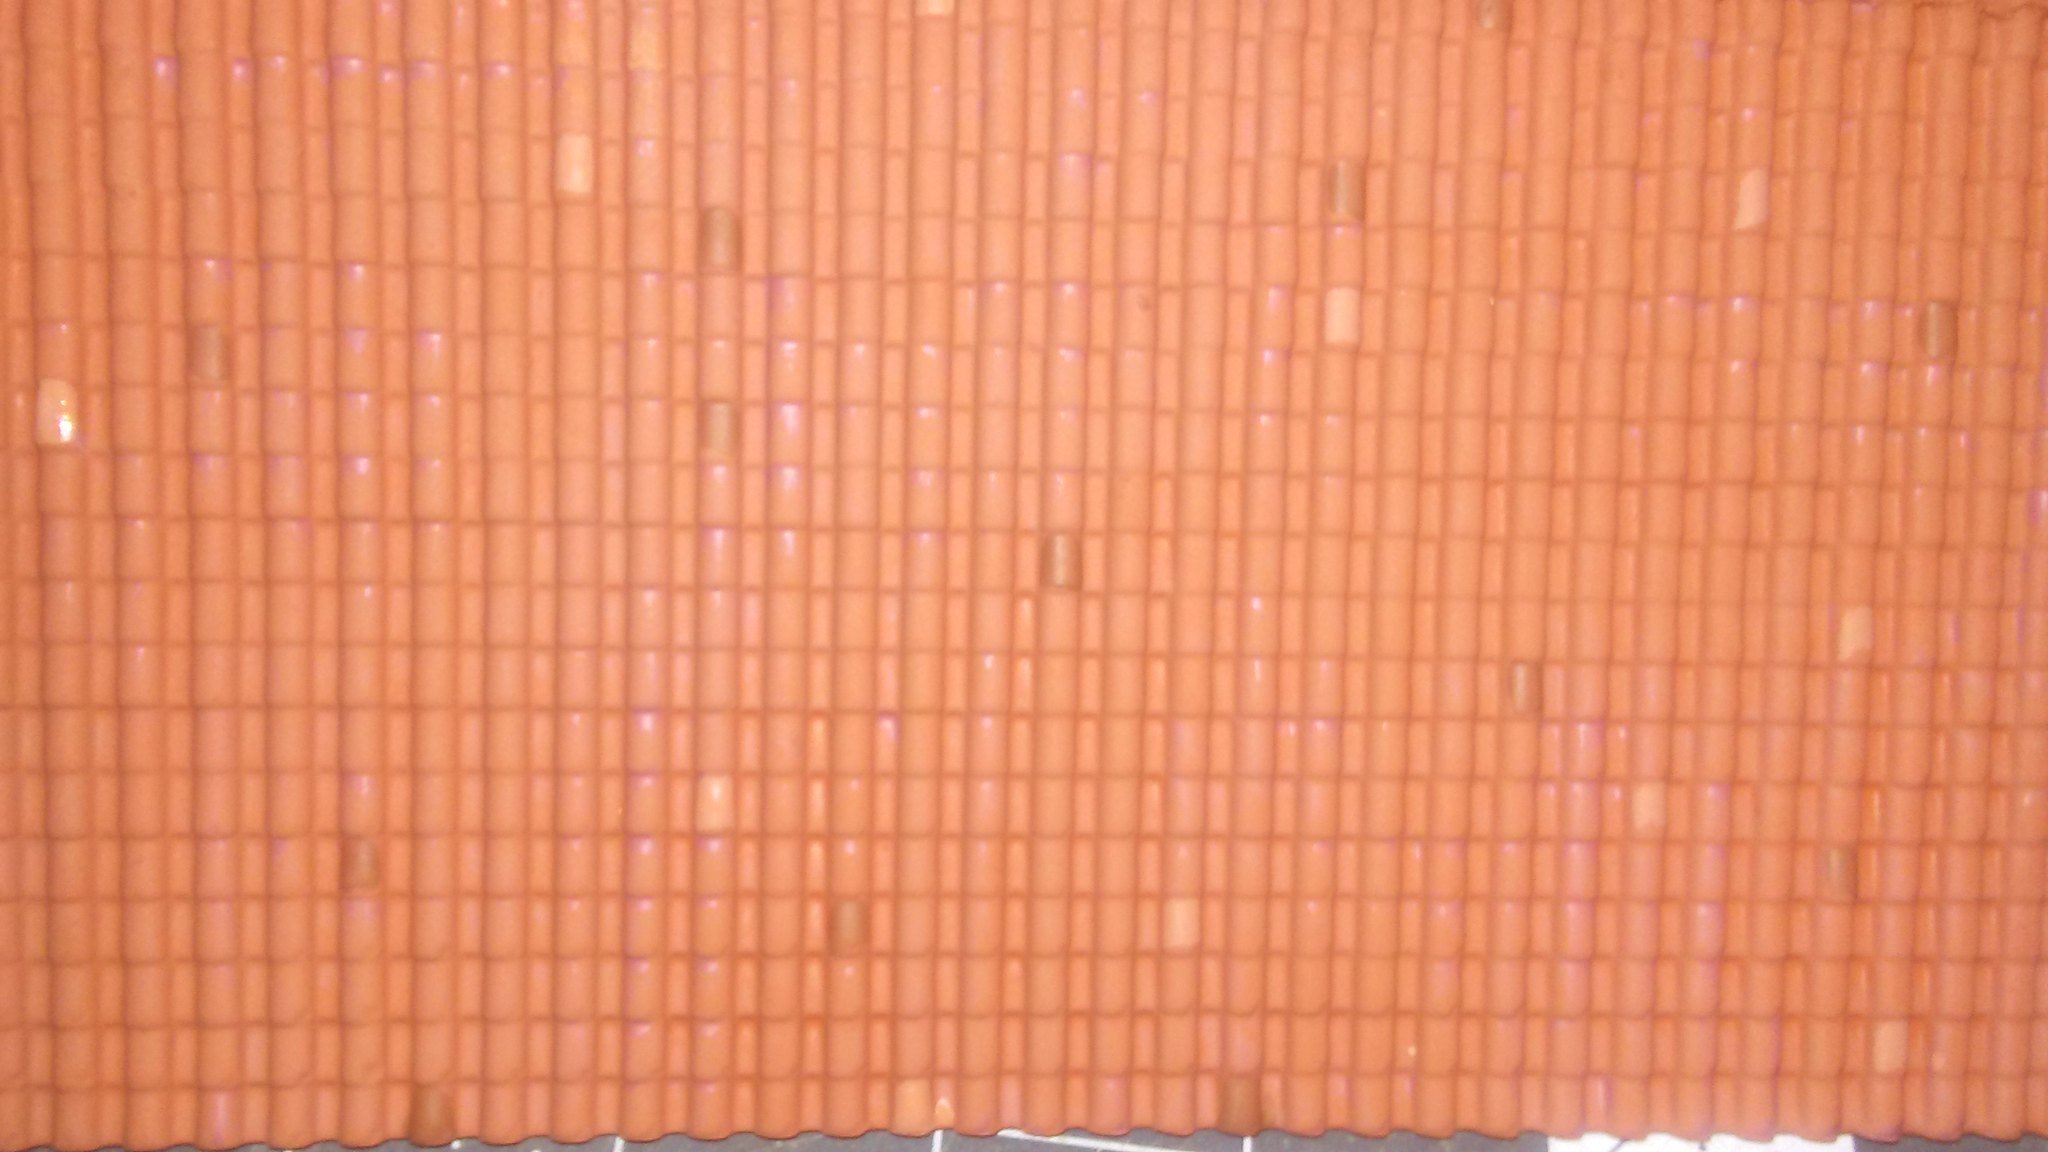 |
| Light and dark tiles painted, and wash applied. |
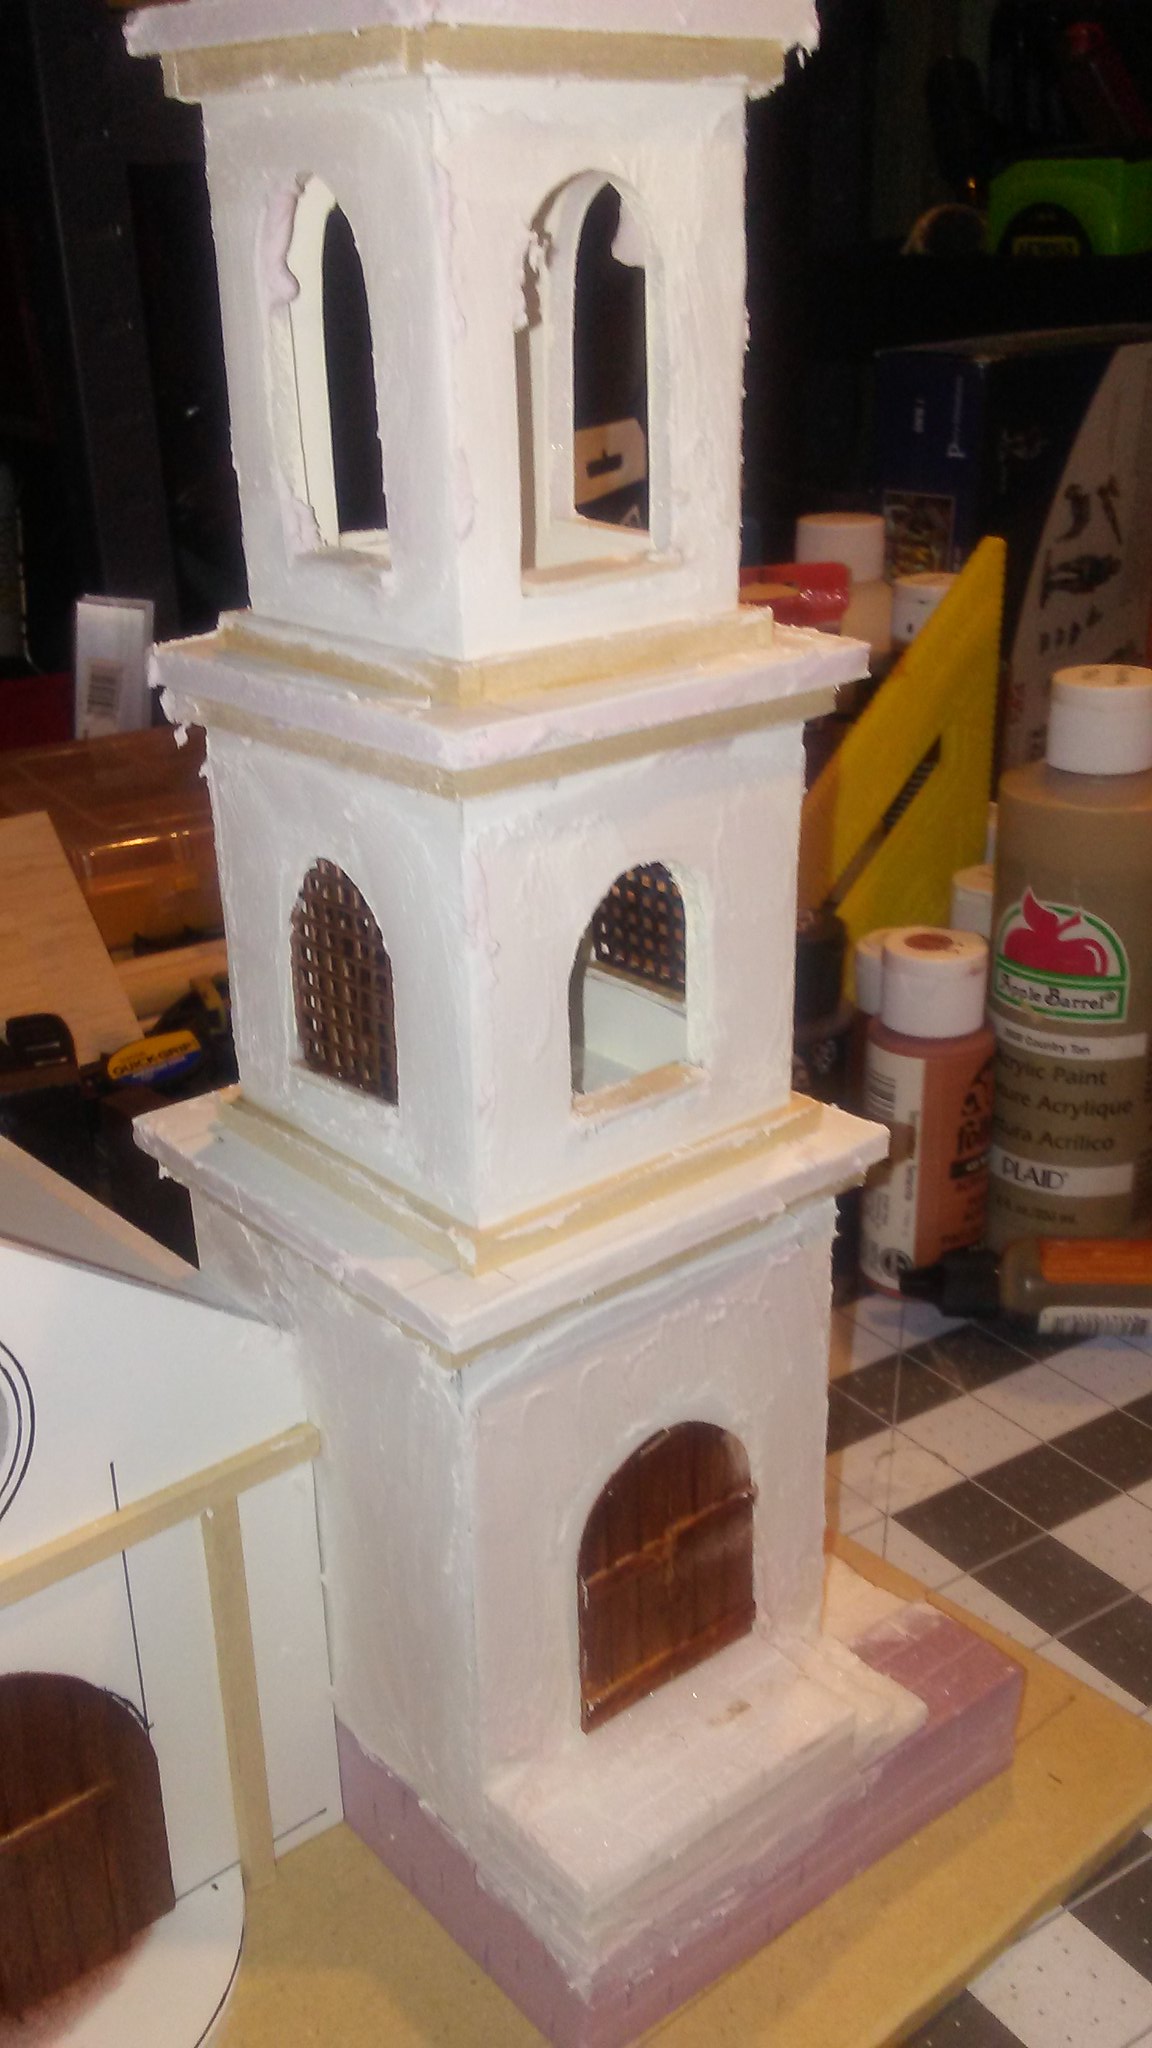
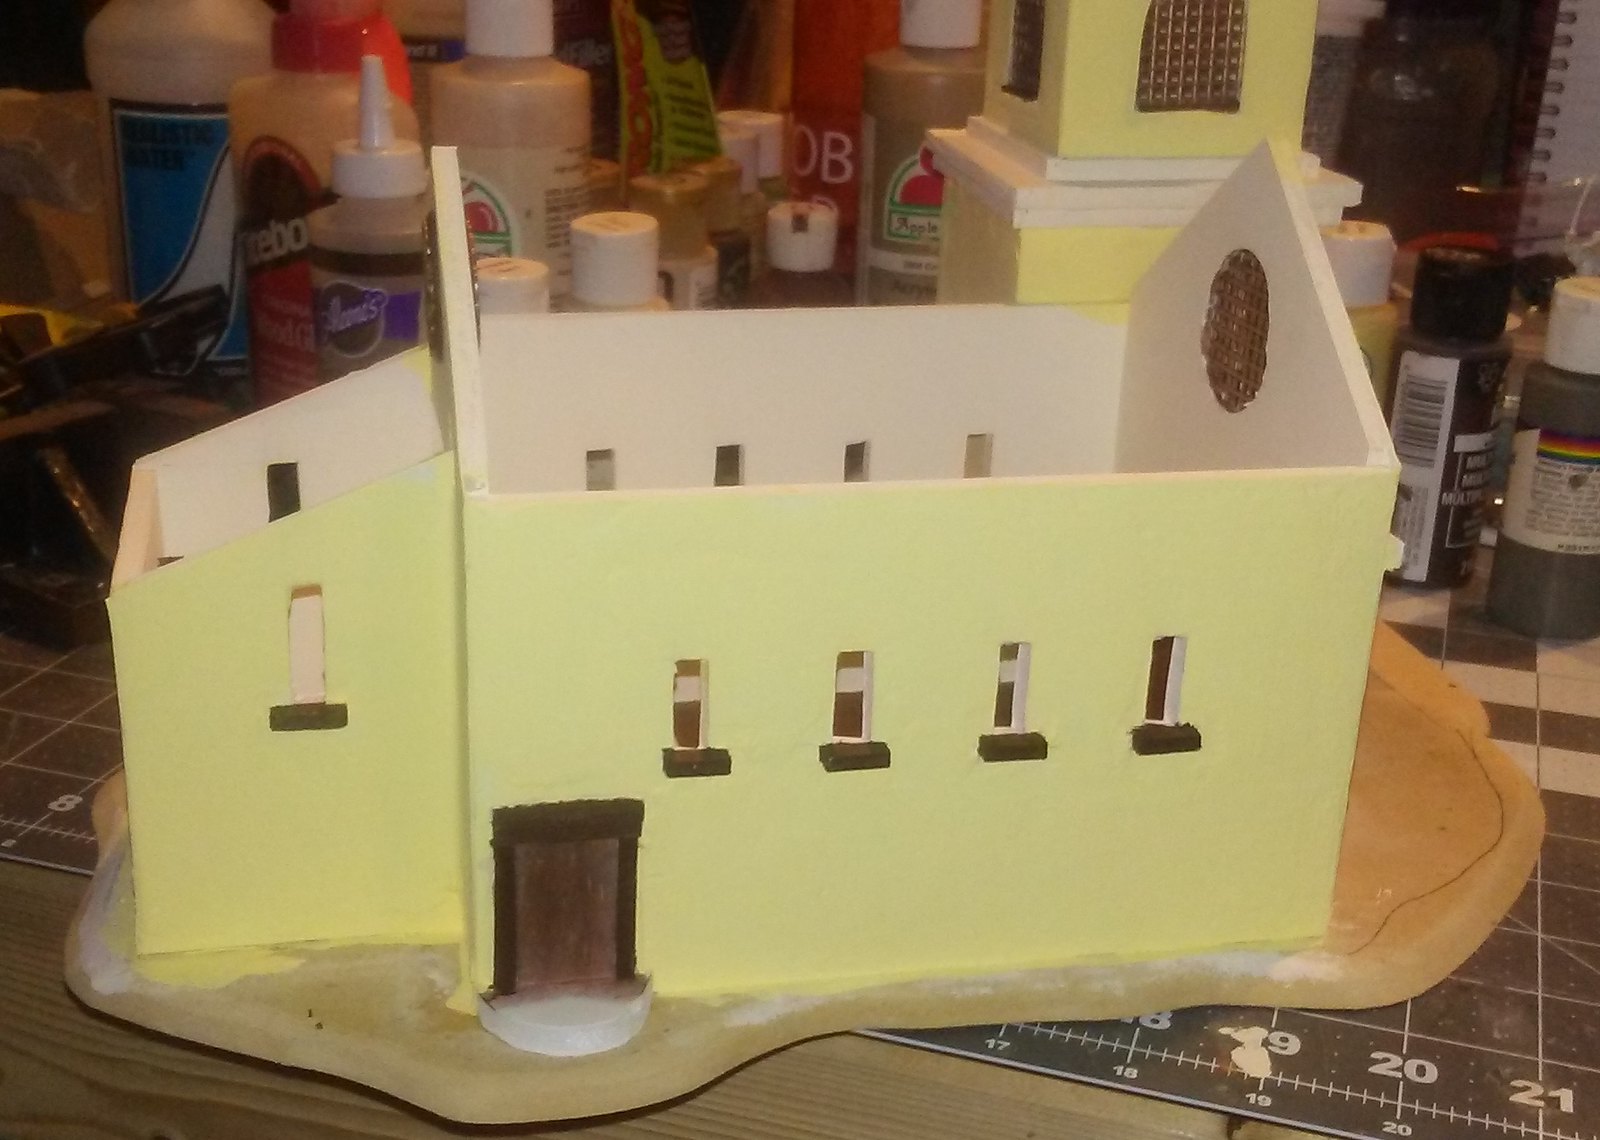
Meanwhile, the church walls need some love as well. The foamcore makes a terrific base, but it is perfectly smooth. I use a product by DAP called
DryDex Spackling. It is water-soluble, easy to work with and clean up, and it goes on pink but dries to a white so it is easy to tell when it's ready for the next step.
 |
| Spackle applied to bell tower. |
I use my fingers to spread the spackle to give it a rough, uneven look. I find that using a spatula or scraper makes the spackle too smooth, which is exactly the look I am trying to prevent.
 |
| Spackle applied to church walls. |
After the spackle is completely dry, I sand it a little. Don't over do the sanding since the goal is to have some irregular relief.
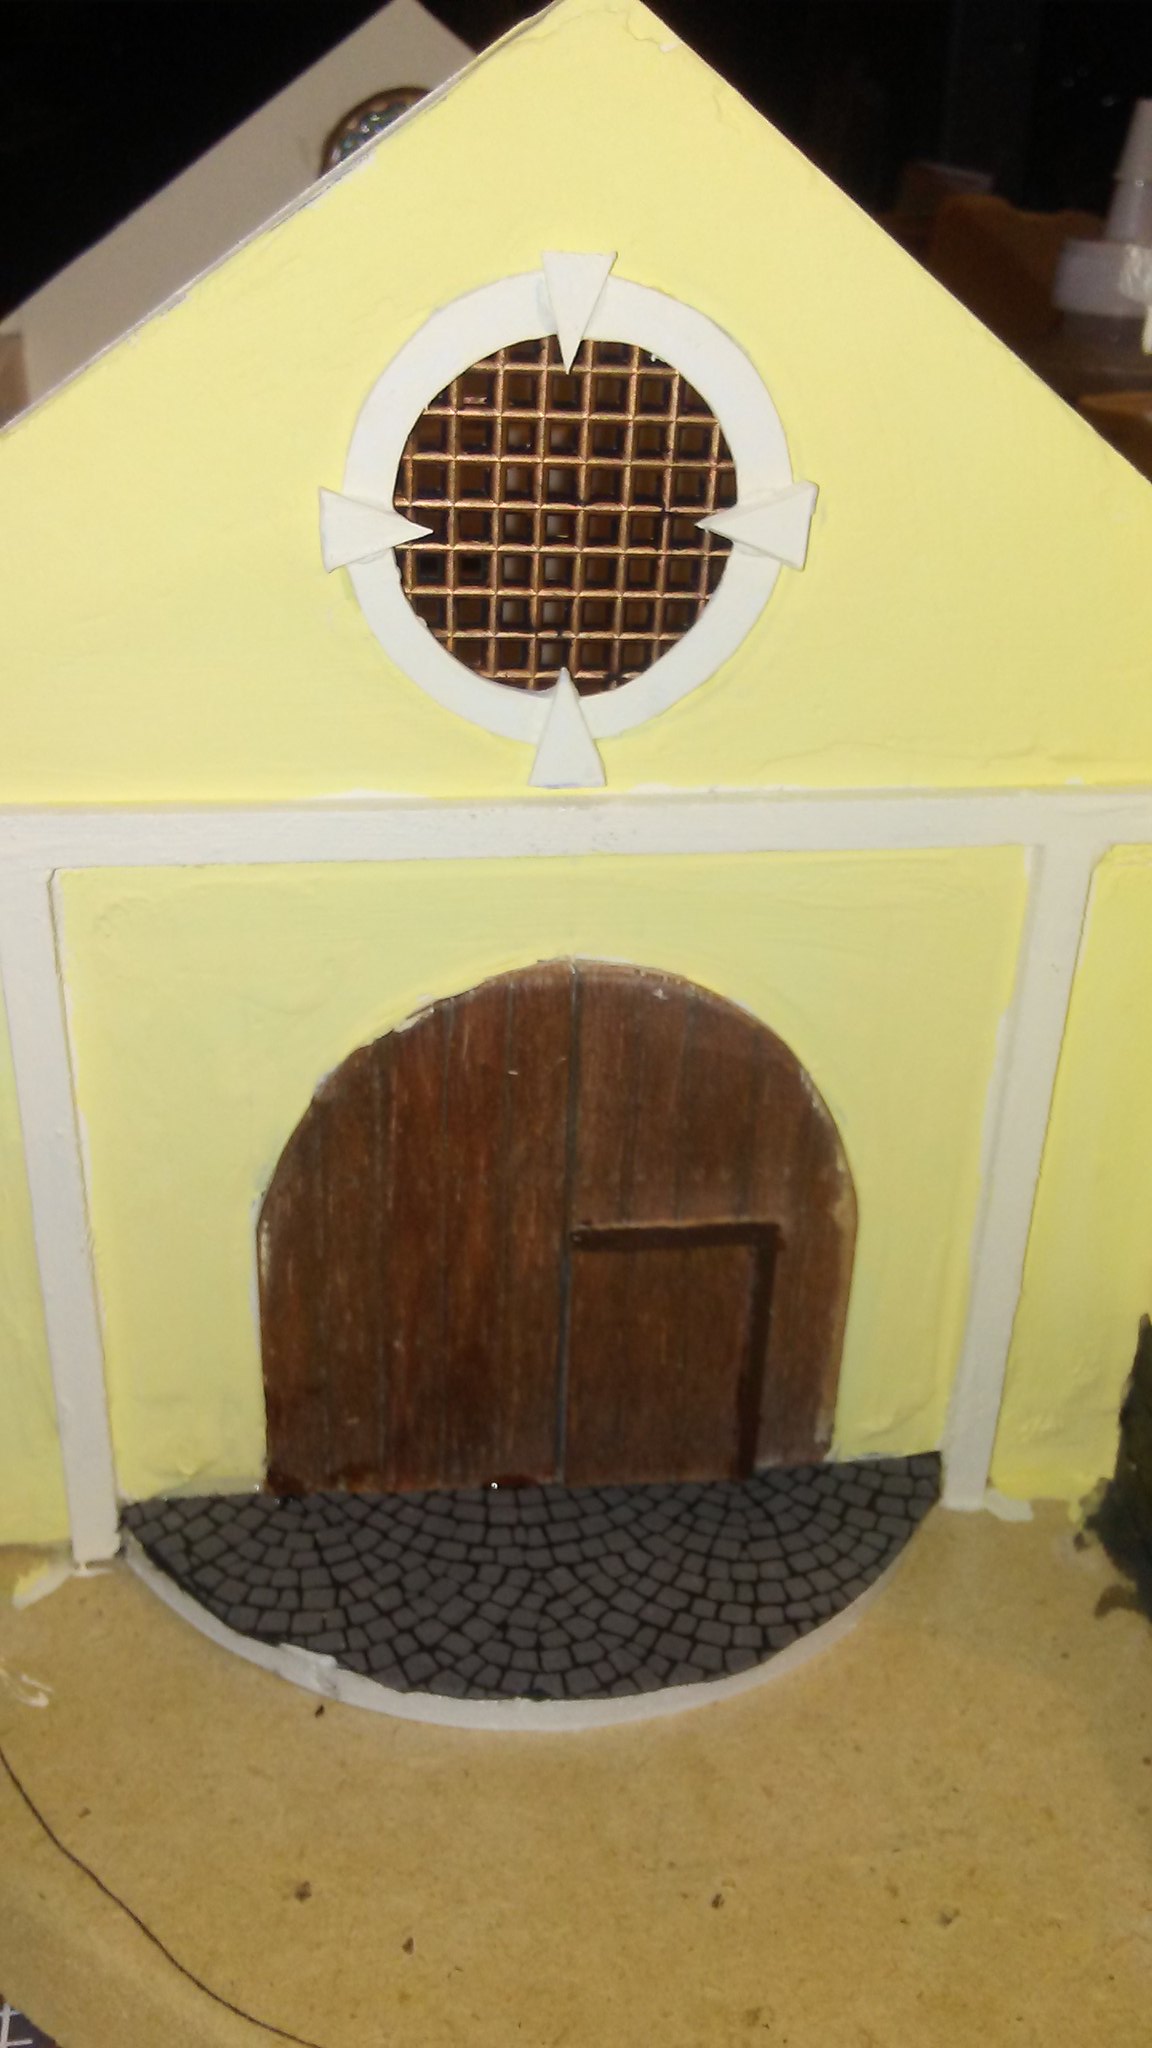
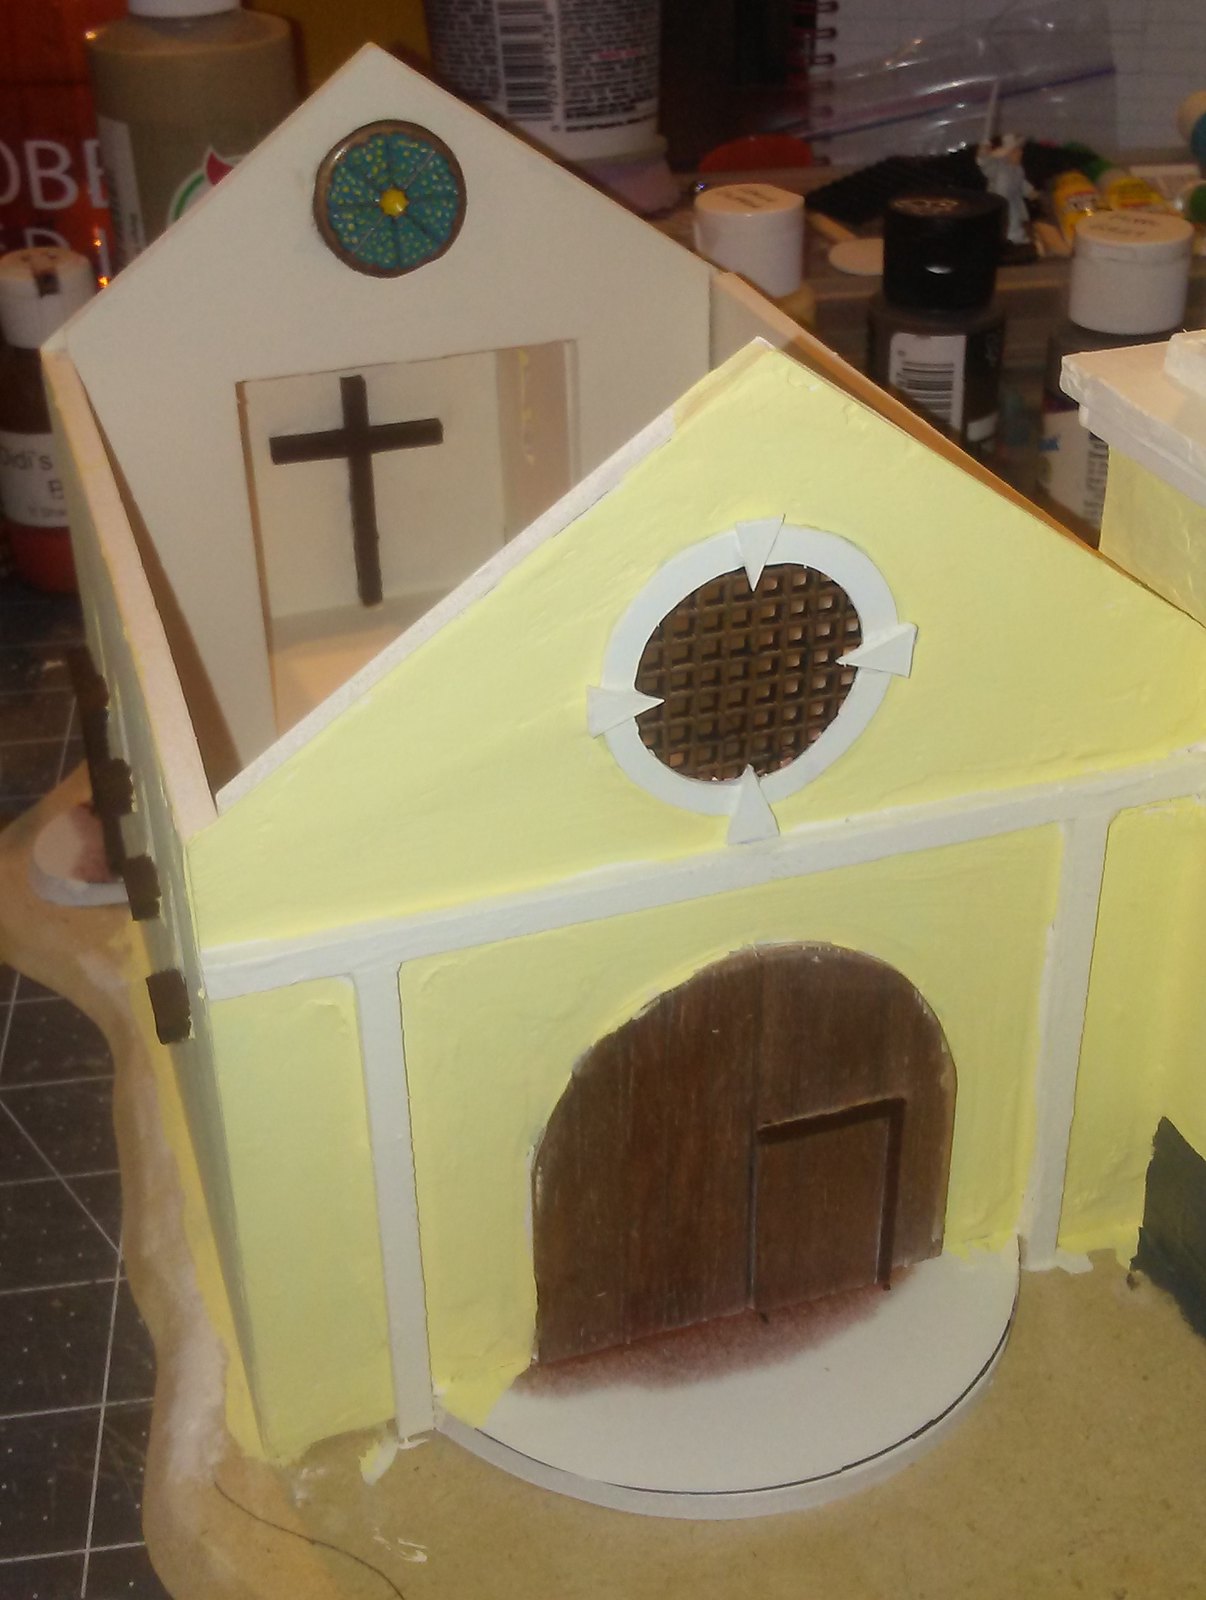
When that was done, I turned to some of the details, such as the circular windows I had cut out of the front and rear walls. For the front wall, I simply cut out a circular piece of a black plastic mesh I found in a craft store years ago. I think it is meant to be used for some sort of cross stitch, but I have found it to be very useful to represent lattices and grates of all types.
To add some relief, I also cut out a circle from plasticard to use as a sort of fram around the window. I also added some small triangles in a cross pattern to give it added detail. Once I had the shapes cut out, I just glued them in place. Lastly, I colored the plastic mesh using a metallic sharpie - it was much easier than painting with a brush, and it leaves a little bit of black visible to add depth. This is the same thing I did in the windows on the middle level of the bell tower. I did leave the front window uncovered so you can place a figure in the tower if you wish.
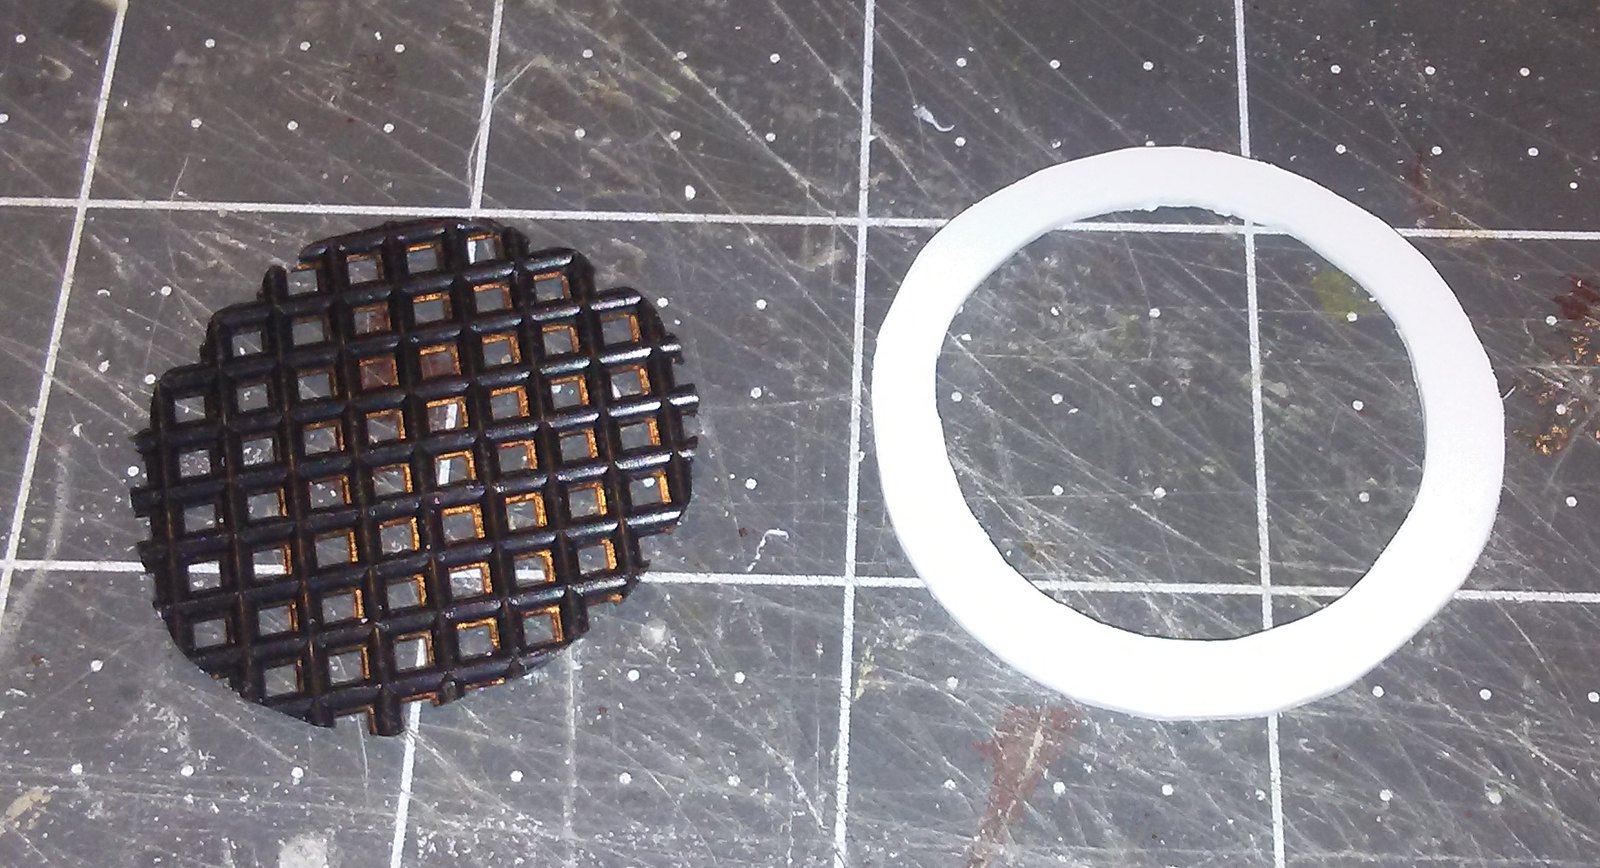 |
| Parts used for front window. |
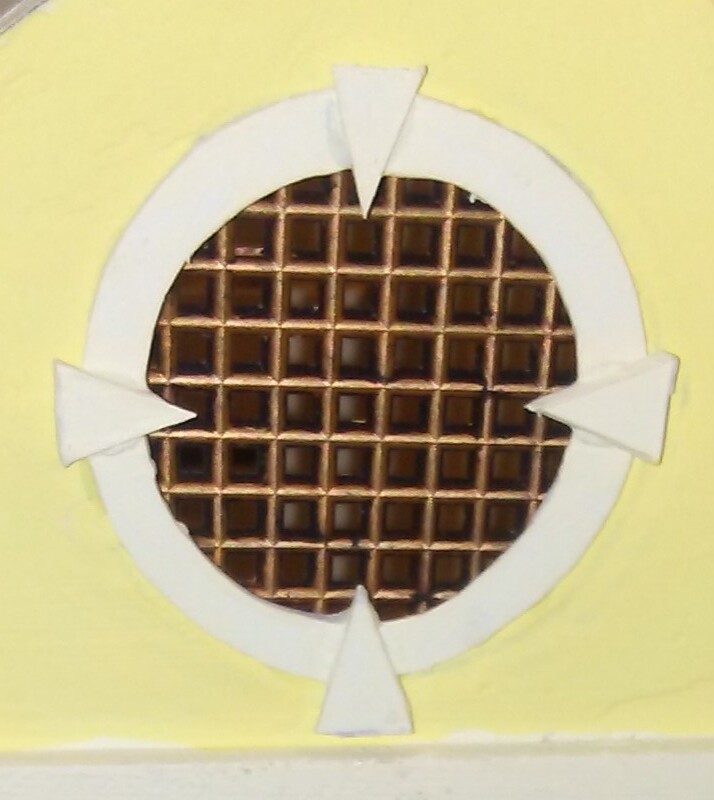 |
| Completed window. |
The rear circular window was done in a different way. Another way of saying that I am a scratch-builder of terrain, is to say that I am a pack rat! I am always on the prowl for odd bits and pieces that can be used to make interesting or odd bits for a piece of terrain. For the rear window, I found my inspiration in an unlikely source - the cap from a carton of orange juice!
 |
| Florida's Natural juice has a unique pattern to the cap. |
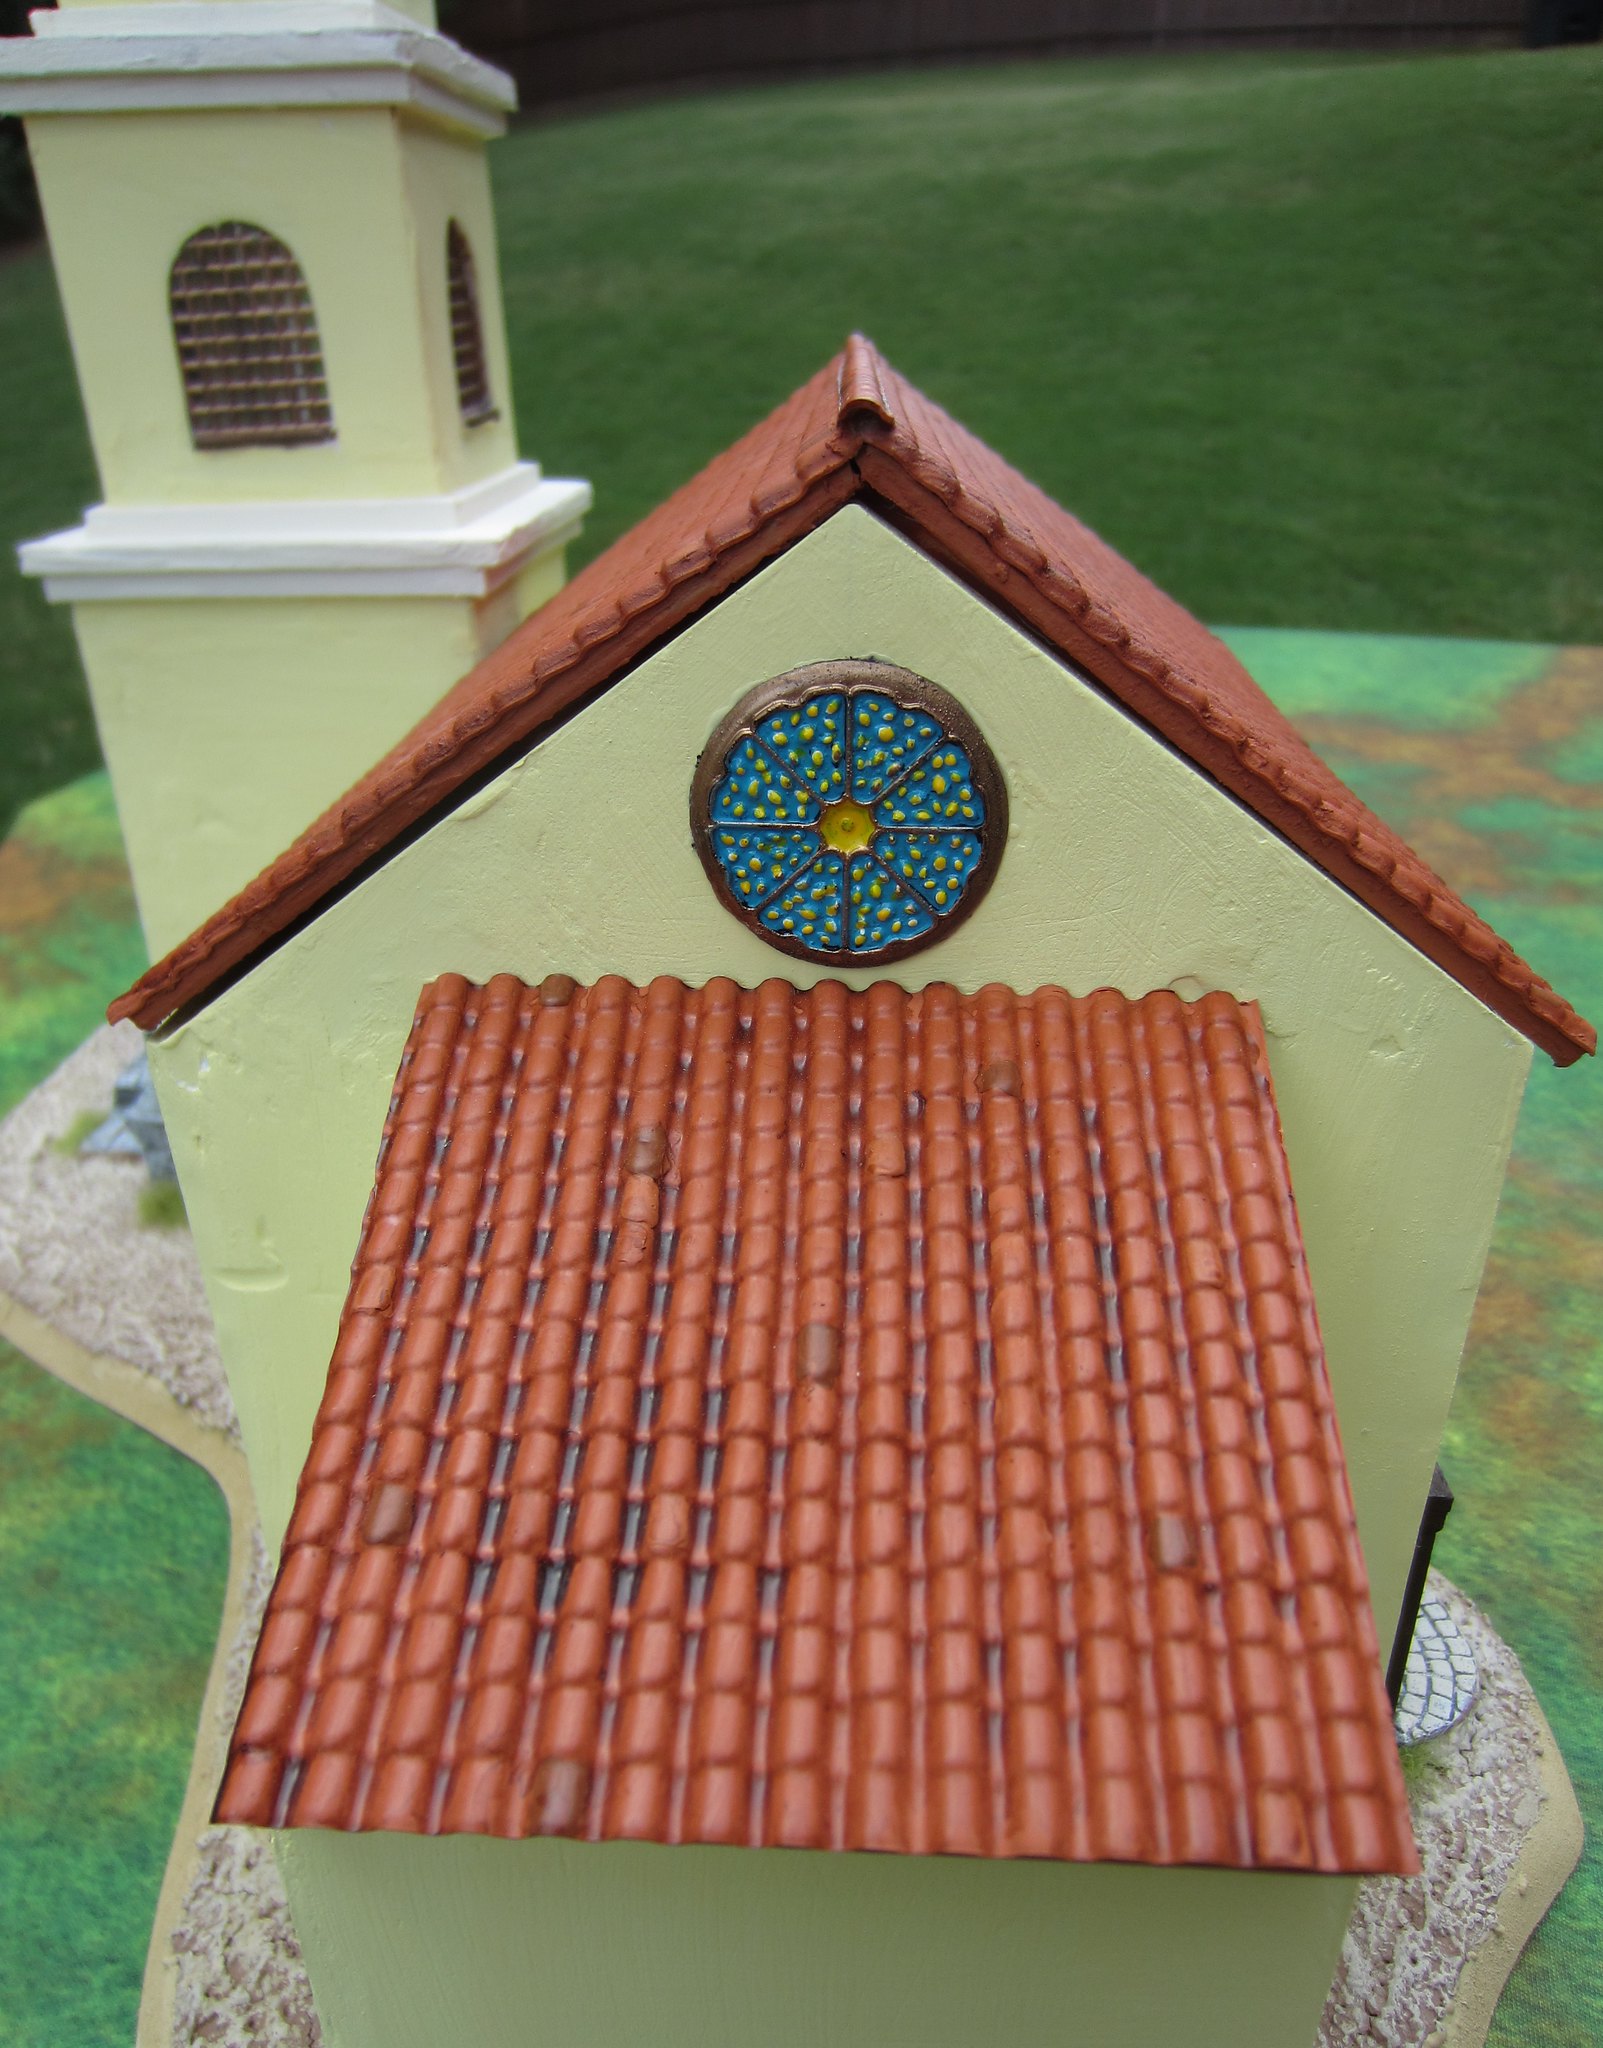
Turning this into what I hope looks like a stained glass window was easy. I sliced the top off the cap, primed it black, painted it, sprayed it with a gloss sealer, and then used the same metallic Sharpie to color the edge and lines between the panes. I repeated the process on the other side of the wall.
 |
| Painted window in rear wall. |
As far as painting the church, I followed Mr. Chalk's lead and used a pale yellow (Lemon Chiffon is the actual color), with relief painted in
Light Ivory. I also used
Light Ivory on all the inside walls of the church.
 |
| Painted church. |
For the wooden sills on the windows and the door frames, I used a dark brown color to create contrast.
 |
| Painted sills. |
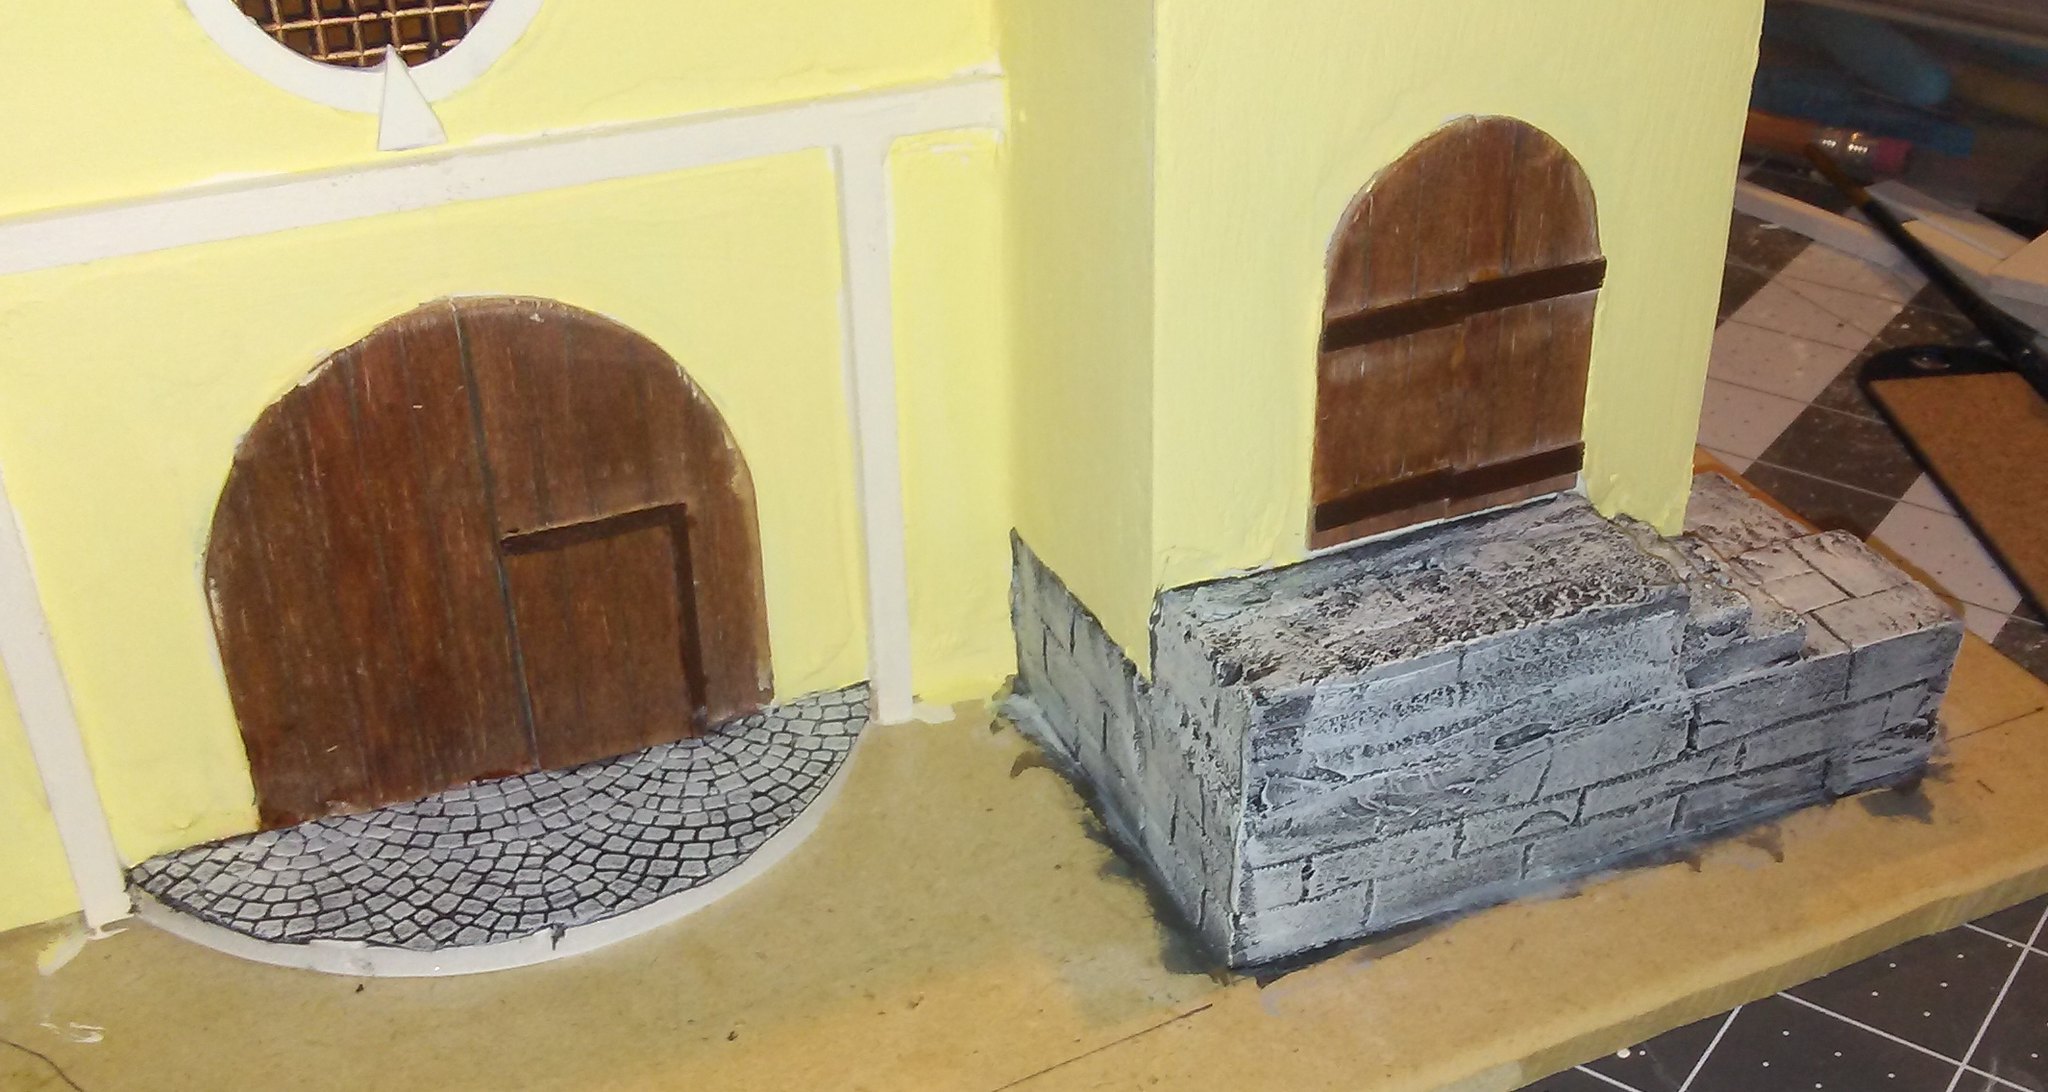
Now it was time for finishing the board the church sits on. I started by painting the foundation for the bell tower in a dark gray (
Hippo Gray).
 |
| Foundation painted. |
I did not know what to do with the raised step leading to the front door, Once again my bits bin came to the rescue! I found a sheet of
textured card from Tamiya that I thought would work well. I cut it to size and glued it down.
 |
| Tamiya Diorama Material Sheet. |
 |
| Textured card applied. |
I was so pleased with the look if it, I repeated the process on the side door.
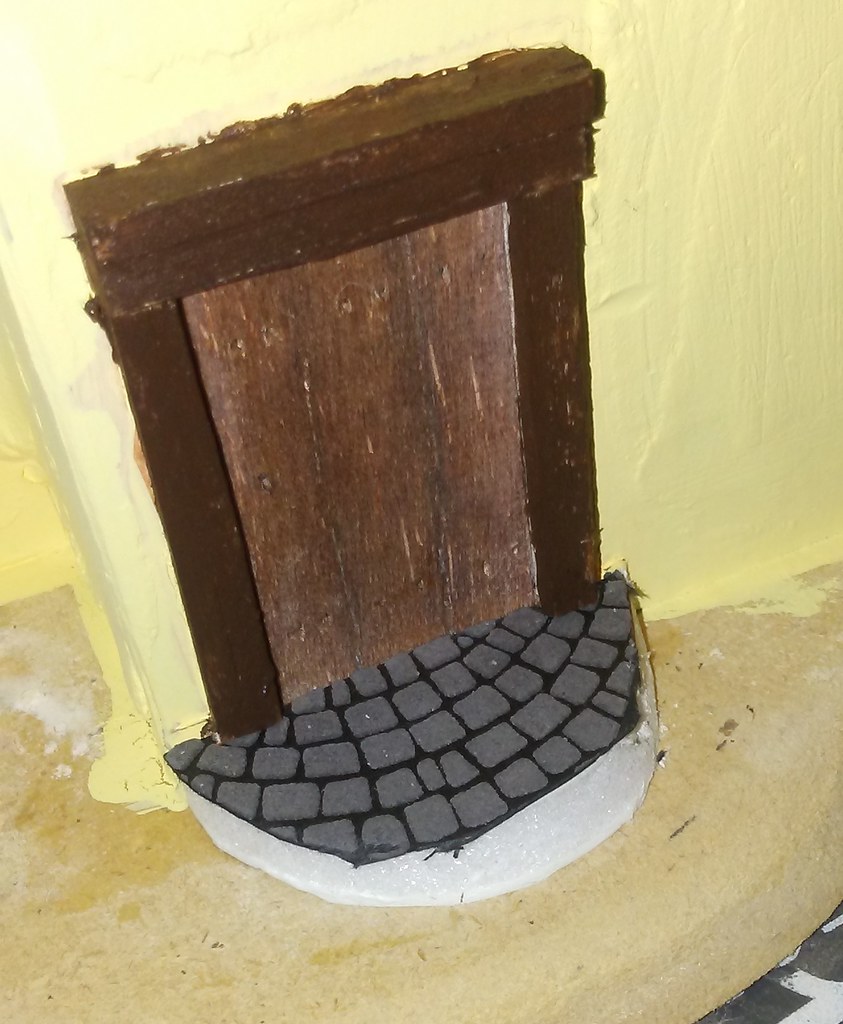 |
| Side door. |
I gave the stone foundation a wash with Citadel Shade
Nuln Oil, then gave it a fairly heavy drybrush of a lighter gray (
Quaker Gray), which I also used on the textured card.
 |
| Light gray drybrush applied. |
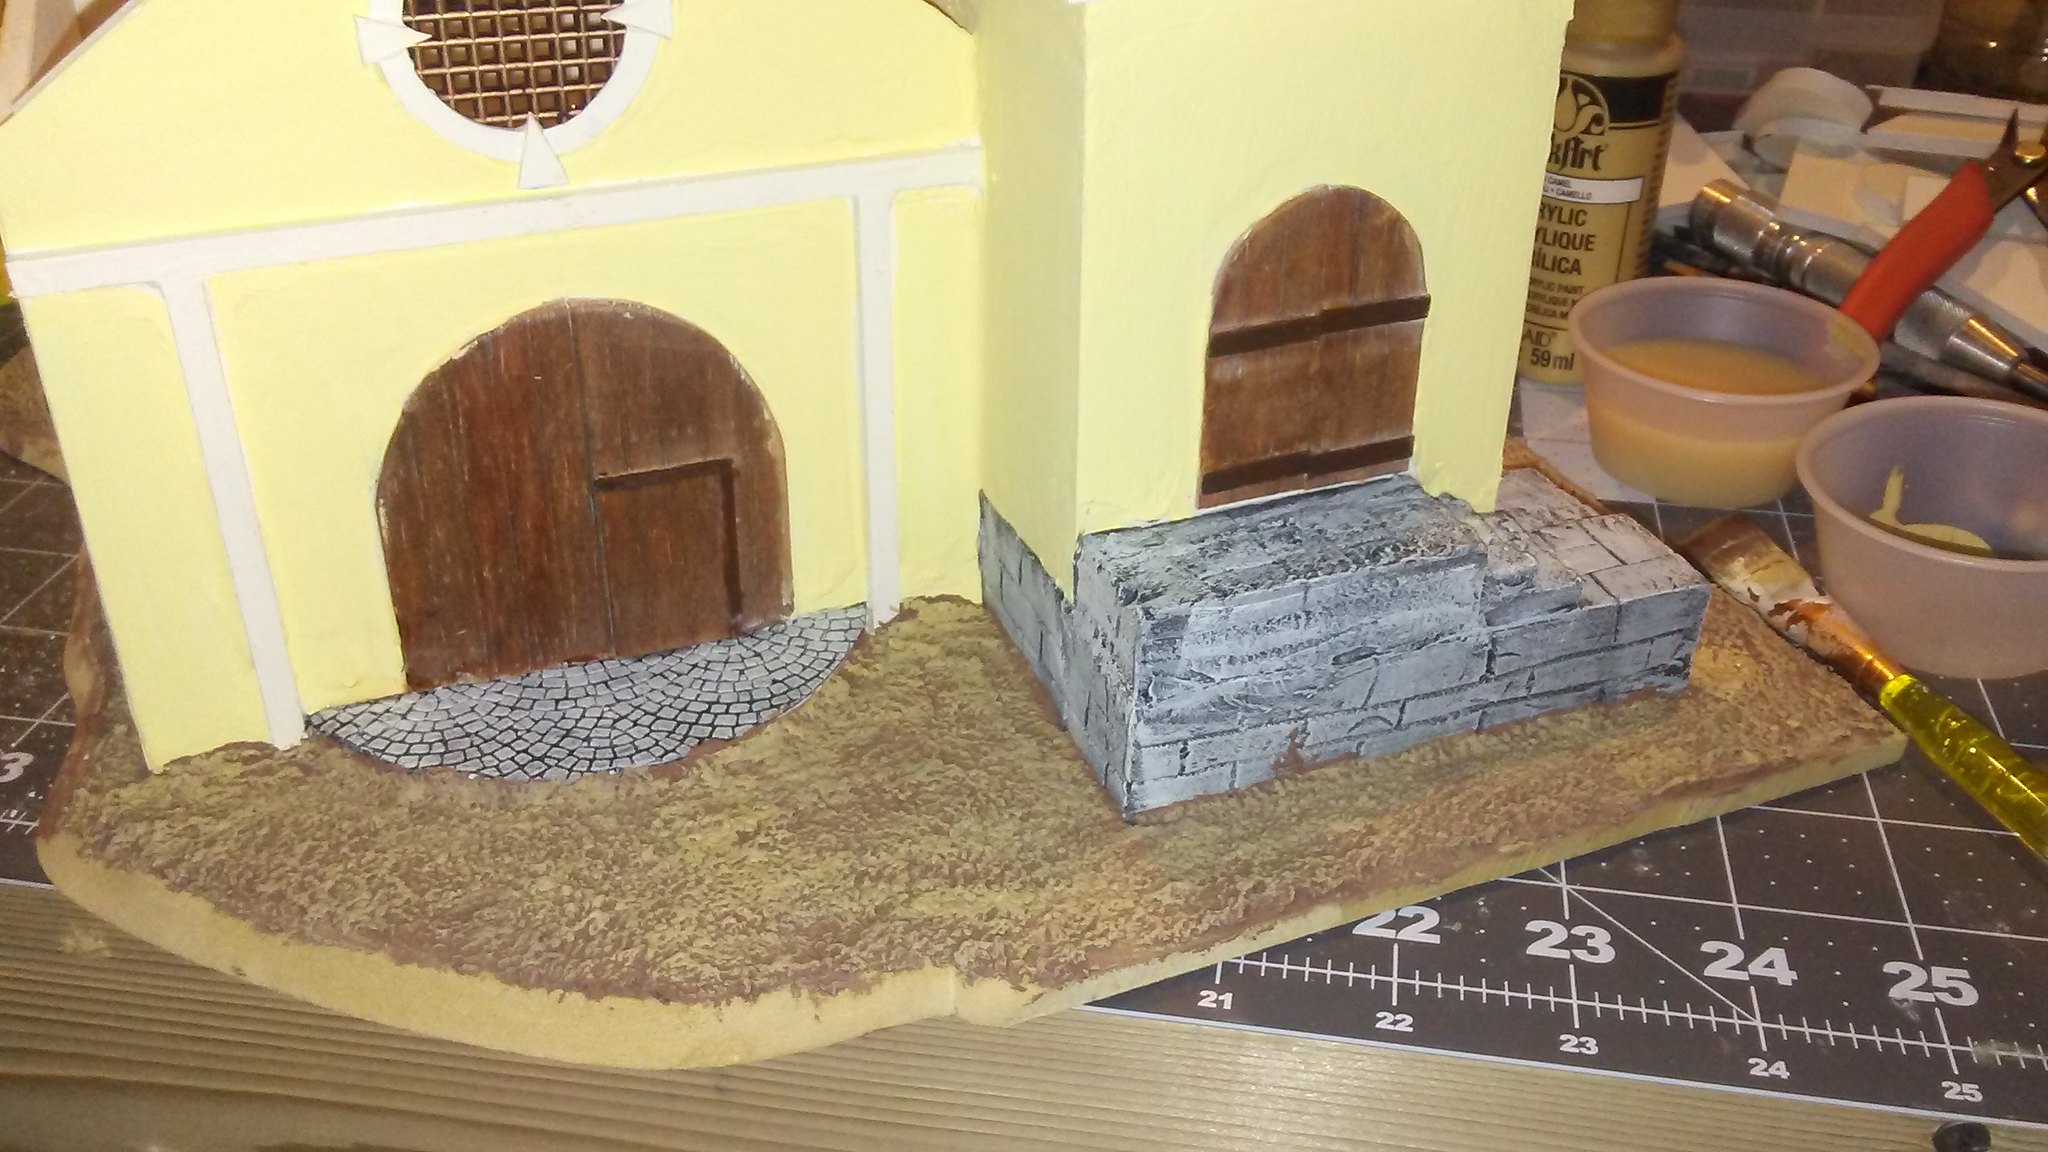
Once that was done, I applied my cheap and easy terrain texture to the entire board. If you missed it in the posts on desert terrain, I take filler, paint and cheap sand and mix into a thick, colored goop.
 |
| Terrain goop before mixing. |
Then I just take a small spatula and spread it evenly on the baseboard, making sure to get it right up against the walls of the building.
 |
| Applying terrain goop. |
Once the board is covered, just set it aside to dry completely. I usually leave it overnight.
 |
| Terrain board covered in goop. |
After it is dry, I give it an initial heavy drybrush of a light tan color (
Camel), followed by a lighter drybrush of
Linen.While applying the linen, I also used it on the entry step to make it blend a little better with the surrounding terrain.
 |
| First drybrush - heavy application of a medium brown. |
 |
| Second drybrush - light application of a lighter brown. |
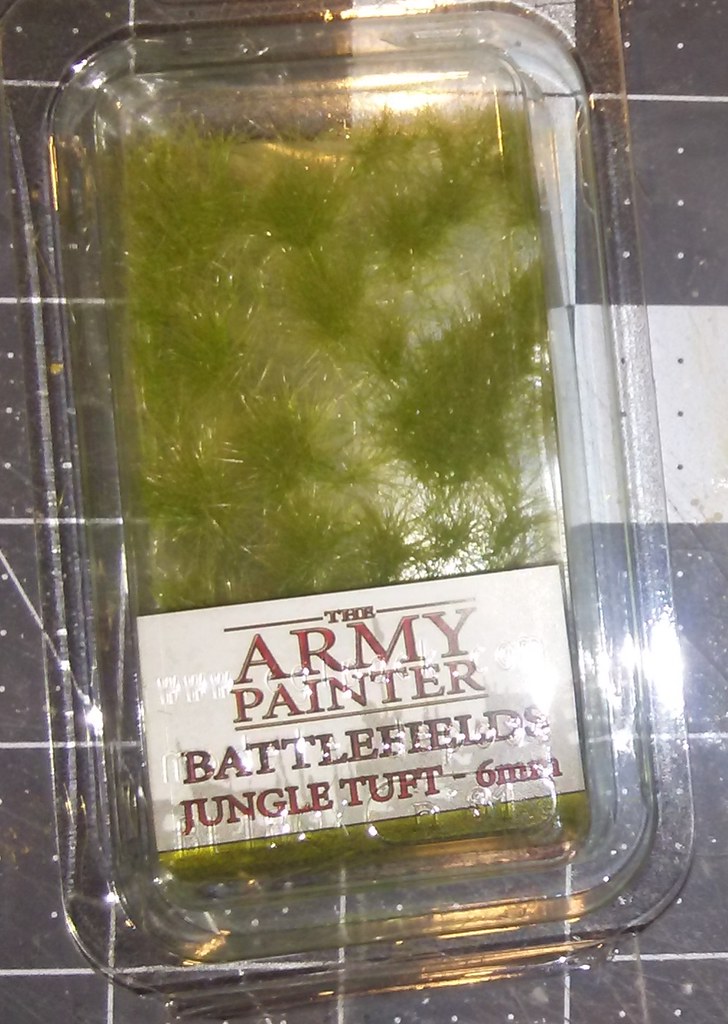
Since it is just a drybrush, it dries quickly. As soon as it's dry, I add some grass tufts. In this instance I chose a light green tuft from
Army Painter called Jungle Tuft.
 |
| Army Painter Jungle Tuft. |
In my opinion, the key to using the tufts is to not overdo it. They're meant to be an accent.
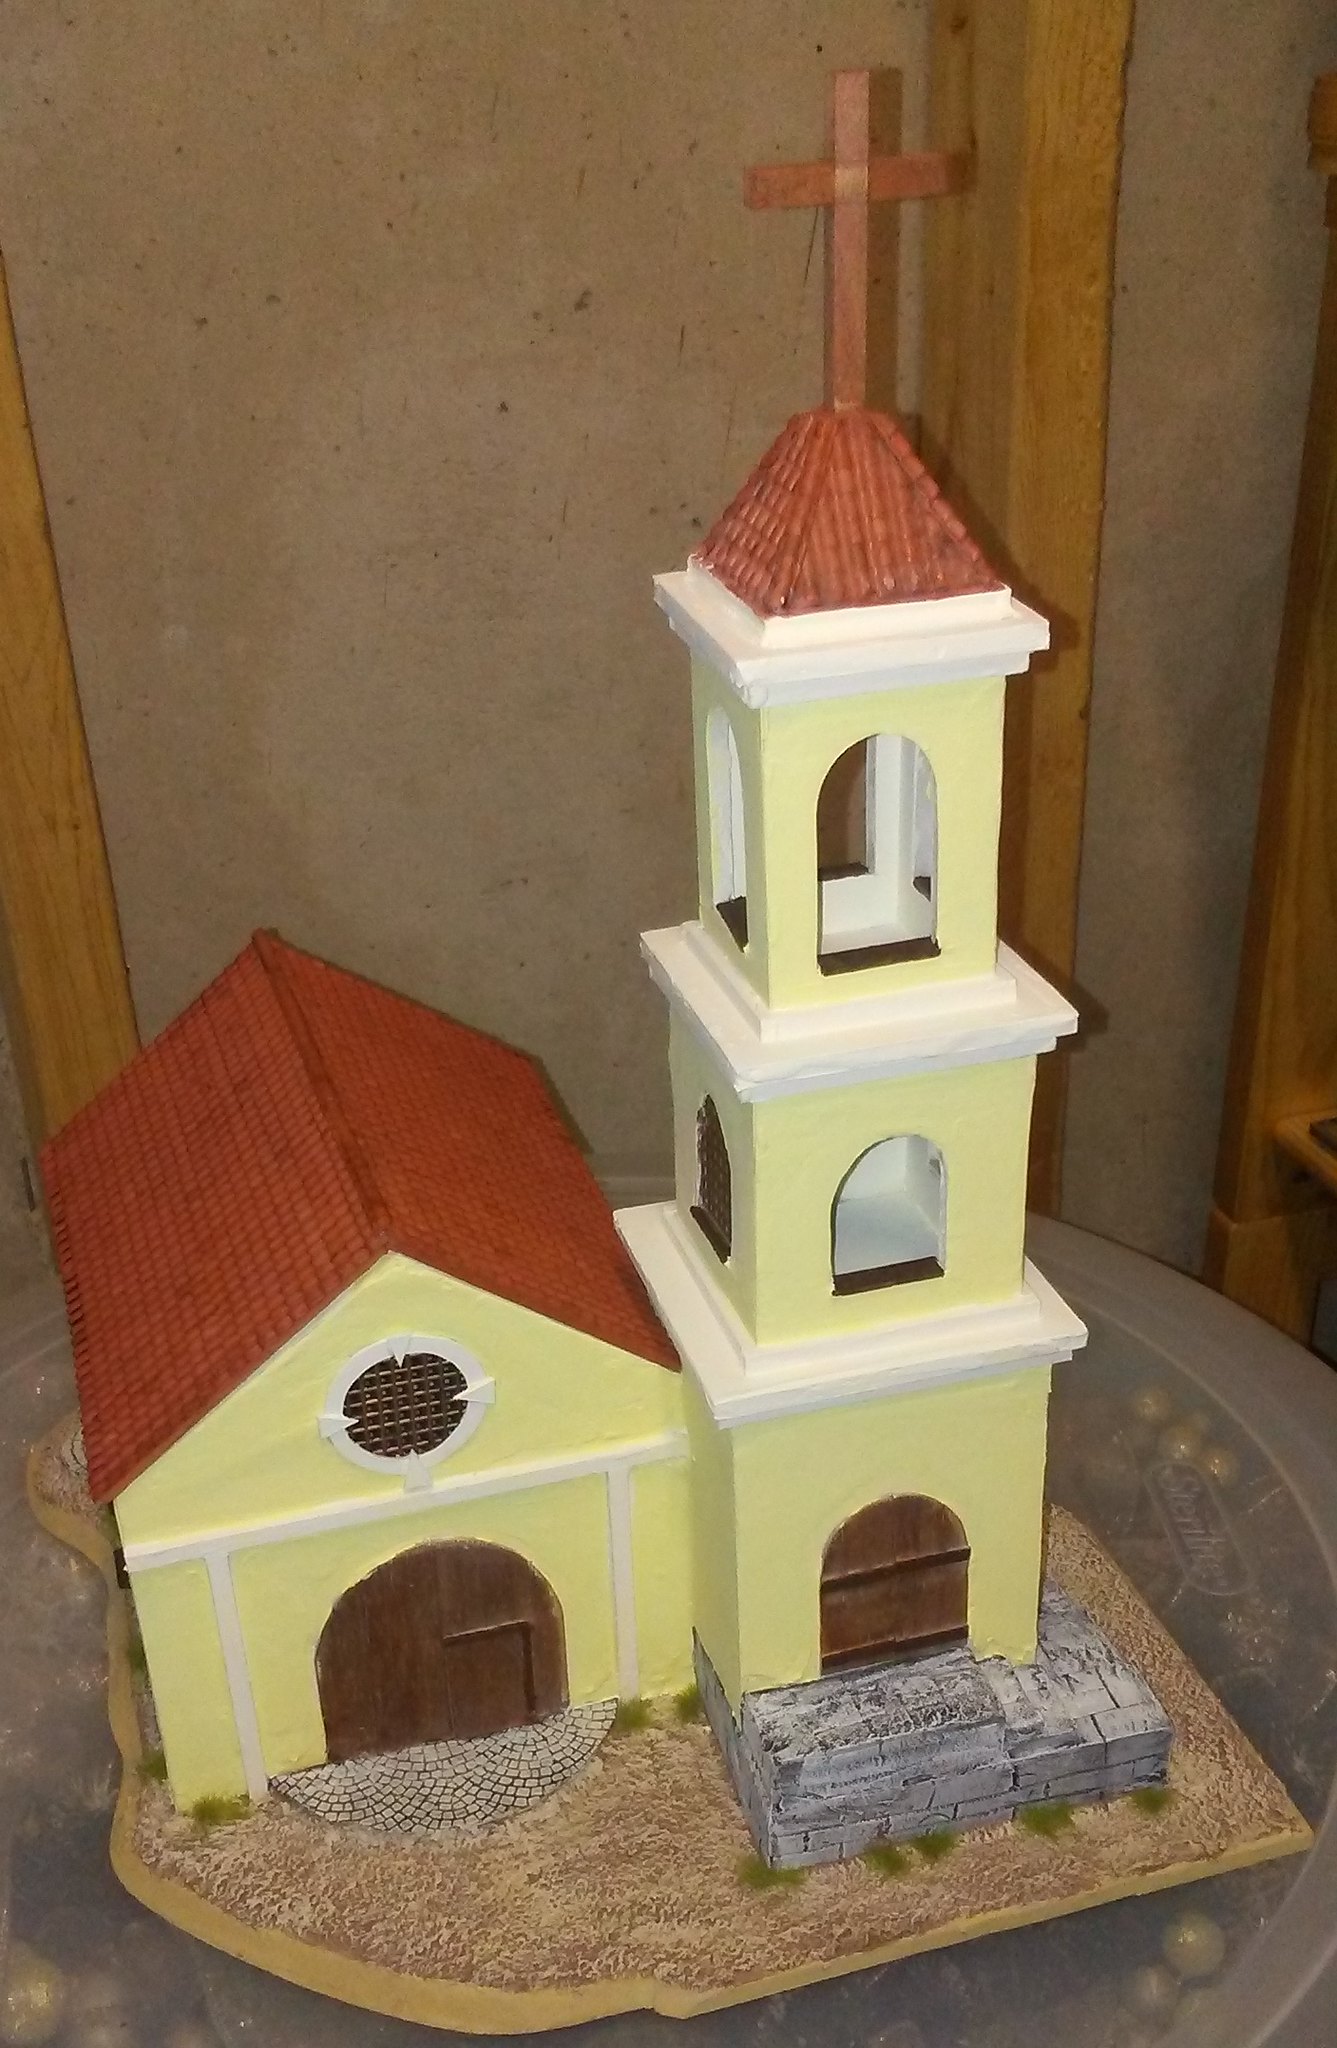 |
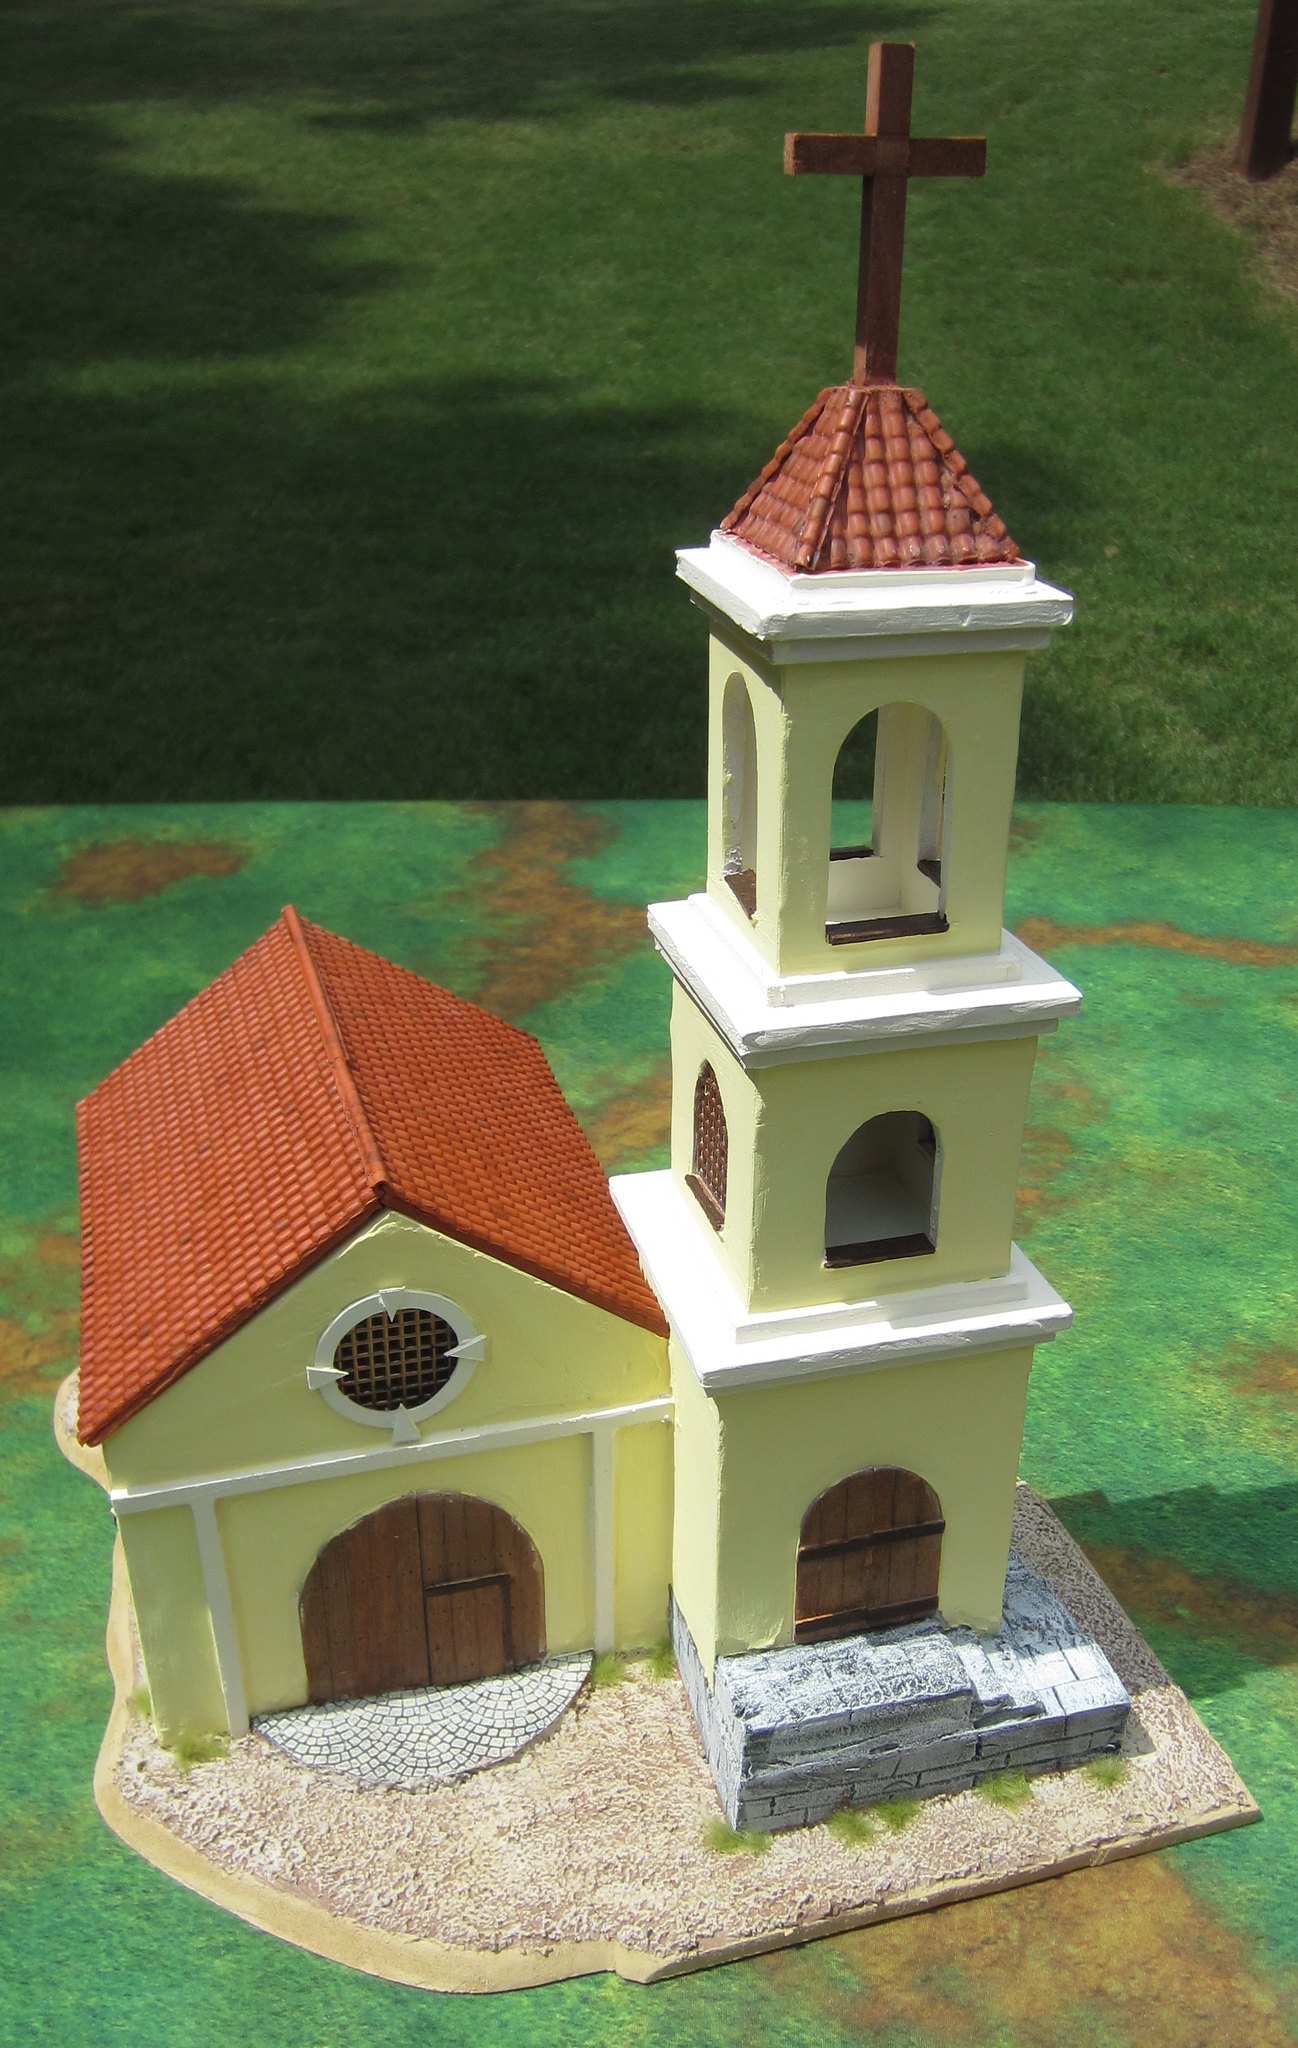
| Completed church. |
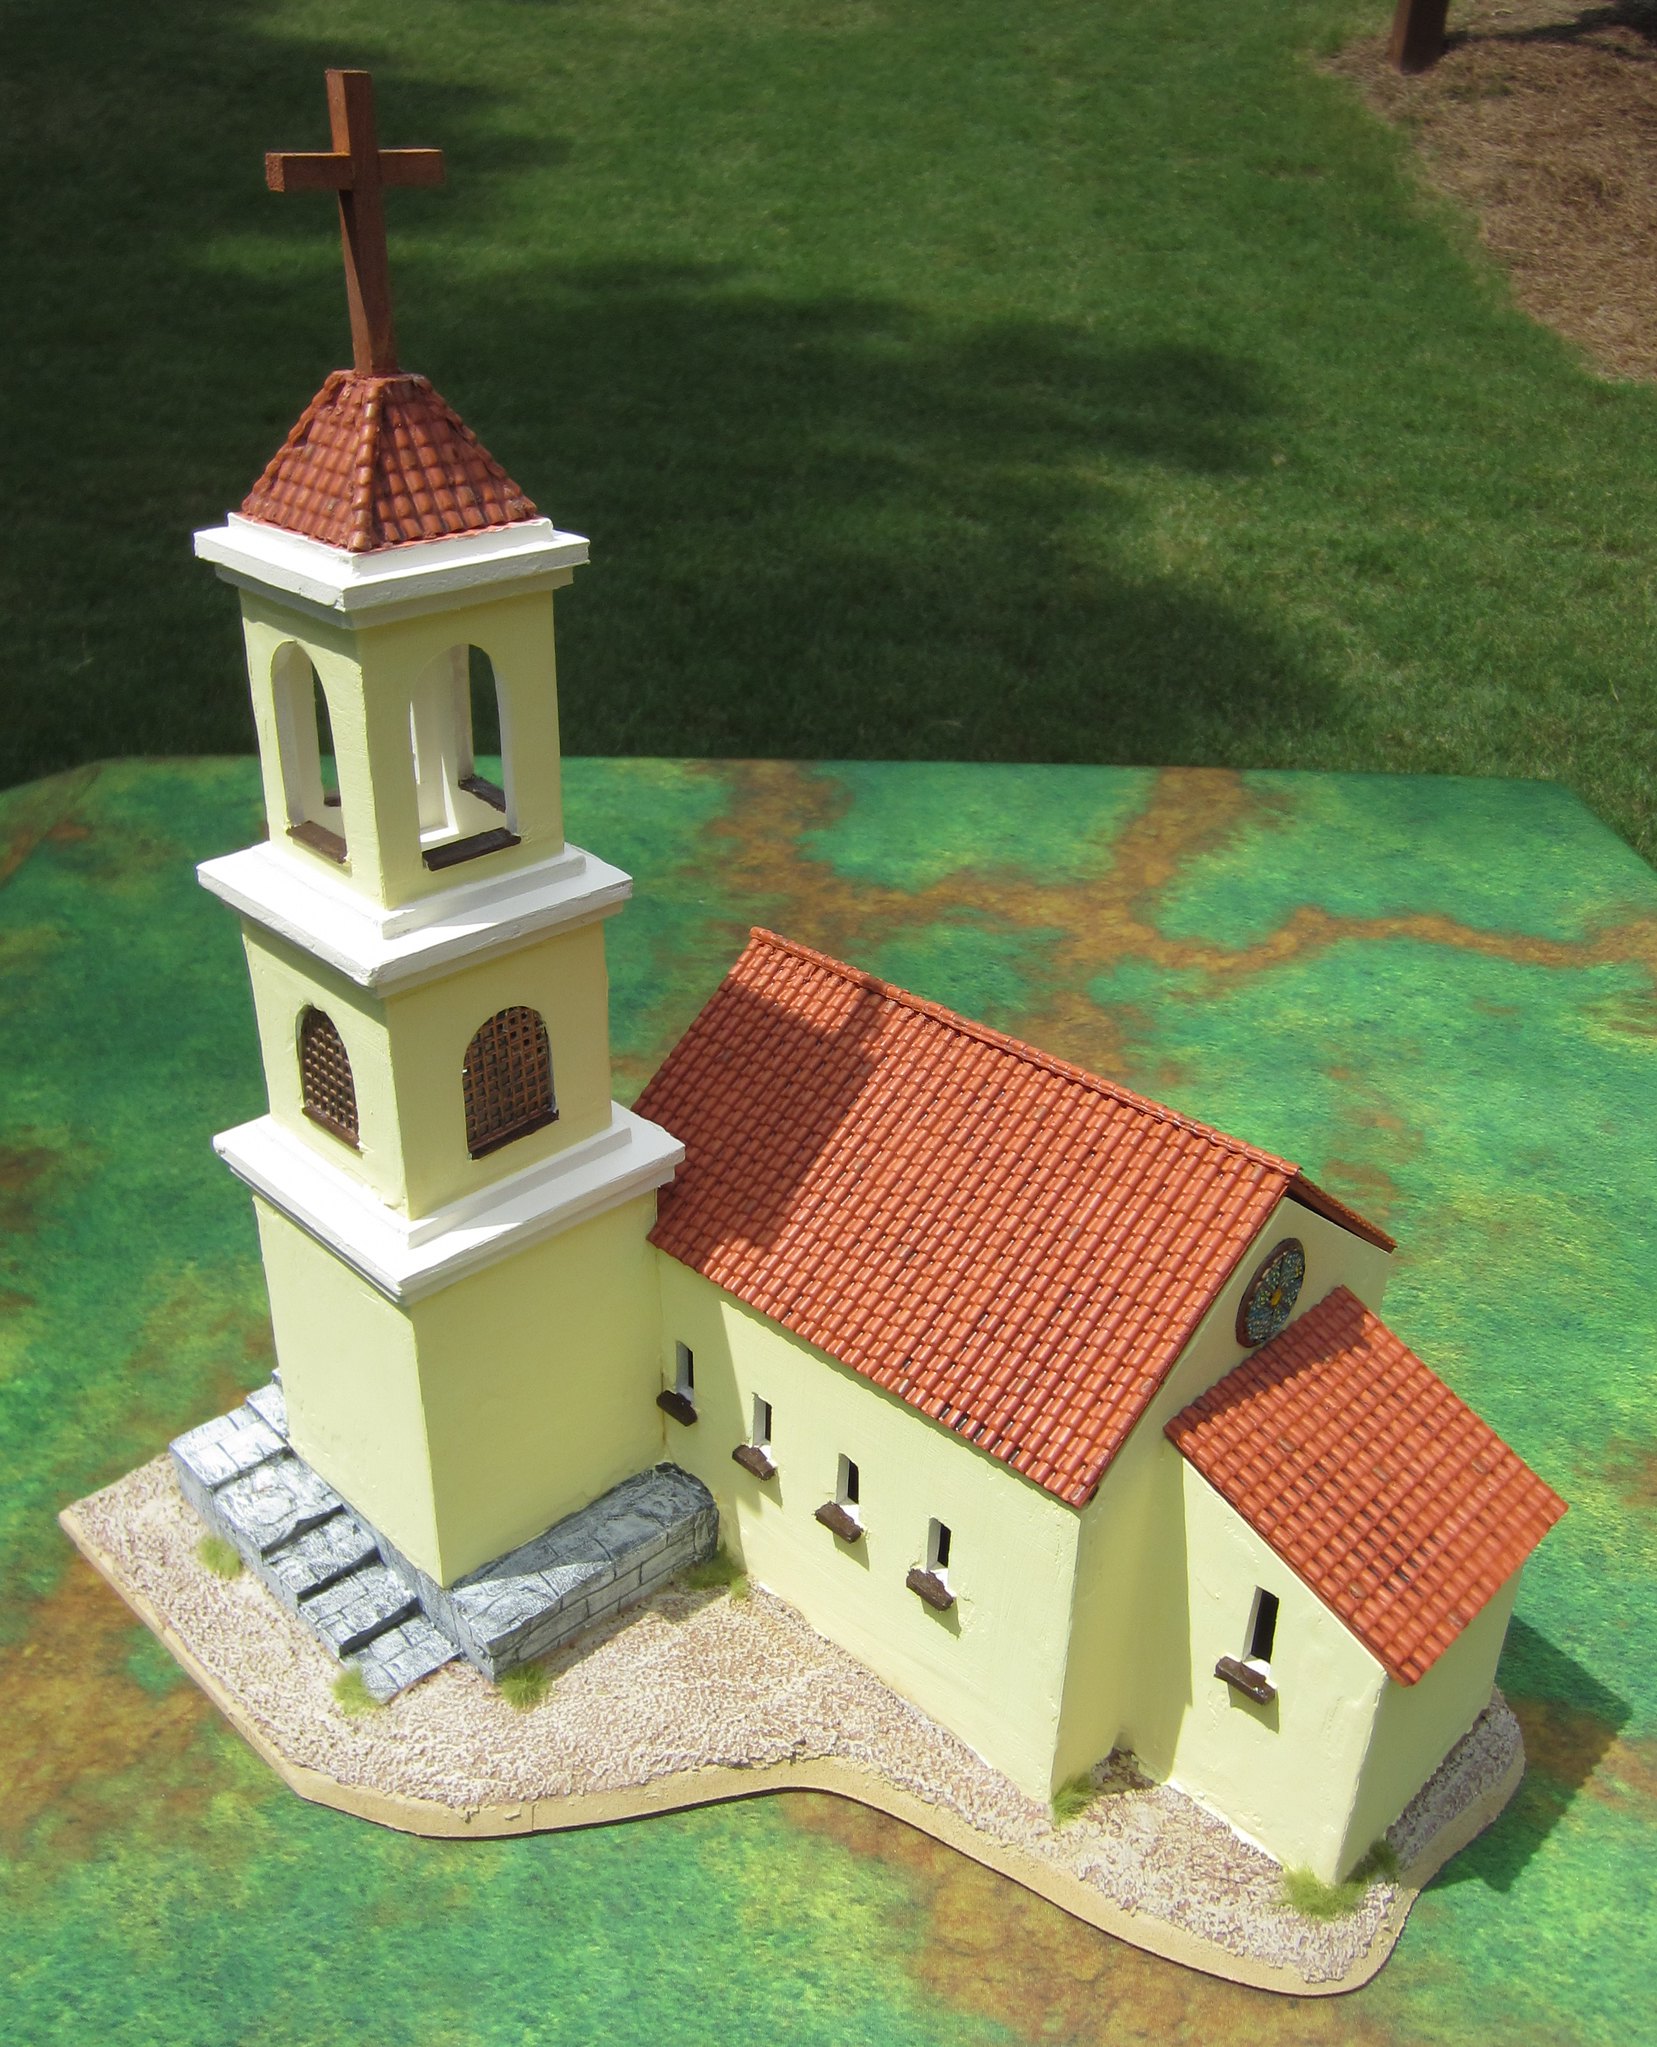
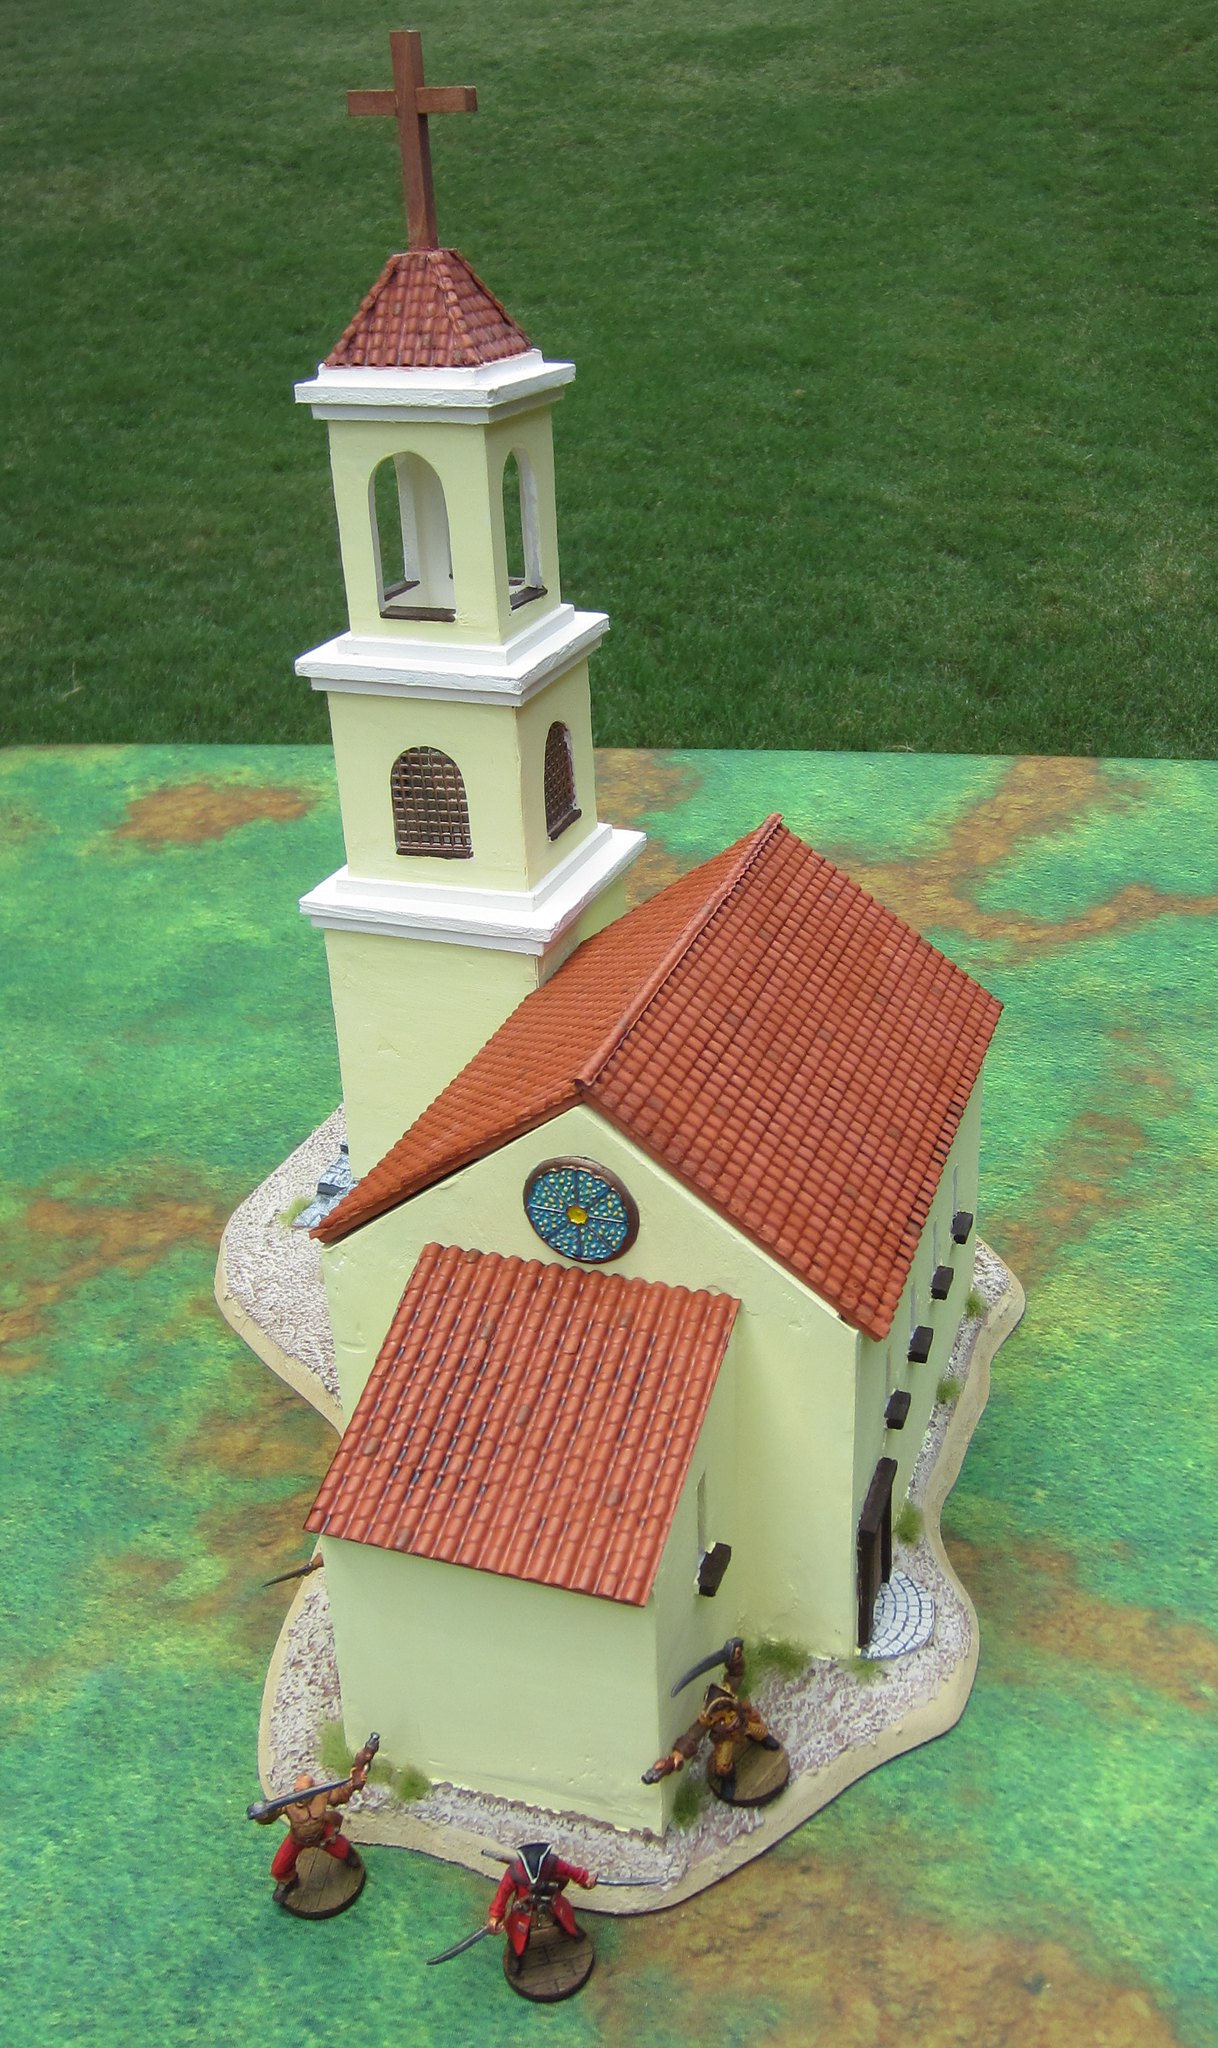
And there you have it - the completed Spanish colonial church. Here's some "glamour" shots to show off the building and details.
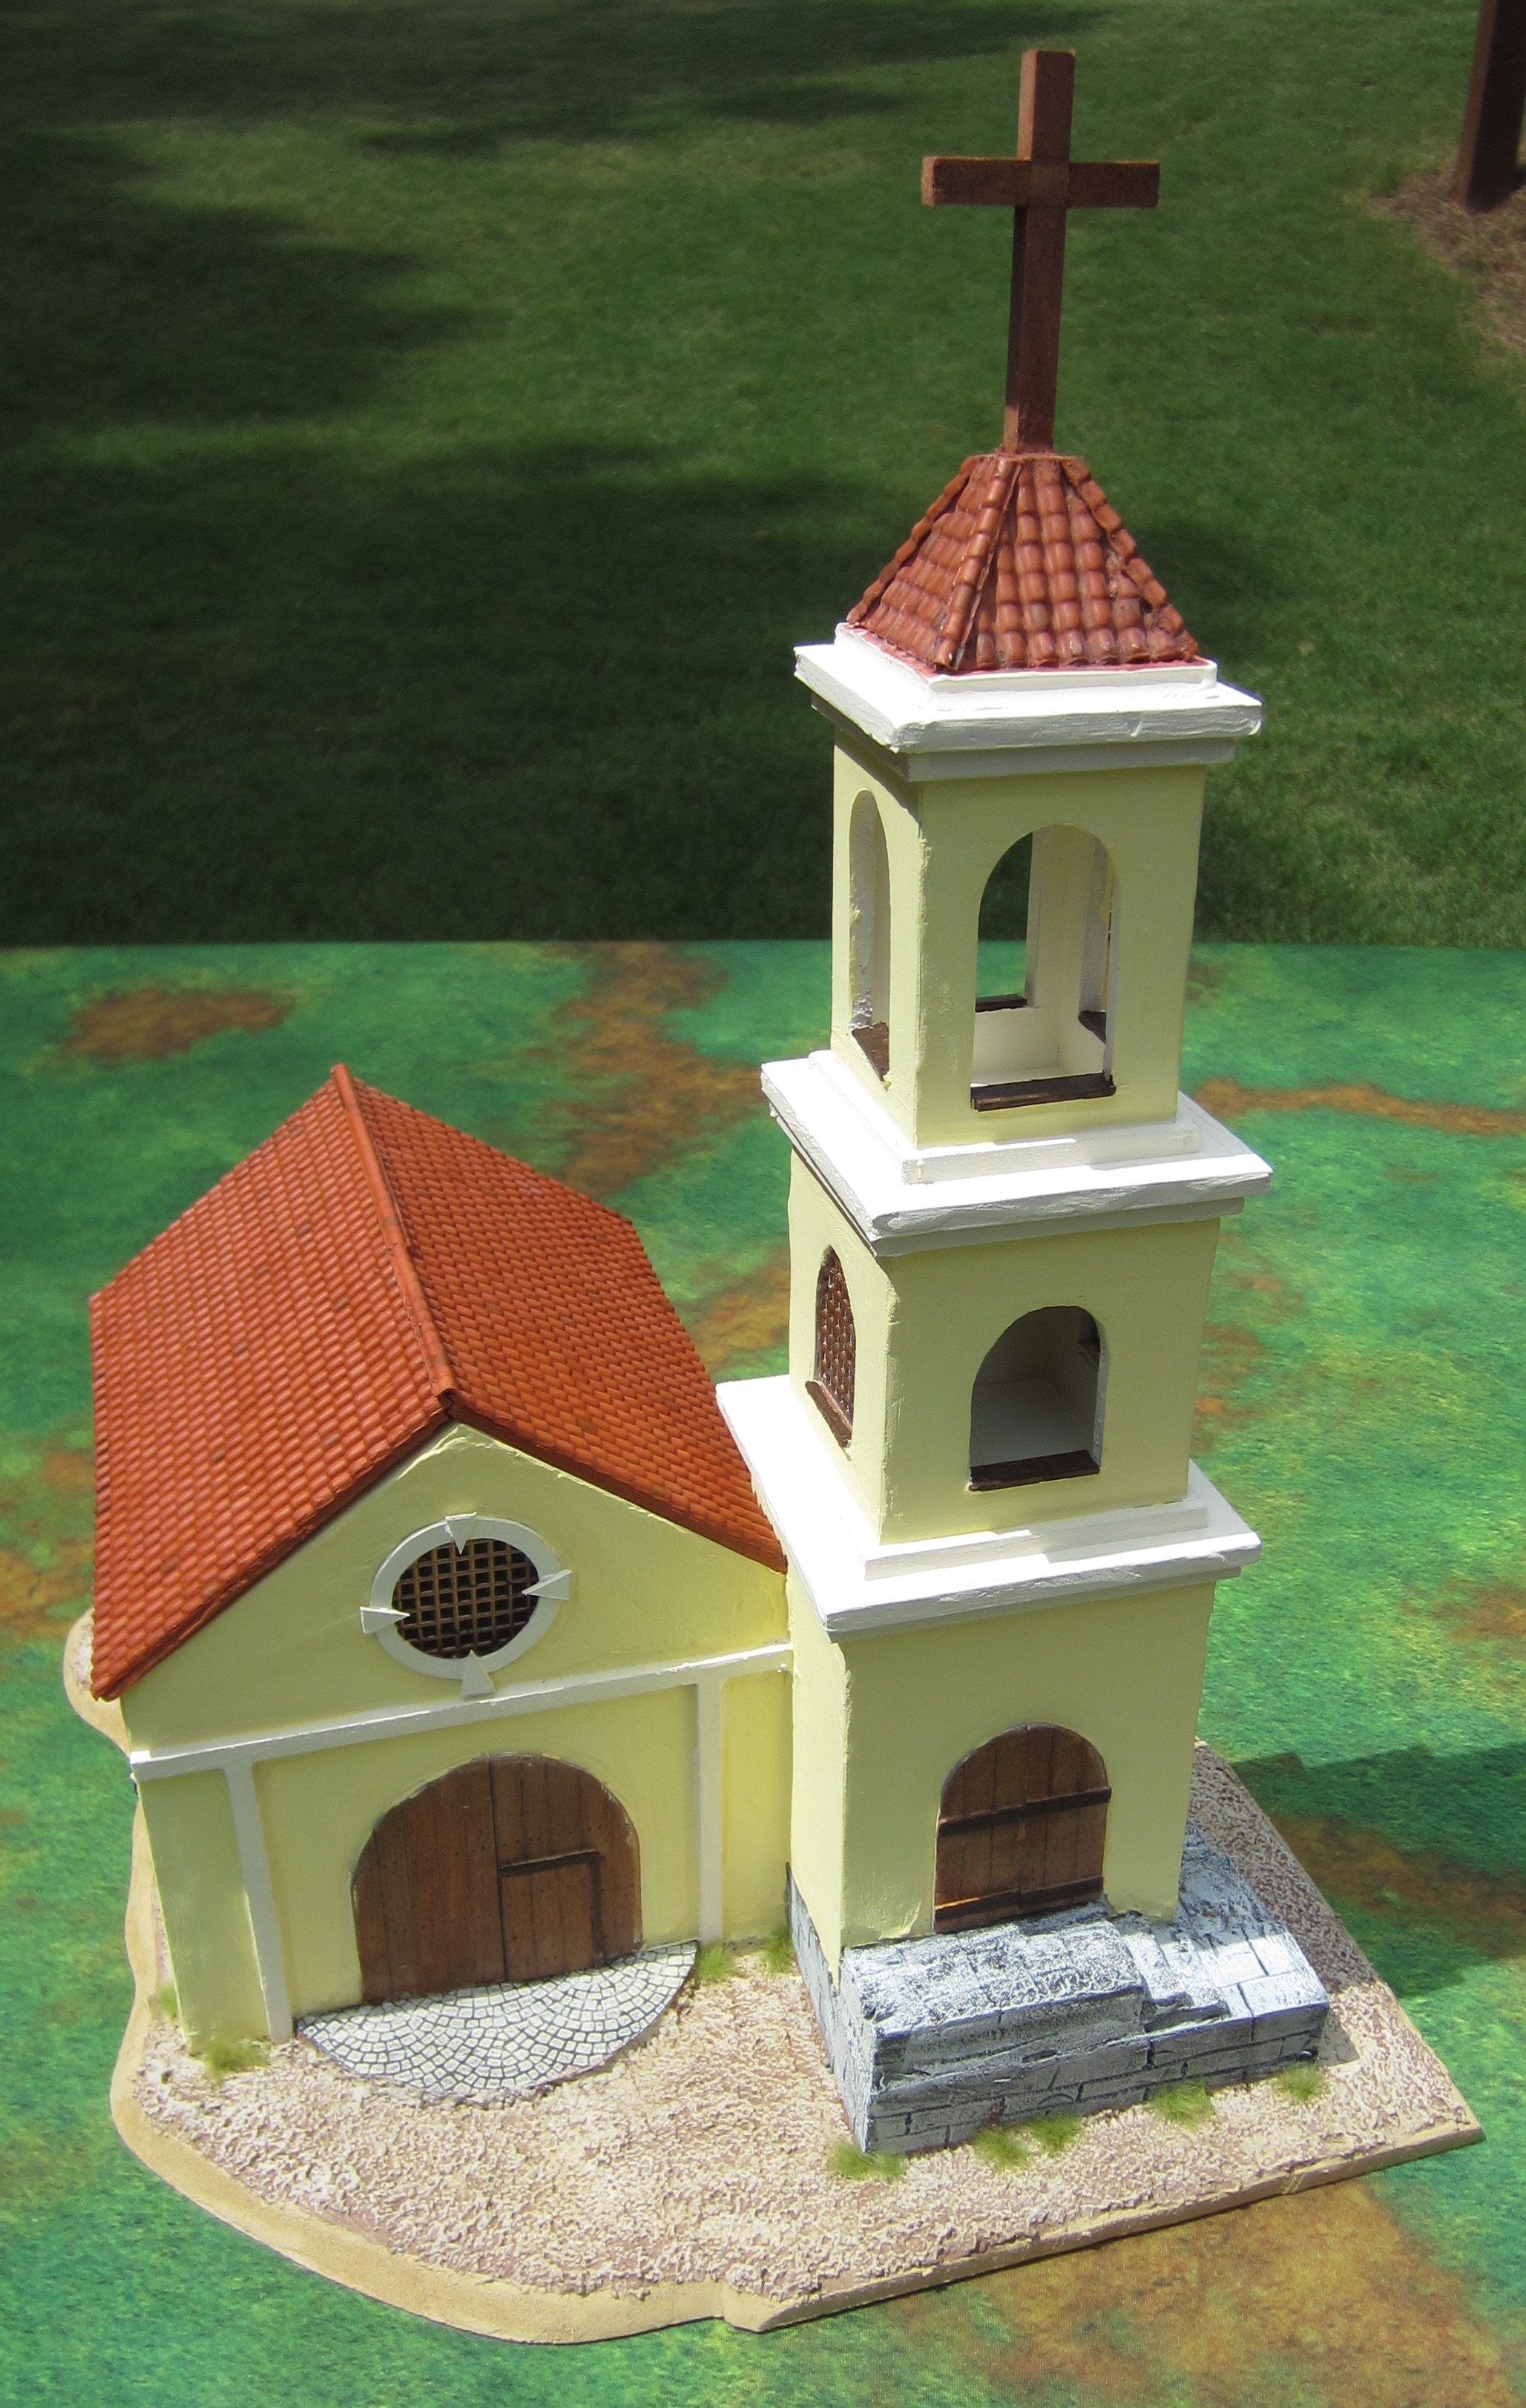 |
| Front of church. |
 |
| Side view of church. |
 |
| Rear view of church. |
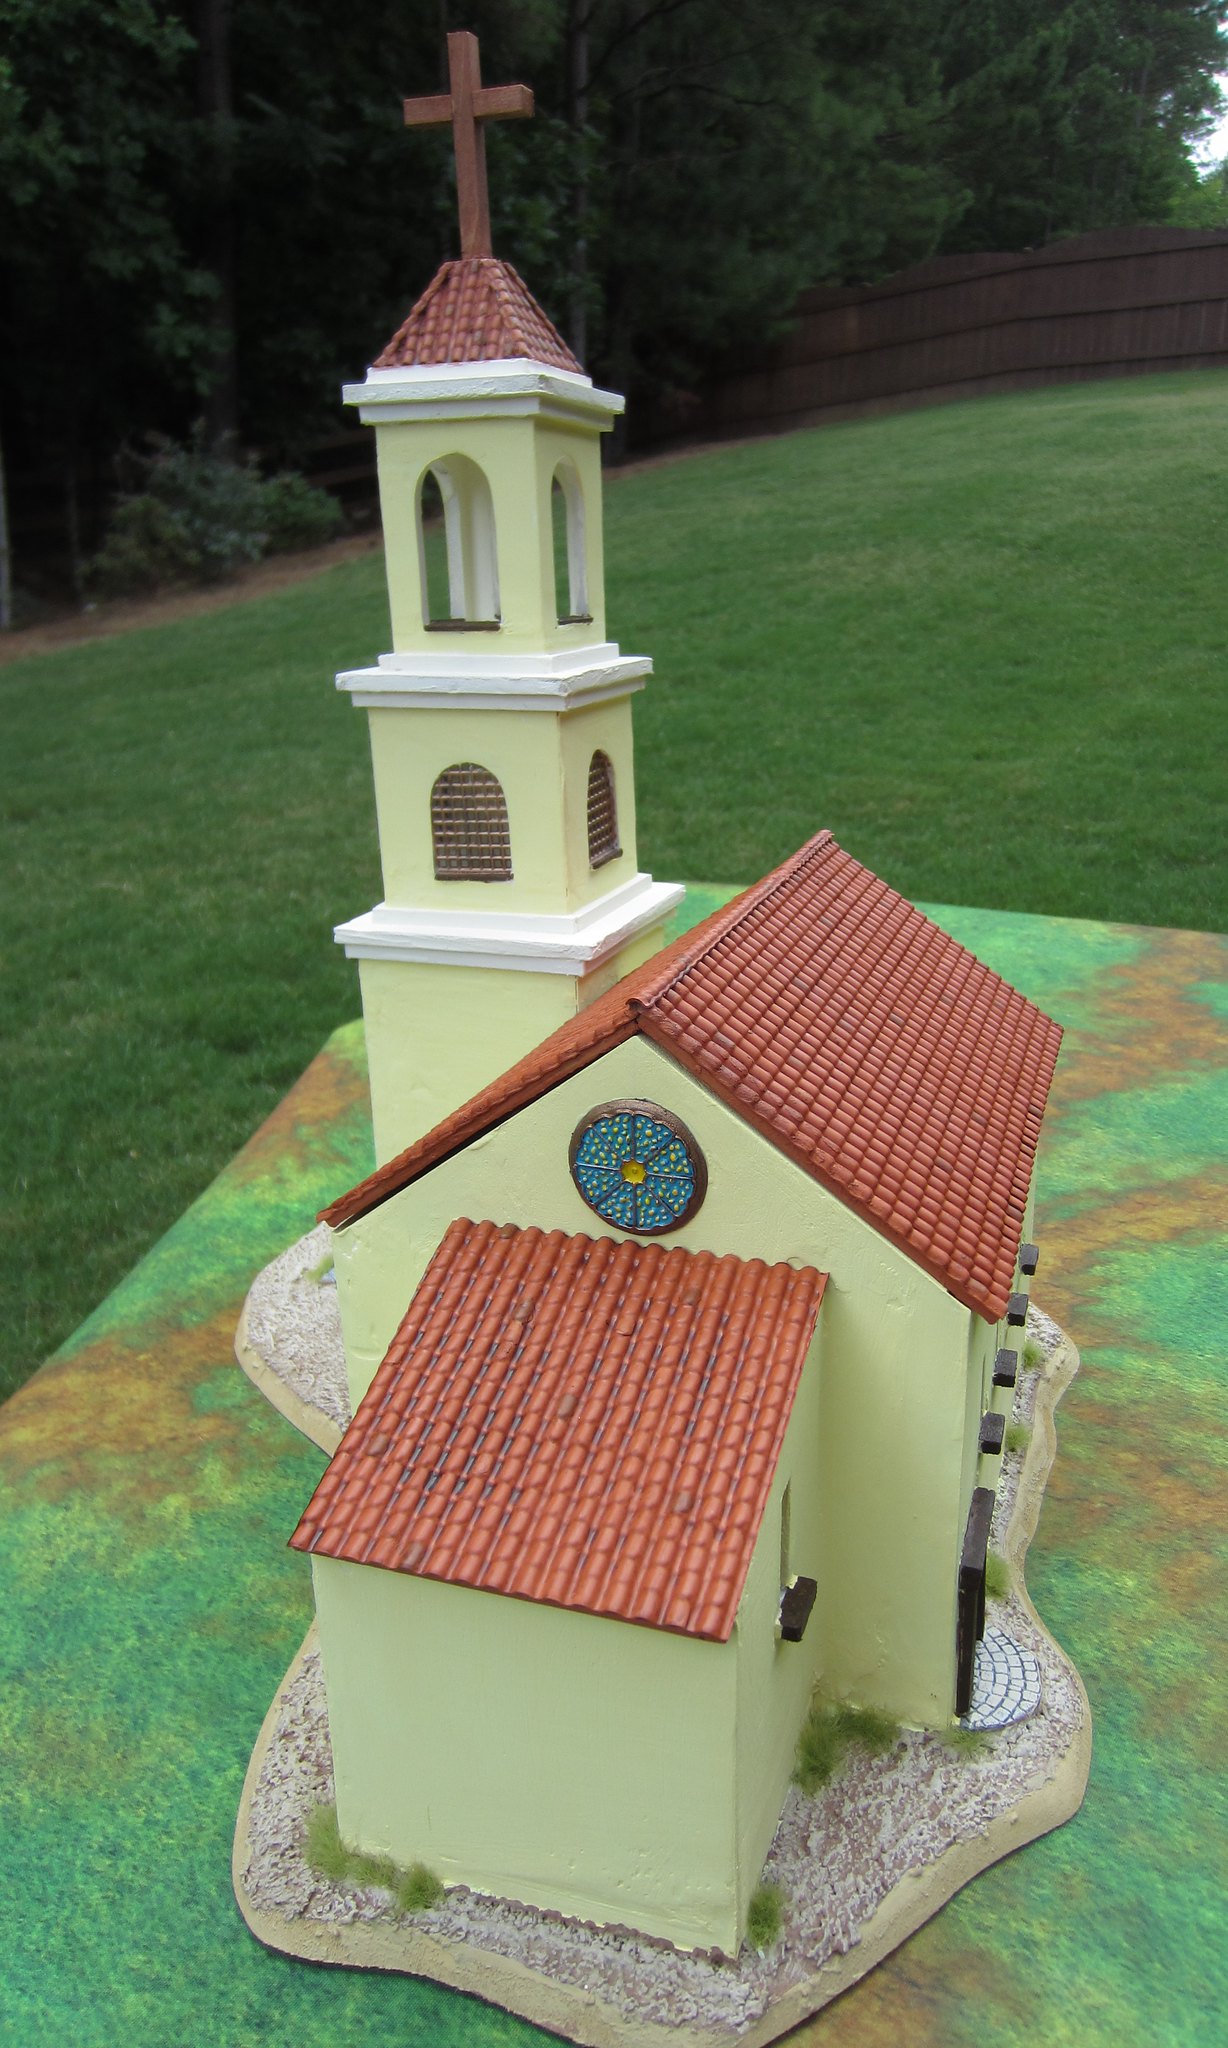 |
| Other rear view of church. |
 |
| Detail of "stained glass" window. |
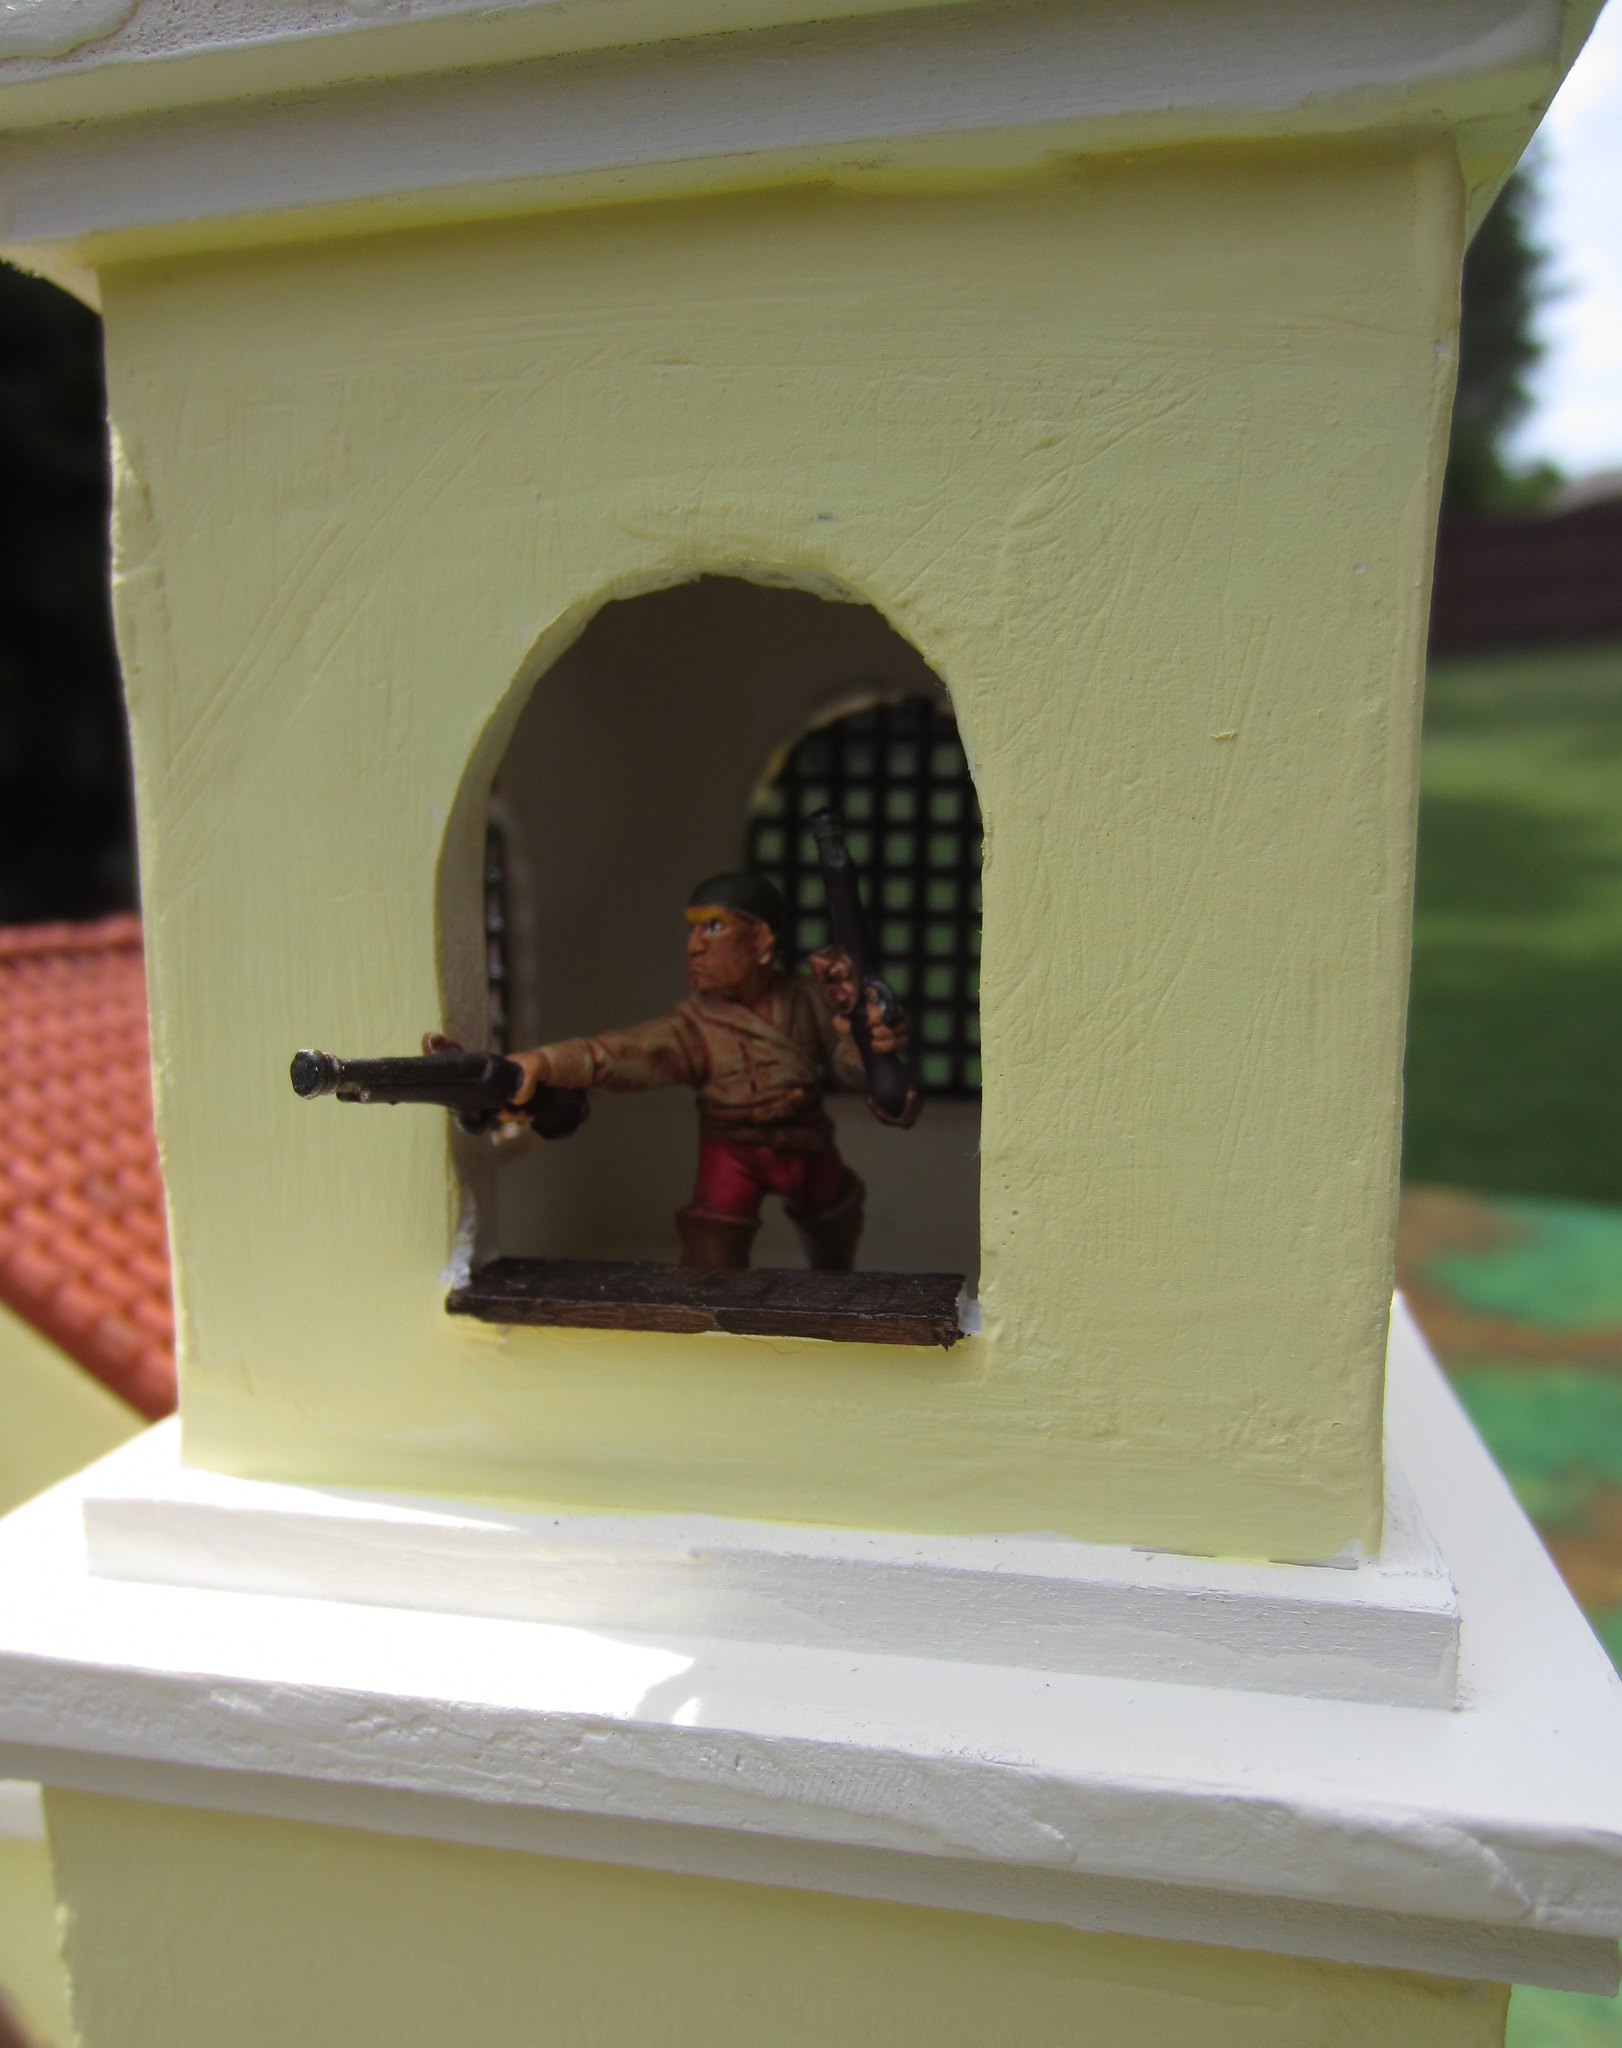 |
| Pirate in bell tower. |
 |
| Pirates around church. |
 |
| Pirates by front entrance to church. |
 |
| Pirates at rear of church. |
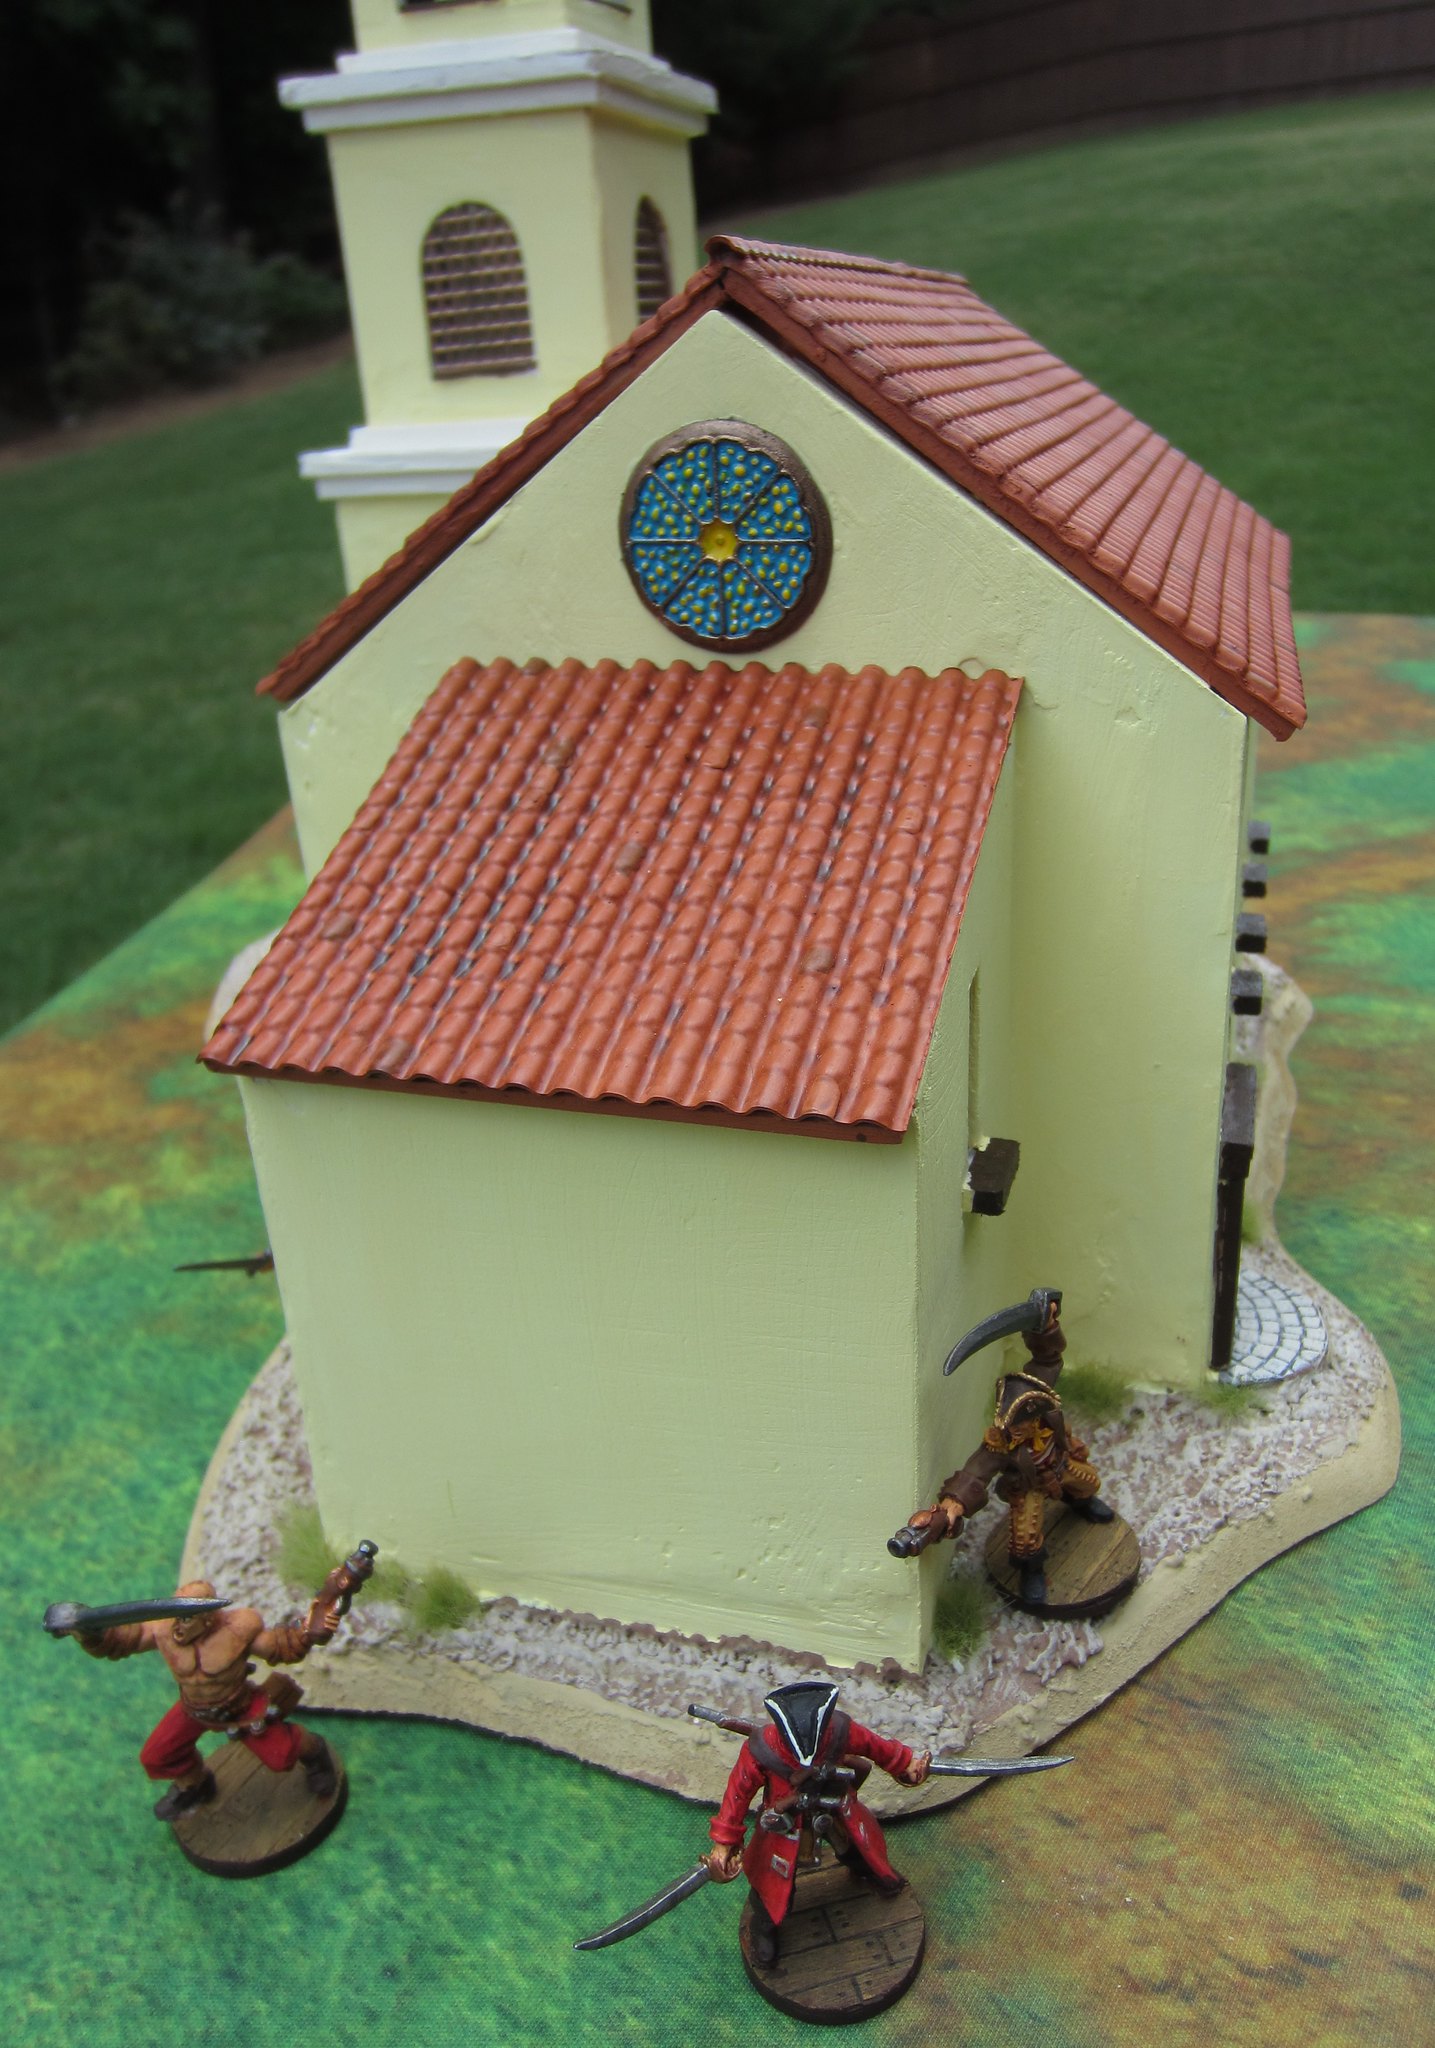 |
| Pirates at rear of church. |
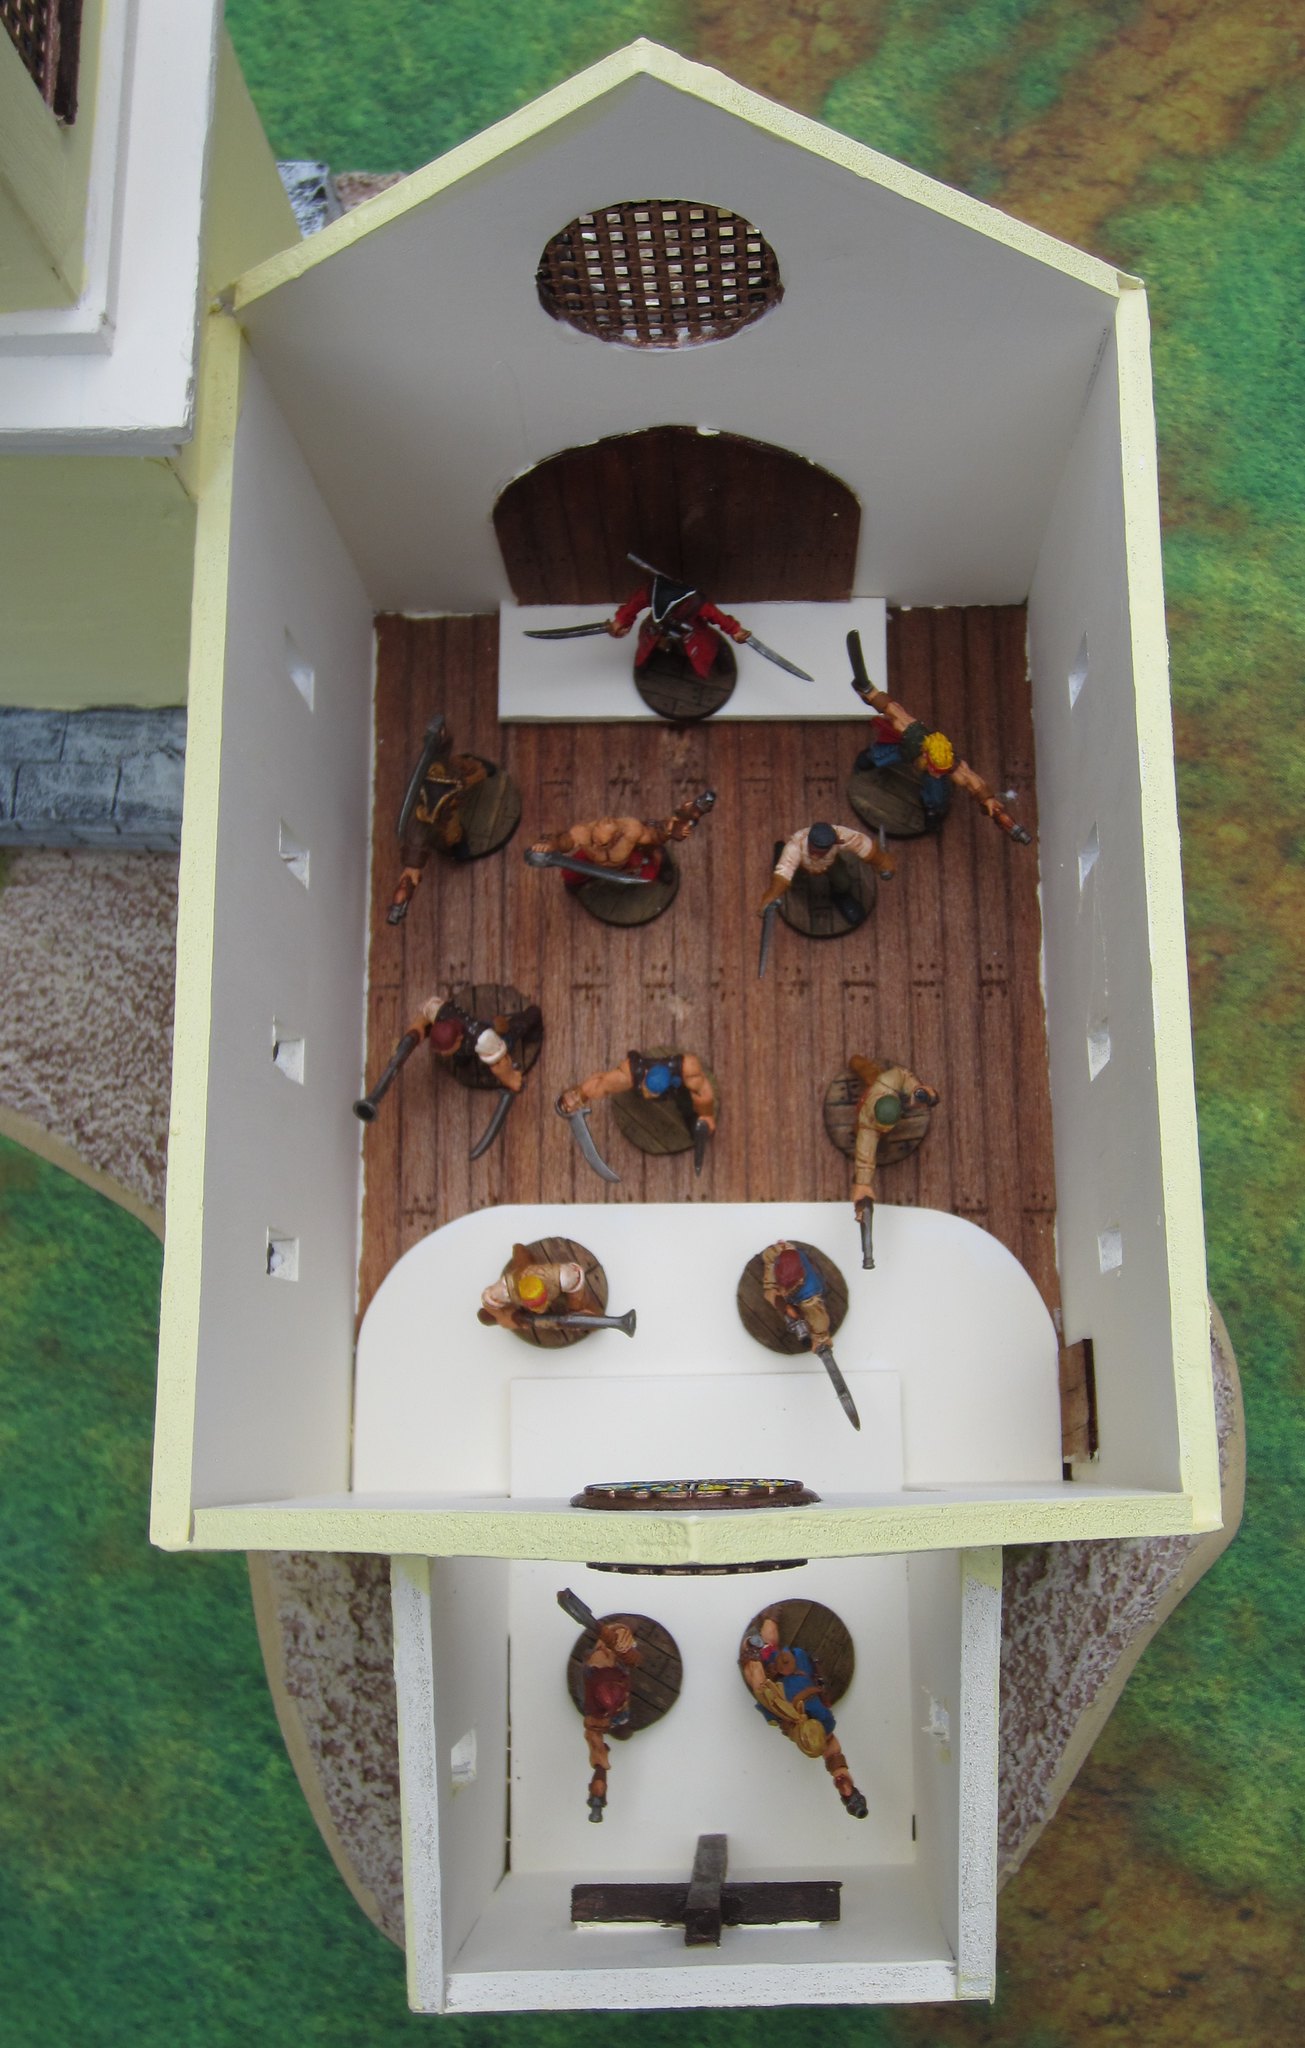 |
| Pirates inside church. |
 |
| Church door seen through colonnade. |
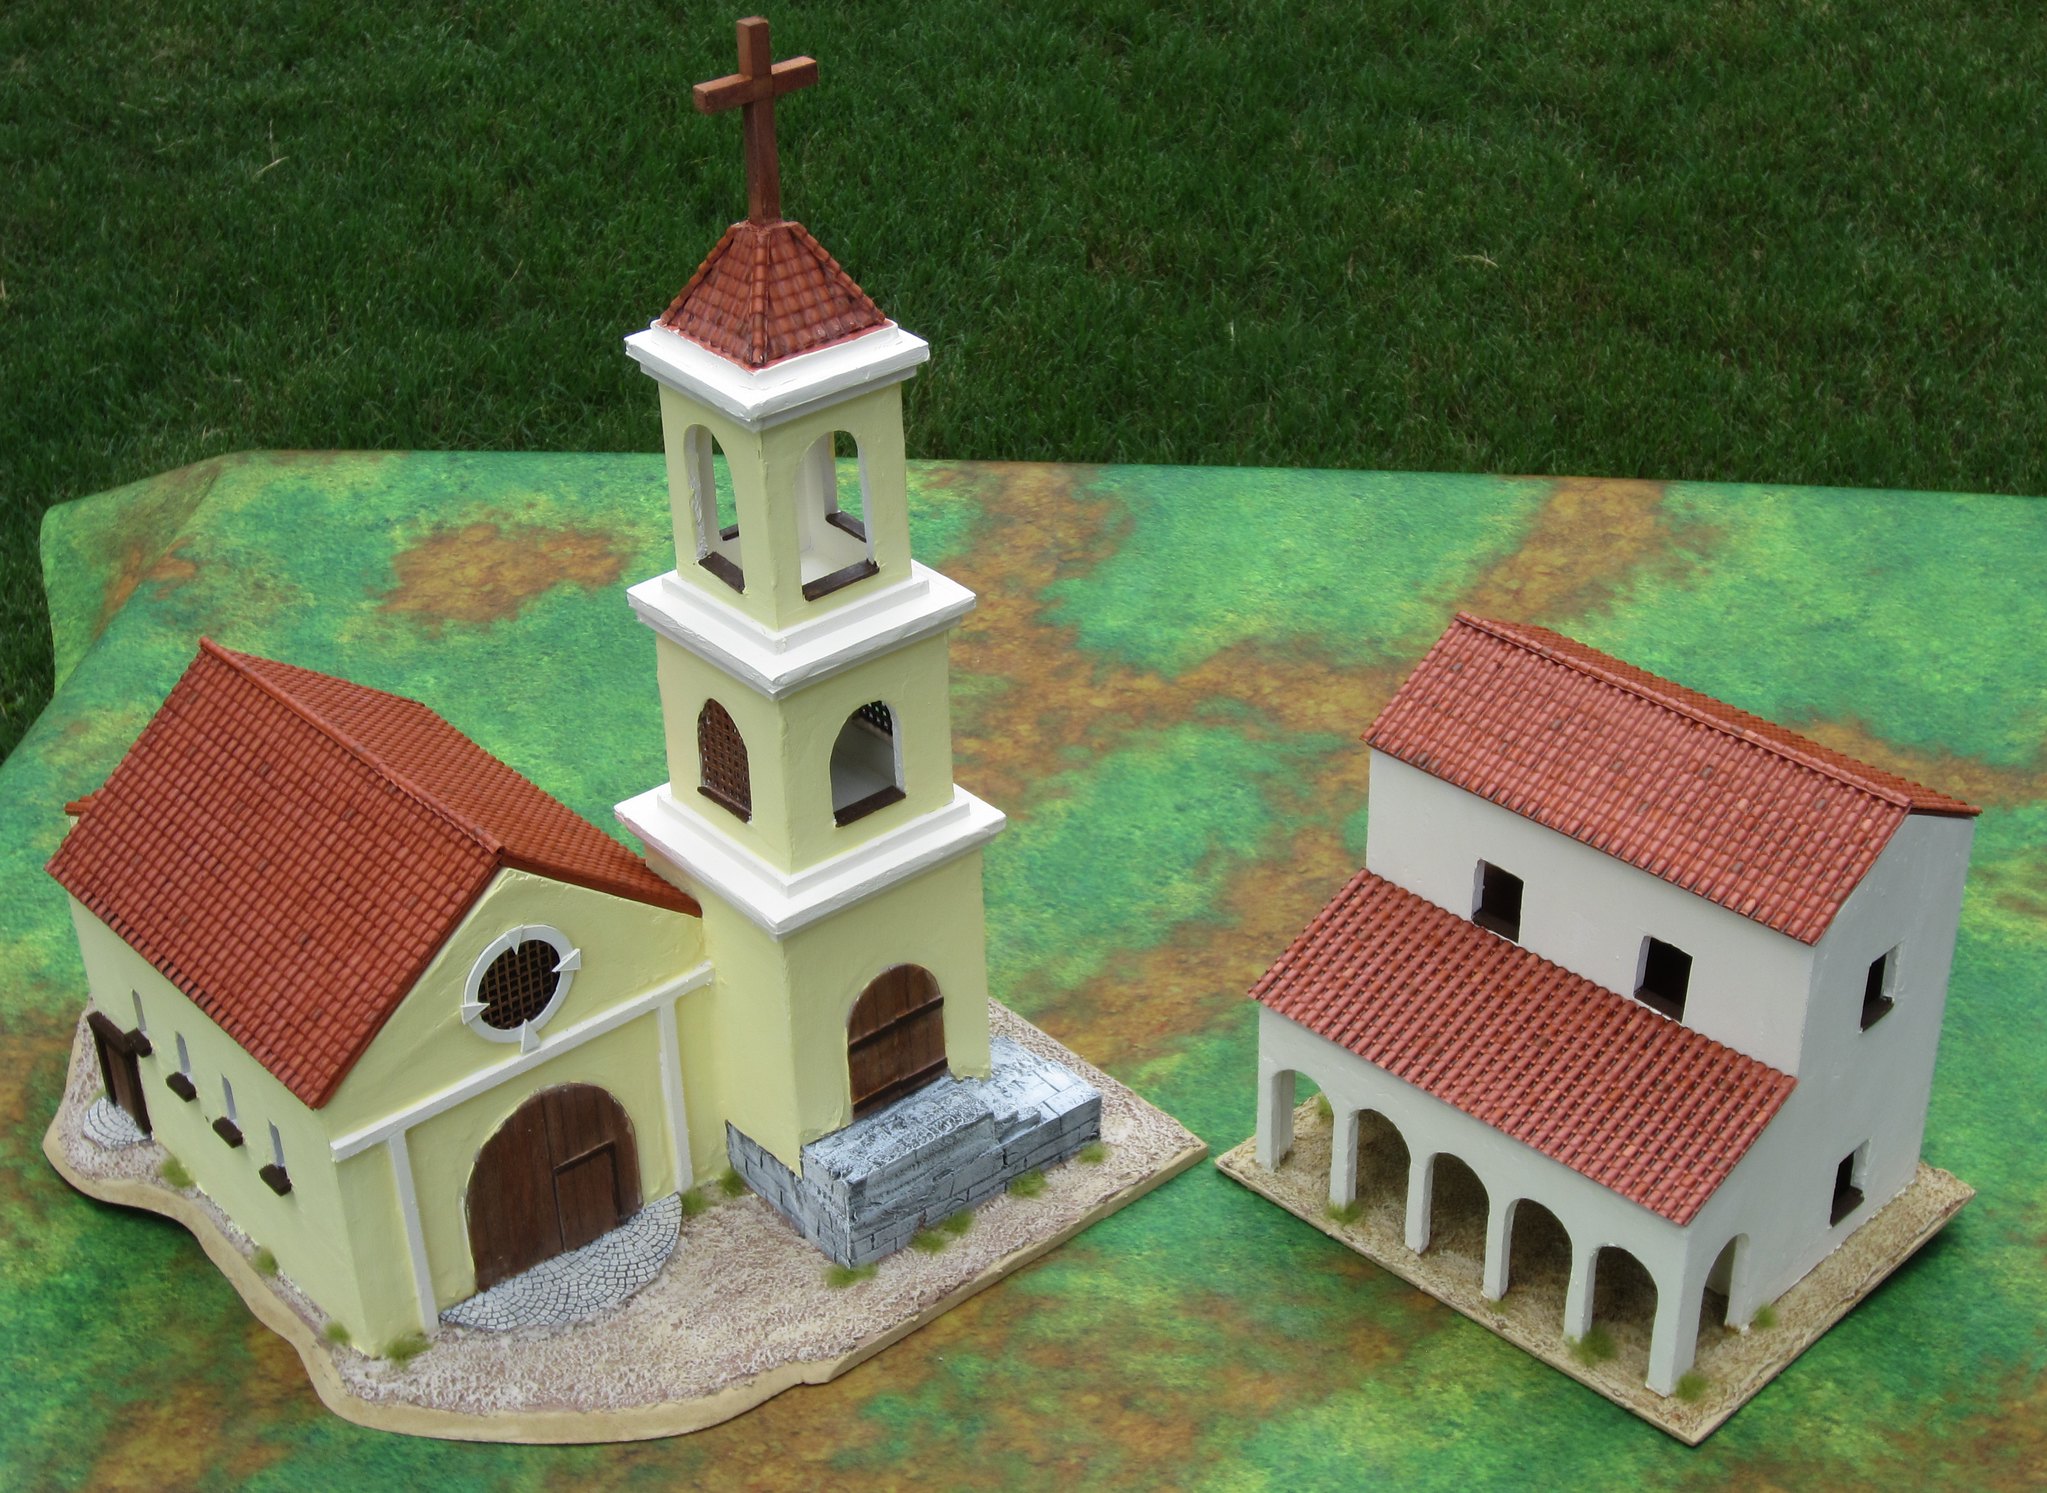 |
| Church and colonnade building completed! |
I hope you enjoy reading these posts as much as I enjoy making and sharing terrain. I have several options as to what to do next, and deciding will be the the hardest part!
'Til next time.


No comments:
Post a Comment