(tl;dr - Scroll down to the bottom to the Overall Lessons section, but I warn you - you'll miss all the fun!)
Based on Richard's instructions, we each brought a list of seven points worth of models. For each scenario, we selected our force from that list, with the number of points available determined by the particular set-up rules. Unfortunately, I only managed to get six points painted in time for the tourney.
In June, I ruptured my biceps tendon, requiring surgery to repair the injury.
 |
| This was the bruised caused by the internal bleeding after the tendon ruptured. |
Following surgery, I had to wear an immobilizing brace on my arm for six weeks.
 |
| The brace locked my elbow to prevent me from re-injuring the tendon as it healed. |
With the brace on, I could paint some, but it as slow, tedious and tiring.

Not being able to bend my elbow made it quite uncomfortable to work. And I was not able to bring the miniature closer to me in order to see it better or reach parts of it more easily with the brush.
That was followed by weeks of physical therapy to regain my range of motion and strength. Soon after my recovery was complete, we took a family vacation to the beach to celebrate my parents' 50th wedding anniversary, and Krista's and my 20th!
The end result is that my painting time suffered greatly over the past months leading up to the tournament. I desperately wanted to have all seven points painted up and ready to go, but in the end I only got six points finished. I finished gluing the banner on my warlord after 11pm on the night before the tournament! I brought an unpainted seventh point of models to the tournament, but after seeing all the wonderfully painted models on the table, I just couldn't bring myself to field Vikings in that dreaded "snow camo" scheme - despite the fact they are from the cold, white north. So, I was handicapped slightly by only having a pool of six points to draw from during force selection.
Richard organized the tournament into four matches, each being a different scenario from the Saga rulebook. You could earn three points for a win, one for a draw, and nothing for a loss. Bonus points were available to be won in each scenario for achieving certain objectives. Also, we kept track of how many victory points of enemy models (per the rules on page 61) we killed, to use as a tiebreaker. This ended up being very important in the end...
Game 1 - Clash of Warlords
For the first game, I was matched up against Alan and his Irish army! Bonus points were available in this scenario for killing the enemy warlord, and for winning while losing 10 victory points or less of troops. Remember, victory points are not the same as points used to purchase units.
Alan's Irish
Warlord (free)
Curadh x2 (.5 pts)
Hearthguard x6 (1.5 pts)
Hearthguard x4 (1 pts)
Handler & doggs x7 (1pt)
Warriors x8 (1pt)
Levy with javelins x12 (1 pt)
Curadh x2 (.5 pts)
Hearthguard x6 (1.5 pts)
Hearthguard x4 (1 pts)
Handler & doggs x7 (1pt)
Warriors x8 (1pt)
Levy with javelins x12 (1 pt)
Henry's Vikings
Warlord (free)
Berserkers x4 (1 pt)
Hearthguard x4 (1 pt)
Hearthguard x8 (2 pts)
Warriors x8 (1 pt)
Levy archers x12 (1 pt)
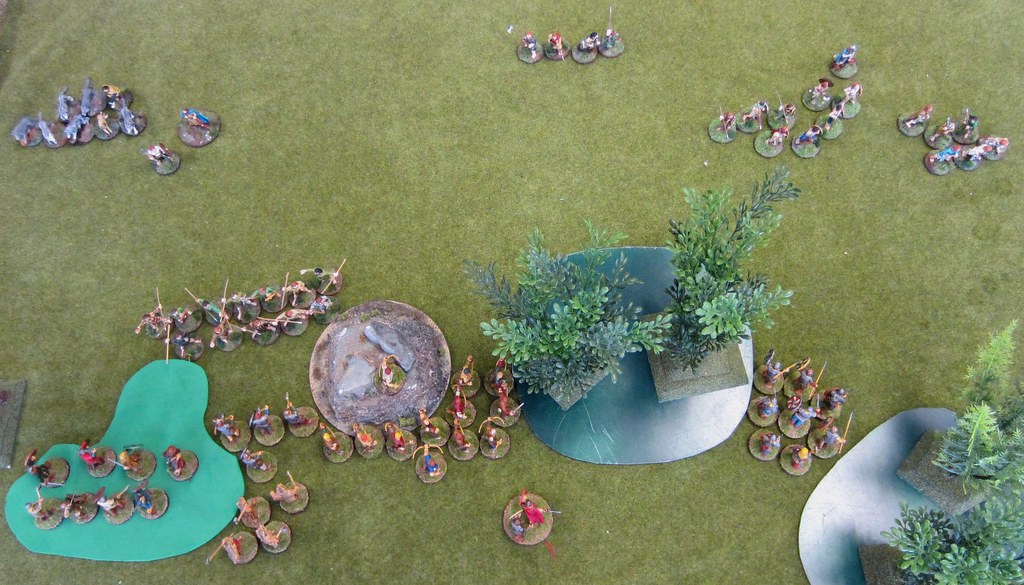
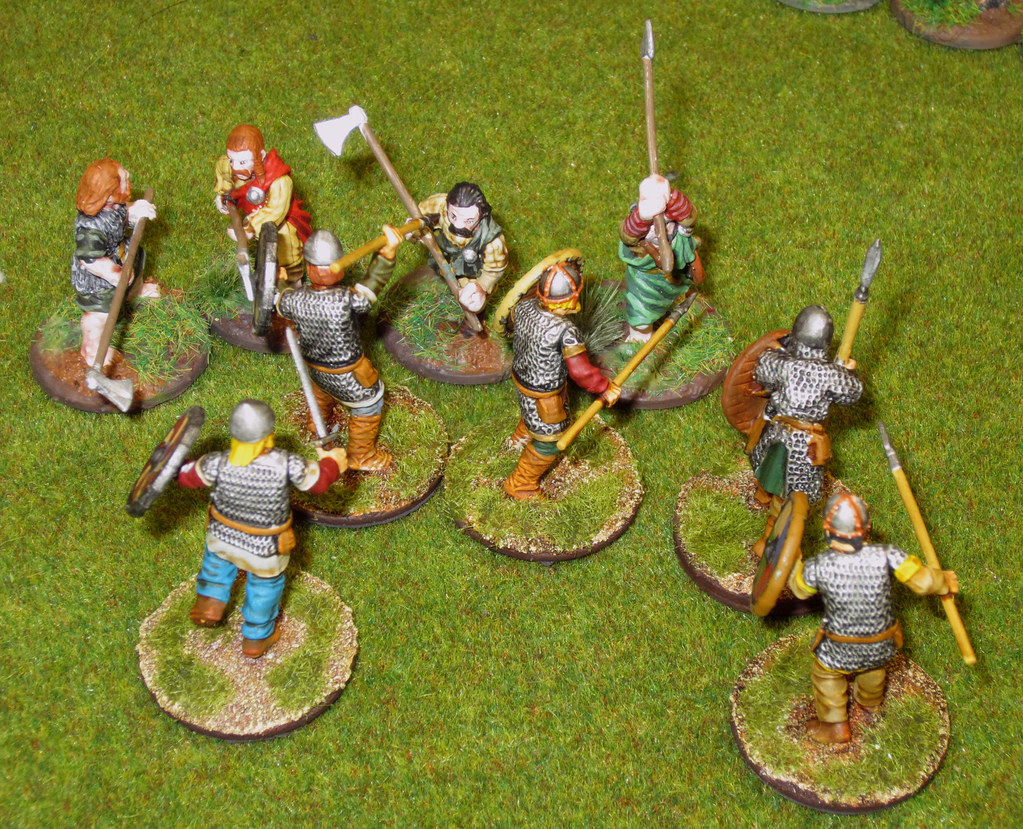
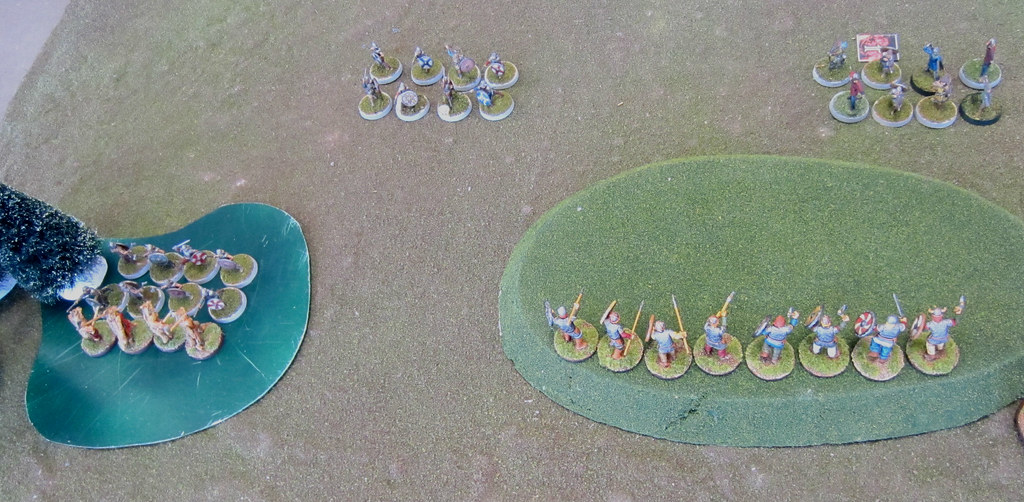
This was my first game ever against the sneaky Irish, so I had no idea what to expect from them. After placing the terrain, I deployed my forces concentrated towards the center-left, while Alan spread his out a little more.
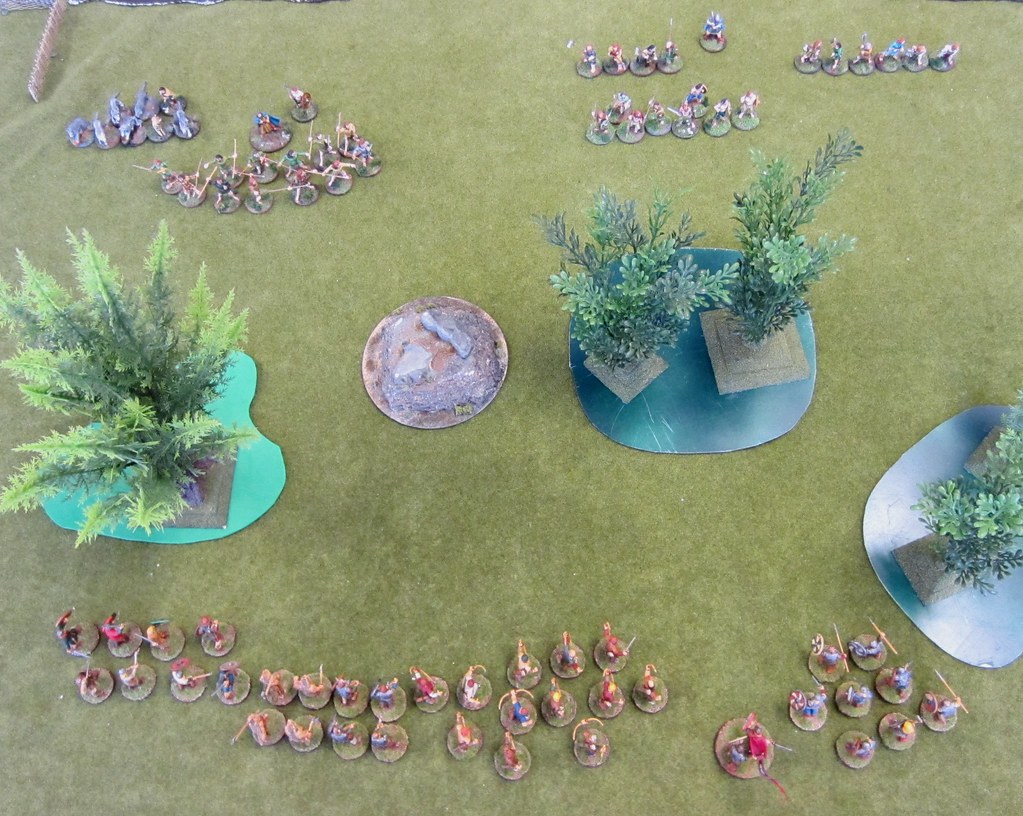 |
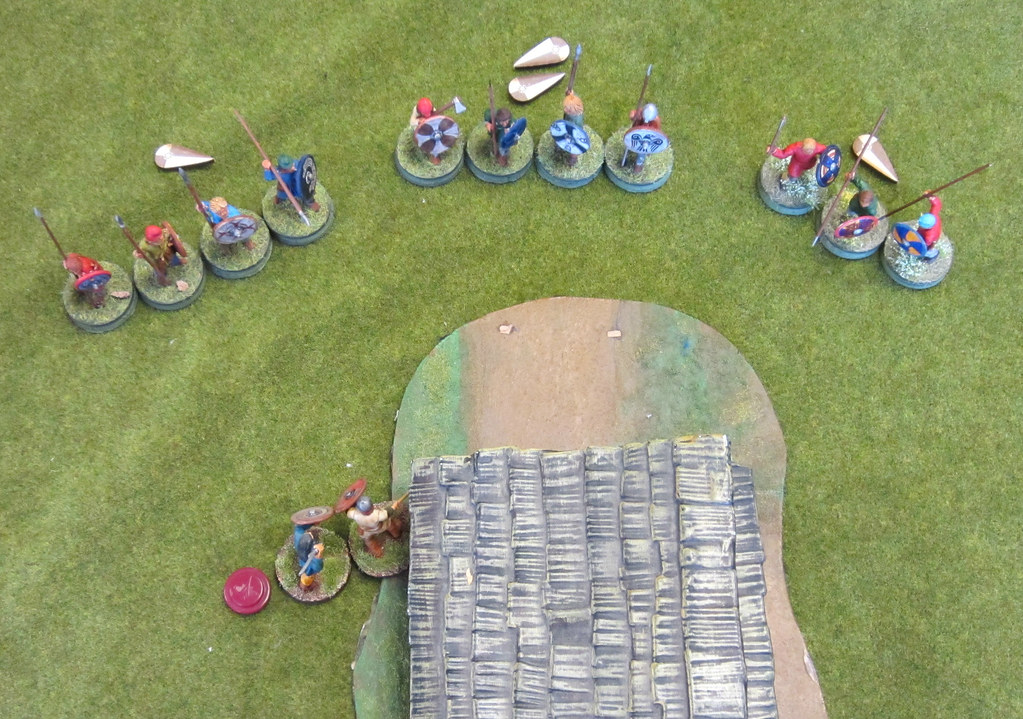
| Initial deployment, my Vikings are at the bottom of the photo. |
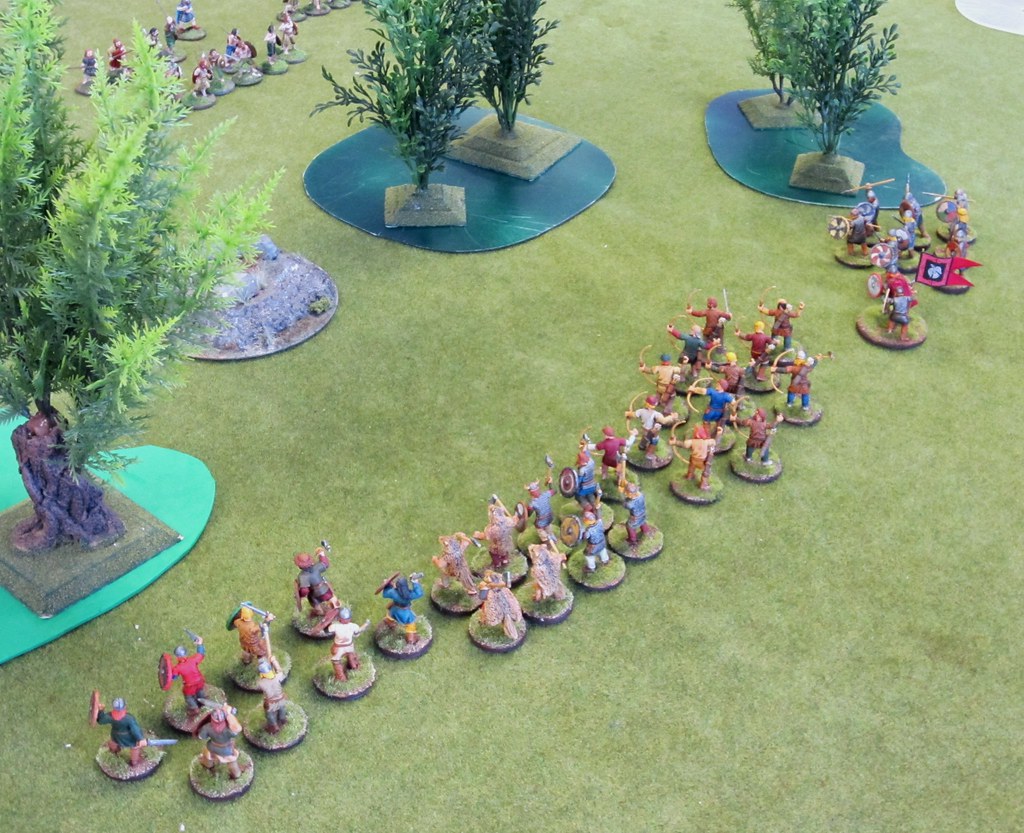 |
| My Vikings prepare to advance across the terrain. |
I gained initiative (I think I won on the "beard" tiebreaker - there's something to be said for having more hair below your eyebrows than above them!). My first turn was spent moving up, and trying to determine what Alan's strategy would be and how best to counter it.
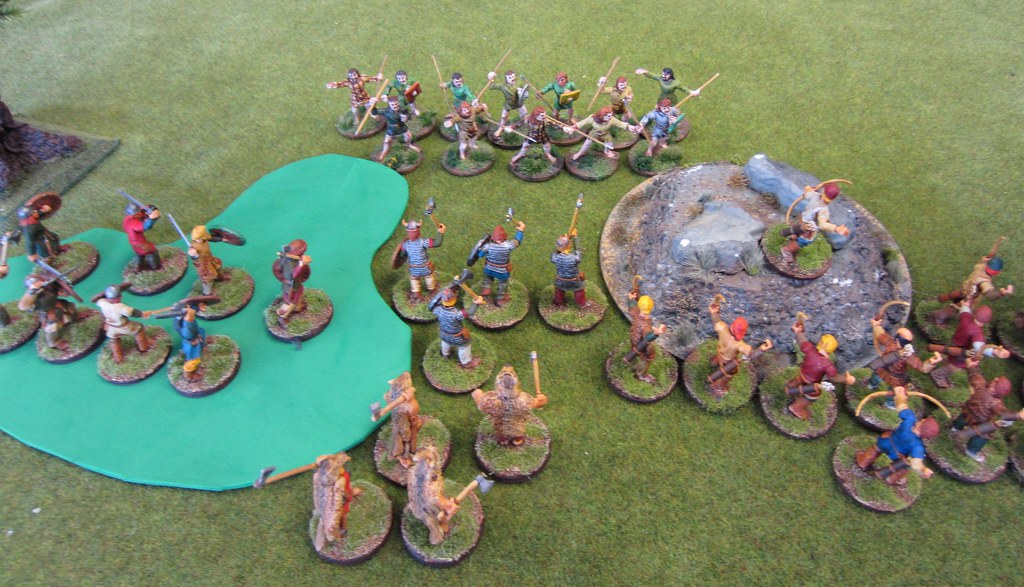
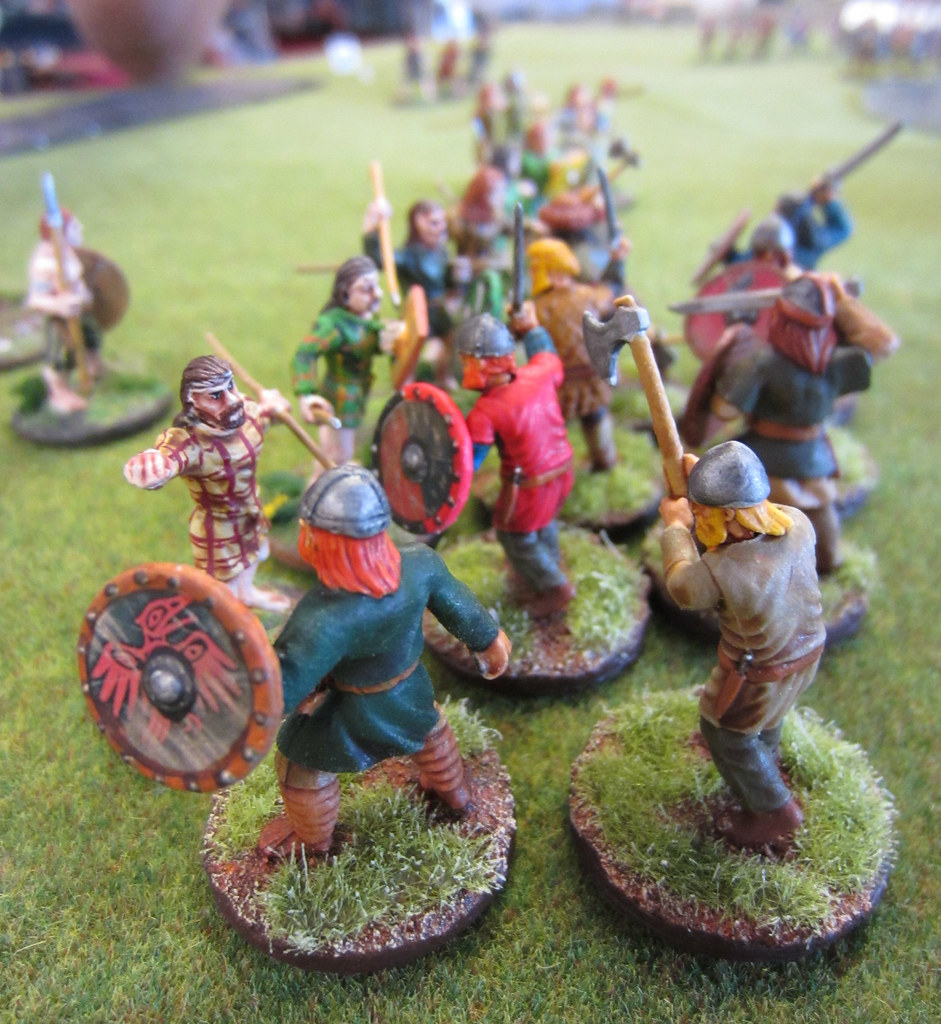
 |
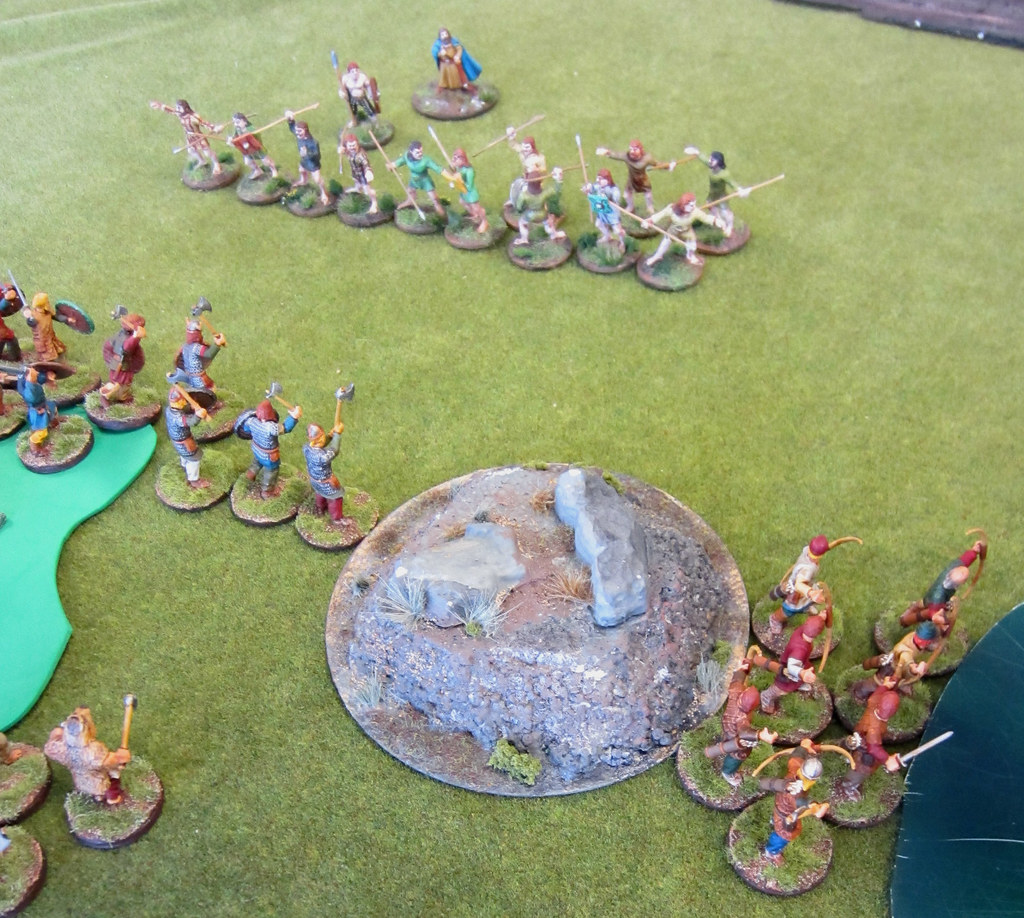
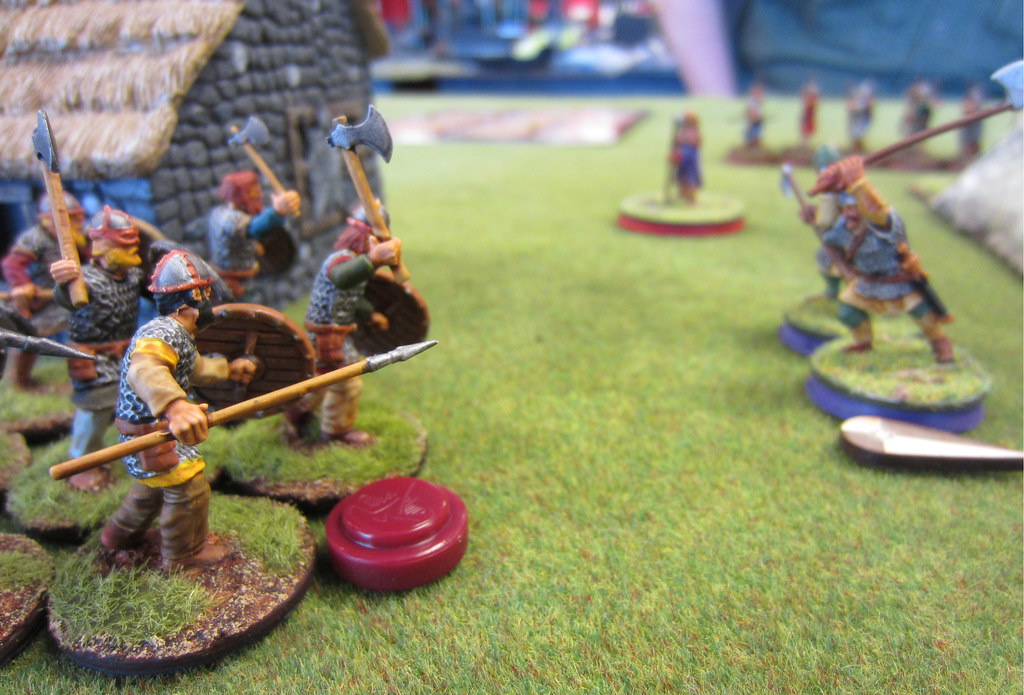
| Shades of things to come: the Irish levy taunt my Vikings! |

I did not have long to wait, as Alan advanced with his levy javelin throwers and started to try and whittle down my forces. Combined with the Sons of Dana battleboard ability which gives him a free shooting attack. this was quite annoying.
 |
| Heirs of Mil allows the Irish to get right in front of the Vikings with impunity. |
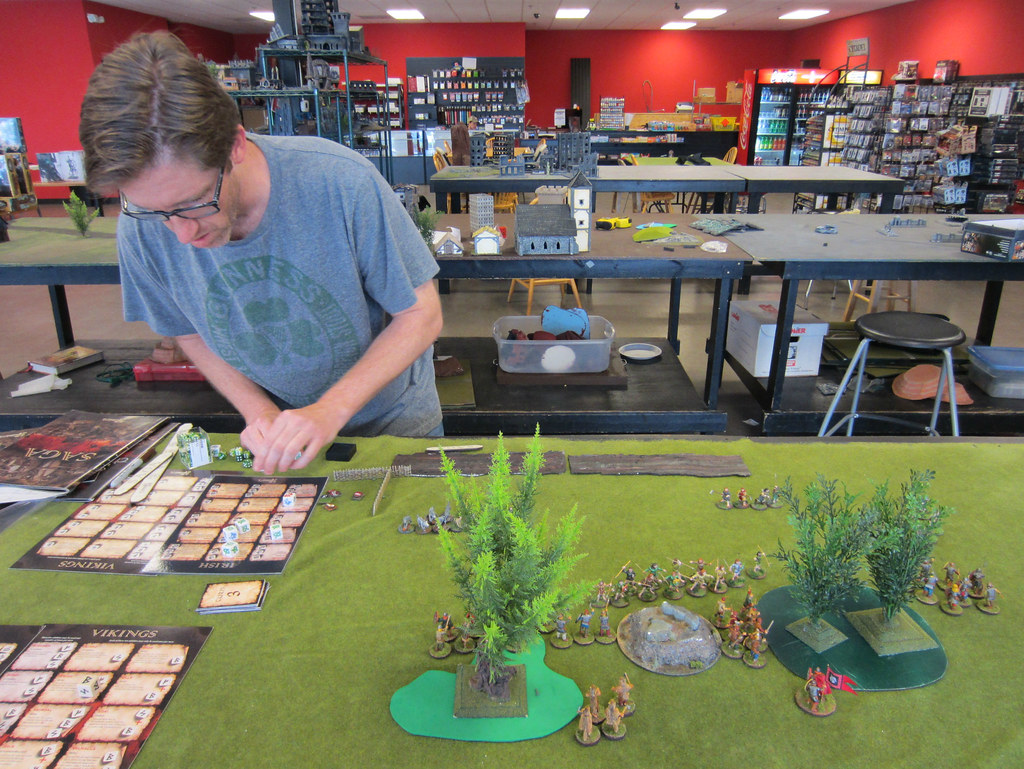 |
| Alan plans his turn. |
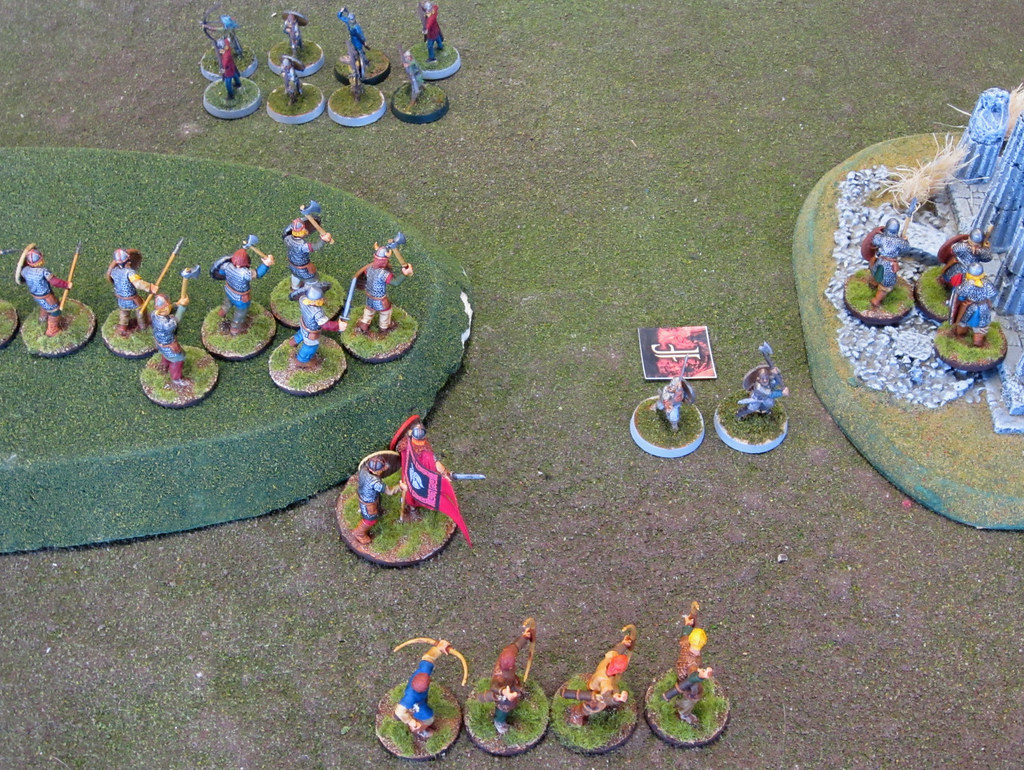
Over the course of the next several turns, Alan continued to gain victory points, while I fruitlessly chased his Irish levy. The Heirs of Mil ability is brutal! I couldn't charge or shot at his pesky javelin guys, and he kept placing them in very effective blocking positions to make it difficult for me to go around them and get to the rest of his forces.
 |
| Overview of the battlefield. The Irish levy on the left successfully screen Alan's Warlord from the bulk of my forces. |
Eventually, we did get to some melee combat, and it was a mixed bag for me. Alan ran his dogg unit around the left flank of my troops and came up from behind.
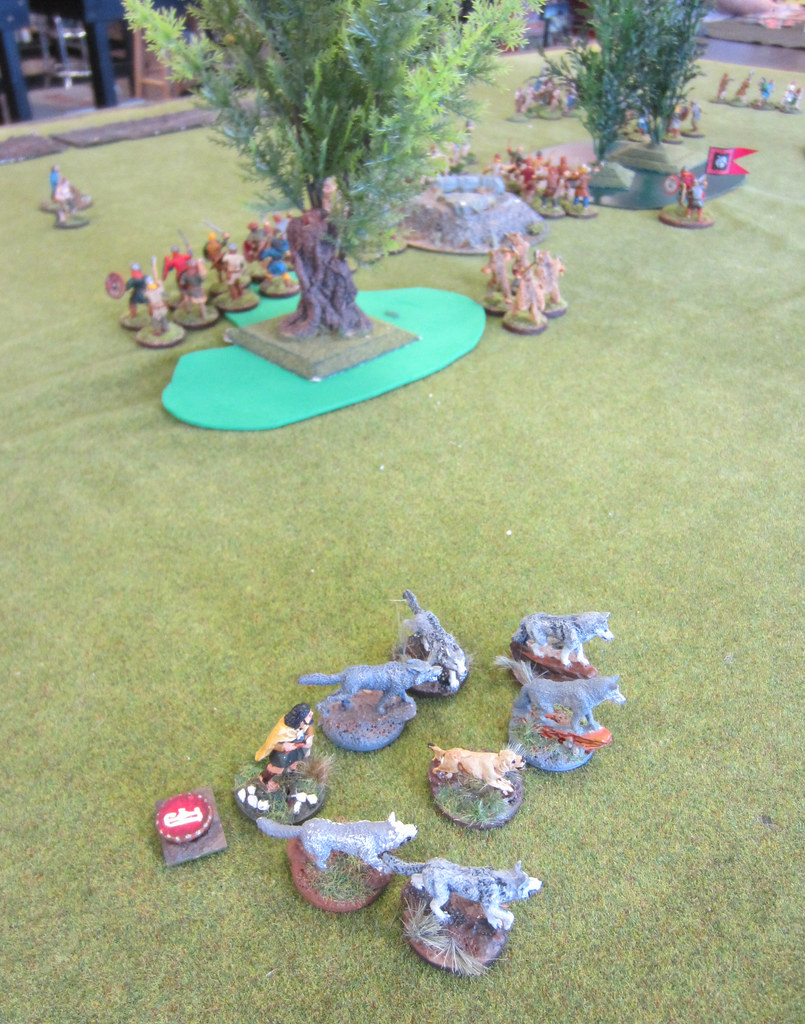 |
| The doggs make their move. |
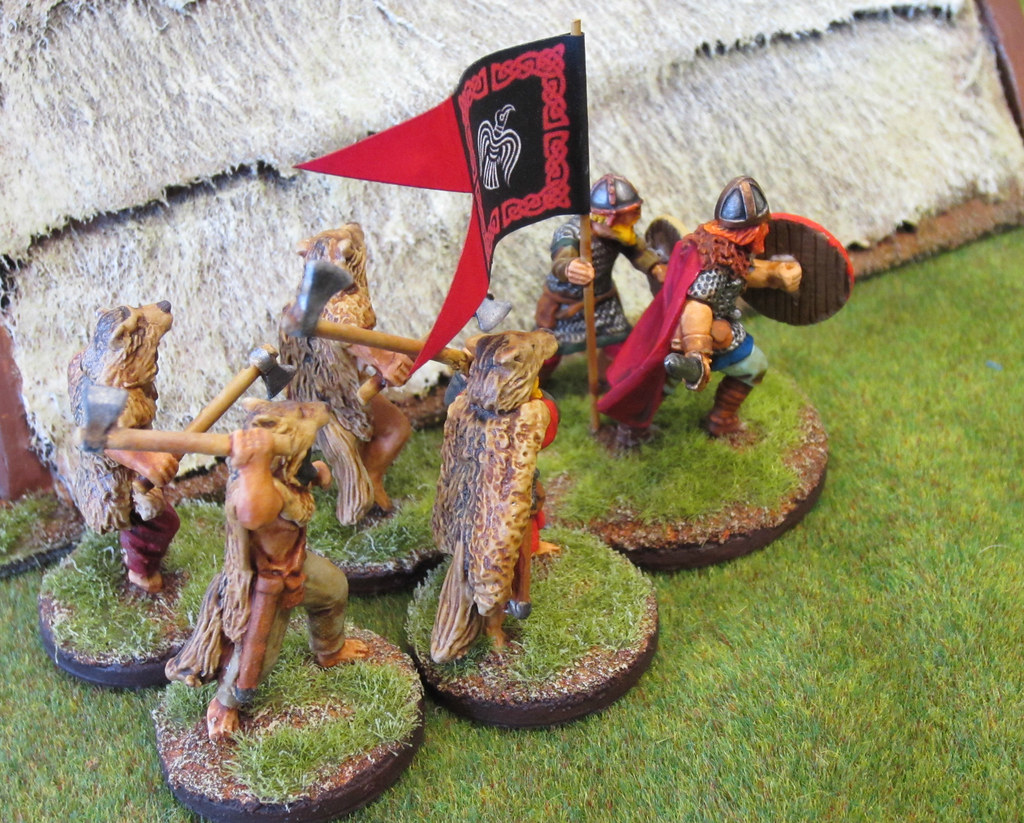
I detached my Berserkers to cut him off. In a brutal combat, the Berserkers were killed to the man, while the handler and one dogg survived.
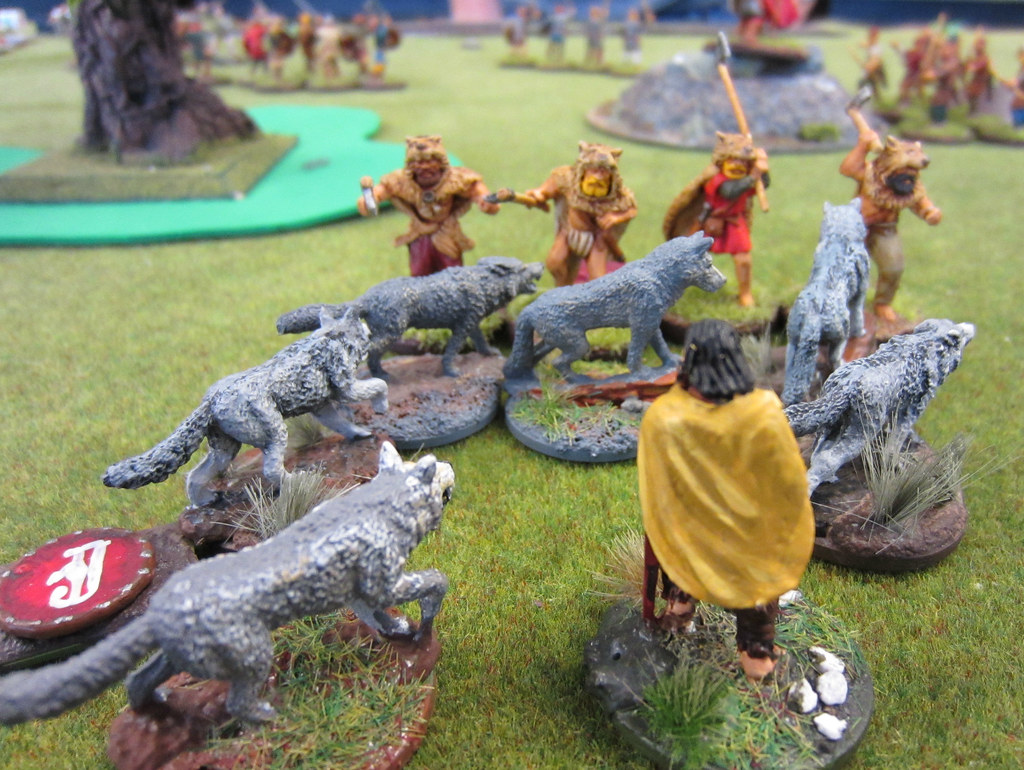 |
| Fur flies in the melee! |
I misinterpreted a rule, and limited my attack dice, which could possibly have meant that the units mutually wiped each other out. But Alan outplayed me enough that it would not have made a difference in the end result - I might have lost by fewer points, but still lost. He really made the most of the terrain and his abilities to slow down and harass my Vikings.
My eight-strong hearthguard unit (down to five men due to those infernal javelins) ran into his hearthguard, and there was much bloodletting on both sides.
My Viking warriors finally managed to charge into his levy, and I was able to wipe them out in a couple of turns of melee. This was too little, too late, and a waste of my troops, since the levy are worth so few victory points. Seeing them finally off the table was very satisfying, but ultimately did not help me much in terms of scoring.
 |
| Satisfying, but ultimately futile (and feudal) combat. |
 |
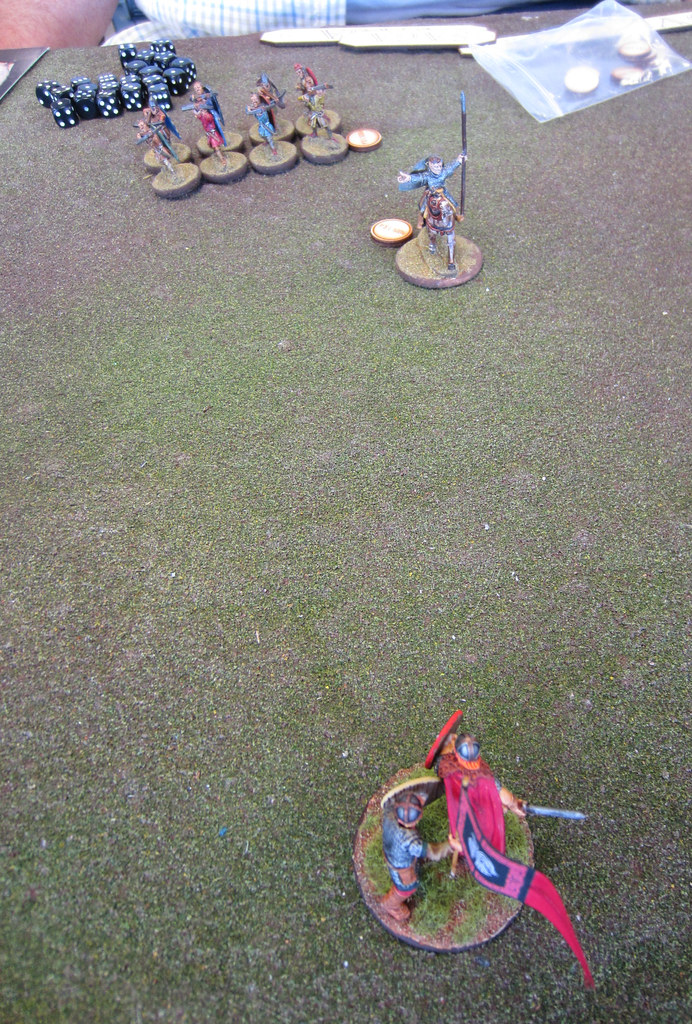
| Finally, a path to the enemy warlord! But the Curadh, using Heirs of Mil, was able to continue blocking me! |
Finally, in the end phase of the battle, I charged my warlord against the handler and surviving dogg, trying to score some last-minute points. Alan countered with The Old Ways. which limited my warlord to rolling two dice, the same as the dogg and handler! My dice abandoned me, and the warlord was slain.
Despite the loss, this was a very enjoyable game. Alan is a great opponent who is pleasant to play against even when he is pounding your army mercilessly. As usual, I learn more from a loss than from a win, and Alan taught me a lot in this game!
Lessons: Choose as little terrain as possible in games against the Irish! This limits their ability to use Sons of Dana.
And, as annoying as the Irish levy can be, scampering this way and that, peppering you with javelins and being immune to counterattack with the Heirs of Mil ability, they're still worth just 1 pt per three models - stay on target and focus on killing off the high-value units.
The Viking ability Odin doesn't do anything against javelins, since it turns a shooting activation into movement. Firing javelins happens as part of a movement activation, not a separate shooting activation, so they still get to throw their pointy sticks at you!
Result: A victory for the Irish, 20 vp to14 vp. Alan also got a bonus point for killing my warlord. After round one, I was 0-1 with zero points. The day could only get better!
And it did, as after this game we set up our armies to be judged for Best Painted. The overall quality of the painting was very good - everyone's army looked terrific, and the voting was very close. In the end, Sean's horde of Anglo-Saxons (with hand-painted shields) took the prize by a meager one vote! Congratulations Sean - well deserved recognition for the hard work you obviously put into your army.

After a break for lunch, it was time for:
Game 2 - The Escort
In this game, I faced Skip and his mounted Normans. Another first for me as I had not played against mounted troops before. And just as in my game against the Irish, the lessons learned were tough ones.
We bid for the honor of escorting the baggage train. I bid four points, and Skip bid five. I "won" the bid, and deployed my four points of Vikings to defend the baggage train. Skip picked five points of Normans, including two units of six mounted knights each, and set up his attacking forces.
Skip's Normans
Warlord (free)
Knights x6 (1.5 pts)
Knights x6 (1.5 pts)
Warriors with crossbows x8 (1pt)
Levy with bows x12 (1 pt)
Knights x6 (1.5 pts)
Knights x6 (1.5 pts)
Warriors with crossbows x8 (1pt)
Levy with bows x12 (1 pt)
Henry's Vikings
Warlord (free)
Berserkers x4 (1 pt)
Hearthguard x8 (2 pts)
Warriors x8 (1 pt)

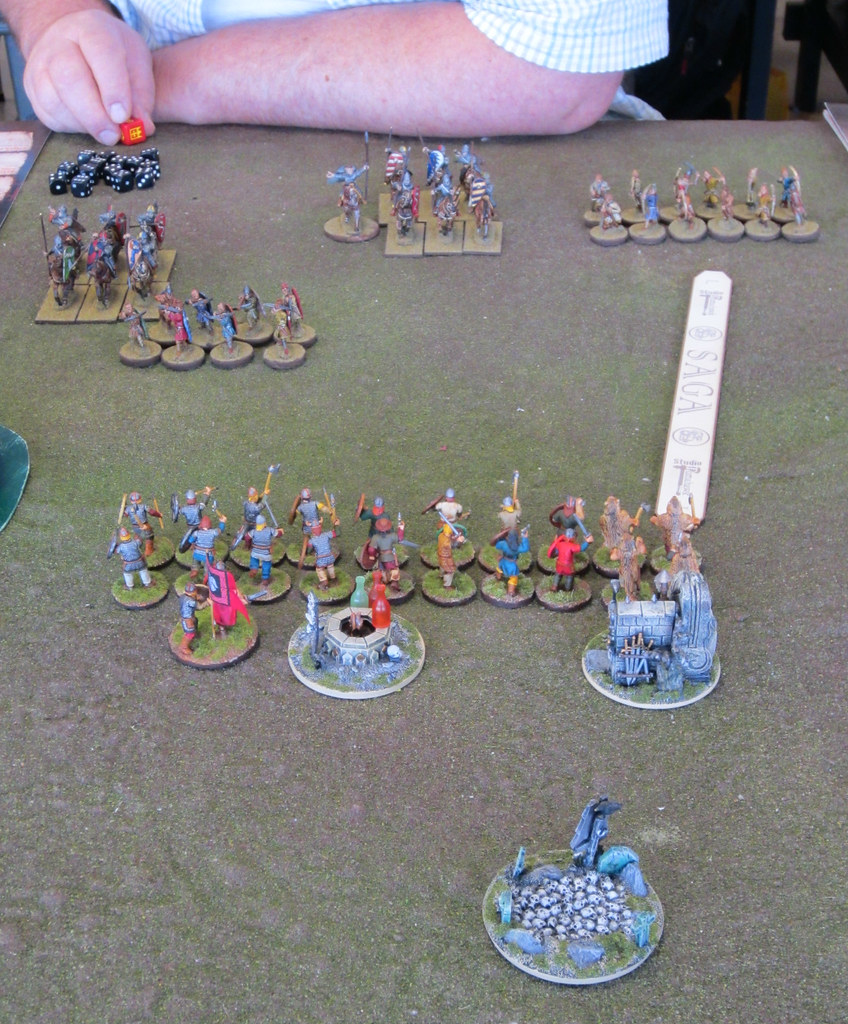
 |
| I'm not protecting a well and graveyard - those are the baggage pieces! |
We didn't have pieces that actually looked like baggage, which is why you'll see my Vikings guarding what appear to be small terrain pieces. Don't let the appearance fool you - they're actually the Vikings' very valuable baggage train. My mission was to get as many of those pieces safely across the board as possible, while Skip would do everything in his power to stop me!
In addition to the usual points for winning the scenario, bonus points were available for killing the enemy warlord, getting all three baggage pieces to safety, or winning while losing 10 victory points or less of troops (if you were the attacker).
The first turn was rather uneventful, as I moved up as much of my force as possible, making sure to keep my troops between the baggage and the enemy.
Here is where I made another costly blunder - my Berserkers were deployed in line with the rest of my army, rather than being screened behind the other warriors. You guessed it! Skip saw this weakness and exploited it immediately, pelting my Berserkers with arrows on his first turn and eliminating them. He was kind enough not to laugh out loud as he made me pay for my poor deployment!
 |
| Skip measures before advancing to within bowshot range and wiping out my Berserkers. |
Skip also began to move one of his knight units around my left flank, in preparation for assaulting my baggage train from the rear.
On the second turn, I continued my advance, activating as many units as possible for movement. My Bondi were able to attack Skip's bowmen on the right, and drive them off with heavy losses.
 |
| My Hirdmen and Bondi screen the baggage from the enemy. |
You'll notice in the picture that Skip's knights, which were behind his crossbowmen, are now gone... because they swept around behind my troops!
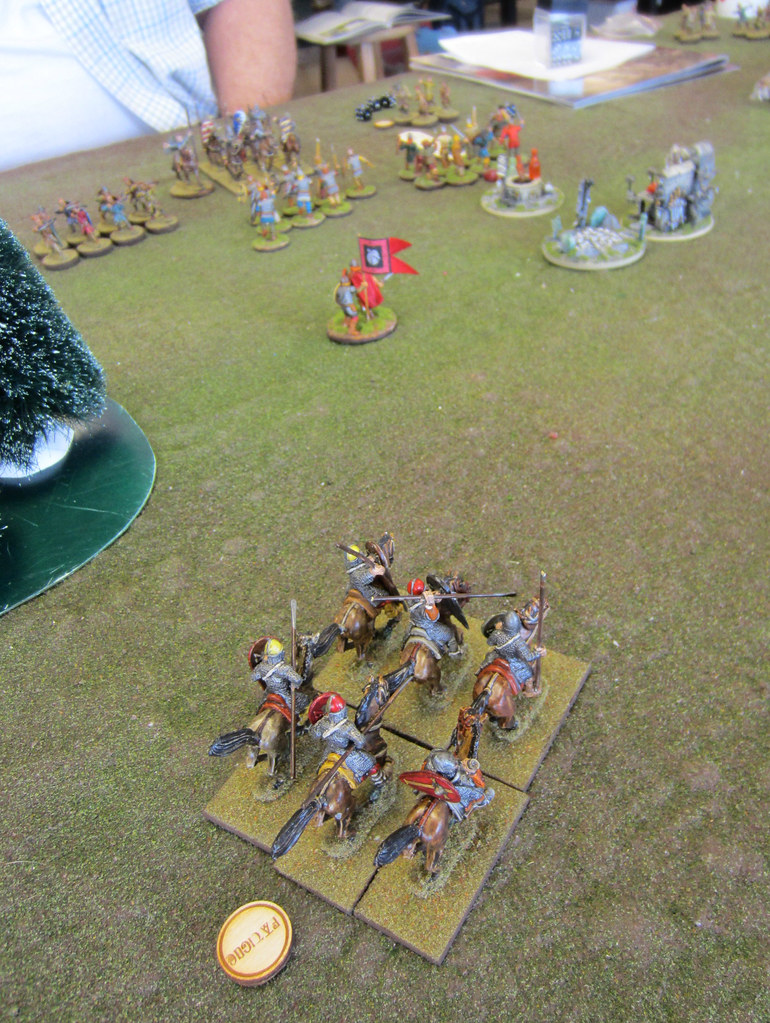 |
| Norman knights in the rear. |
On his turn, Skip attempted to charge - but I used his fatigue to slow him down, stopping him before he could make contact.
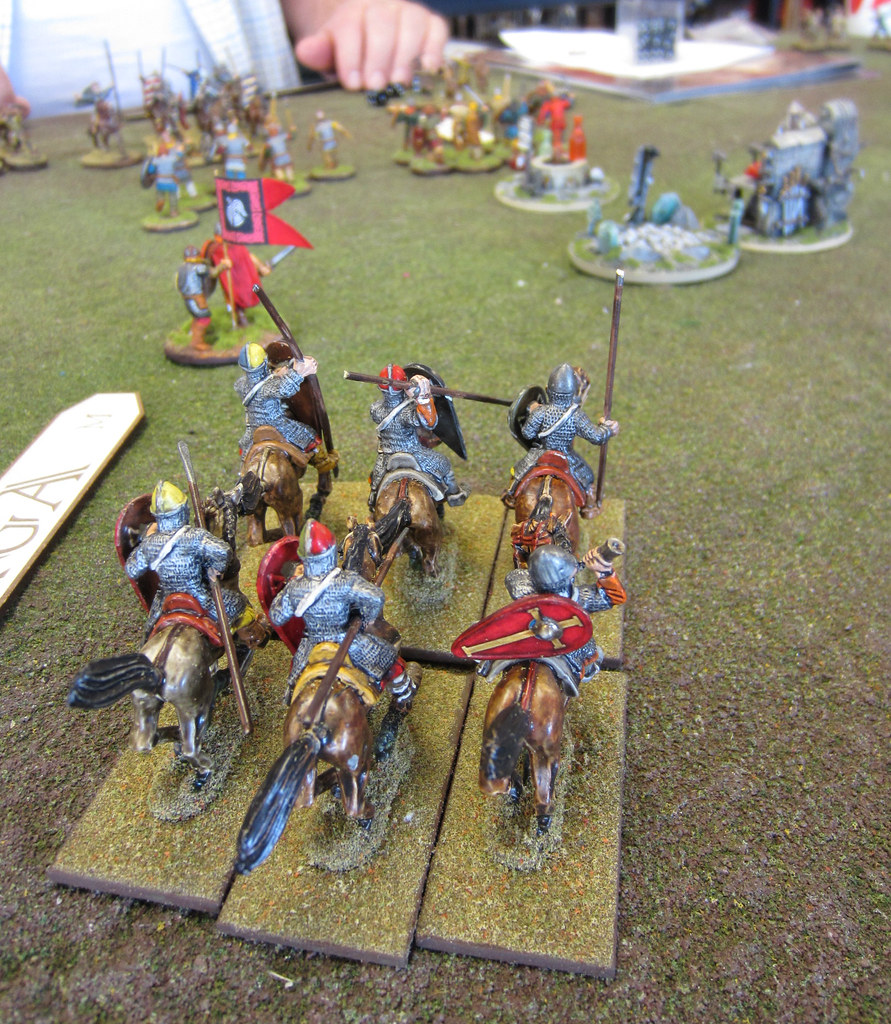
Meanwhile, I charged my Hirdmen into his warlord and knightly retinue. Lots of dice were rolled - I think each of us rolled 16 hits! Both units were wiped out - leaving the warlord standing tall in the saddle, with his "I'm king of the world!" pose.
Our warlords faced each other across the field of battle, no longer protected by intervening troops.
Faced with the choice of running up to engage the opposing warlord, or hanging back to protect the baggage from the marauding knights, I chose to have my warlord screen the baggage.


Meanwhile, you can see in the top right corner that my Bondi have cleared a path for the baggage to reach the corner of the board and escape.
The final turns saw my warlord valiantly defeated by Skip's knights, who then managed to capture the baggage. His warlord was able to charge and kill a second baggage train piece, but I managed to barely get one off the board to pull out a draw in this scenario. Phew!
Another fun game against a great opponent. Skip was a gentleman in every aspect of the game and once again, I was taught a lot about proper planning and troop placement.
Lessons: Keep your friends close, and your Berserkers closer! Do NOT just leave them sitting on the end of your battle line with a big neon "Shoot at me!" sign on them.
The Viking ability Odin, which denies an enemy their shooting attack, is very useful against the Normans. Although Skip was able to get off shots with his bowmen, I managed to counter a lot of incoming shots from the crossbowmen.
Result: A draw, with Skip scoring a bonus point for killing my warlord. I was sitting at 0-1-1 halfway through the tournament, with just one point.
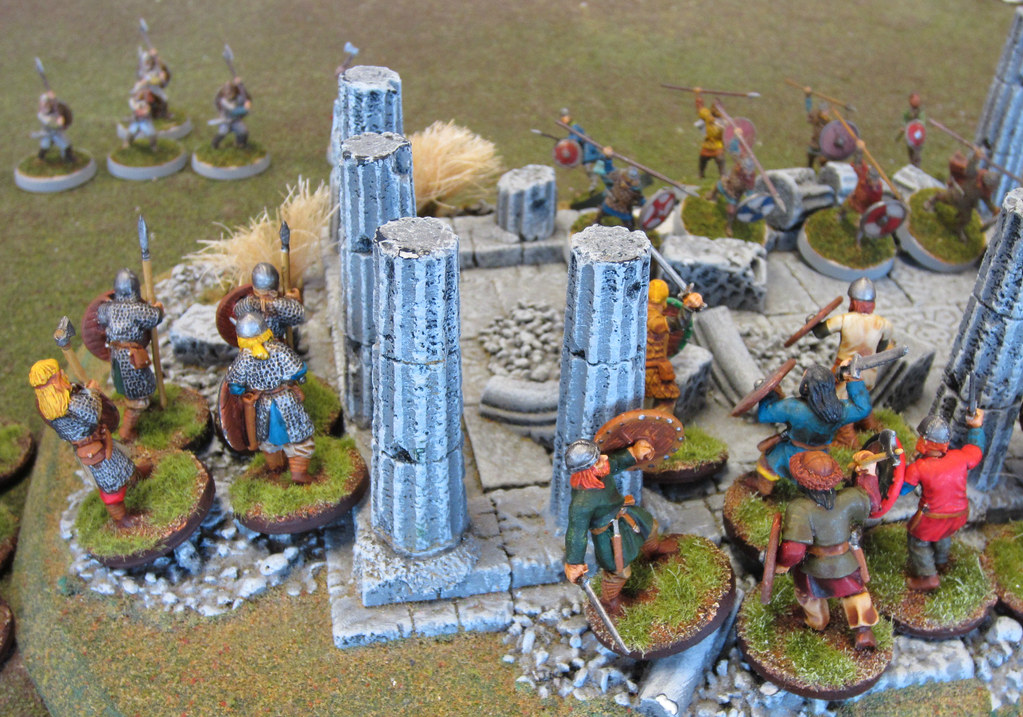
Game 3 - Sacred Ground
This was an epic clash between rival bands of marauding Vikings! My warband against Wes and his 1/72 scale Zvezda Vikings. I have to say, despite their slightly smaller size, I was very impressed with the look of the Zvezda figures. And Wes' paint job made them look even better. (You can see them at the Plastic Soldier Review site.)
In this match, bonus points would be awarded for killing the enemy warlord, as well as for scoring twice as many victory points as the opponent. Points were scored for having models on the sacred terrain at the end of each of your opponent's turns. The number of points you could score was limited to a maximum of eight points per terrain piece per turn. This forced you to spread out your forces to maximize your points, rather than concentrate your entire warband on one terrain piece.
Wes' Vikings
Harald Hardrada (1)
Hearthguard (Varangians) x4 (1 pt)
Warriors x8 (1pt)
Warriors x8 (1pt)
Warriors x8 (1pt)
Levy archers x12 (1 pt)
Hearthguard (Varangians) x4 (1 pt)
Warriors x8 (1pt)
Warriors x8 (1pt)
Warriors x8 (1pt)
Levy archers x12 (1 pt)
Henry's Vikings
Warlord (free)
Berserkers x4 (1 pt)
Hearthguard x4 (1 pt)
Hearthguard x8 (2 pts)
Warriors x8 (1 pt)
Levy archers x12 (1 pt)
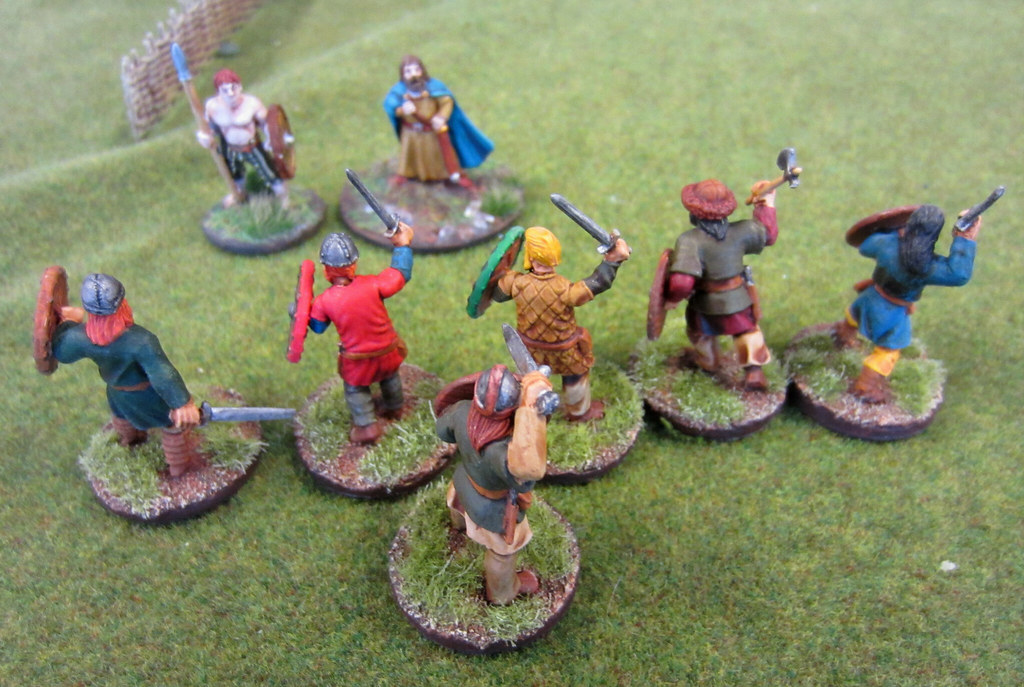
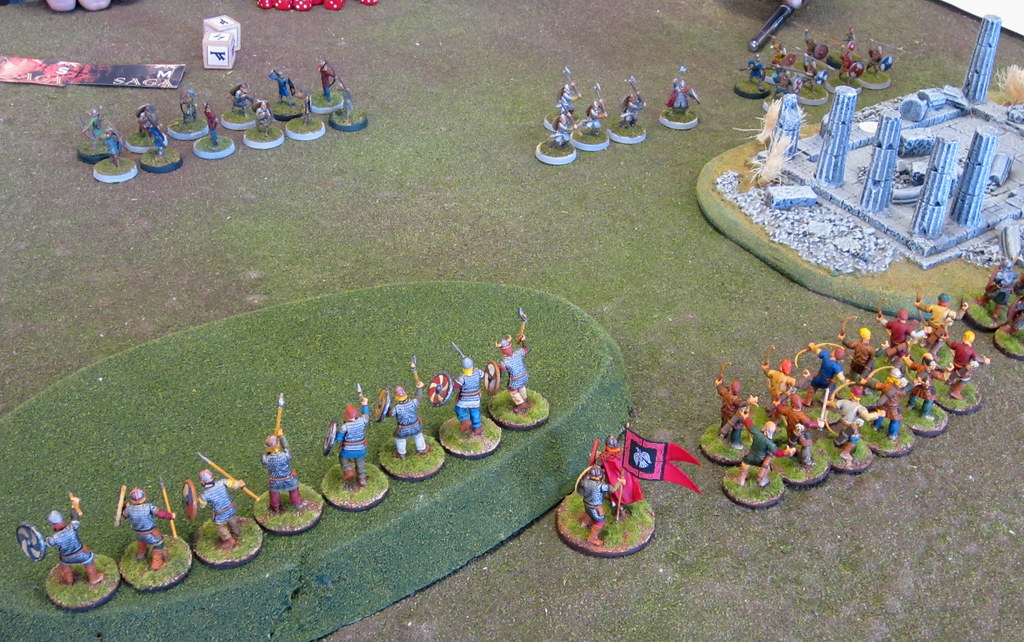
We placed the terrain and rolled for initiative - once again my beard won me the honor of deploying first. Since we both had the same number of units, I finished deploying first as well, which meant that I got to move first (which is an advantage in this particular scenario).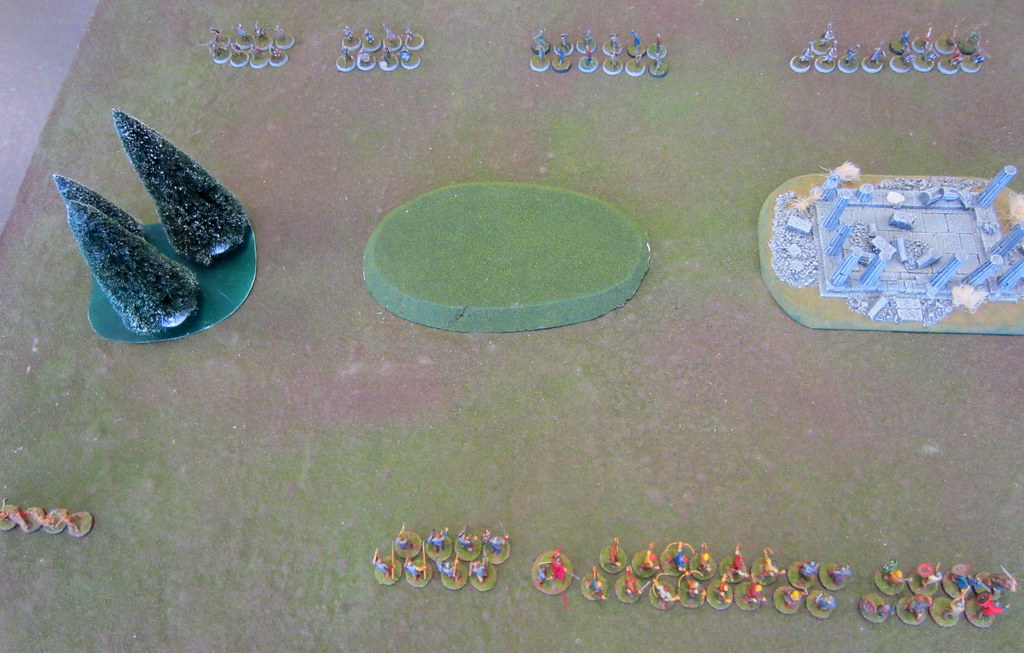 |
| Initial deployment. |
On my first turn I was able to advance a couple of my warriors on the central sacred hill, and place my other troops in good position to move onto the forest on the left and the ruins on the right in the coming turn. Wes moved his Vikings into position, threatening to rush the sacred areas in turn two.
On turn two I managed to get the rest of my Hirdmen onto the central hill, and consolidate on the right before advancing into the ruins in force.
 |
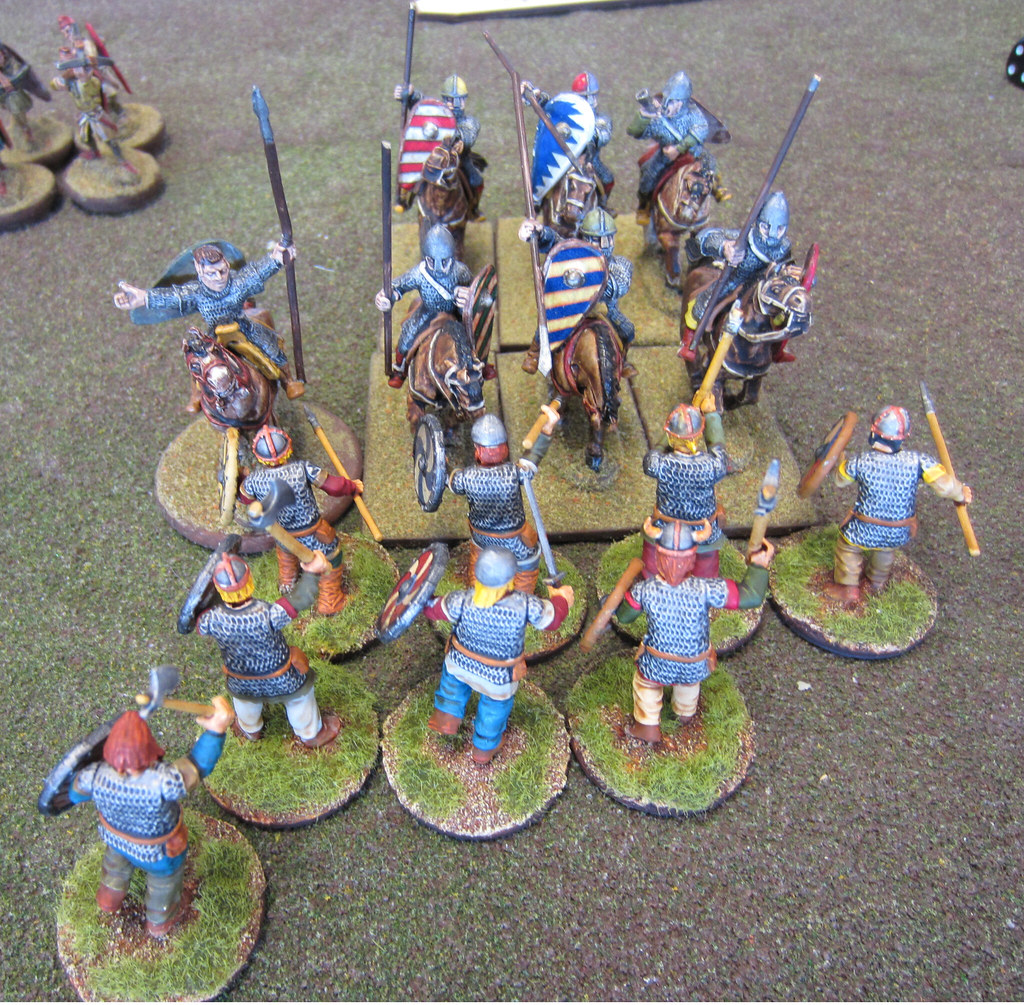
| Warriors charge onto the sacred hill! |
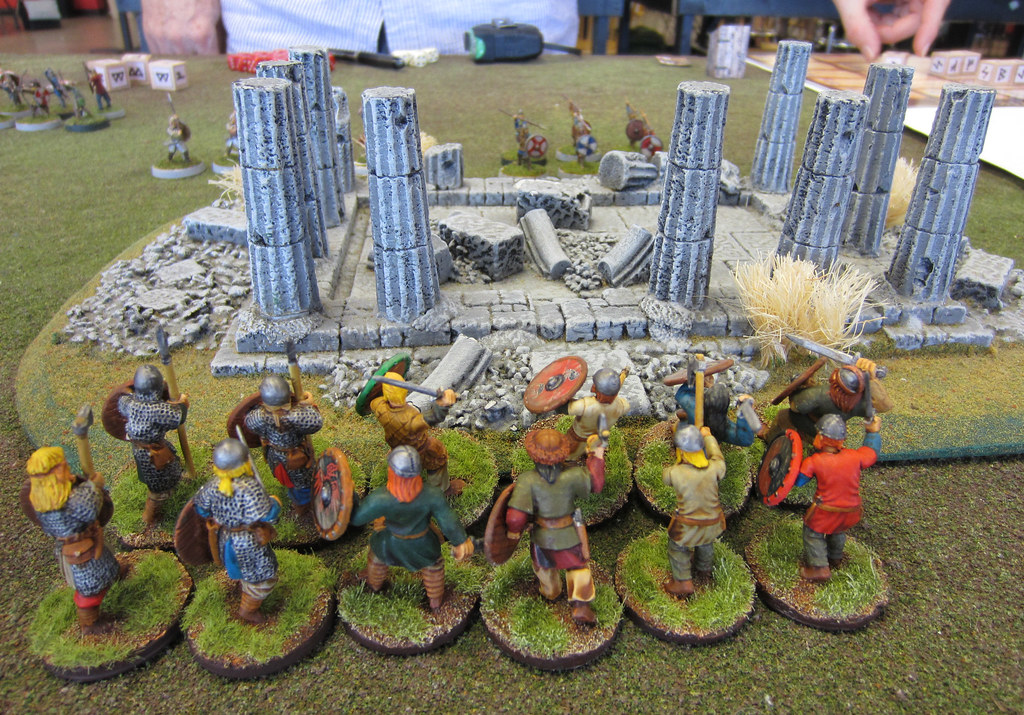
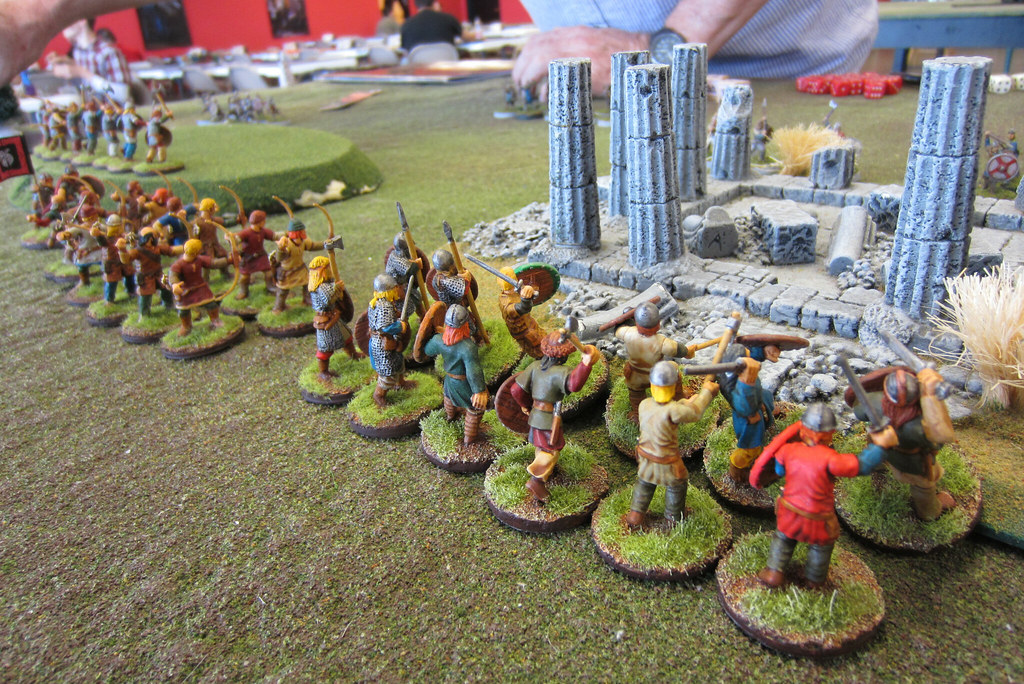
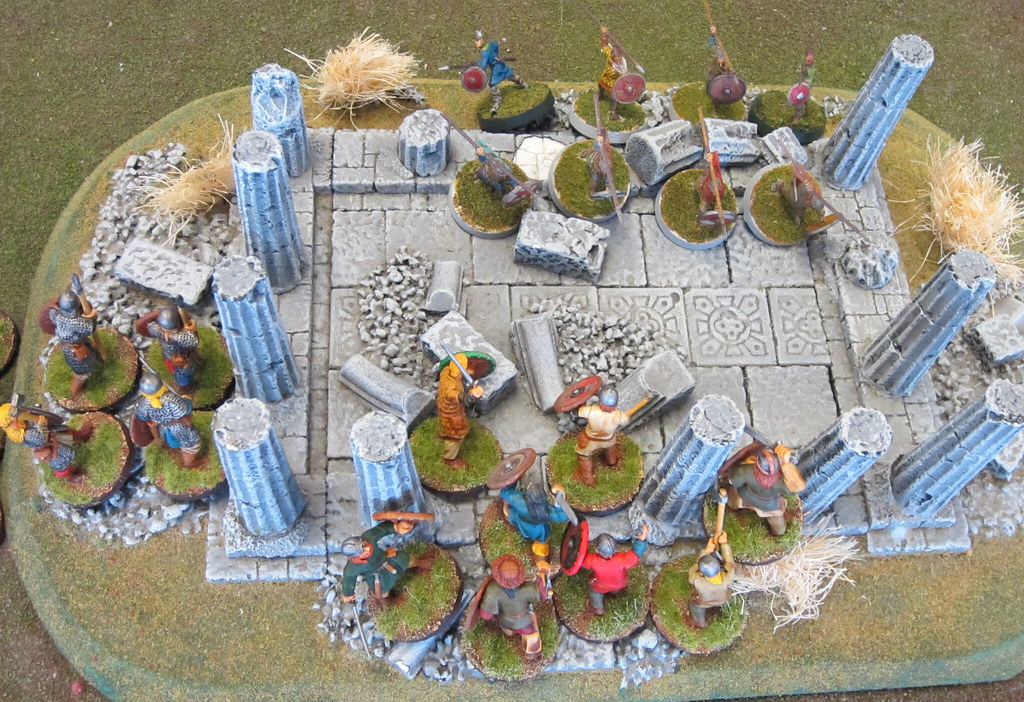
On the next turn, I moved the hearthguard and warriors on the right into the ruins, poised to score some big points.

While I controlled the center and right, on my left things were a little more combative. My Berserkers were engaged by a unit of eight enemy warriors. In keeping with the day's theme, although they managed to kill off all the enemy, my Berserkers were all cut down. This cleared the way for Wes to move his second unit of warriors into the forest uncontested, and begin scoring points for that terrain feature.

In the closing turns, Wes charged his Varangians into the gap between the two terrain pieces on my right, trying to destroy my archers (which had been pestering him with arrows much of the game). While he was able to kill off most of them, his unit also suffered casualties. And in an ensuing melee between his warlord and my Hirdmen, his warlord fell! I was left firmly in control of the central and right terrain, while he controlled the left.

In this game, everything went well for me, my strategy paid off and my dice were hot. Unfortunately for Wes, his dice went ice cold and he was unable to budge my troops from the sacred terrain. Despite being on the losing end, Wes was a very gracious and honorable opponent.
Lesson: Yet again, I did not use my Berserkers well. Though they did kill off a unit of his warriors, they were in turn killed rather easily. I will need much more practice with the Ulfhednar to learn how to utilize them to their best effect.
Result: I won the game, 79 to 25, and earned two bonus points. Going into the final match, I was 1-1-1 and had six points. I was back in the hunt!
Game 4 - Homeland
After playing three games against players I had never faced before, in the final game I was across from a very familiar face - Brian. He's one of my all-time favorite people to game against, and I knew this was going to be a great game.
Once again, there was a bidding process to determine the defender and the attacker. I bid four points, while Brian bid five, so it fell to me to defend my village against a savage Anglo-dane attack!
Despite losing the bid with five points, Brian was given six points of troops to use in the attack. Meanwhile, we ruled that the larger central house could hold up to 12 models, while the smaller houses on the ends could fit eight each. Horses can not enter the buildings, but since I was facing Anglo-danes, this was a moot point.
Brian's Anglo-danes
Warlord (free)
Hearthguard x8 (2 pts)
Warriors x8 (1pt)
Warriors x8 (1pt)
Warriors x8 (1pt)
Levy with bows x12 (1 pt)
Hearthguard x8 (2 pts)
Warriors x8 (1pt)
Warriors x8 (1pt)
Warriors x8 (1pt)
Levy with bows x12 (1 pt)
Henry's Vikings
Warlord (free)
Berserkers x4 (1 pt)
Hearthguard x8 (2 pts)
Warriors x8 (1 pt)
The bonus points for this match would be awarded for killing the enemy warlord, controlling all three buildings at the end of the game (defender), or for winning without losing more than 12 victory points of troops (attacker).
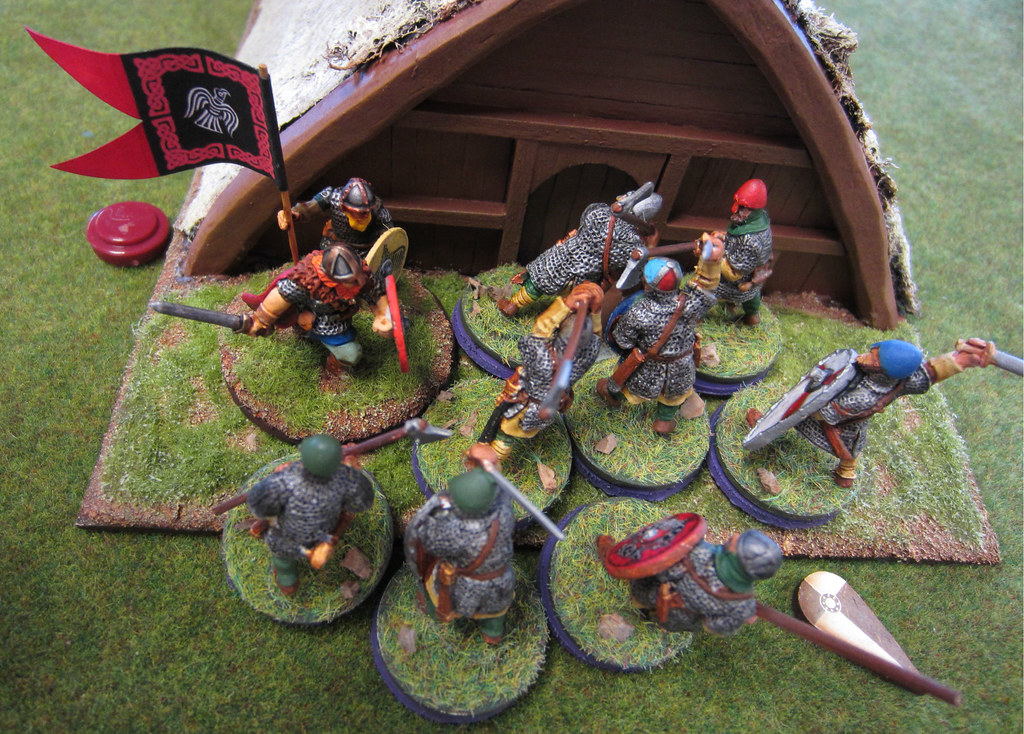
I am quite fond of my Berserkers, because I love the look of the models, so I chose them as one of my four points. I should have left them at home, because they were fairly useless in this scenario, at least the way I used them. I place them in the central building, accompanying my warlord.
 |
| My warlord and Berserkers. Since the roof is not removable, I placed them beside the building. |
On the right I placed a point of warriors, while on the left I placed a unit of eight hearthguard.
 |
| No, really, we're inside the house! |
Brian deployed his Anglo-danes in a line stretching across the field of battle.
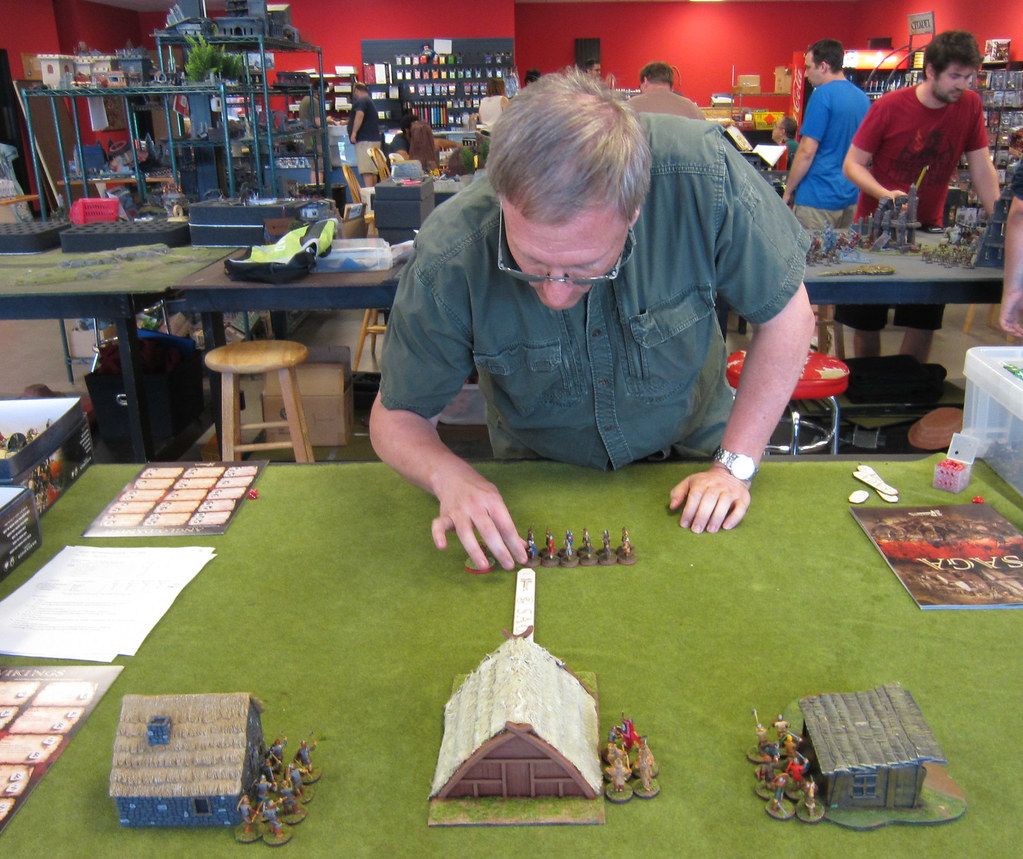 |
| Brian carefully measure his deployment. |

 |
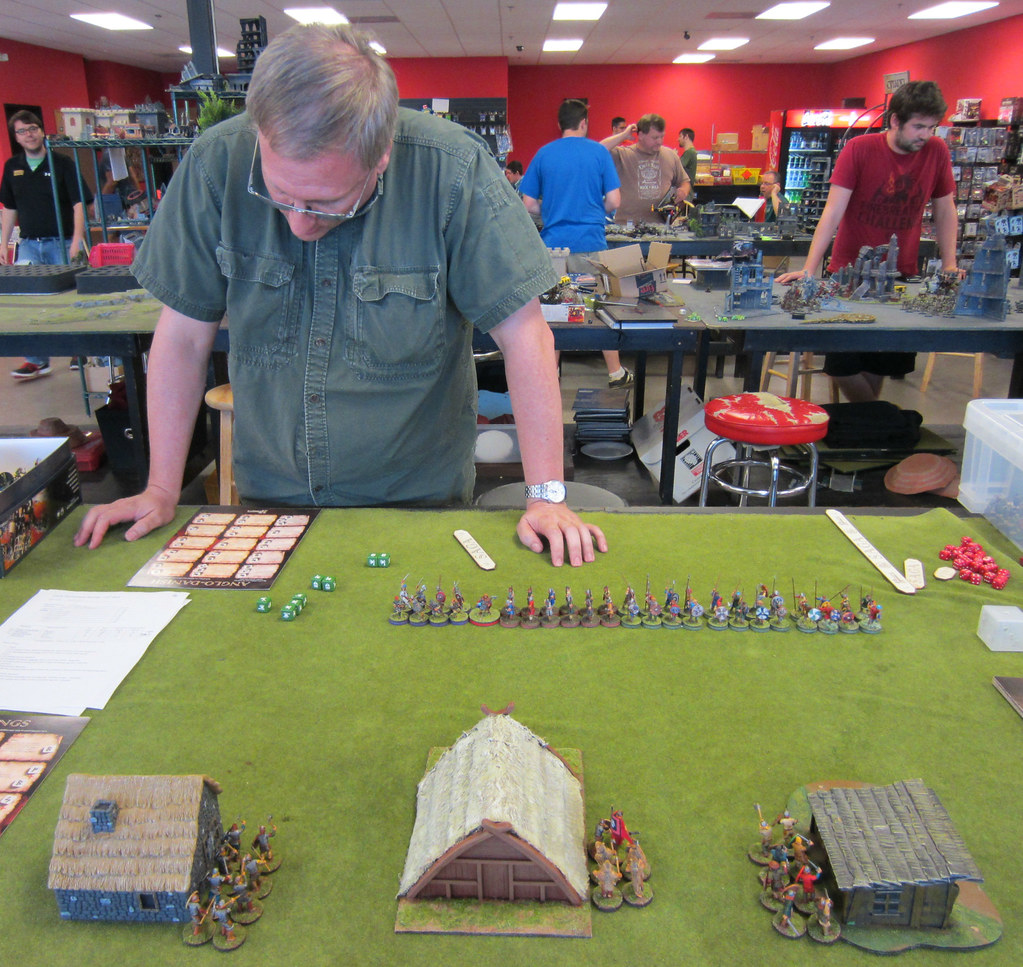
| There sure are a lot of Anglo-danes approaching. Hope they're friendly! |
 |
| The impressive Anglo-dane shield wall! |
On the first turn, Brian used Trapped to give fatigue to three of my units, then unleashed a barrage of arrows at the Berserkers in the central house.
 |
| Brian ponders what Anglo-dane deviousness he can throw at my Vikings. |
 |
| One Berserker failed his save, and died in a hail of arrows. |
On turn two, Brian continued his advance, and this time his arrows were more effective, killing off the last of the Berserkers. Despite the hard cover from being inside the house, Berserkers are still very vulnerable to missile fire. I'd have done better to take a unit of regular hearthguard in their place - lesson learned.
Once the Berserkers were cleared out, Brian charged his own hearthguard into the large building and engaged my warlord. I killed some of the Huscarls, but my warlord was killed as well. He only managed to survive one of the four battles during the tournament - he must have a death wish!
Meanwhile, on my right, Brian sent three units of Ceorls to engage my Bondi.

Over the course of the next four turns, he charged his forces in, time and time again, whittling down my defending warriors and giving them fatigue. The special rules for a building mean that unless the attacker completely wipes out the defending unit, they have to retreat after the melee regardless of who suffers the most casualties. This meant that my Bondi were able to hang tough after each combat.

On the right, the numbers in Brian's favor made themselves felt, and the brave Bondi finally succumbed. Now Brian was in possession of two of the three village buildings.
Unfortunately for him, he did not have enough units left on the other flank to threaten my hearthguard in the time remaining, and he pulled his warlord back rather than leave him in a position where he'd be vulnerable to a sortie from me.
Having the hearthguard in control of that one building gave me the win!
Lesson: Homeland is incredibly tough for the attacker, and frankly a bit boring for the defender. I did not have enough points to do much else than just sit in the buildings and try to weather the onslaught. There's not much strategy to just rolling dice when you get attacked. All my important decisions, both good and bad, were made when I deployed.
Result: Another win for the Vikings! Three points for me, and Brian earned a bonus point for killing my warlord. With this result, I finished 2-1-1, with a total of nine points.
Overall result: I finished in second place. I tied with Brian in points with nine, but edged him out in victory points (I told you they'd be important) by killing more enemies during the course of the day. No one was really close to Alan, who finished undefeated (three wins and a draw), with 11 points.
Overall lessons:
- The Irish are tough!
- Be as familiar as possible with the rules. I am aware of at least one occasion where I misinterpreted a rule and shortchanged myself on the number of attack dice I rolled. I am certain I also made mistakes in my favor.
- Berserkers are great in hand-to-hand, but they need to be protected in order to get into melee with the enemy. Otherwise, they quickly become nothing more than wolf-shaped pincushions!
- Protect your warlord! This goes without saying, but what I mean by it is don't be afraid to go defensive in combat - giving up some offense to give your warlord a better chance of surviving can be a huge factor in the game.
- Concentrate on the scenario objectives, and stay focused on your overall plan. Obviously, there's a fine balance between not getting distracted from your main strategy, while remaining flexible enough to react to your opponent's moves.
- Have I mentioned how tough the Irish are? I now have three warbands (Welsh, Irish and Pagan Rus) on my painting table waiaintg for me to finish off my final points of Vikings. After Saturday's tournament, the Irish have jumped to the top of that list!
And, once more, a huge thank you to Gripping Beast. Not just for their support of our tournament, but for creating this wonderful game! It truly is one of those games that is simple enough to learn quickly, yet has a depth and complexity that make you keep wanting to play it in an attempt to master it.
I am eagerly looking forward to the next tournament - I just hope I have time to paint up my Irish before-hand!
'Til next time!
P.S. - While I was at Giga-Bites on Saturday, I picked up a copy of Saga: The Crescent and the Cross. I wanted it for the updated rules that apply to Saga, as well as to start researching a Spanish warband. Stay tuned for a review...


2 comments:
Sounds like it was awesome fun.
Hi Robert,
Yes, it was a great day of gaming and fellowship. We're very likely going to do another one, though not too soon. Maybe in a couple of months or so - and I am looking forward to a Crusades-themed tournament now that The Crescent and the Cross is out!
Henry
Post a Comment