Pages

Wednesday, May 28, 2014

Star Trek: Attack Wing - Tholian Web OP

I ran  the Star Trek:Attack Wing Tholian Web OP at Giga-Bites Cafe this past Saturday. It was great fun to see the players maneuver their fleets as the web closed in on them.

We had a good mix of fleets represented, with a couple of Borg fleets, a Romulan warbird fleet, and a pair of Federation fleets.

Here's the action:

Romulan warbirds close in on a Borg sphere backed up by fighters and a mine-dropper.


Federation starships bracket a Borg sphere prior to blasting it into atoms!

What to do, what to do?

Federation strike force.

Borg sphere!
 
Pair of Borg spheres prepare to engage the enemy!

The warbirds de-cloak to attack!


Good sportsmanship and good competition.

Concentration!

I hope that's an evade!

Measuring range.

Another Borg sphere about to bite the dust!

Dueling minefields (the disabled token is just to differentiate ownership).

Hmmm, I think you are just withing range!

Federation strike force moves into a cloaked minefield!

Good fellowship and competition among siblings.

Assigning a target lock.

Federation starships move against a Borg sphere.

That attack is gonna hurt - I think a Defiant class was killed on that roll.

Two Borg spheres vs. a sphere and a Valdore.

Romulan warbirds track down a Borg sphere that has strayed from its escort.

Measuring range before unleashing a barrage!

OK, now where do the web tokens go?
The Tholian Web closes in!

That's gonna be close!

The Enterprise can't quite make the turn and is destroyed by the Web!


It was a close event, with four players ending up 2-1, so the winner was determined on points. The winning fleet combined a strong Borg sphere with cloaked mines and fighters, and finished with 276 points to the second place finisher's 245.

All in all, this was one of my favorite OP scenarios so far. I loved the tension building as the Webs kept shrinking the playing area. The only regret is that since I was running the event, I did not get to play. But that will be remedied Friday when the store runs another event - and this time I get to play!

'Til next time!

Monday, May 26, 2014

Saga Viking warband - Basing and completion!

It took a little longer than I would have liked, but I was finally able to polish off the first 2pts of Viking hearthguard for my Saga warband.


I finished the bases on the figures using my standard technique. I know that everyone has their own preferred method of basing figures, and I do not claim that mine is any better than anyone else's, but it works for me. I find it results in a good-looking base that is detailed and durable enough for a gaming figure.

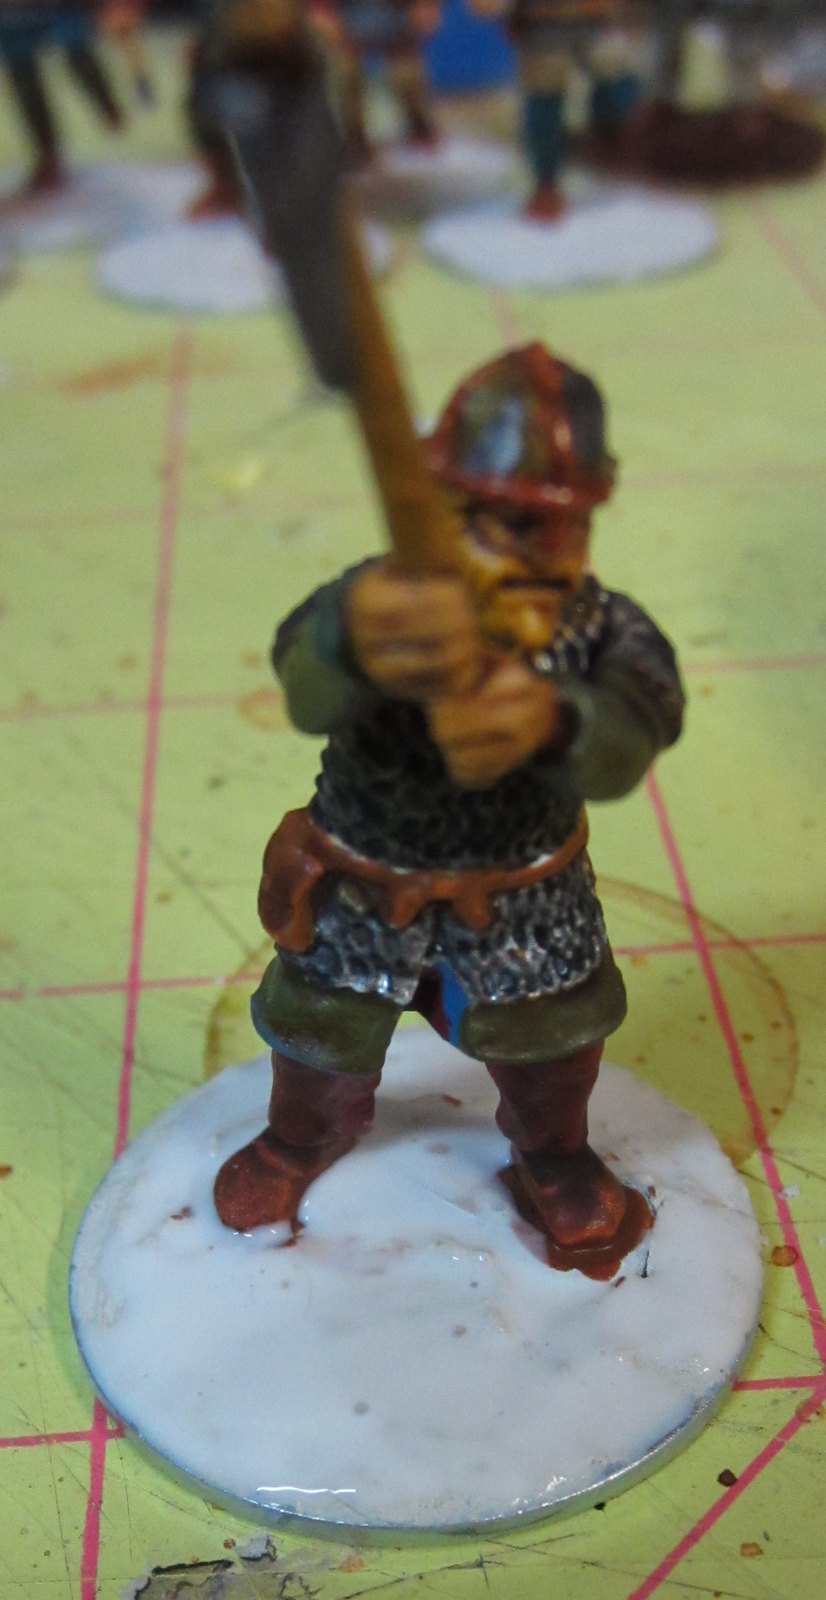
Step 1: Coat the base in glue.


I use a wood or carpenter's glue, but you can also use white or PVA glue. I find the wood glue is a little thicker and covers better than the white glue. I have used TiteBond as well as Gorilla Glue with good results.

Step 2: Dip in sand.


I have a small tub of fine sand I use for basing. I am not sure where I got it - I think it may have come from the kids' sandbox when they were younger. I just take the figure with the glue on the base and dip it into the sand deep enough for the base to be fully covered. Then I pull it out and tape on the figure to knock off the excess glue.


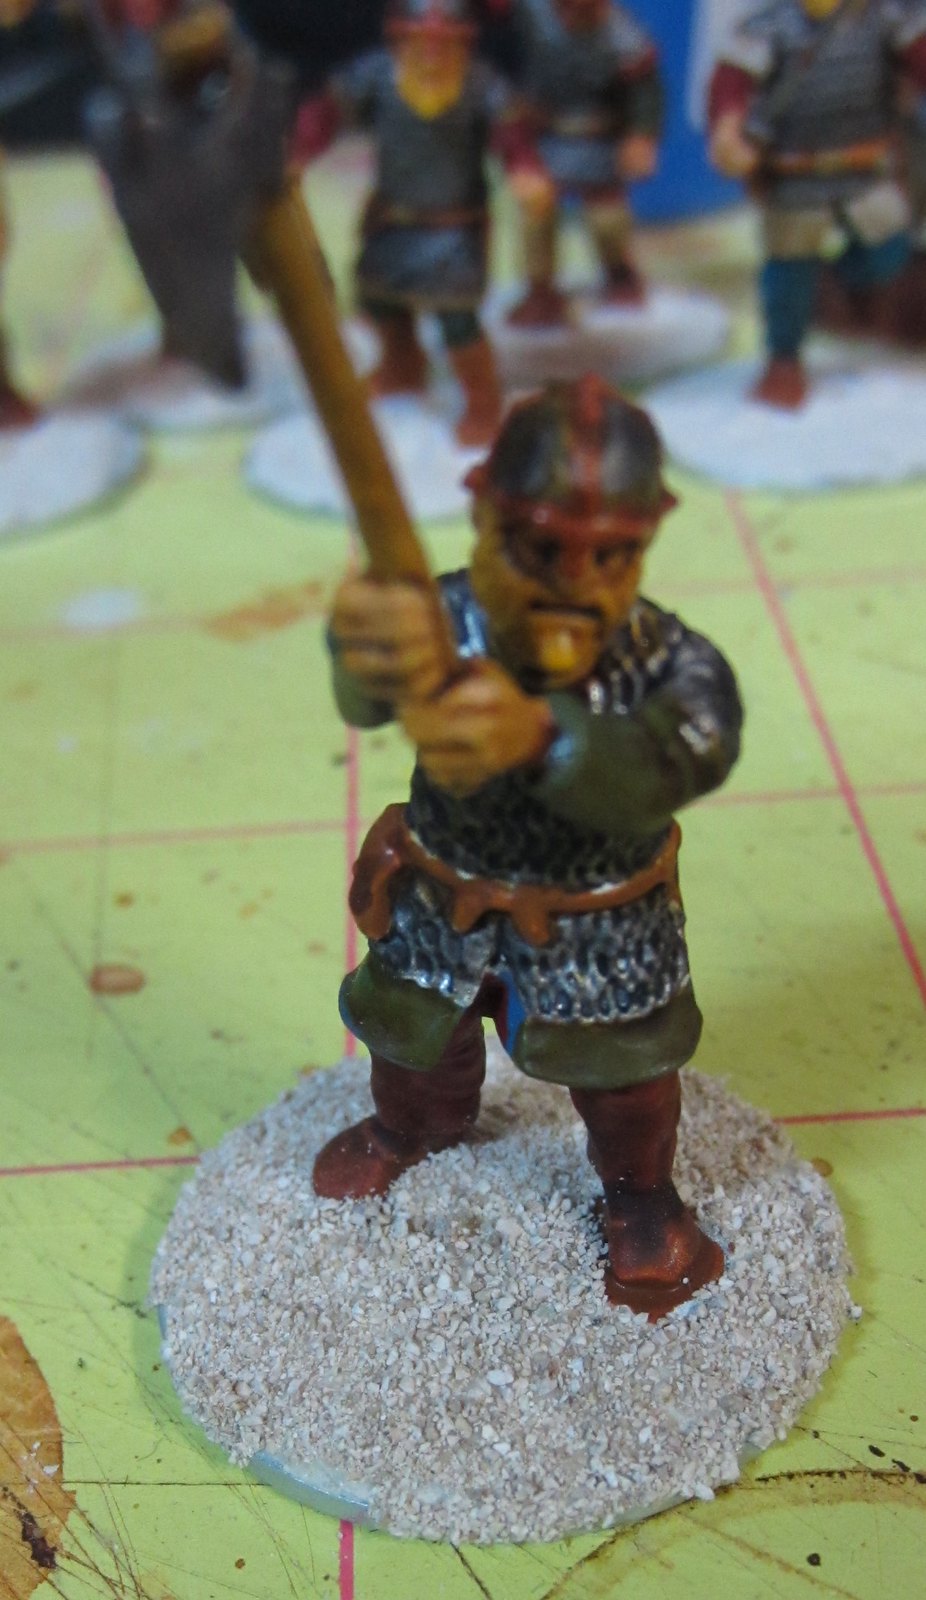
Step 3: Dab on "Scenic Cement."


I then dab on a product made by Woodland Scenics, called Scenic Cement. As far as I can tell, it is basically watered-down PVA glue with a wetting agent to break surface tension. (You can probably make your own from water, glue and a drop of dishwashing detergent.) The wetting agent allows the glue to completely saturate the sand, rather than just sit on the top, and creates a very solid bond that will prevent the sand from flaking off the base.


Step 4: Dip in sand, again.


After the glue has been dabbed on the base, I dip the figure on the sand again and knock off the excess. This fills out the glue and raises the surface of the sand to better hid the edge of the molded base the figures are standing on.

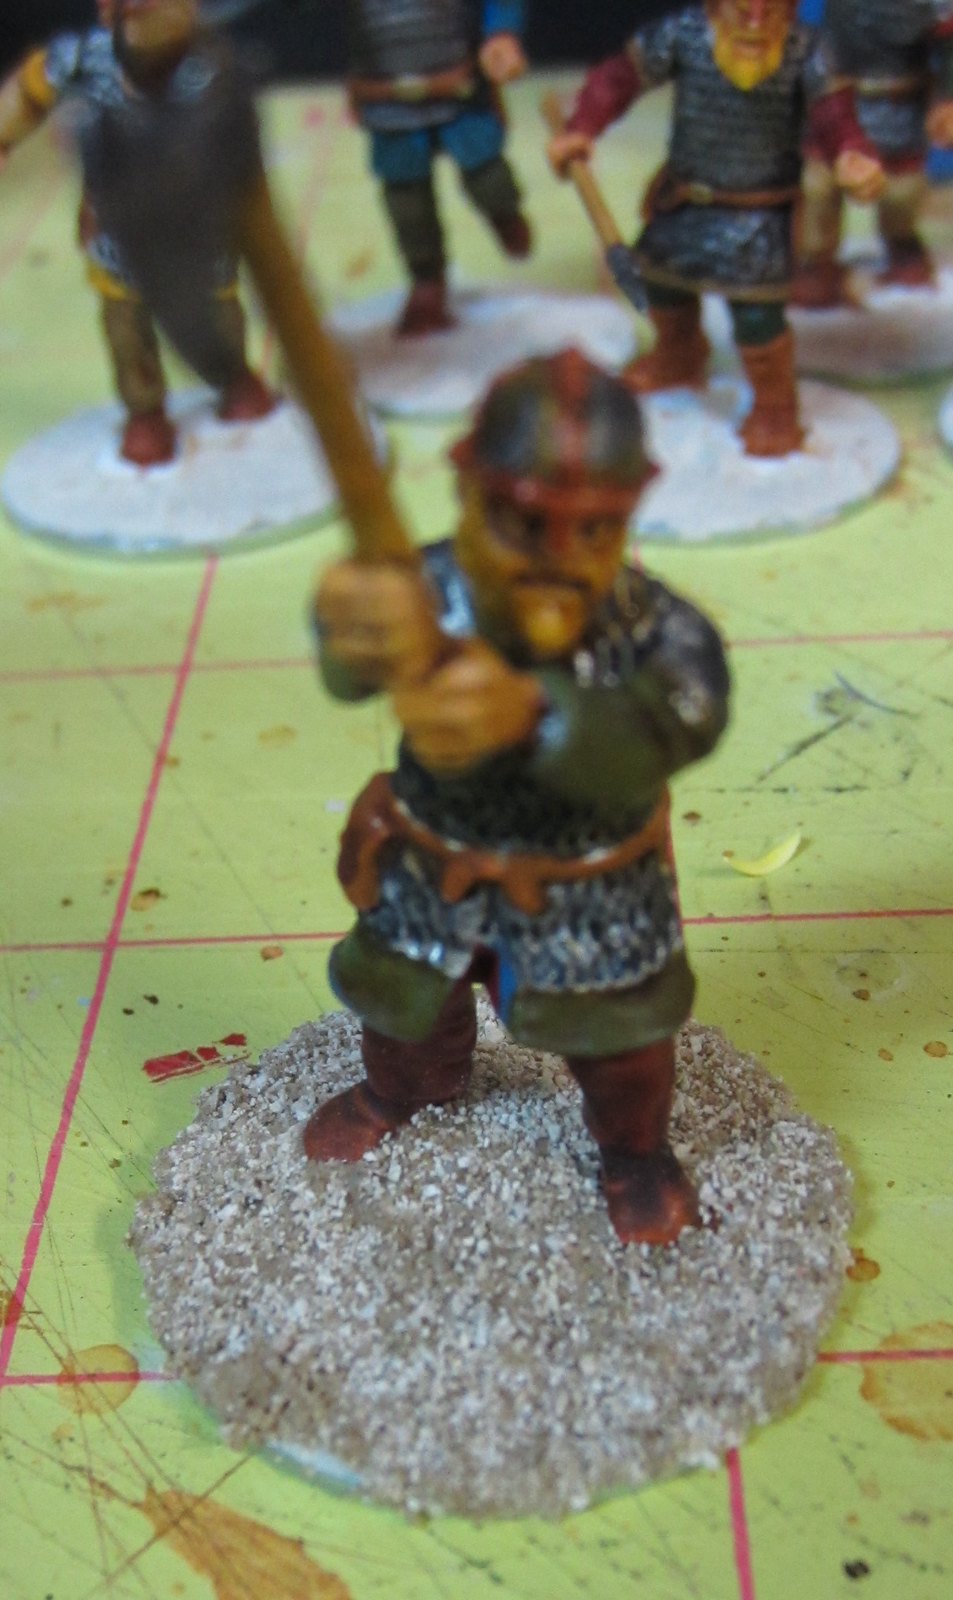
Step 5: Dab on some more scenic cement.

I repeat the dabbing on of the scenic cement. Again, this completely saturates the sand with the glue mixture.


Step 6: Tint the sand with ink.

I put a few drops of a dark borwn ink on the base. The ink spreads throughout the base where it has been wetted with the scenic cement. I think you could probably use a wash for this, but I like the deep brown look created by using ink. I buy mine at Michael's.

If you are making bases for other environments, you can use any color ink. I've also black ink for when I am making asphalt or modern city bases.


Step 7: Allow to dry completely!


Before you move on to the next stage (drybrushing and adding grass) let the bases dry completely. If you don't, you'll knock some of the sand off when you are drybrushing. This is the hardest part for me, since I am very impatient. I usually let the bases dry overnight - I set them aside and work on something else for the rest of the day.


Step 8: Apply the first drybrush.


The specific colors used will depend on what environment your bases will be. The brown base actually works well for a variety of different bases. If it's a desert base, for example, I just use a heavier drybush of the same colors I used for these Vikings. If it's supposed to be a muddy field, then it may not need much other than a slightly lighter brown drybrush. Experiment with the colors until you find a combination that produces the desired results.

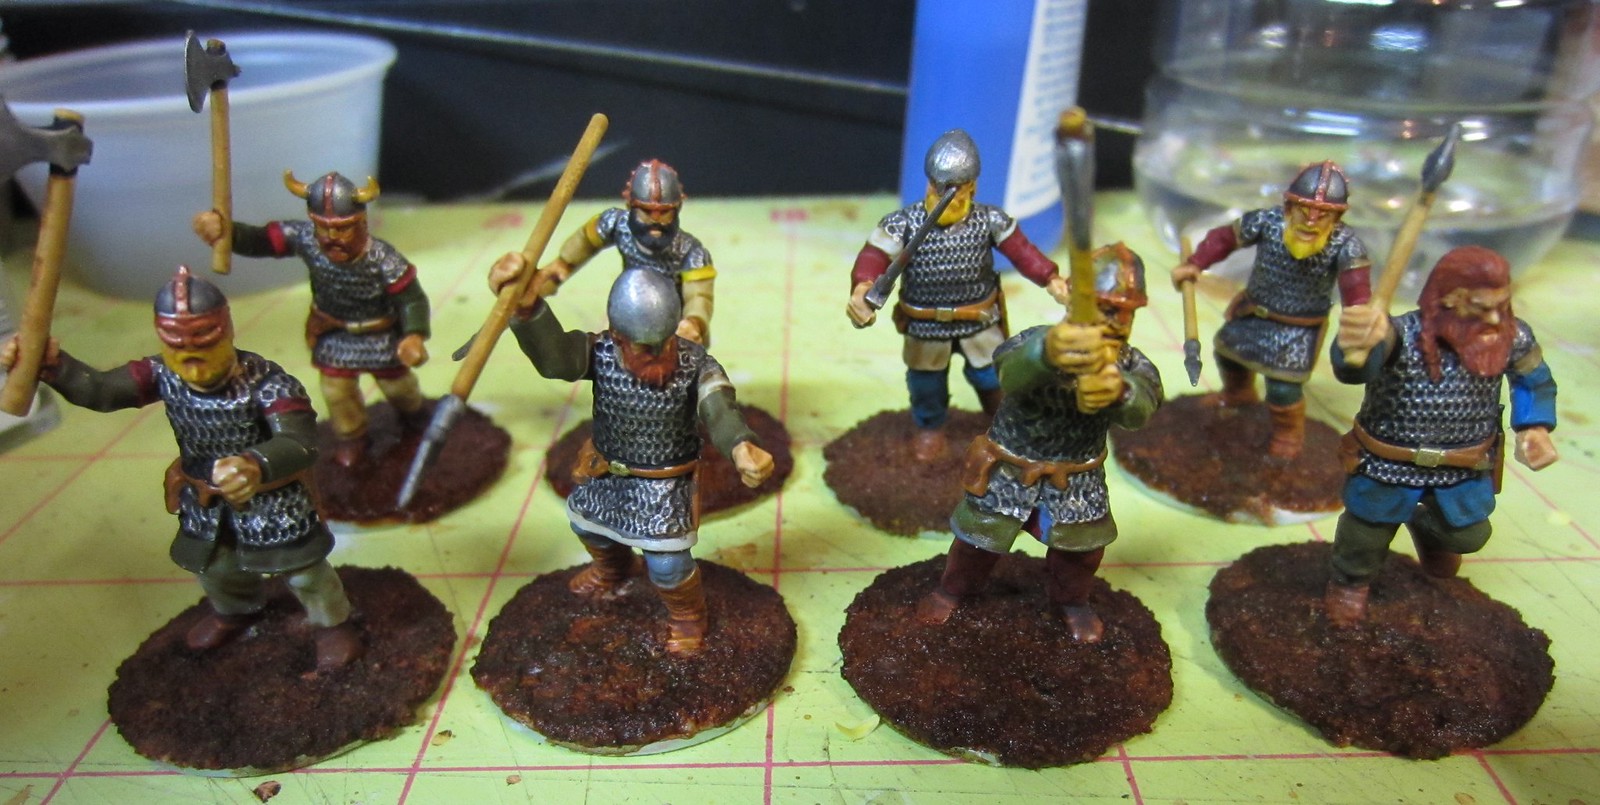
For the Viking bases, I started with a fairly heavy drybrush of Yellow Ochre. The brushed bases are in the first row, with the untouched bases in the back.


Step 9: Apply the second drybrush.


In order to give the bases a little depth, I use a second, lighter drybrush. In this case I used Menoth Base White.

Once again, the front bases have received the second drybrush.


Step 10: Apply the ground cover.


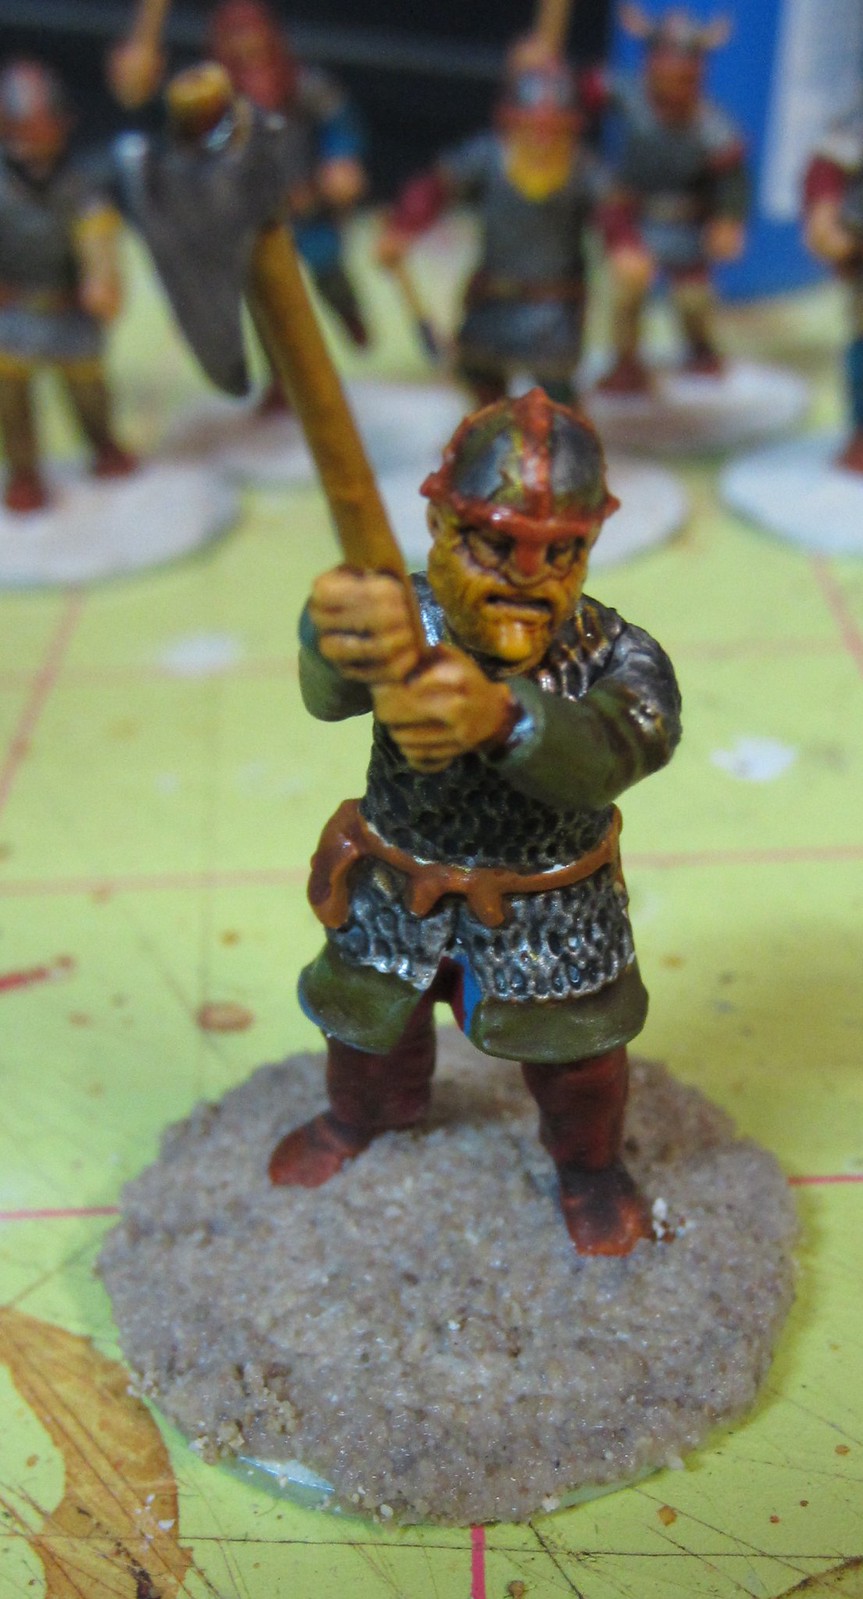
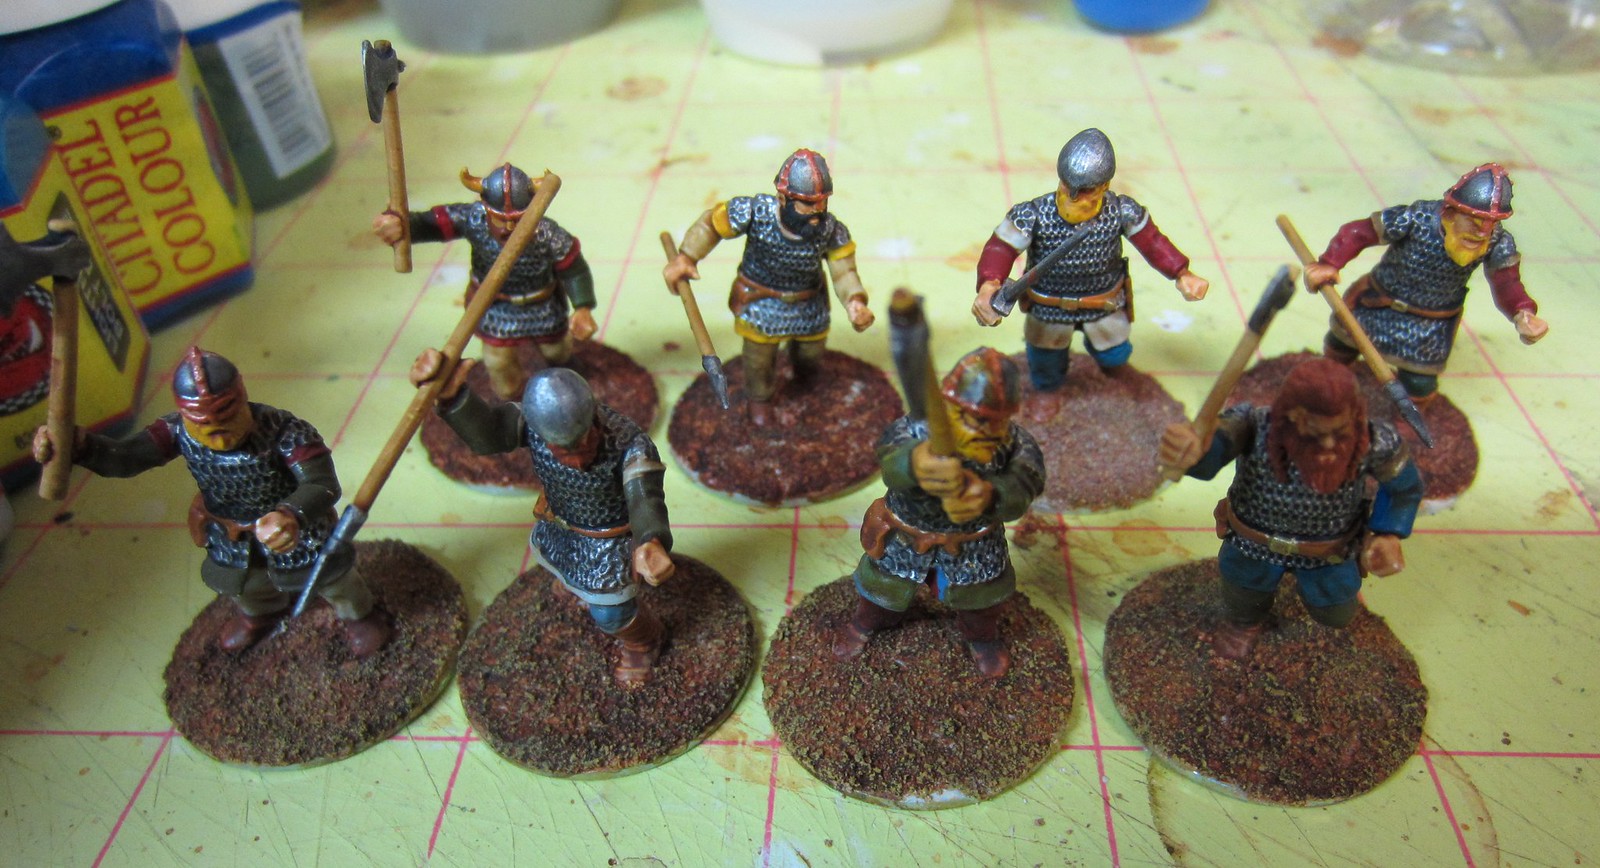
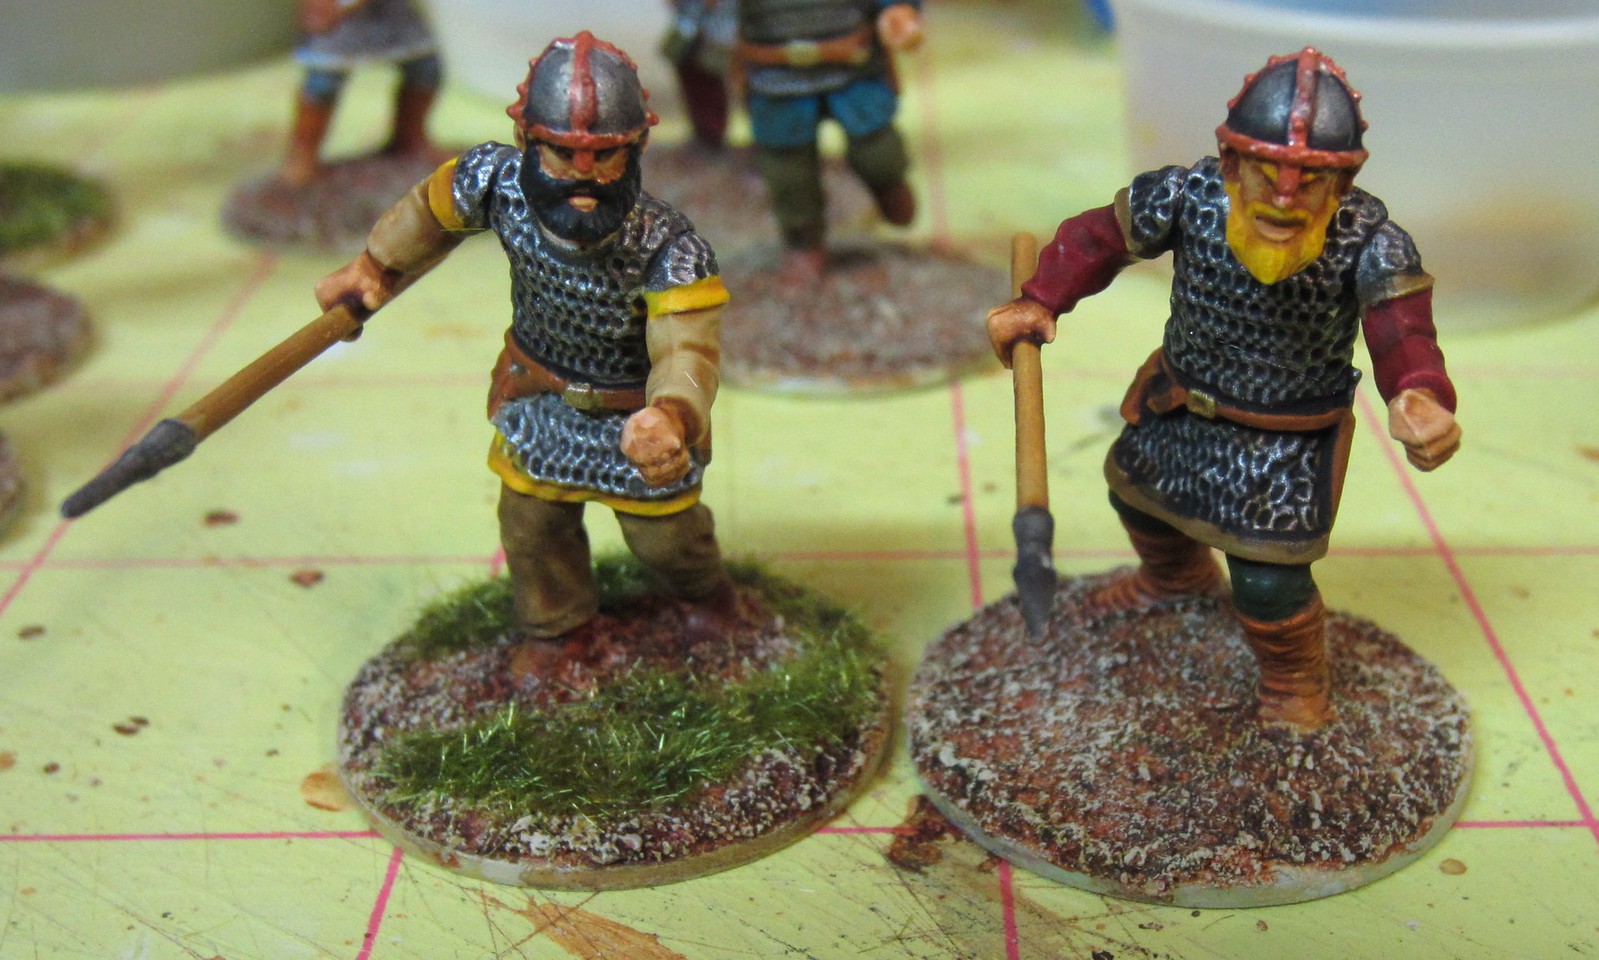
Once the second drybrush is complete, it's time for the ground cover. I used static grass on these bases. I just dab on some super glue in a random pattern on the base. Then I sprinkle the static grass on the base, turn the figure upside down, and tap the bottom of the base. This has the effect of making the static grass "stand" and makes it look more like real blades of grass. The figure on the left has had the static grass applied.

Step 11: Finishing up.

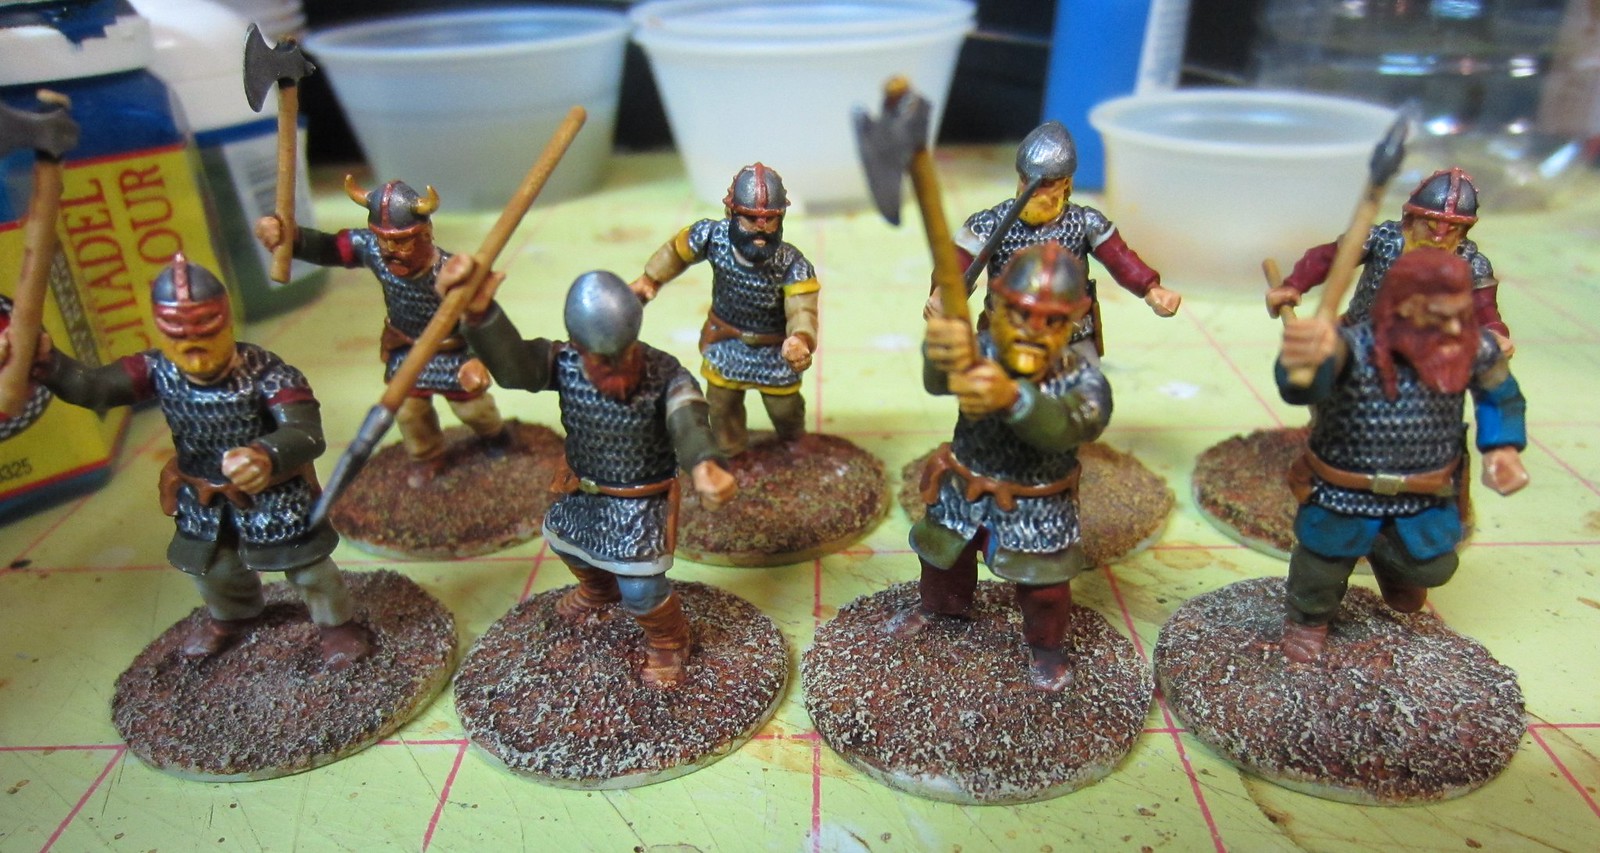
I paint the edges of the bases an appropriate color - in this case Scorched Brown - then spray the entire figure with a matte sealer.

As you can see, I use a variety of colors and paints, from many manufacturers. I just find a color I like, and don't worry too much about who makes it. I mix Privateer paints, Citadel paints and the cheap Apple Barrel or Folk Art colors from Walmart! For scenery and bases, I find it doesn't much matter what you use, as long as the colors blend into something you like.

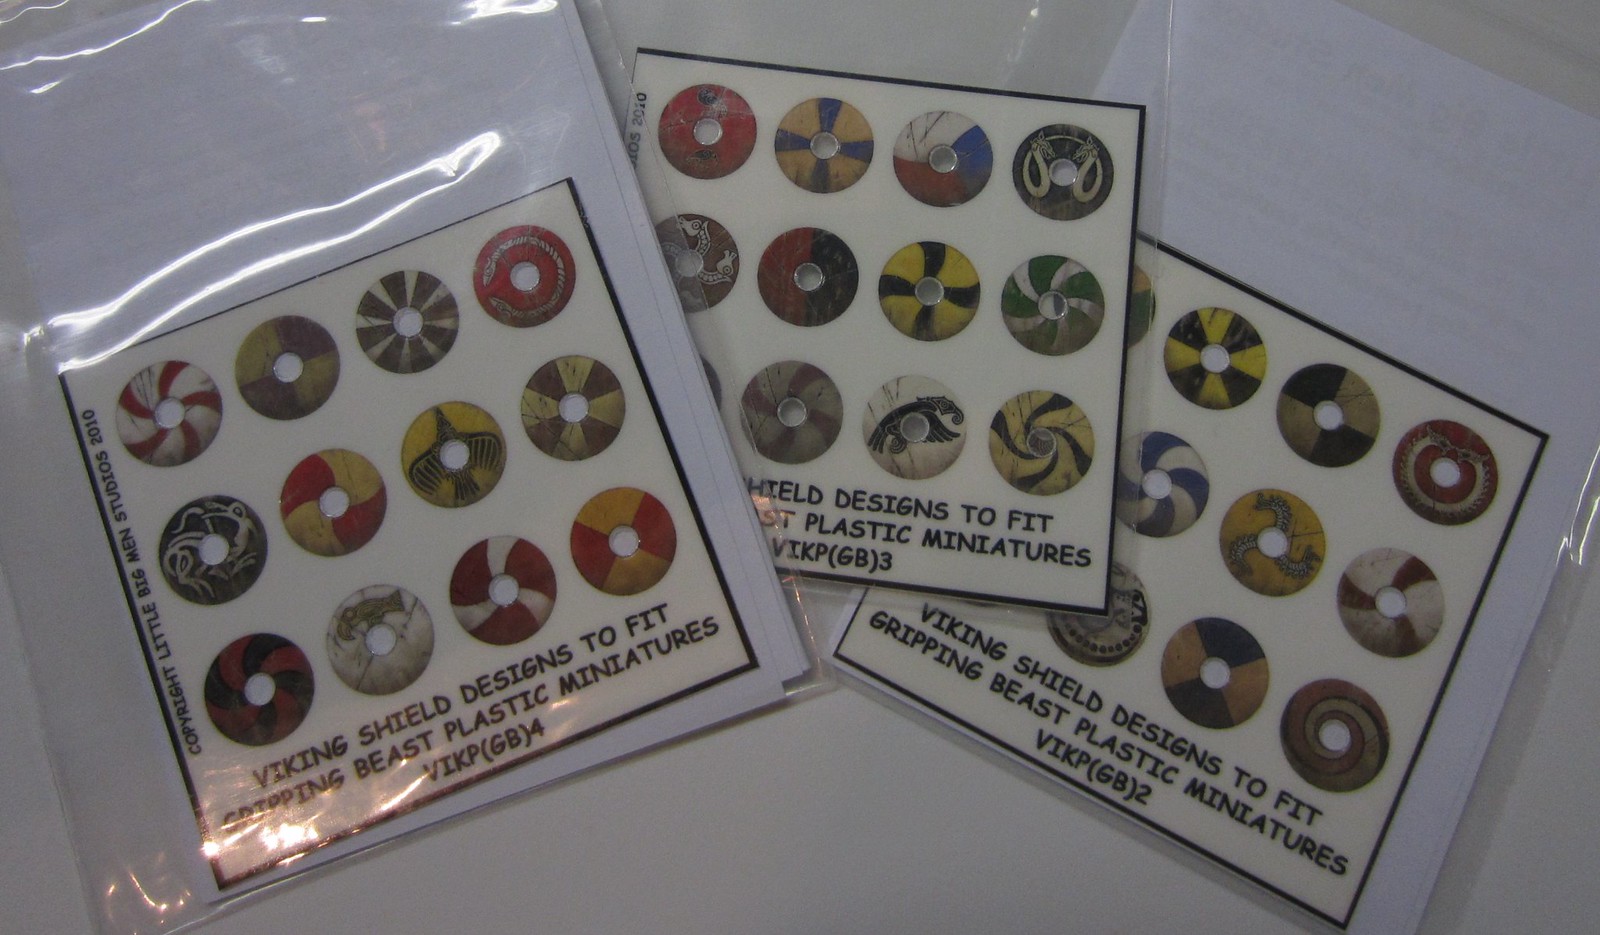
So, after basing, all that was left to finish the figures was adding the shields. I took the easy way out, and ordered some transfers from Little Big Men Studio. They are easy and quick to apply, and look great (much better than I could do by hand).


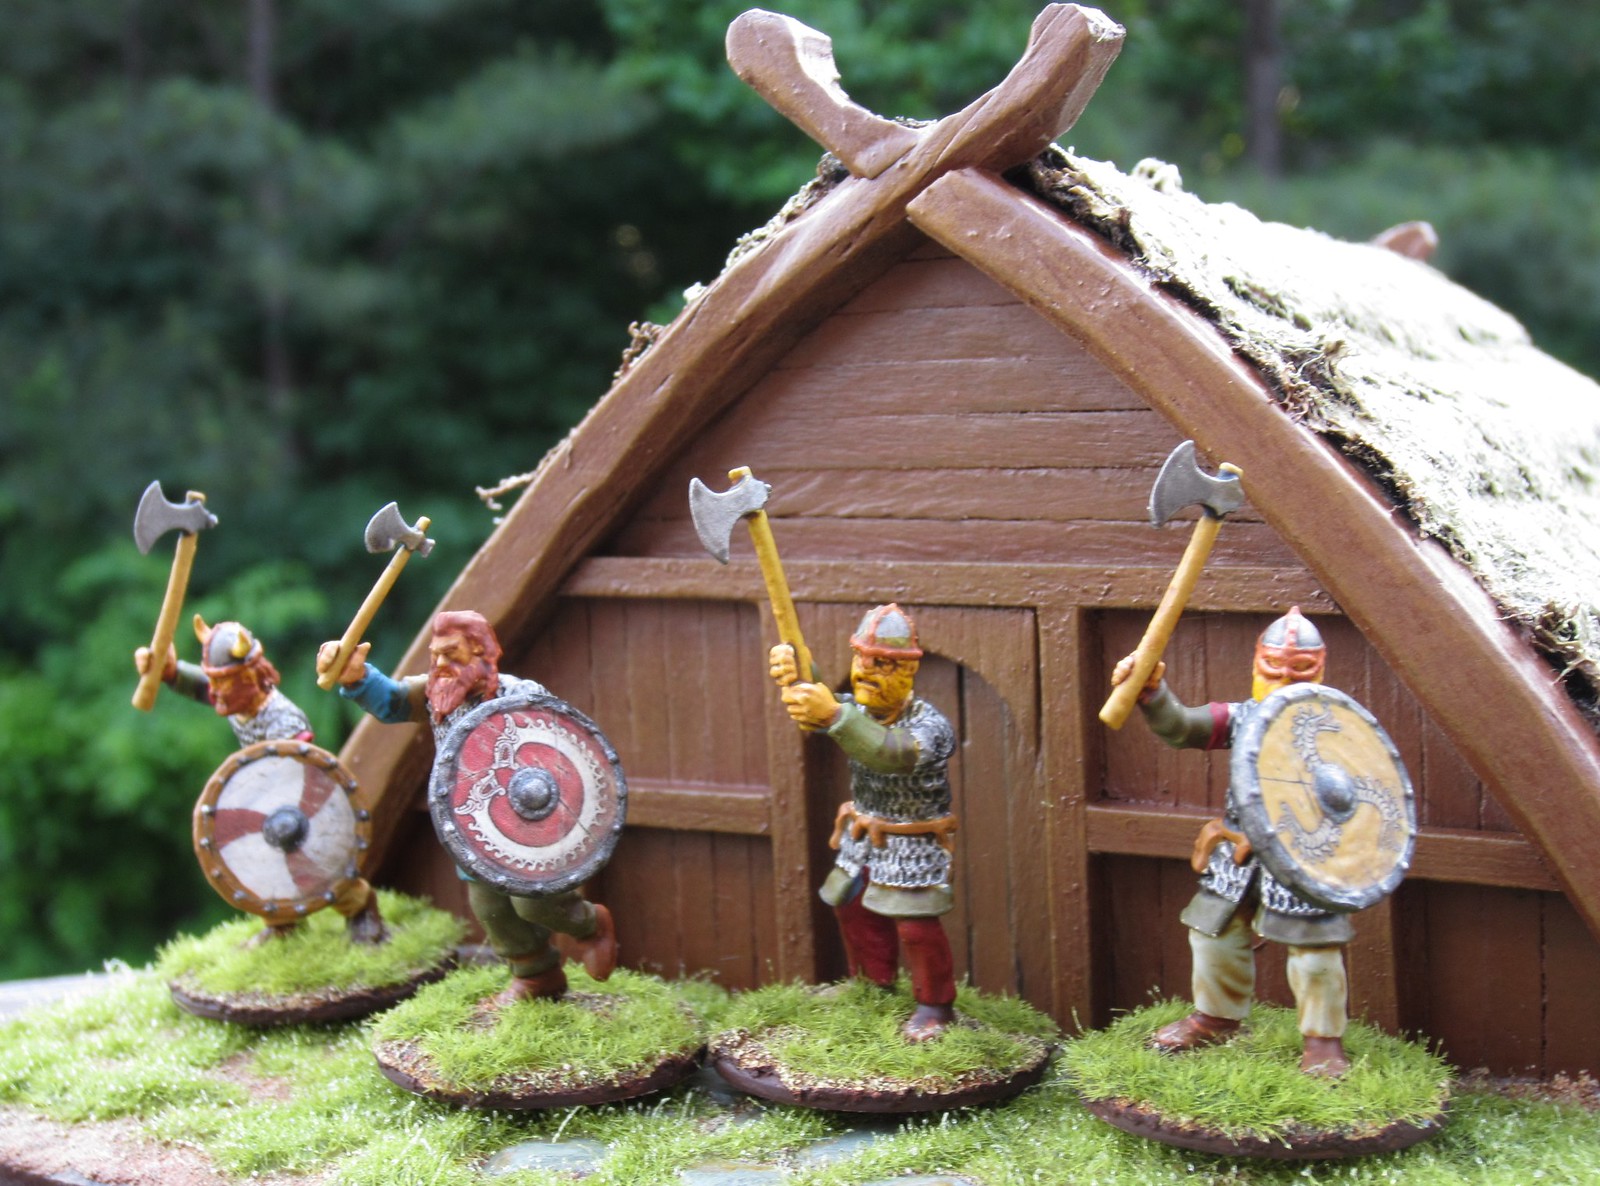
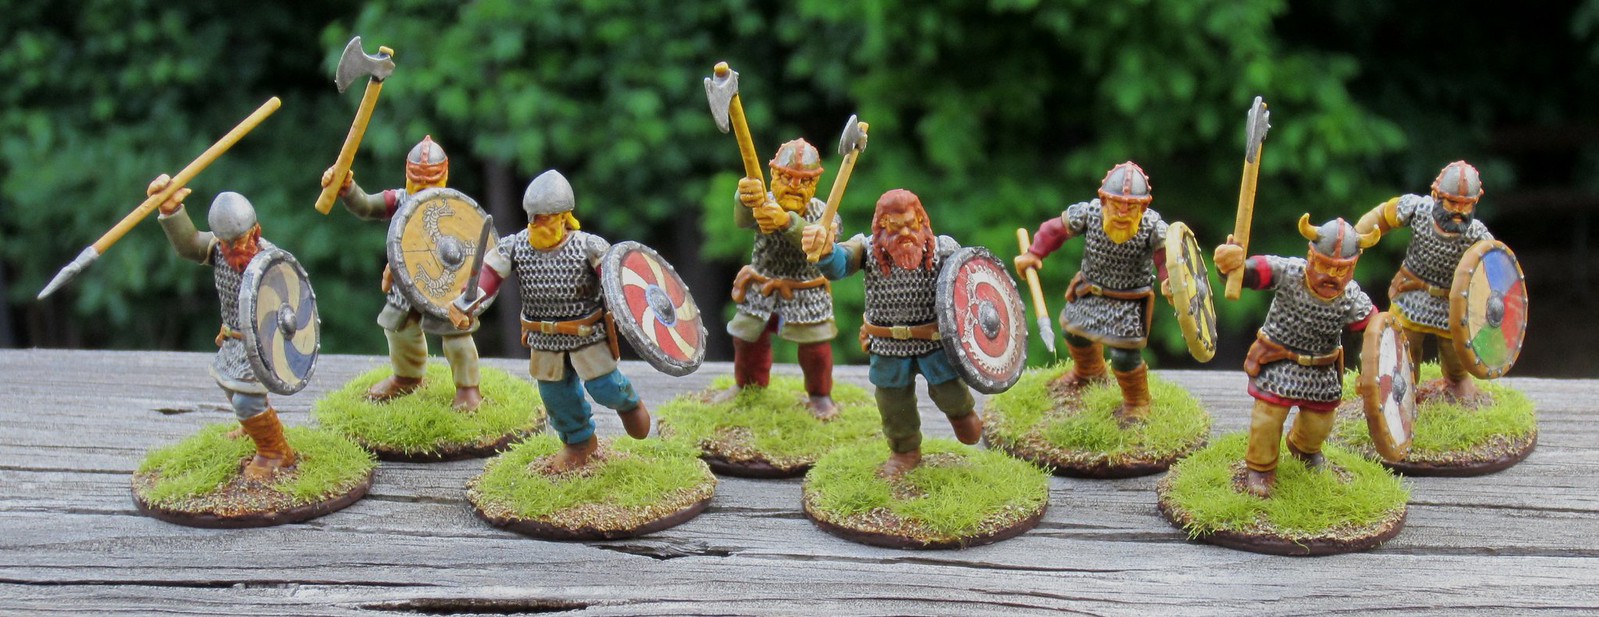
Once those were sorted, I just had to assemble my Viking raiders for a photo op!


Now on to the next 4 points of Vikings. Hopefully, these will not take me as long. There's a Saga event at the local game shop in late June, and that deadline gives me incentive to get the warband done.

'Til next time!

Tuesday, May 20, 2014

Car Wars - Georgia State Patrol Enforcer

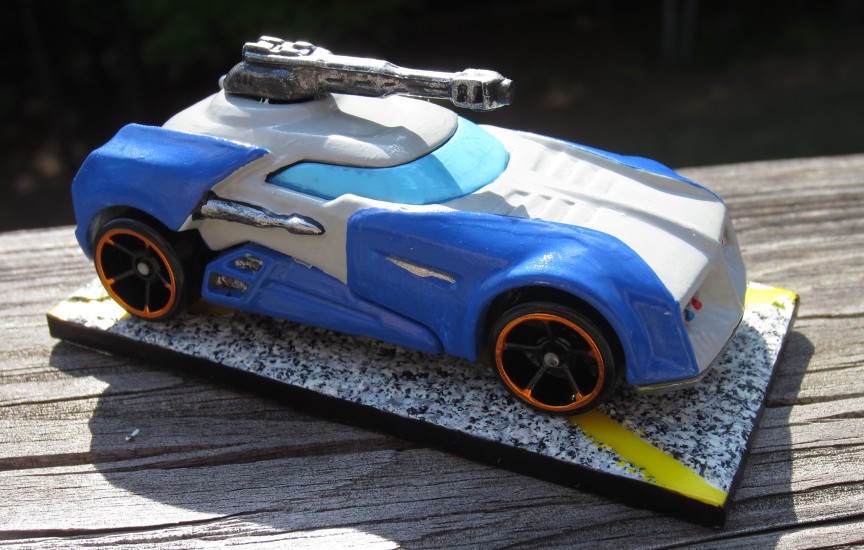
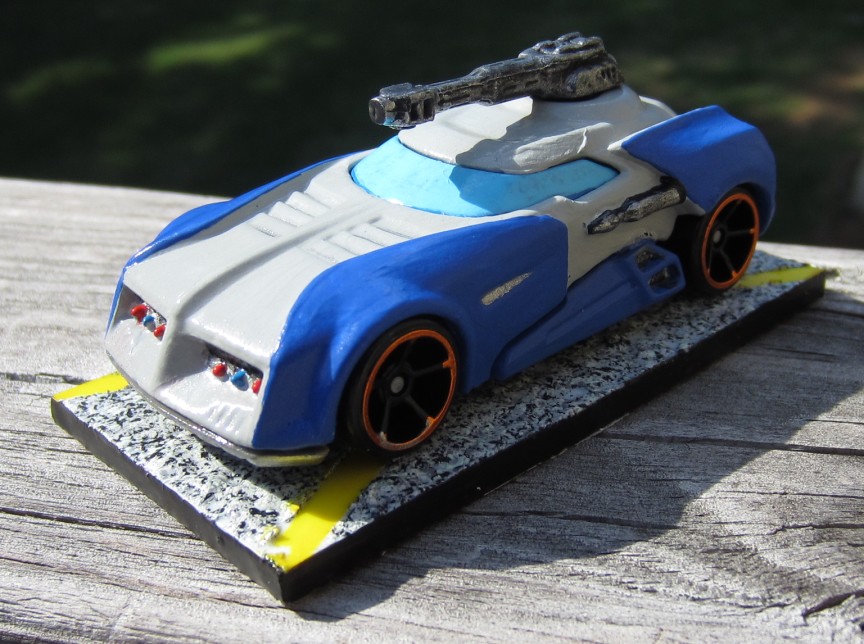
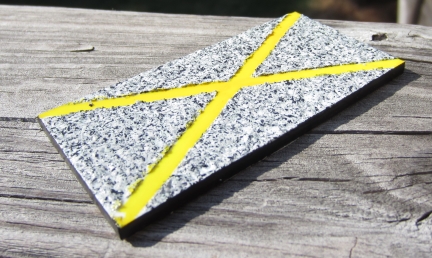
Since it seems Car Wars is seeing a resurgence locally, I wanted to do something local, yet cool. I repainted a Hot Wheels "Turbo Turret" car in a Georgia State Patrol scheme. I need to find decals in orange to get some text on it.


These are the stats I came up with:

Enforcer (Rolling Thunder Motors, Law Enforcement Division)
Mid-sized, Heavy chassis, Heavy suspension, Large power plant, 4 Solid tires, Driver, Gunner, Recoilless Rifle in Turret, 2 Linked Machine Guns Front, Plastic Armor: F28, L28, R27, B28, T27, U15, Gear Allocation: [6 lbs.], Acceleration 5, Top Speed 97.5, HC 3, 5274 lbs., $14648


This is a real GSP Dodge Charger.


The base I painted up using Fleckstone spray paint (granite) and some masking tape to mark out lines to show firing arcs.
Can't wait to have a chance to get duellin'!

'Til next time!

Monday, May 19, 2014

Saga Vikings - first two points nearing completion!

I was able to get some worktable time this weekend, and made good progress on the Saga Vikings I am currently painting. My first group is 2pts of Hearthguard from Wargames Factory - each point is four chainmailed warriors armed with axe, sword or spear, and shield.

I am not an expert painter, by any stretch of the imagination, and despite the fact that I work slowly and meticulously, I consider my figures to be painted to a wargaming standard, nothing more. My technique is, ultimately, very simple. I basecoat in the desired colors, then wash. That's it. These are the steps/colors I used to paint these particular figures:

I usually prime my figures in white. I know most other mini painters prime in black, but I just feel that it dulls down the colors too much to paint them over a black base. I use Vallejo and Games Workshop paints interchangeably, and I will note the colors used if I remember!

I painted the faces and hands with Vallejo flat flesh, and folowed with the hair and beards. I used a variety of colors, including GW Sunburst Yellow, Bestial Brown, Vermin Fur, and Vallejo German Grey (which is almost black).

GW Chainmail went on next, followed by Snakebite Leather on the belts and some leggings. For the helmets, I used Chainmail on the main parts, and followed with Copper on the ridges and face masks.

The spear shafts and axe handles were painted GW Bubonic Brown, as I wanted lighter wood to simulate ash. And the weapon blades and spear points were painted GW Chainmail.

The various tunics and pants were painted in a variety of colors. I used GW Shadow Grey, Space Wolf Grey, Enchanted Blue, Mechrite Red, and a ton of Vallejo greens and khakis. I mixed them pretty much randomly on the figures, just trying to get combinations of tunics and pants that looked good to me. I used GW Bestial Brown on the boots, and the basecoating was complete:


After that dried completely, I applied a couple of washes. First, I used GW Nuln Oil shade on the chainmail armor, helmets and weapons. I used a pretty heavy coat of this, and went over some areas more than once to lose the silvery shine. When that dried, I applied GW Seraphim Sepia shade over the rest of the models, covering hair, faces, tunics, leggings, etc. The wash really brings out the details, and blends the colors into a cohesive appearance.

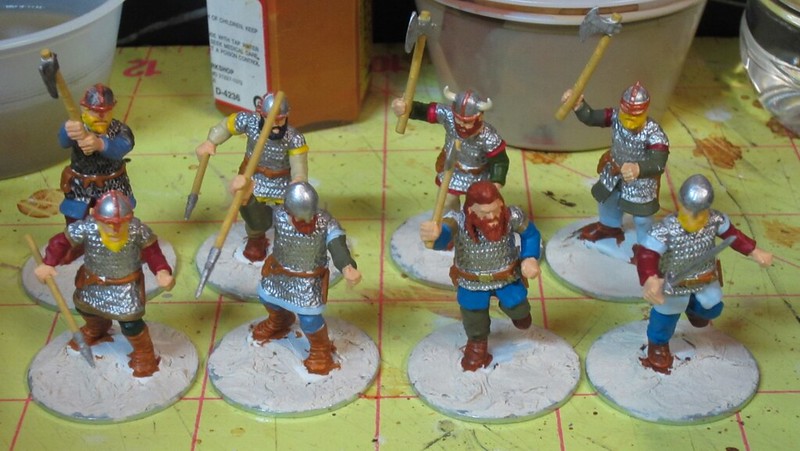
At this stage, I consider the figures to be complete, except for the basing and the shields:


Since Dark Age warrior shields are so highly visible, they need to look good or else the whole miniature suffers. Since I do not think I can do the shields justice painting by hand, I have some transfers on order from Little Big Man Studios that will make them stand out. I'll post more pictures when they are ready.

Now to get started on my next batch of warriors - more Hearthguard and some Bondi. I hope to have a full 6pt Saga warband painted by the end of the month, and have set that as my goal, since I work better under the pressure of a deadline.

'Til next time!

P.S. To those of you who noticed the non-historically accurate horns on the Viking in the back row. Yes, I know! :)
Long story - when I first assembled these Vikings, the plan was to use them as Skandians (from John Flanagan's Ranger's Apprentice books). They are Viking analogues that do use horned helmets. That wargaming project never really got off the ground, and when I rescued these figures to use for Saga, I decided not to change his head/helmet.

Sunday, May 18, 2014

First Saga Battle - Vikings vs Anglo-Saxons

Asgrim leaned heavily against his Dane axe as he wiped his forearm across his face. It came away drenched with sweat and blood. Across from him, Haakon sat, binding a gash on his arm.

"By Hel's ruined face, Haakon, it has been a day for the sagas!"

"Asgrim, you hairy arse, sagas are sung of victories, and today there was no victor."

"This was a red day, a day of heroic acts and feats of arms. How can you be in such a grim mood?"

As he got to his feet to find something to eat,  Haakon thought back on the day's events. Yes, grim was the right word to describe his state of mind. Dawn had broken with the promise of glory and plunder, but the sun had set on a field of the dead.

He thought back to the battle that had transpired...

Ulf had led their band, the bloodsworn, to a hill that the nithing Anglo-Saxon considered sacred. According to local legends, they buried their so-called kings there, clad in their best mail, and surrounded by treasure. In their home village, a volur had read Ulf's dreams, telling him that hill would be where he would find his destiny. Ulf had taken that to mean that was where he'd earn a crown.

The men had been uneasy at that, believing no good come from looting a barrow - at best they would anger the spirits of the dead, and at worst the dead might not really be dead. They had all heard tales of draugar. But Ulf was persuasive, and had gathered a band of warriors to his side to explore the place. Before they departed, however, he took two precautions. He'd had the witch craft a spell of binding onto an iron amulet in the shape of scissors. And he'd had the men take a blood oath to each other and to the mission. They had sworn, cutting themselves and mingling their blood, not to abandon their quest or their mates. They were brothers, bound by blood.

Whether he was led by his dream, or by his fate, Ulf led them unerringly to the holy mound. Their journey across the sea had been uneventful, and they had thought it to be a good omen. Once they had beached their longship, hard marching had brought them to the barrow on the third night. But, across from them, they had seen the fires - the Anglo-Saxon dogs were here to protect their sacred ground!

The men had awaked long before the sunrise, and around him Haakon could hear the sounds of warriors adjusting armor, sharpening blades and engaging in their usual banter. By dawn, which had broken bright and cloudless, they were ready.

Ahead of them was the barrow, rising lightly from the flat ground. To the left was a grove of trees, obviously planted for a purpose as it stood alone in the field. To the vikings' right were some erected stones, though no one could guess at their significance.

Ulf ordered the ulfhednar and some of the bondi ahead into the grove, while he led the hirdmen towards the hill. One group of bondi were held back, much to their anger. The Anglo-Saxon warlord had much the same idea, sending his warriors ahead into the field of battle.

Haakon had been with the group of bondi and berserkers that made their way towards and into the trees. They encountered some spearmen, but were able to push them back and out of the grove in hard fighting. But, the bloodiest action was reserved for the central hill.

Ulf's chosen men, wanting to impress their jarl, charged up the hill and into the waiting ranks of foemen. They were unable to break the enemy's shieldwall, but held a portion of the sacred ground. Then Ulf arrived, and the stalemate was broken, and bloodily!

One band of huscarls charged into the spears of the Anglo-Saxons, only to be driven off by greater numbers. By Odin's dead eye, these Angles bred like dogs in rut! Kill one and two seemed to rise in his place.

The wolf-men had abandoned the grove then, seeking to find and kill the enemy leader and bring a quick end to this fight. The Saxon archers, though few, made them pay for leaving the cover of the trees. A group of Saxons fell upon the surviving berserkers, and overwhelmed them with their numbers.

Finally, Ulf had had enough of this stalemate. Calling upon Odin and his son, the Thunderer, Ulf led the remaining hirdmen in a charge against the Saxon swine-farmers. From the woods, Haakon had seen them race into the massed spears of their enemy. The gods truly were with them, and though they fell, they did not leave a single foeman standing. The last of the huscarls had thrown himself in front of a spear meant for Ulf, giving his life in exchange for his jarl's, and thus fulfilling his bloodoath.

But the charge left Ulf weary, and when the Saxon leader came upon him, wearing outlandish and sorcerous armor, he fell. There, on a piece of dirt sacred to dogs, Ulf met his destiny. The witch's prophecy was fulfilled. The bondi that had held back until then, seeing their leader fall, charged headlong towards the Saxon dog, Asgrim in the lead. They caught him, and despite his strength and size, like a pack of wolves taking down a  bear, they felled him.

The death of their lord took the spirit out of the enemy. Their bowmen milled about in confusion, while the warriors among the sacred stones held their position, watching warily but not advancing. From his position on the edge of the woods, Hakon could see the Saxon spearmen ahead of him, and hear them shouting curses and insults, though they too did not move against the viking warriors.

The day ended much as it had begun, with neither side being able to completely claim the sacred land. The only victors were the scavengers, four- and two-legged, picking over the corpses of the fallen.


Note: It truly was an epic battle, and a great introduction to Saga for me. Big thanks to Sean for his patience with a newbie! I had tons of fun, and would gladly play him again. As far as Saga, I love the battle board mechanic! It gives you a wealth of decisions to make about how you're going to conduct your troops, while keeping the actual game mechanics pretty simple. No need to memorize huge charts of armor and weapons values. Just attack, choose what abilities you're using, roll dice and remove casualties. I'm very glad I chose to get into this game. My only regret is that neither of us thought to take photos during the battle. (Note to self - remember to bring a camera!)

Now what I need to do is (1) become more familiar with the abilities on the battle boards, both my own and my opponent's, and (2) finish painting my warriors! I was very inspired by Sean's wonderfully painted Saxons, especially his shield work. I have to say, you must see them in person, the photos on his blog do not do them justice!

Wednesday, May 14, 2014

Saga - Viking building completed!
I have finally finished painting up the Viking dwelling for my Saga terrain! (The first part of this post, detailing construction of the building, can be found here.) For me, this is quite an accomplishment, since I am a notoriously slow modeler. Whether it comes to painting figures, making terrain, of any other aspect of the hobby, it is a rare occurrence for me to actually finish something before getting sidetracked onto another project.

I had a great time with this piece, from beginning to end- from drawing it up, to making the parts, to assembling and painting. I was inspired by the great terrain pieces available from 4Ground.

Their buildings look great, and from everything I have read, they are a breeze to assemble. And since they are pre-painted, they can be on your gaming table quickly.

While they are reasonably priced (from about $20 for a small building, to $80+ for a set of three), for a table full of terrain depicting even a small village, it adds up. That's what motivated me to try and build my own.

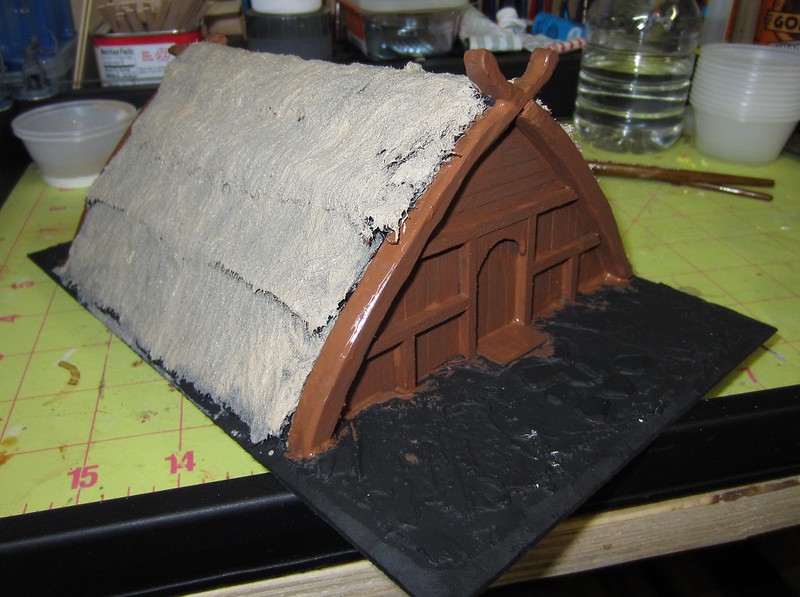
After getting a basecoat on it, this is what it looked like:

Basecoated!

One thing I found out is that even after sealing the thatch (teddy bear fur) with water-down PVA, it still absorbed a lot of paint, and the paint stayed wet on it for a  long time. For my next efforts, I think I will use a less watery mix of PVA. Also, for thatched roofs, I will try priming with white rather than black. The black undercoat made all the following coats look quite dark, which is not the effect I wanted. It took several coats of paint, and many layers of drybrushing, to get a look I was happy with.
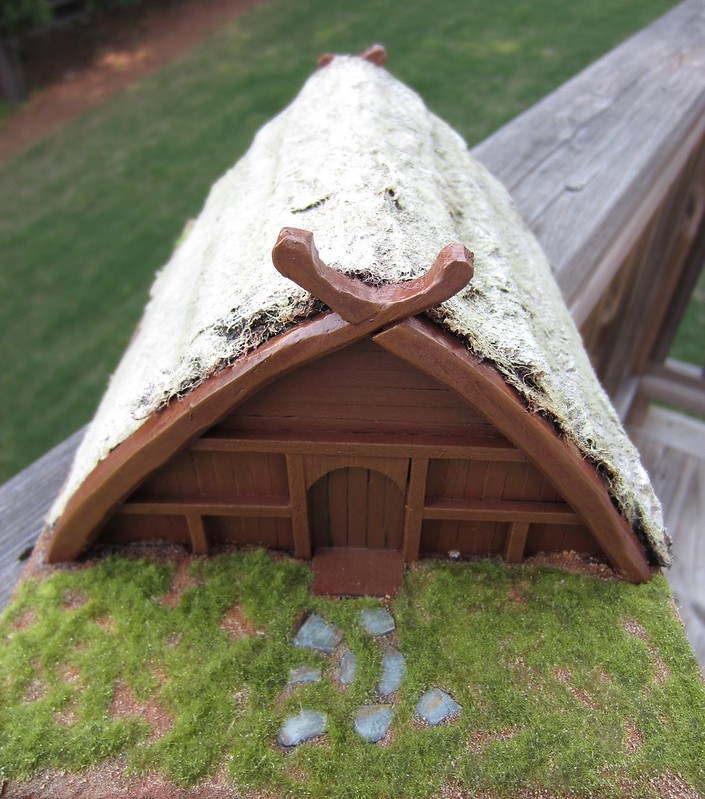
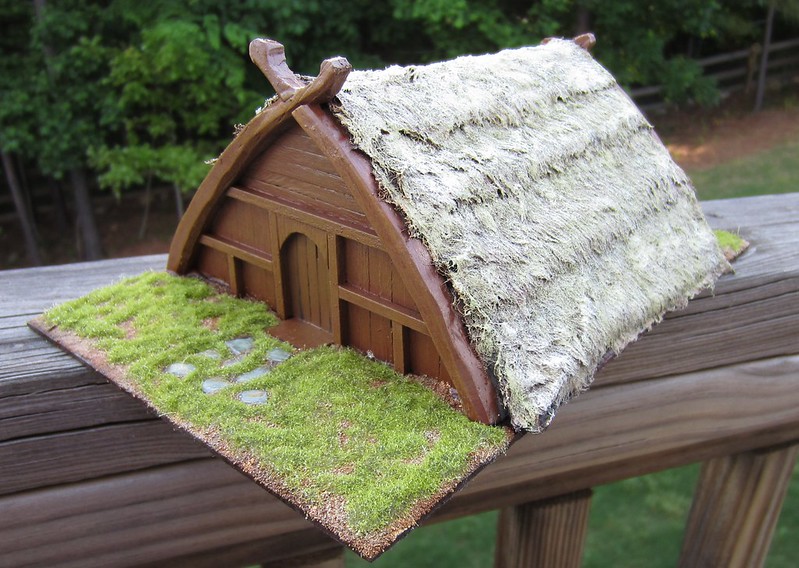
Complete with ground cover.
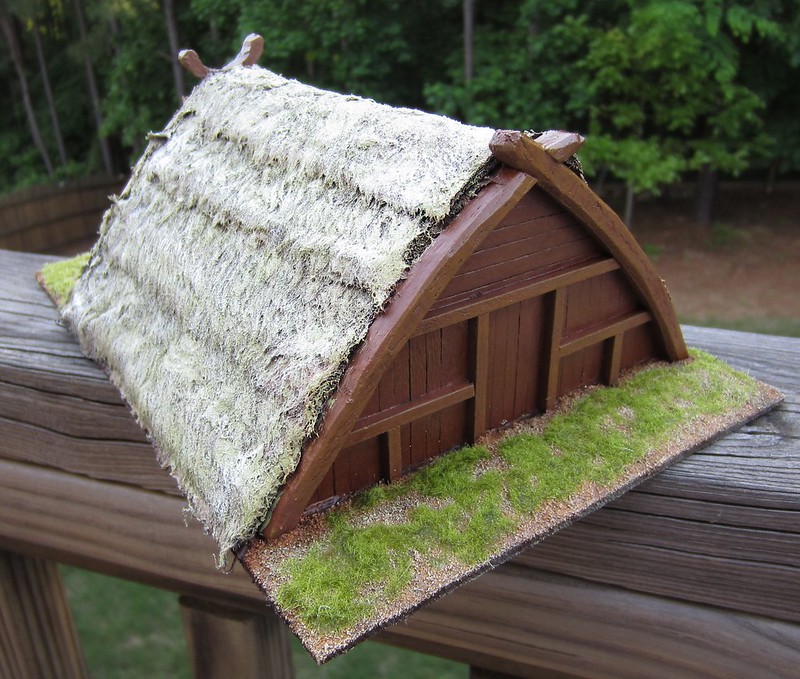
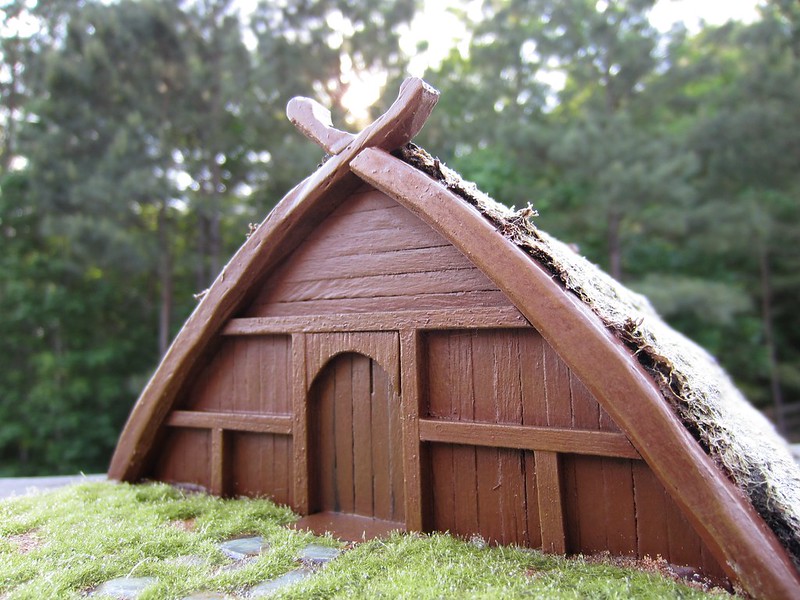
After the clear sealing coat was dried, I took the building outside to get some photos in natural sunlight, which I always think looks best:
Front view
Three-quarters view from the front.
Three-quarters view from the rear.
And this is my favorite shot:
Sun sets in woods behind Viking house.
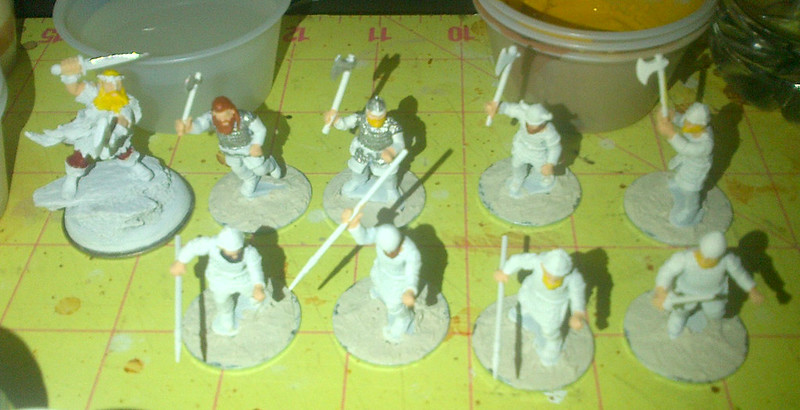
The only thing missing is a band of wild Vikings gathered around the building. I am working on that, and hope to have at least a unit or two of Hearthguard finished by the weekend. I know this is a poor image, but this is where I stand on that:
So, was it worth it to build my own Viking dwelling from scratch, rather than go the manufactured route?

Absolutely! I think the 4Ground buildings are a fantastic option for anyone short on time, but for me scratch-building the terrain is a good option.

I estimate it cost me about $5 or less in materials, especially using scavenged coffee stirrers for the planking. And it took probably about five to seven hours of work, spread over the course of a couple of weeks. Now that I know what is involved, I am planning on building several more structures. I think these will go more smoothly and quickly, and I will use a factory-style method and complete each step for all buildings (I'll cut out all the end pieces first, plank them all, assemble them all, etc.) before moving on. But that will have to wait until I have painted a couple of 4- to 6-point warbands for Saga.

'Til next time!