 |
| The completed Governor's House. |
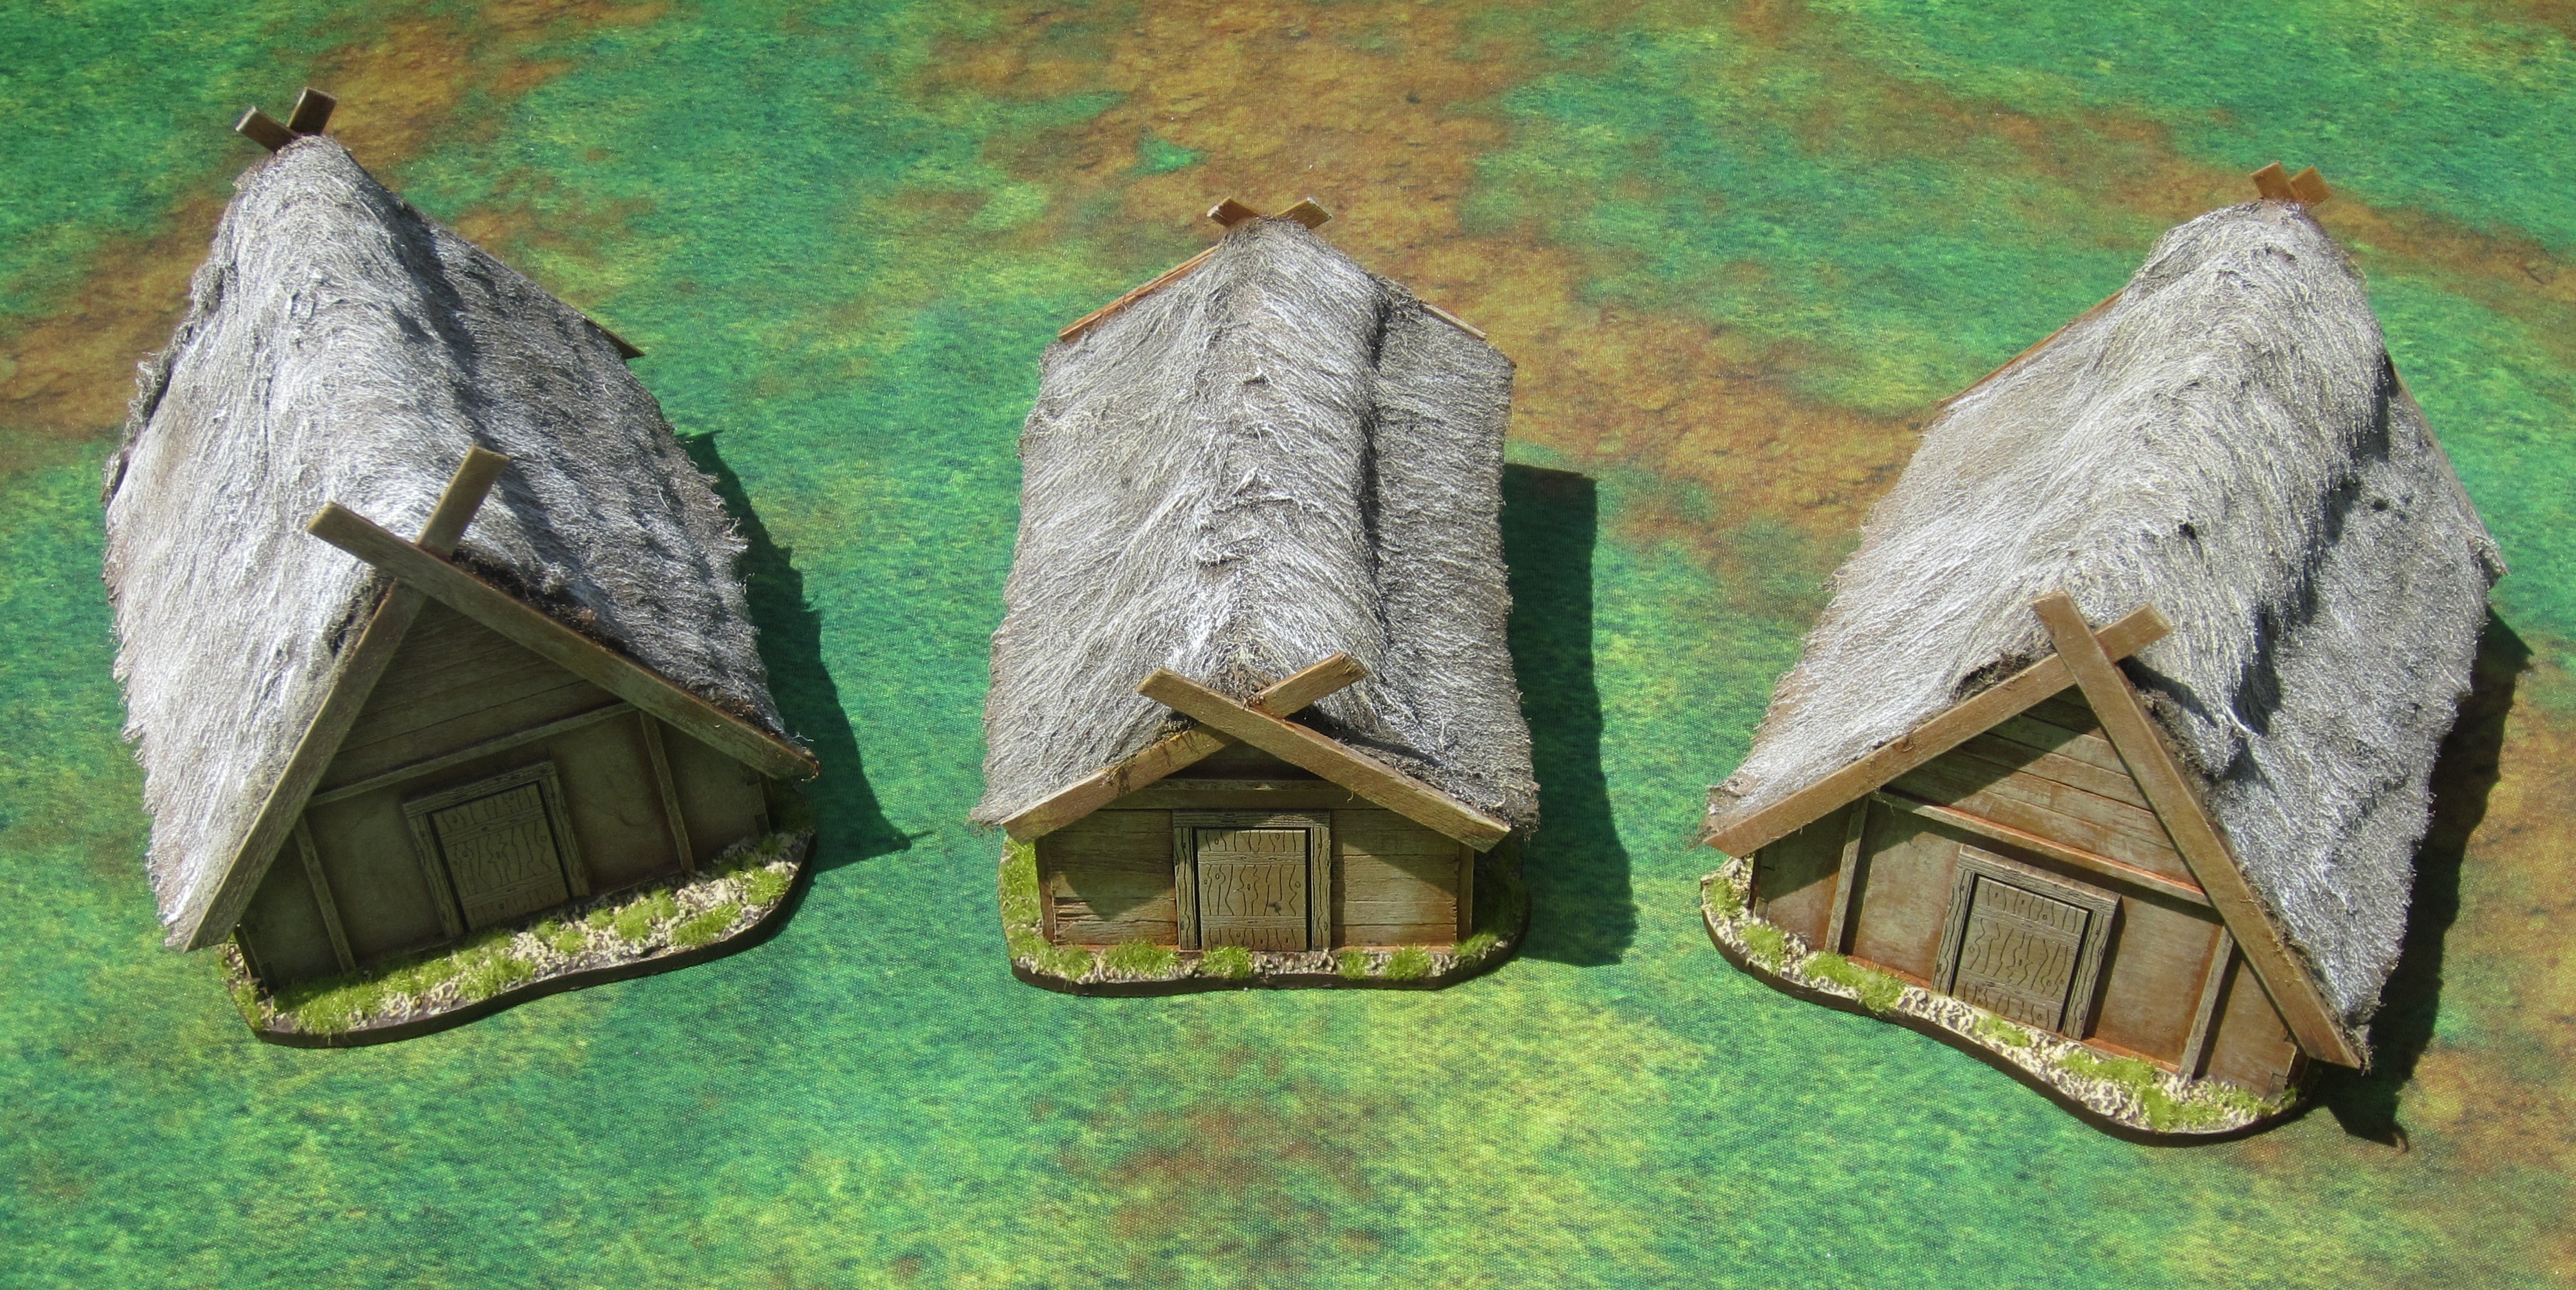
Last time, I showed you the
peasants' houses. This time, we're moving into a better part of town - houses for the upper class merchants, officials and even the governor himself.
The big difference for these houses is that they were all started years ago! In one of my last enthusiastic terrain building phases, I began several houses intended for a Spanish colonial village. But as often happens with my projects, my enthusiasm waned and the incomplete houses languished in a dusty bin in the basement for many years. I had three houses that I had started work on, and all were in different stages of completion, ranging from just begin to nearly completed.
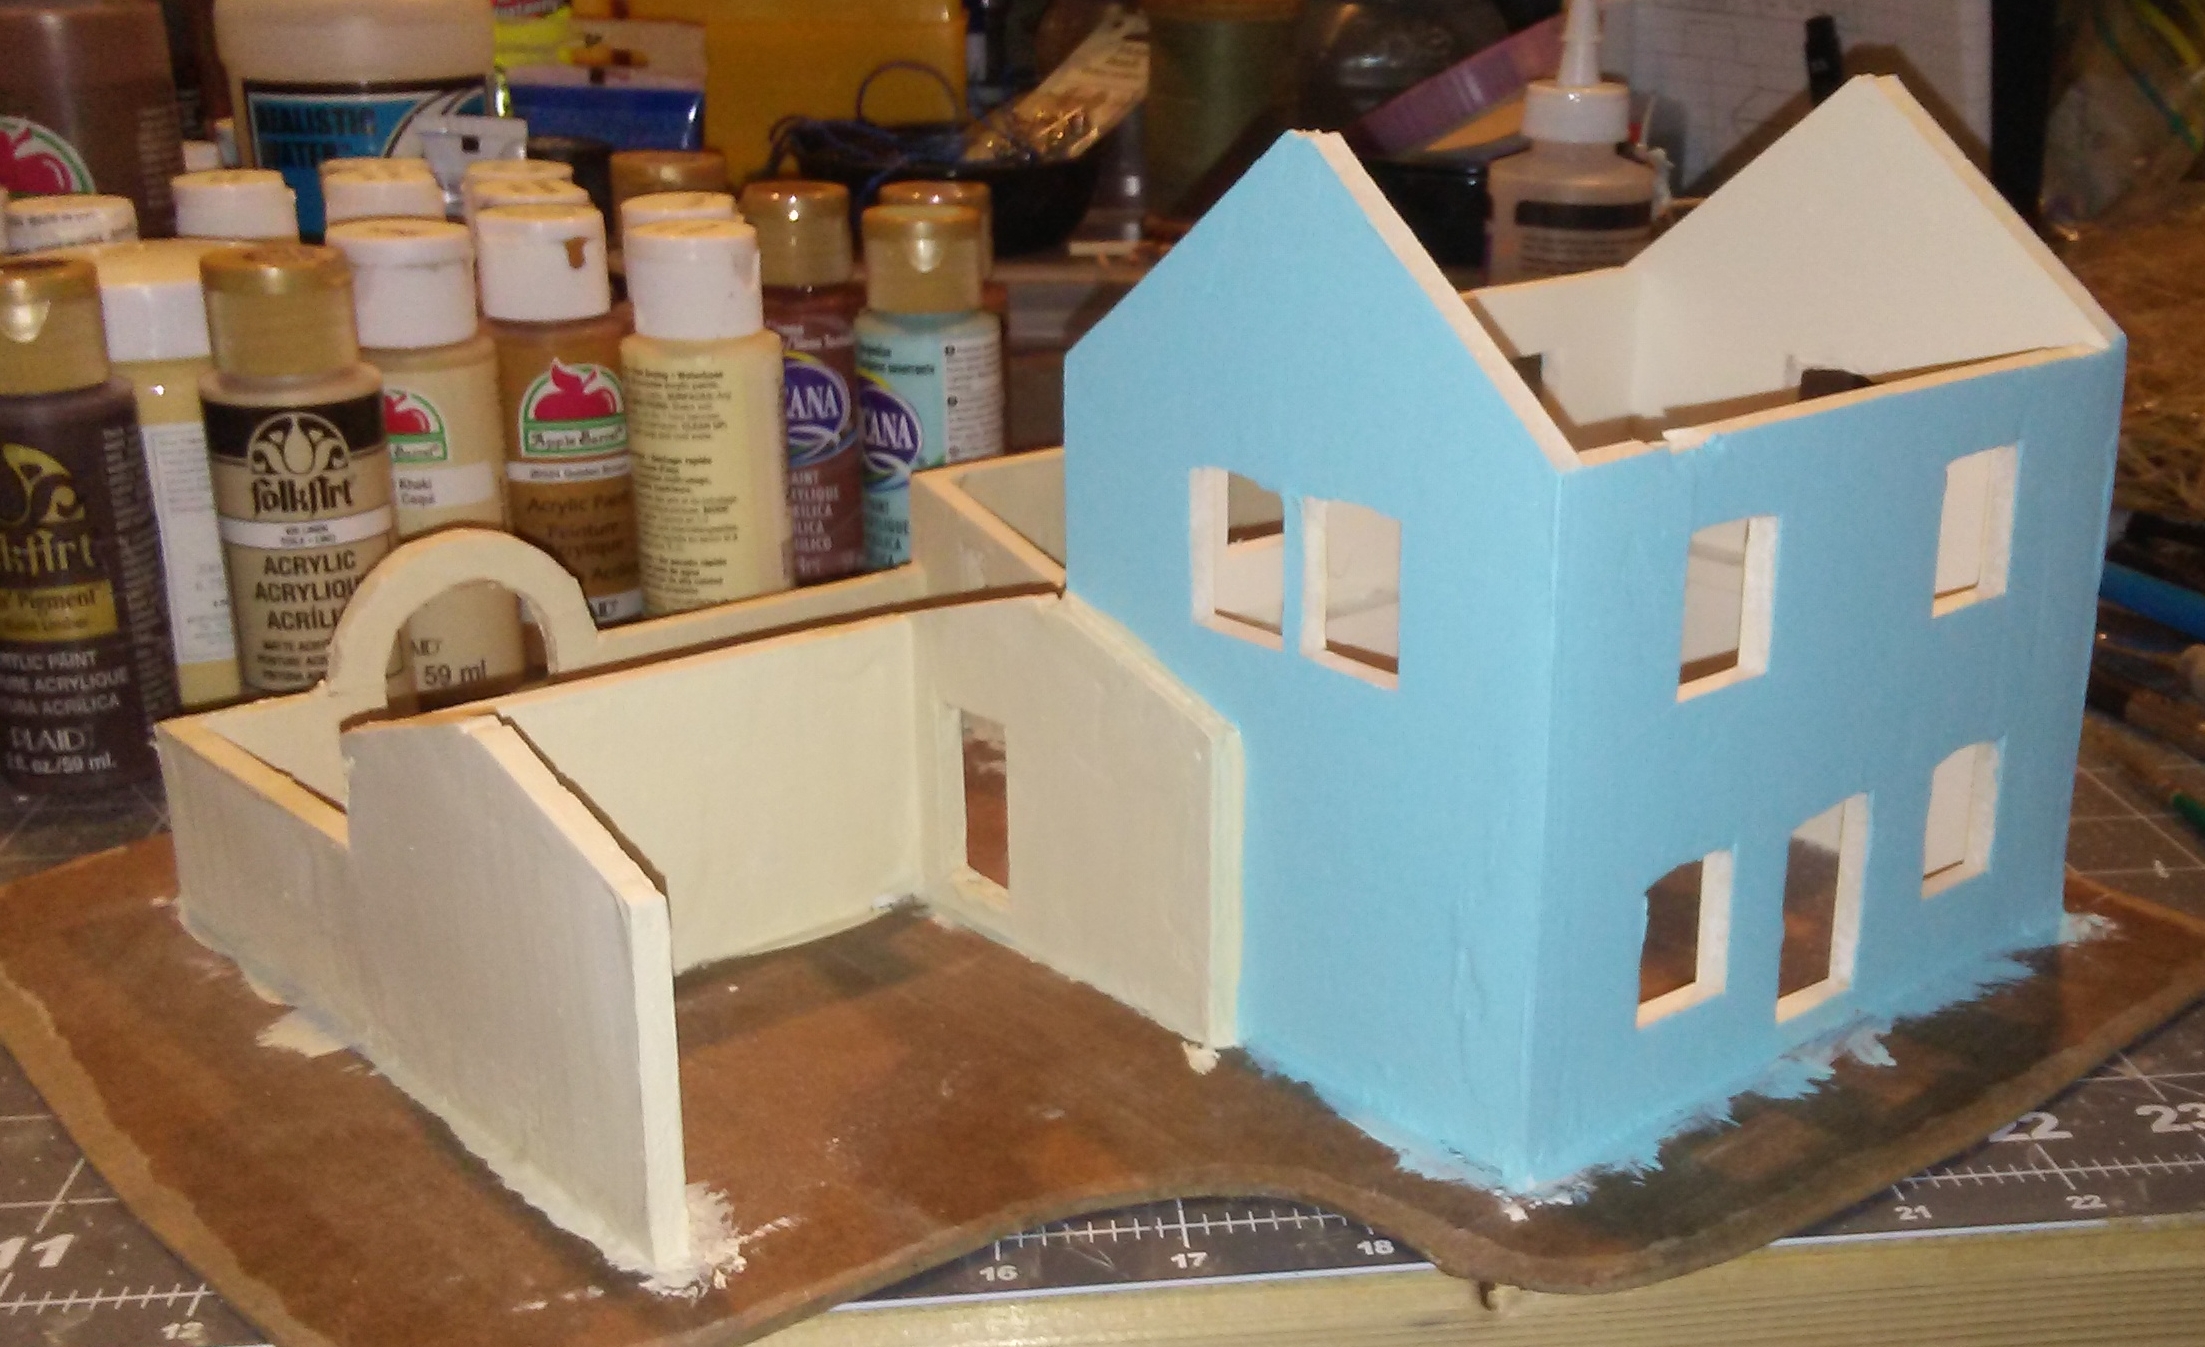
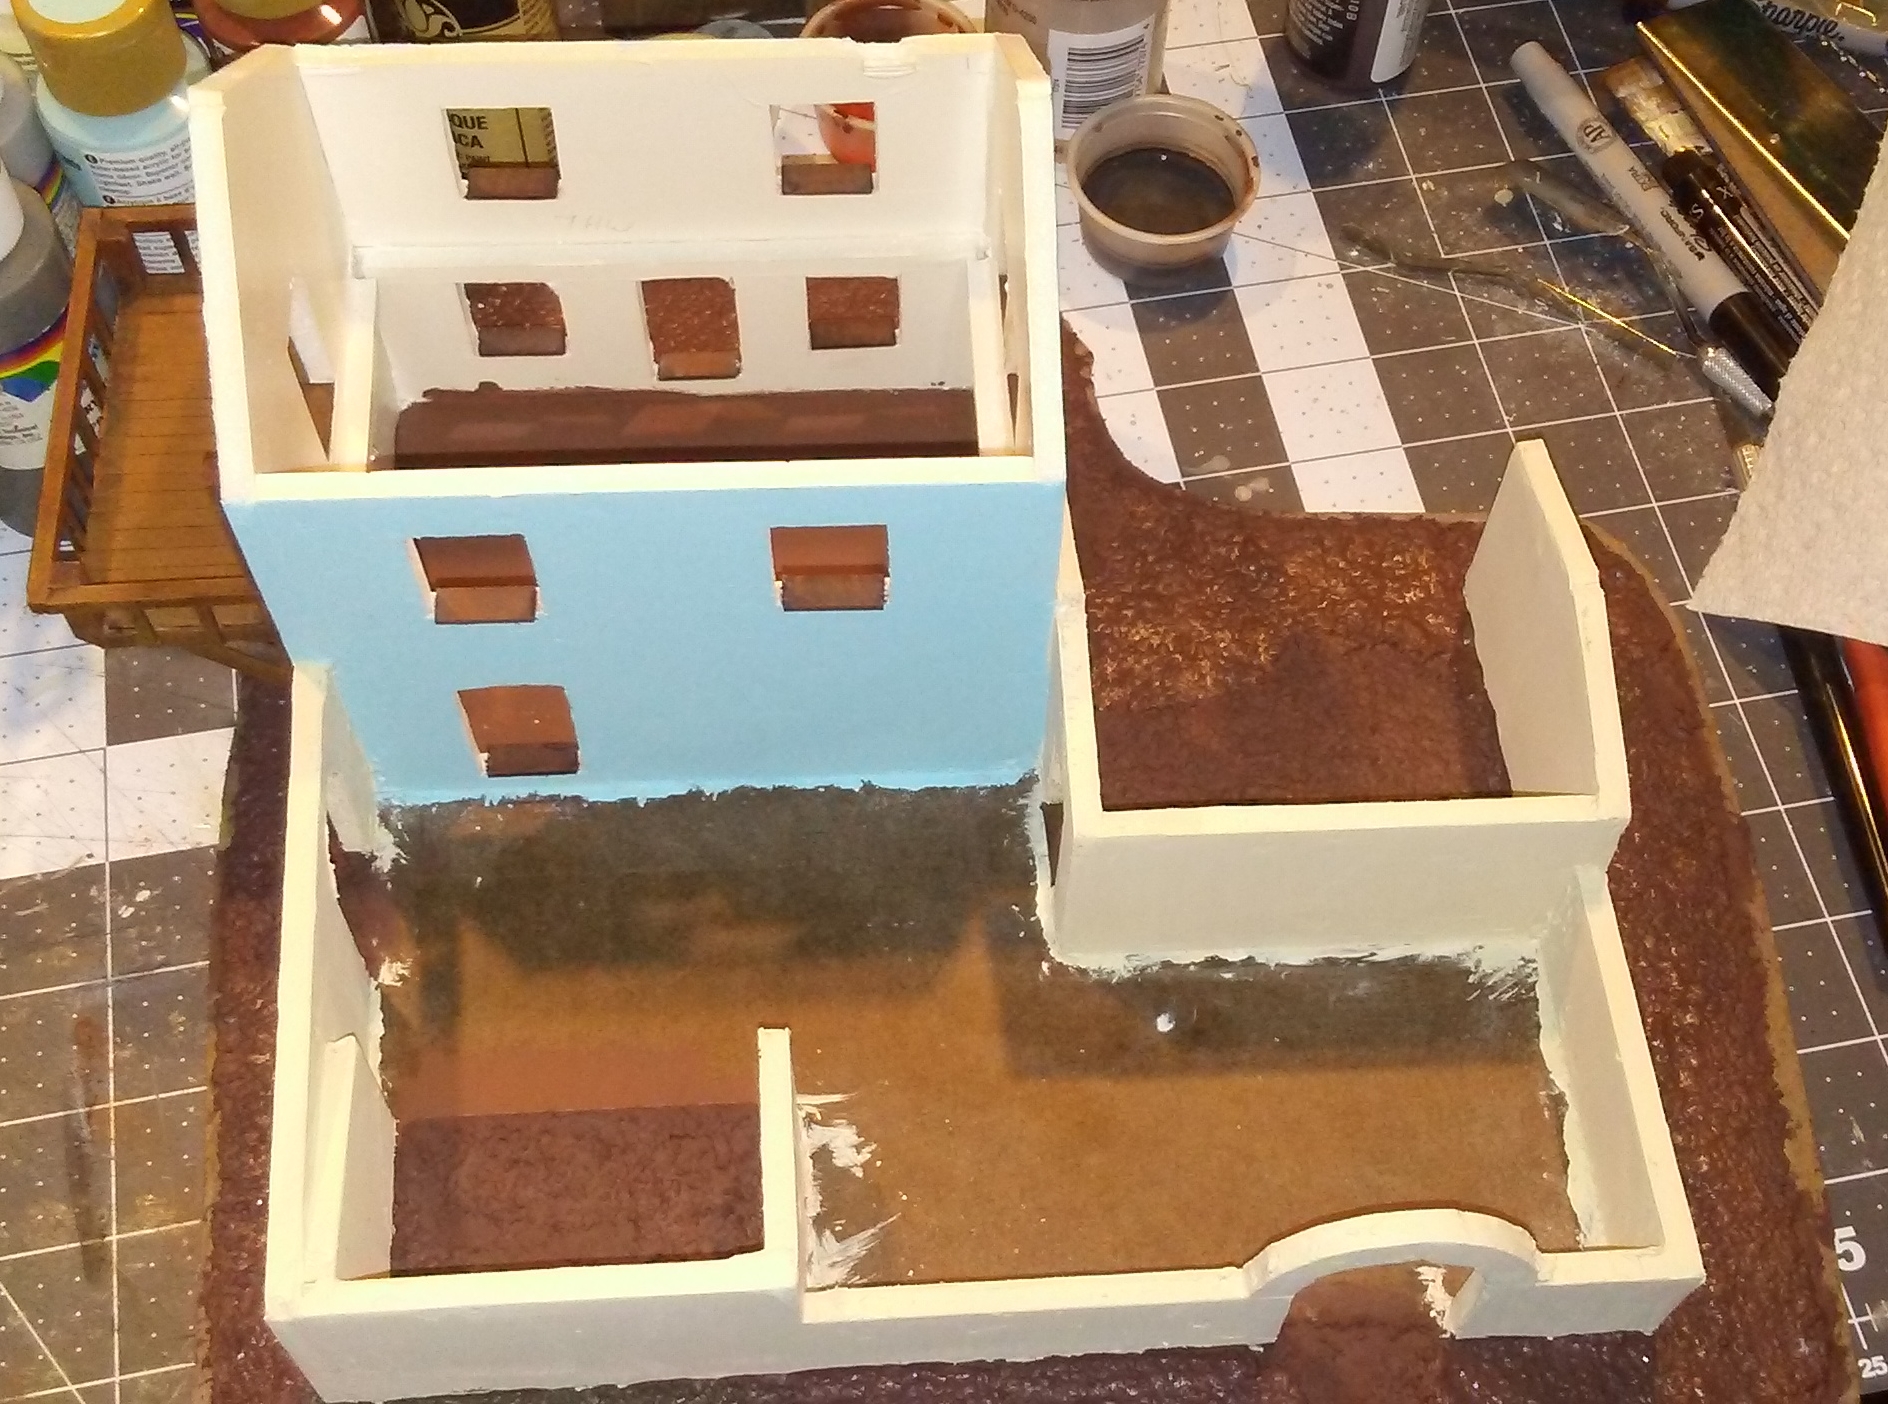
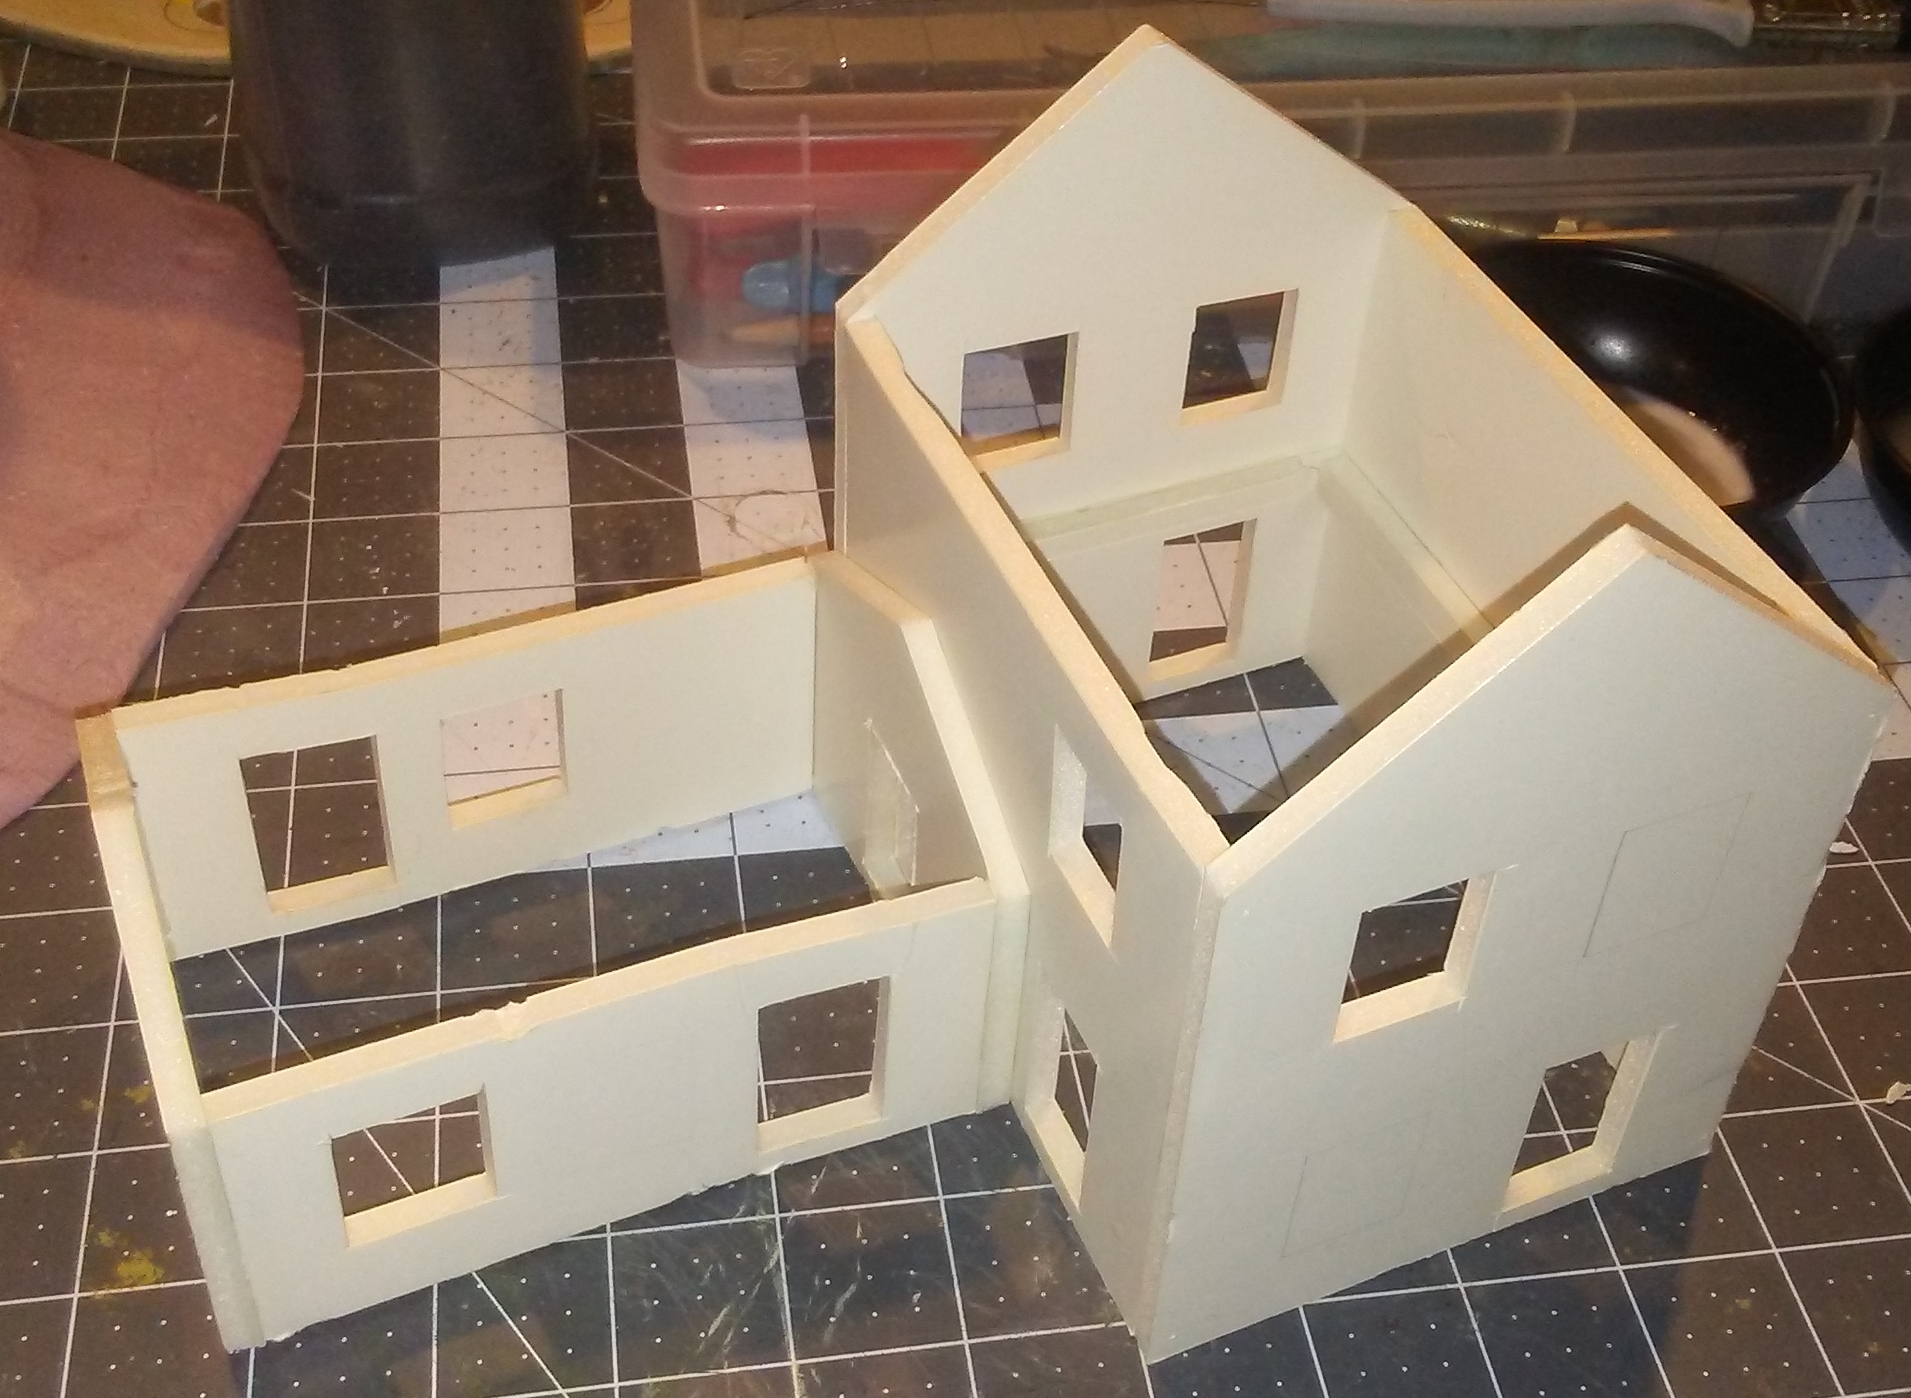
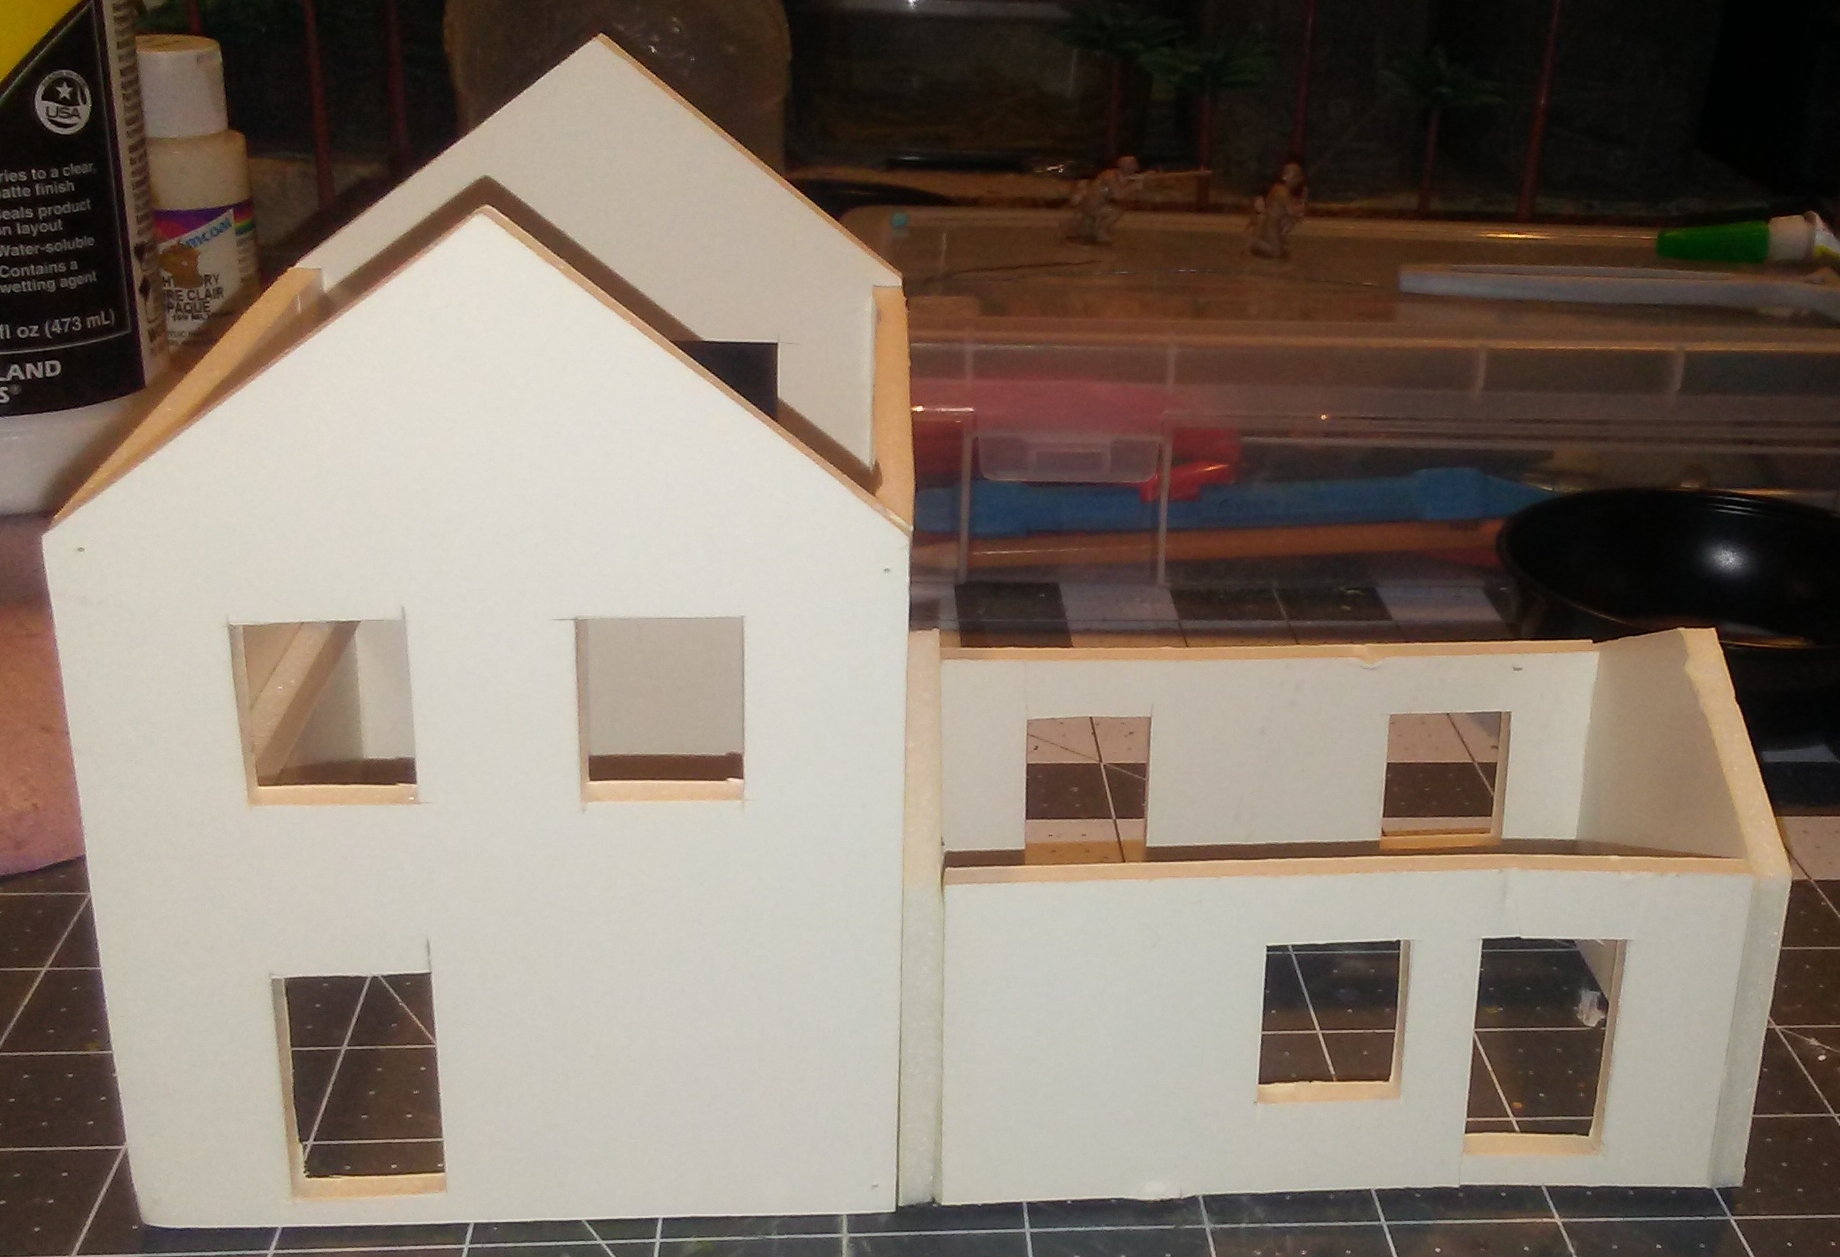
The first house I will show is the grandest one, the Governor's House. When I stopped work on this building, the walls were up, the roofs were partially done and the house had been glued onto an MDF base. (This particular house was built by me, but designed by my daughter, who was helping me.)
 |
| Governor's House as it was when I abandoned it. |
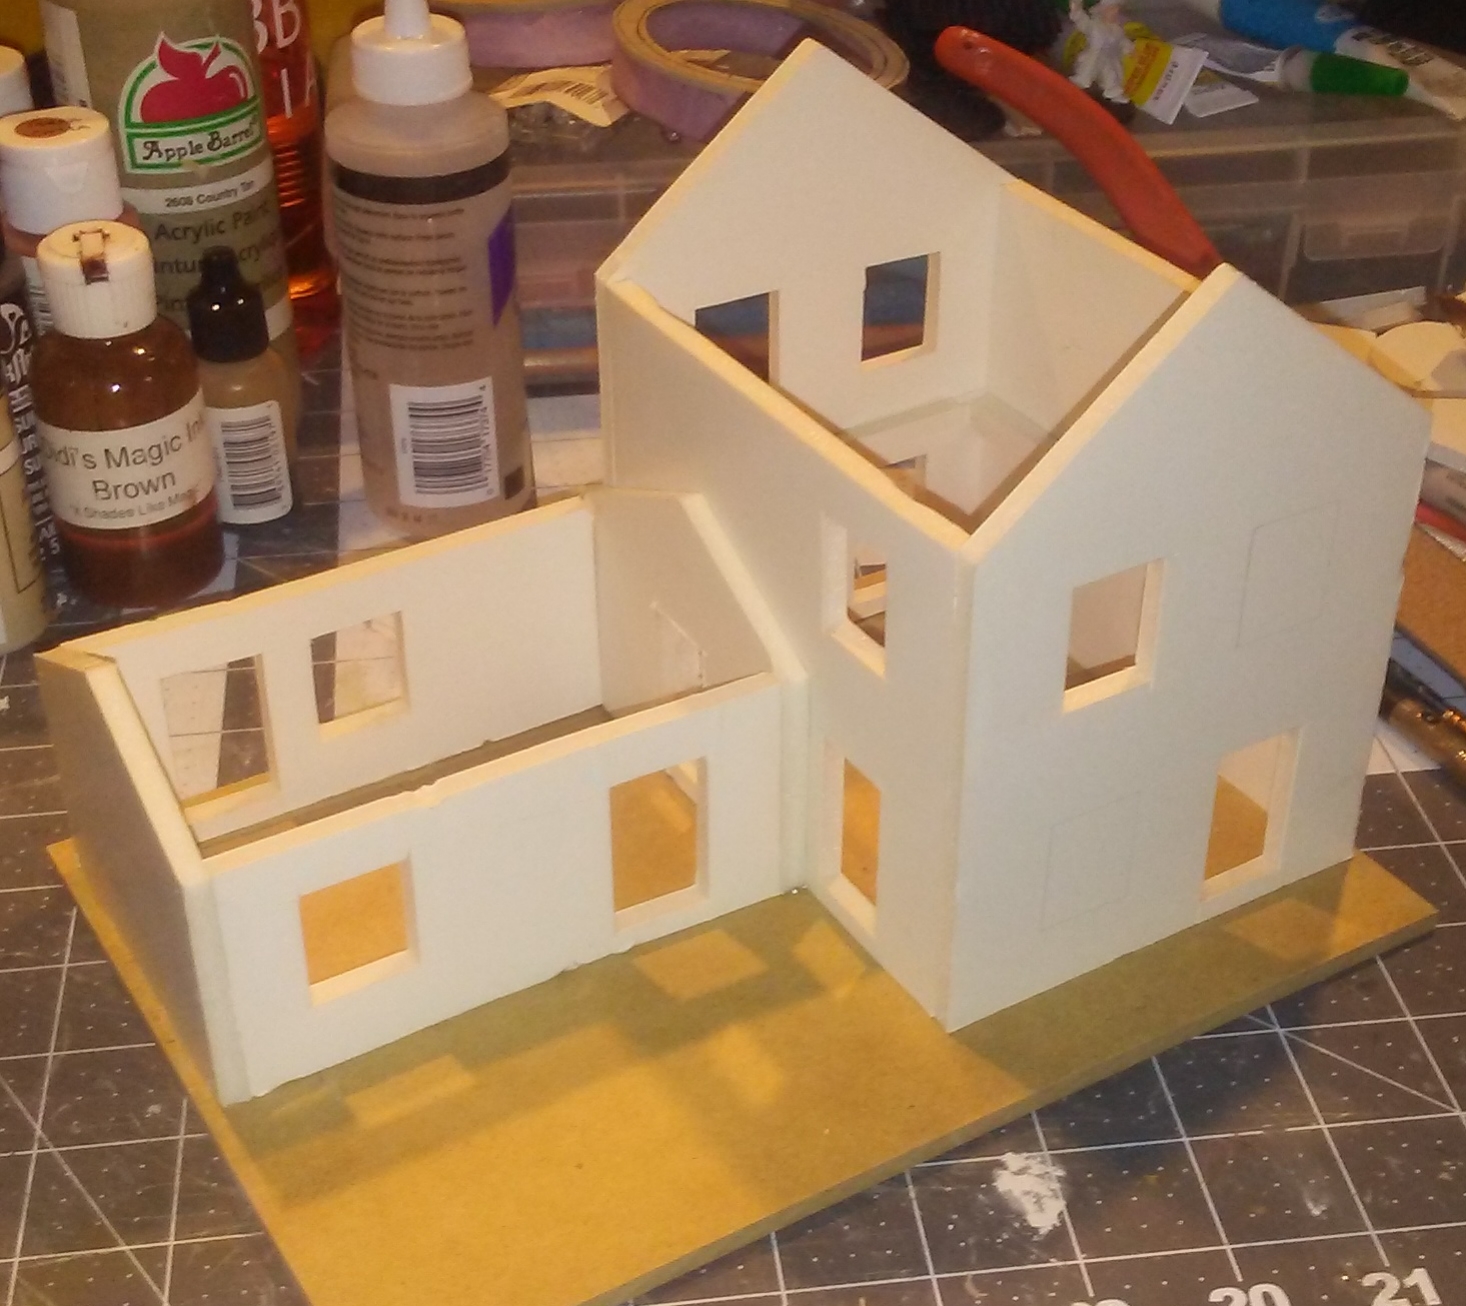
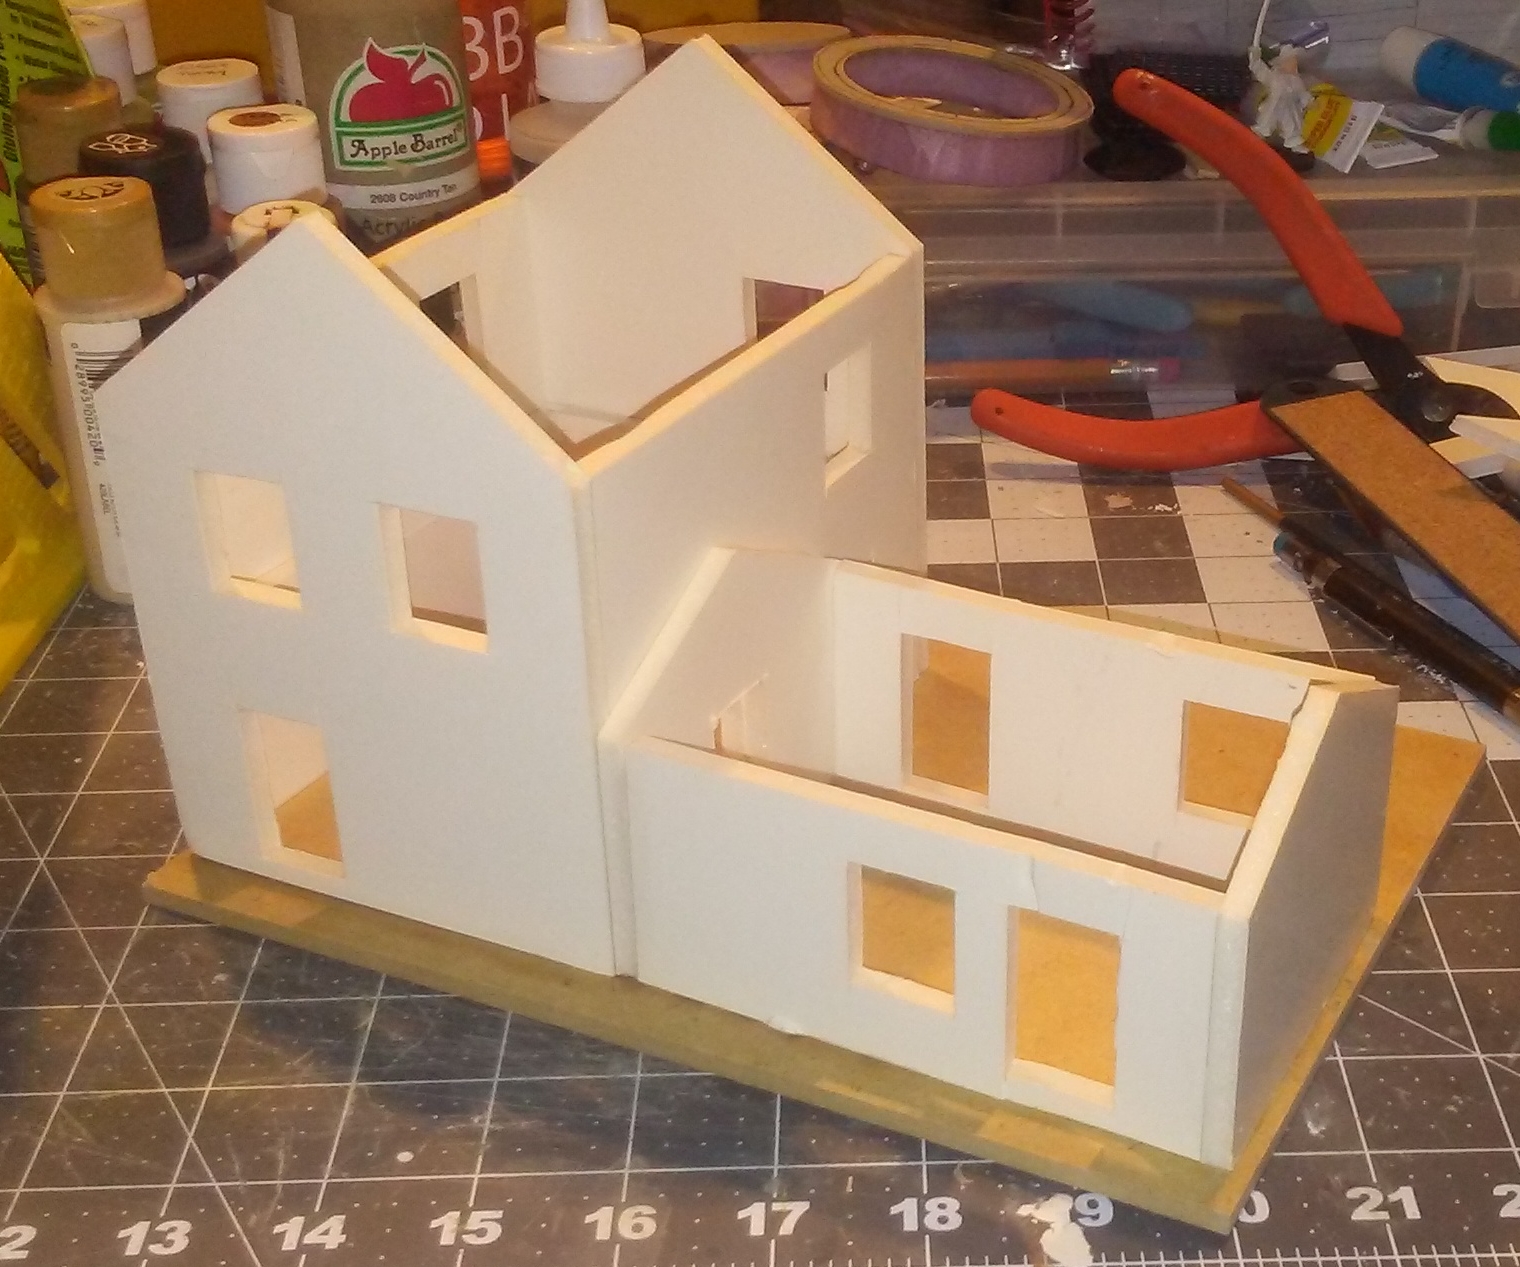
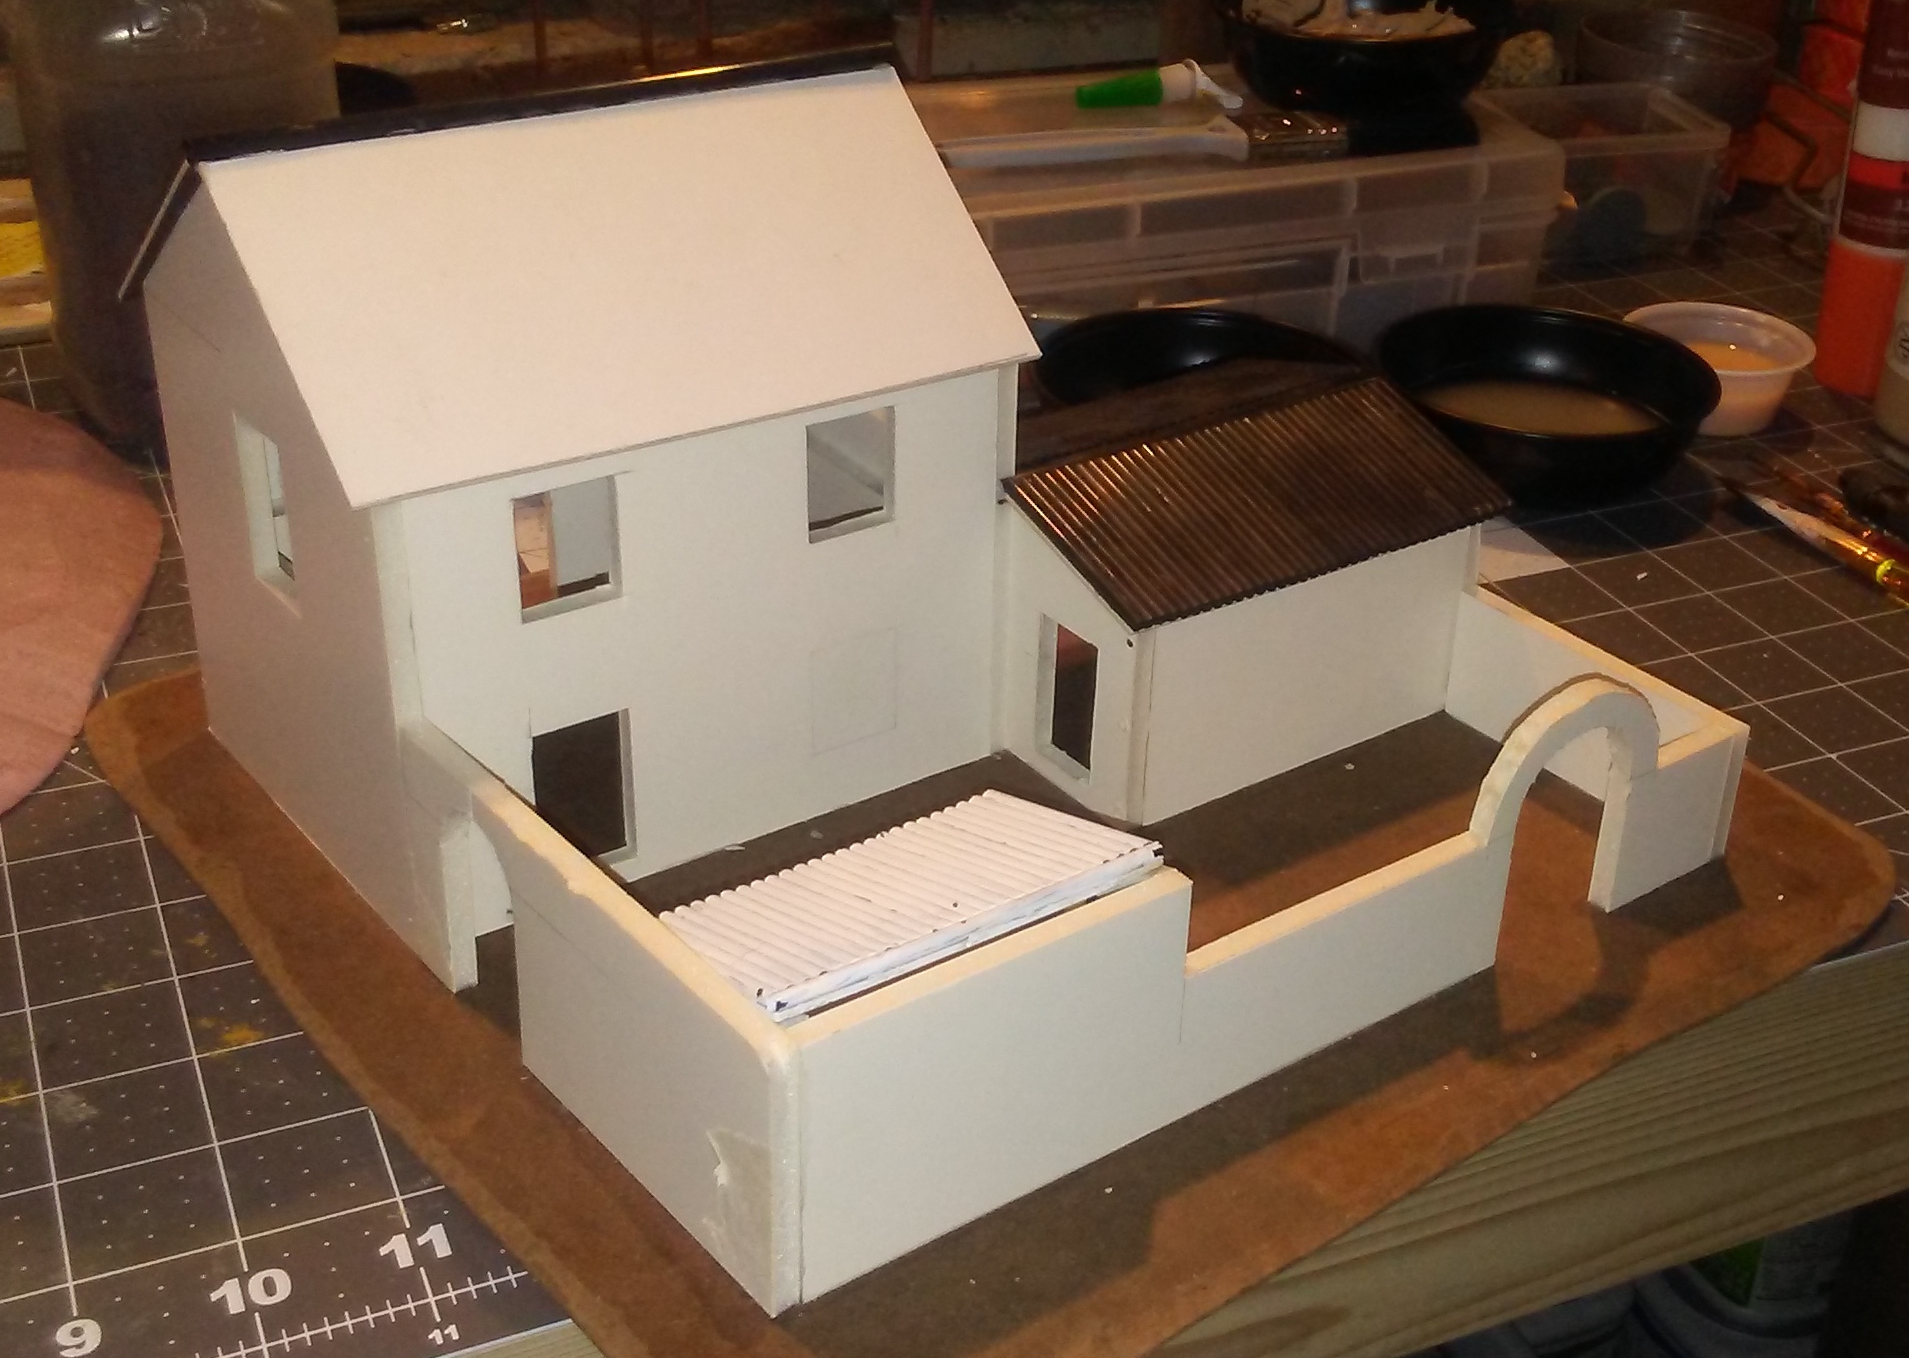 |
| Governor's House partially built. |
 |
| Governor's House partially built. |
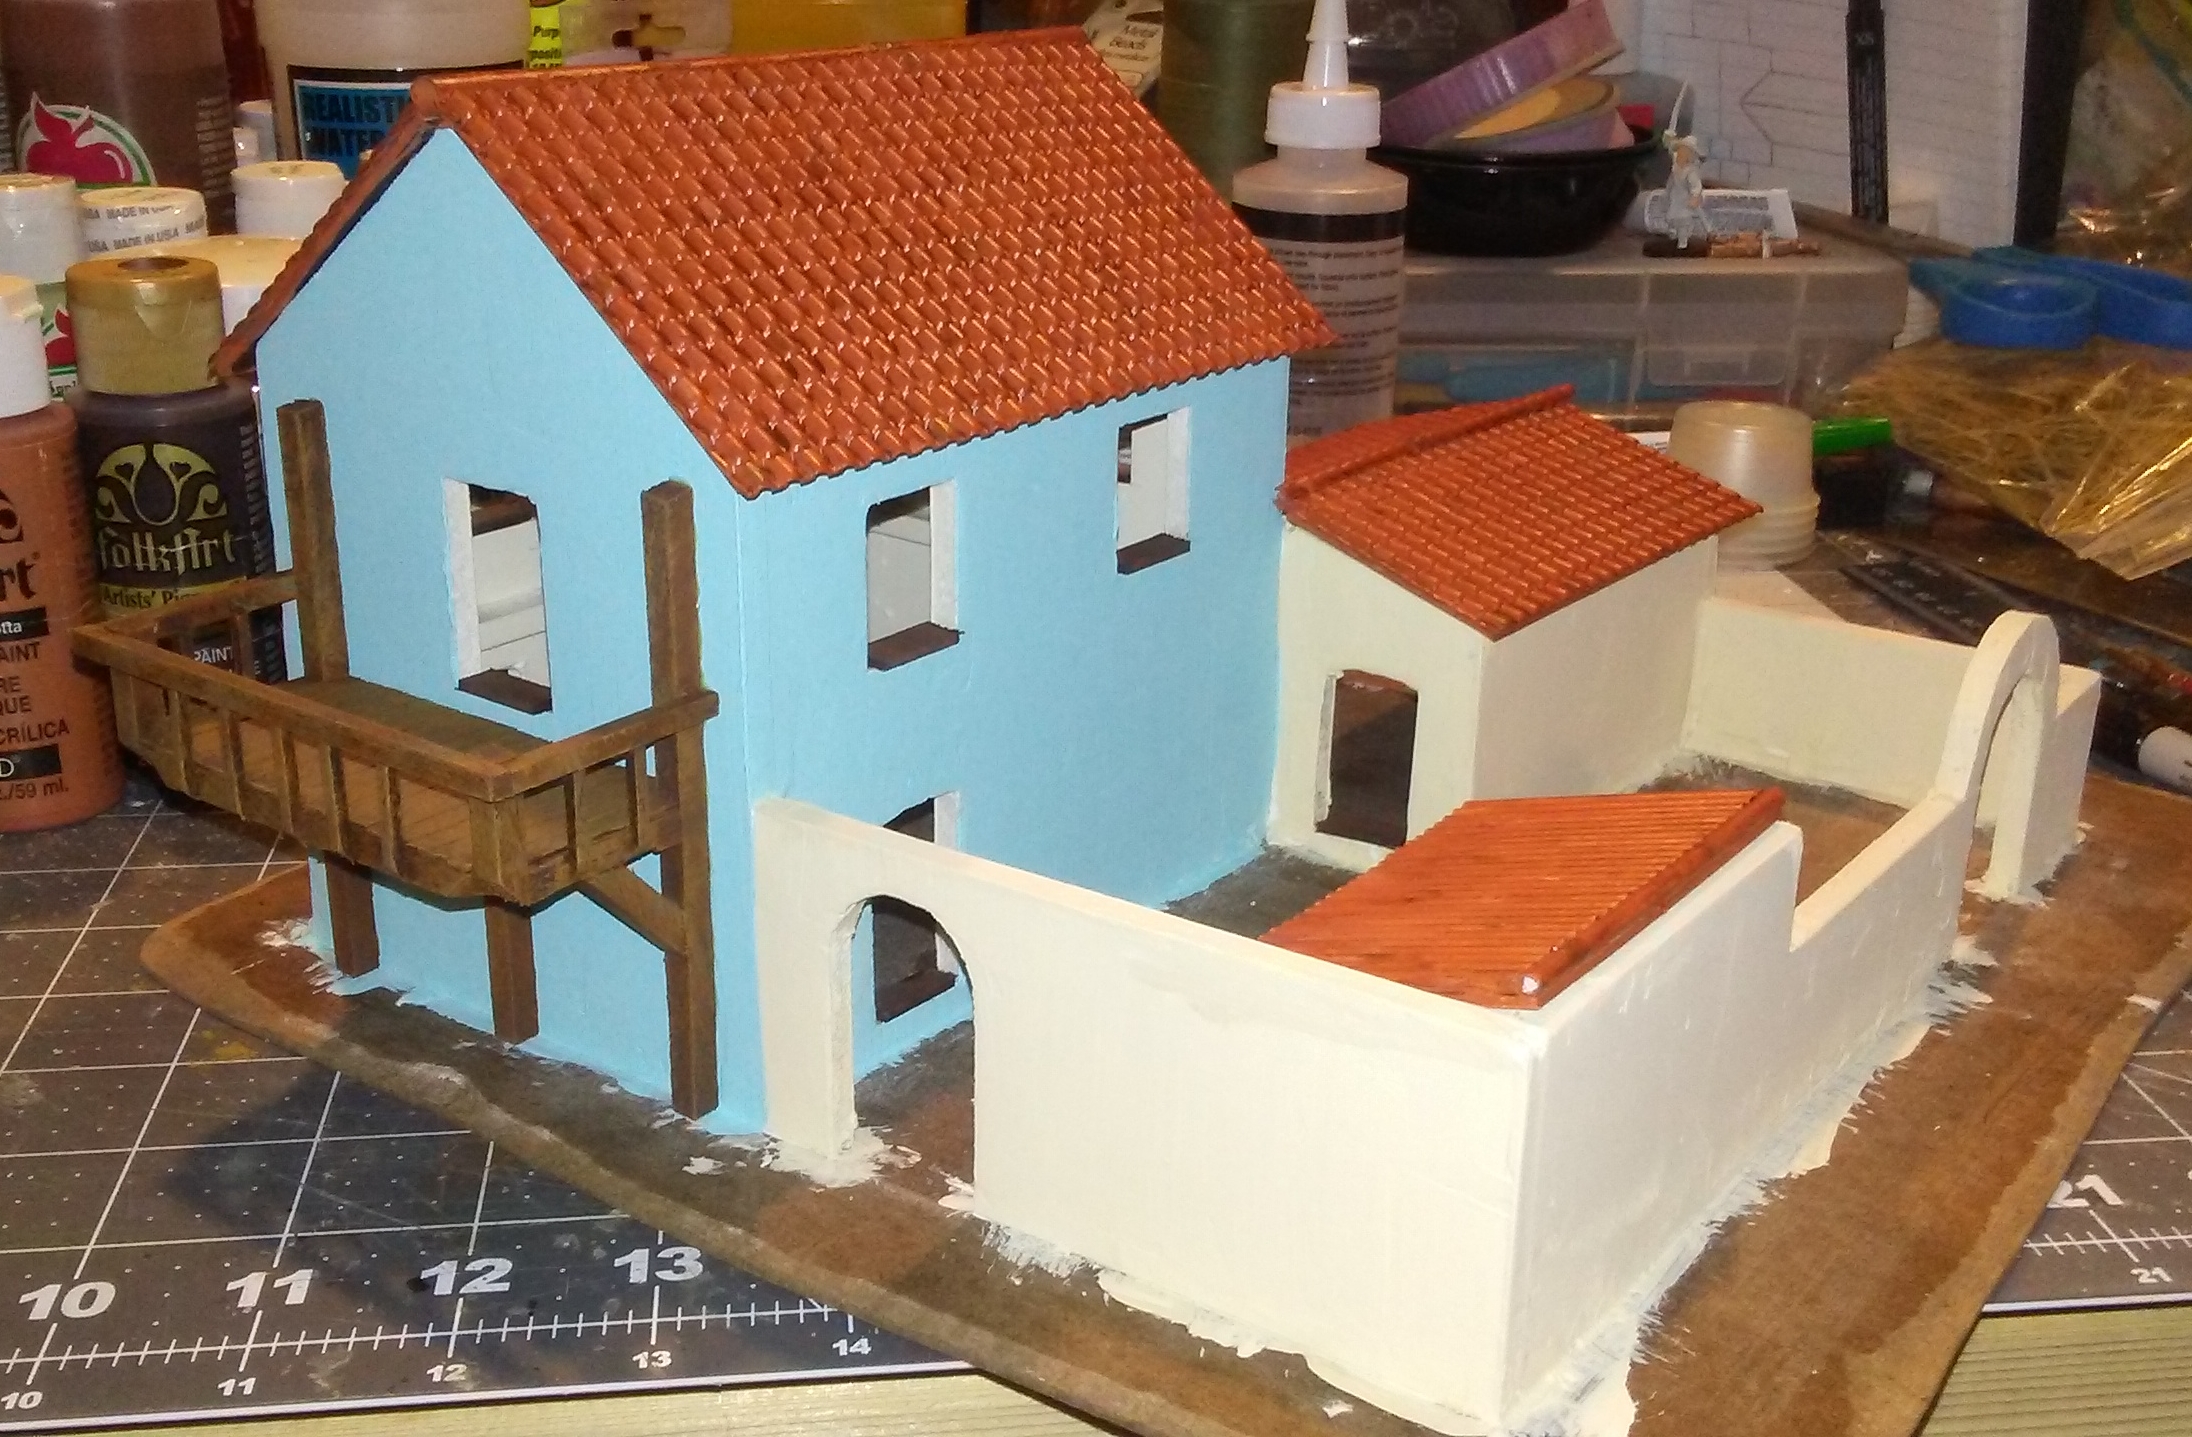
The first thing I did was to make new roofs using
Plastruct Spanish tile sheets. Since I began using these sheets on other buildings, I quickly realized they were quicker and easier to use than my prior method of making tile roofs, and they looked better as well. In one of the photos above you can see that I tried to simulate the tile roof by gluing plastic straws onto the roofs. This looked okay, not great, but the main issue is that I could not find a glue that would adhere well to the sticky soft plastic of the straws, and they pulled right off the roof easily.
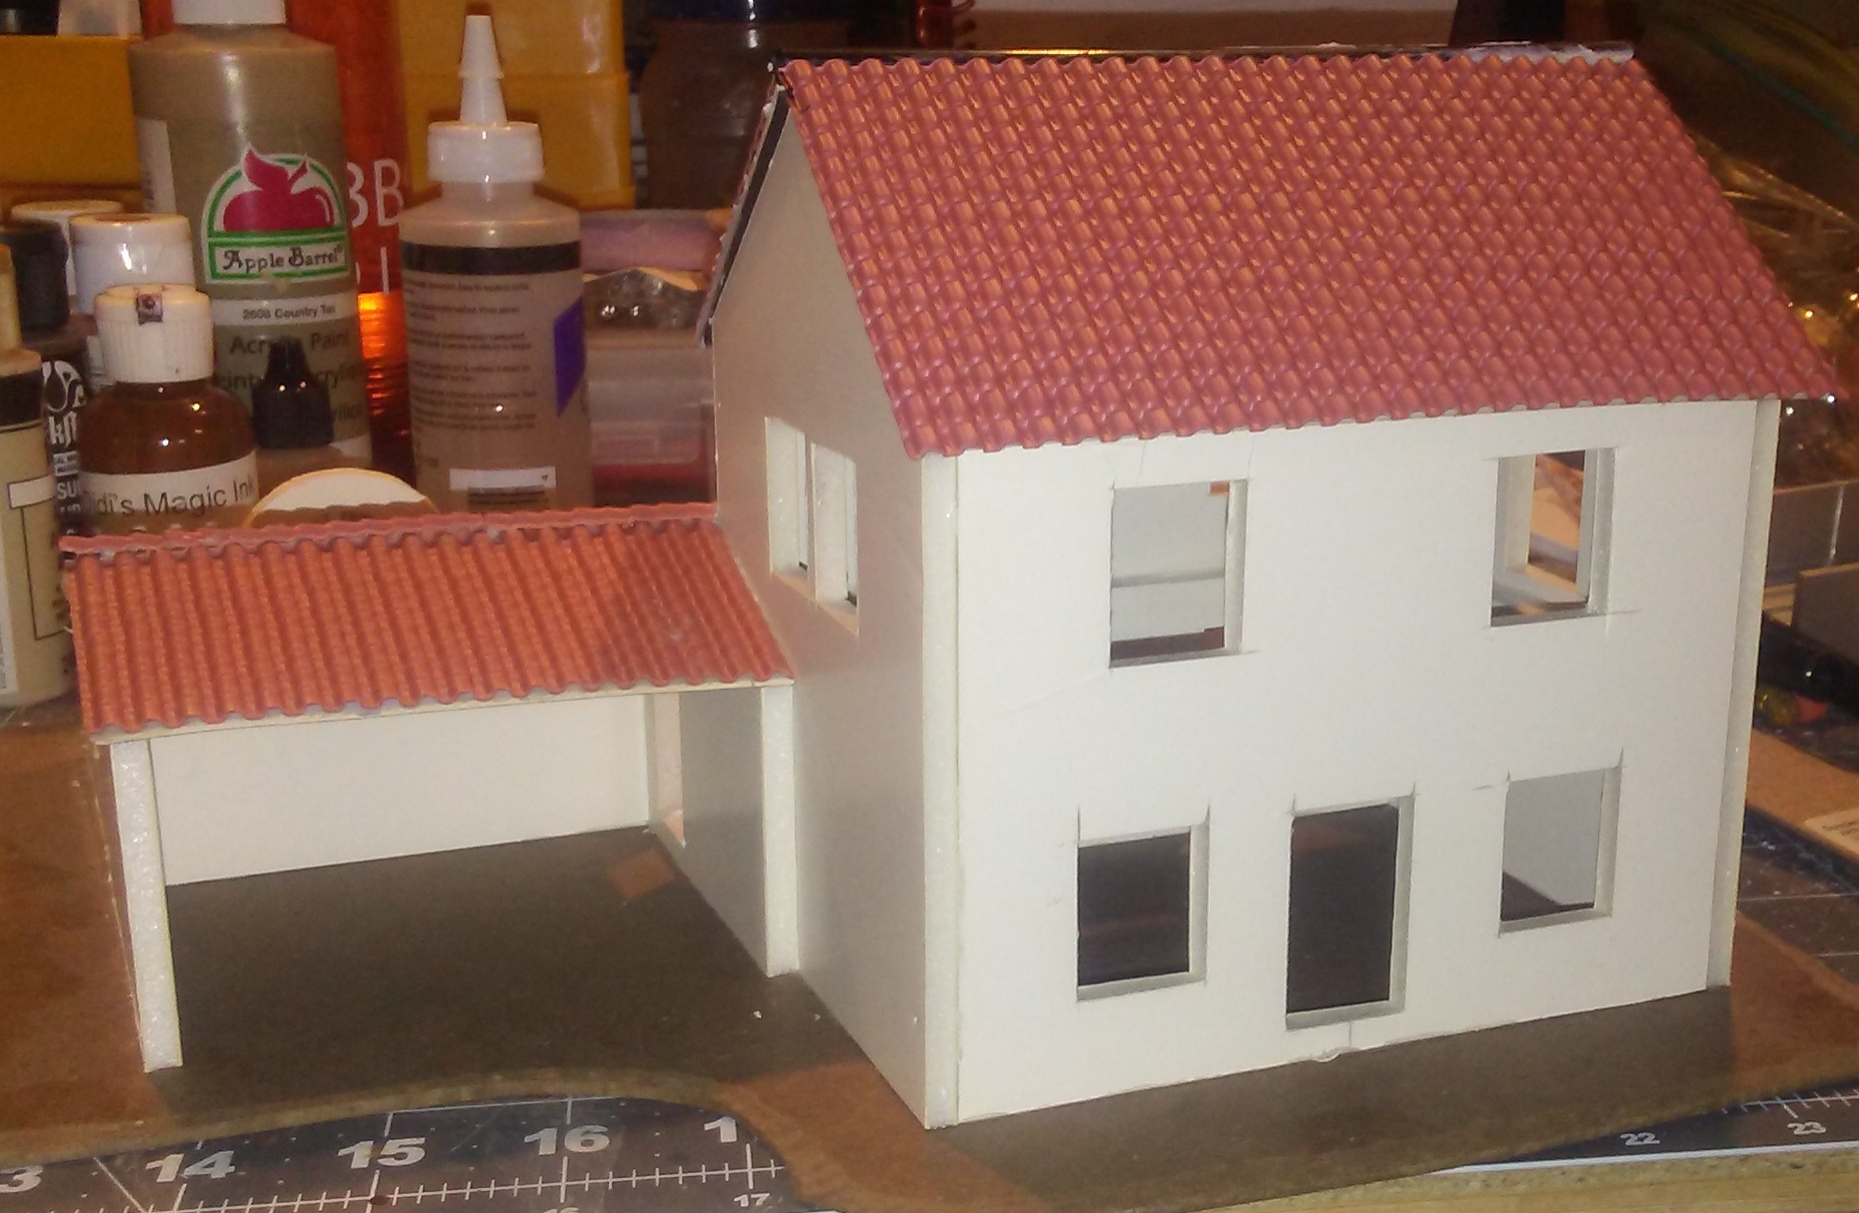 |
| New Plastruct roofs for the house and shed. |
 |
| I kept the small roof made with straws for the smaller shed. |
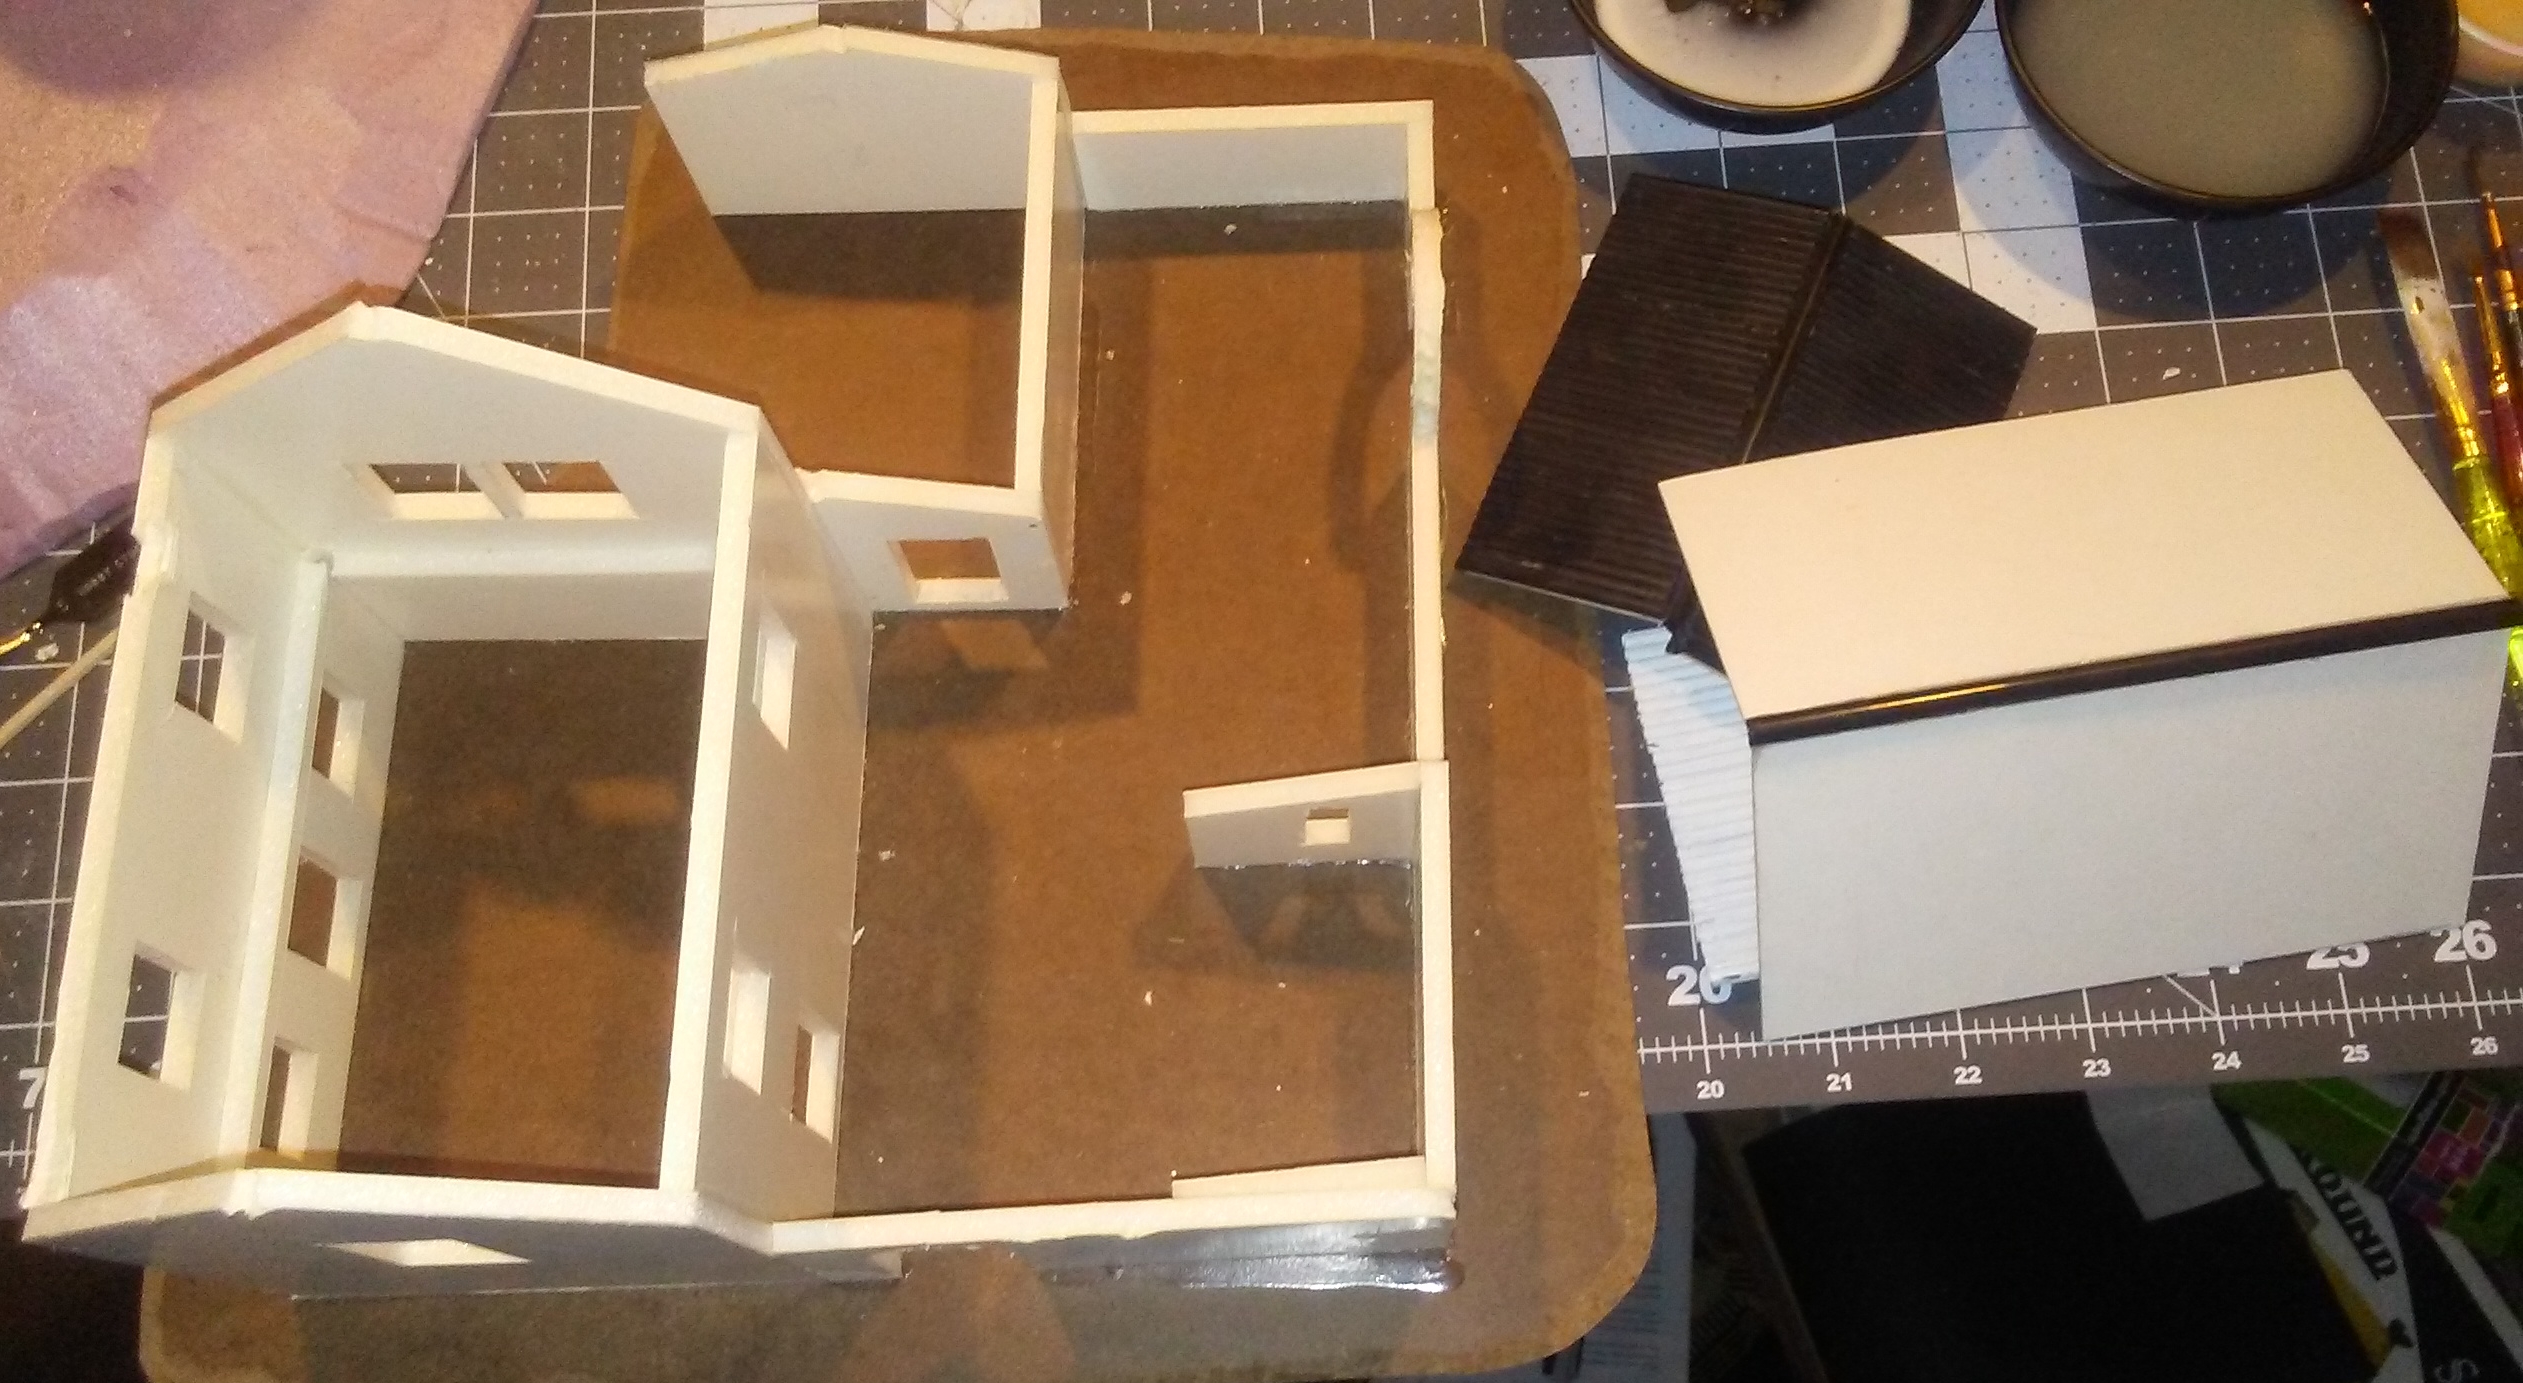
 |
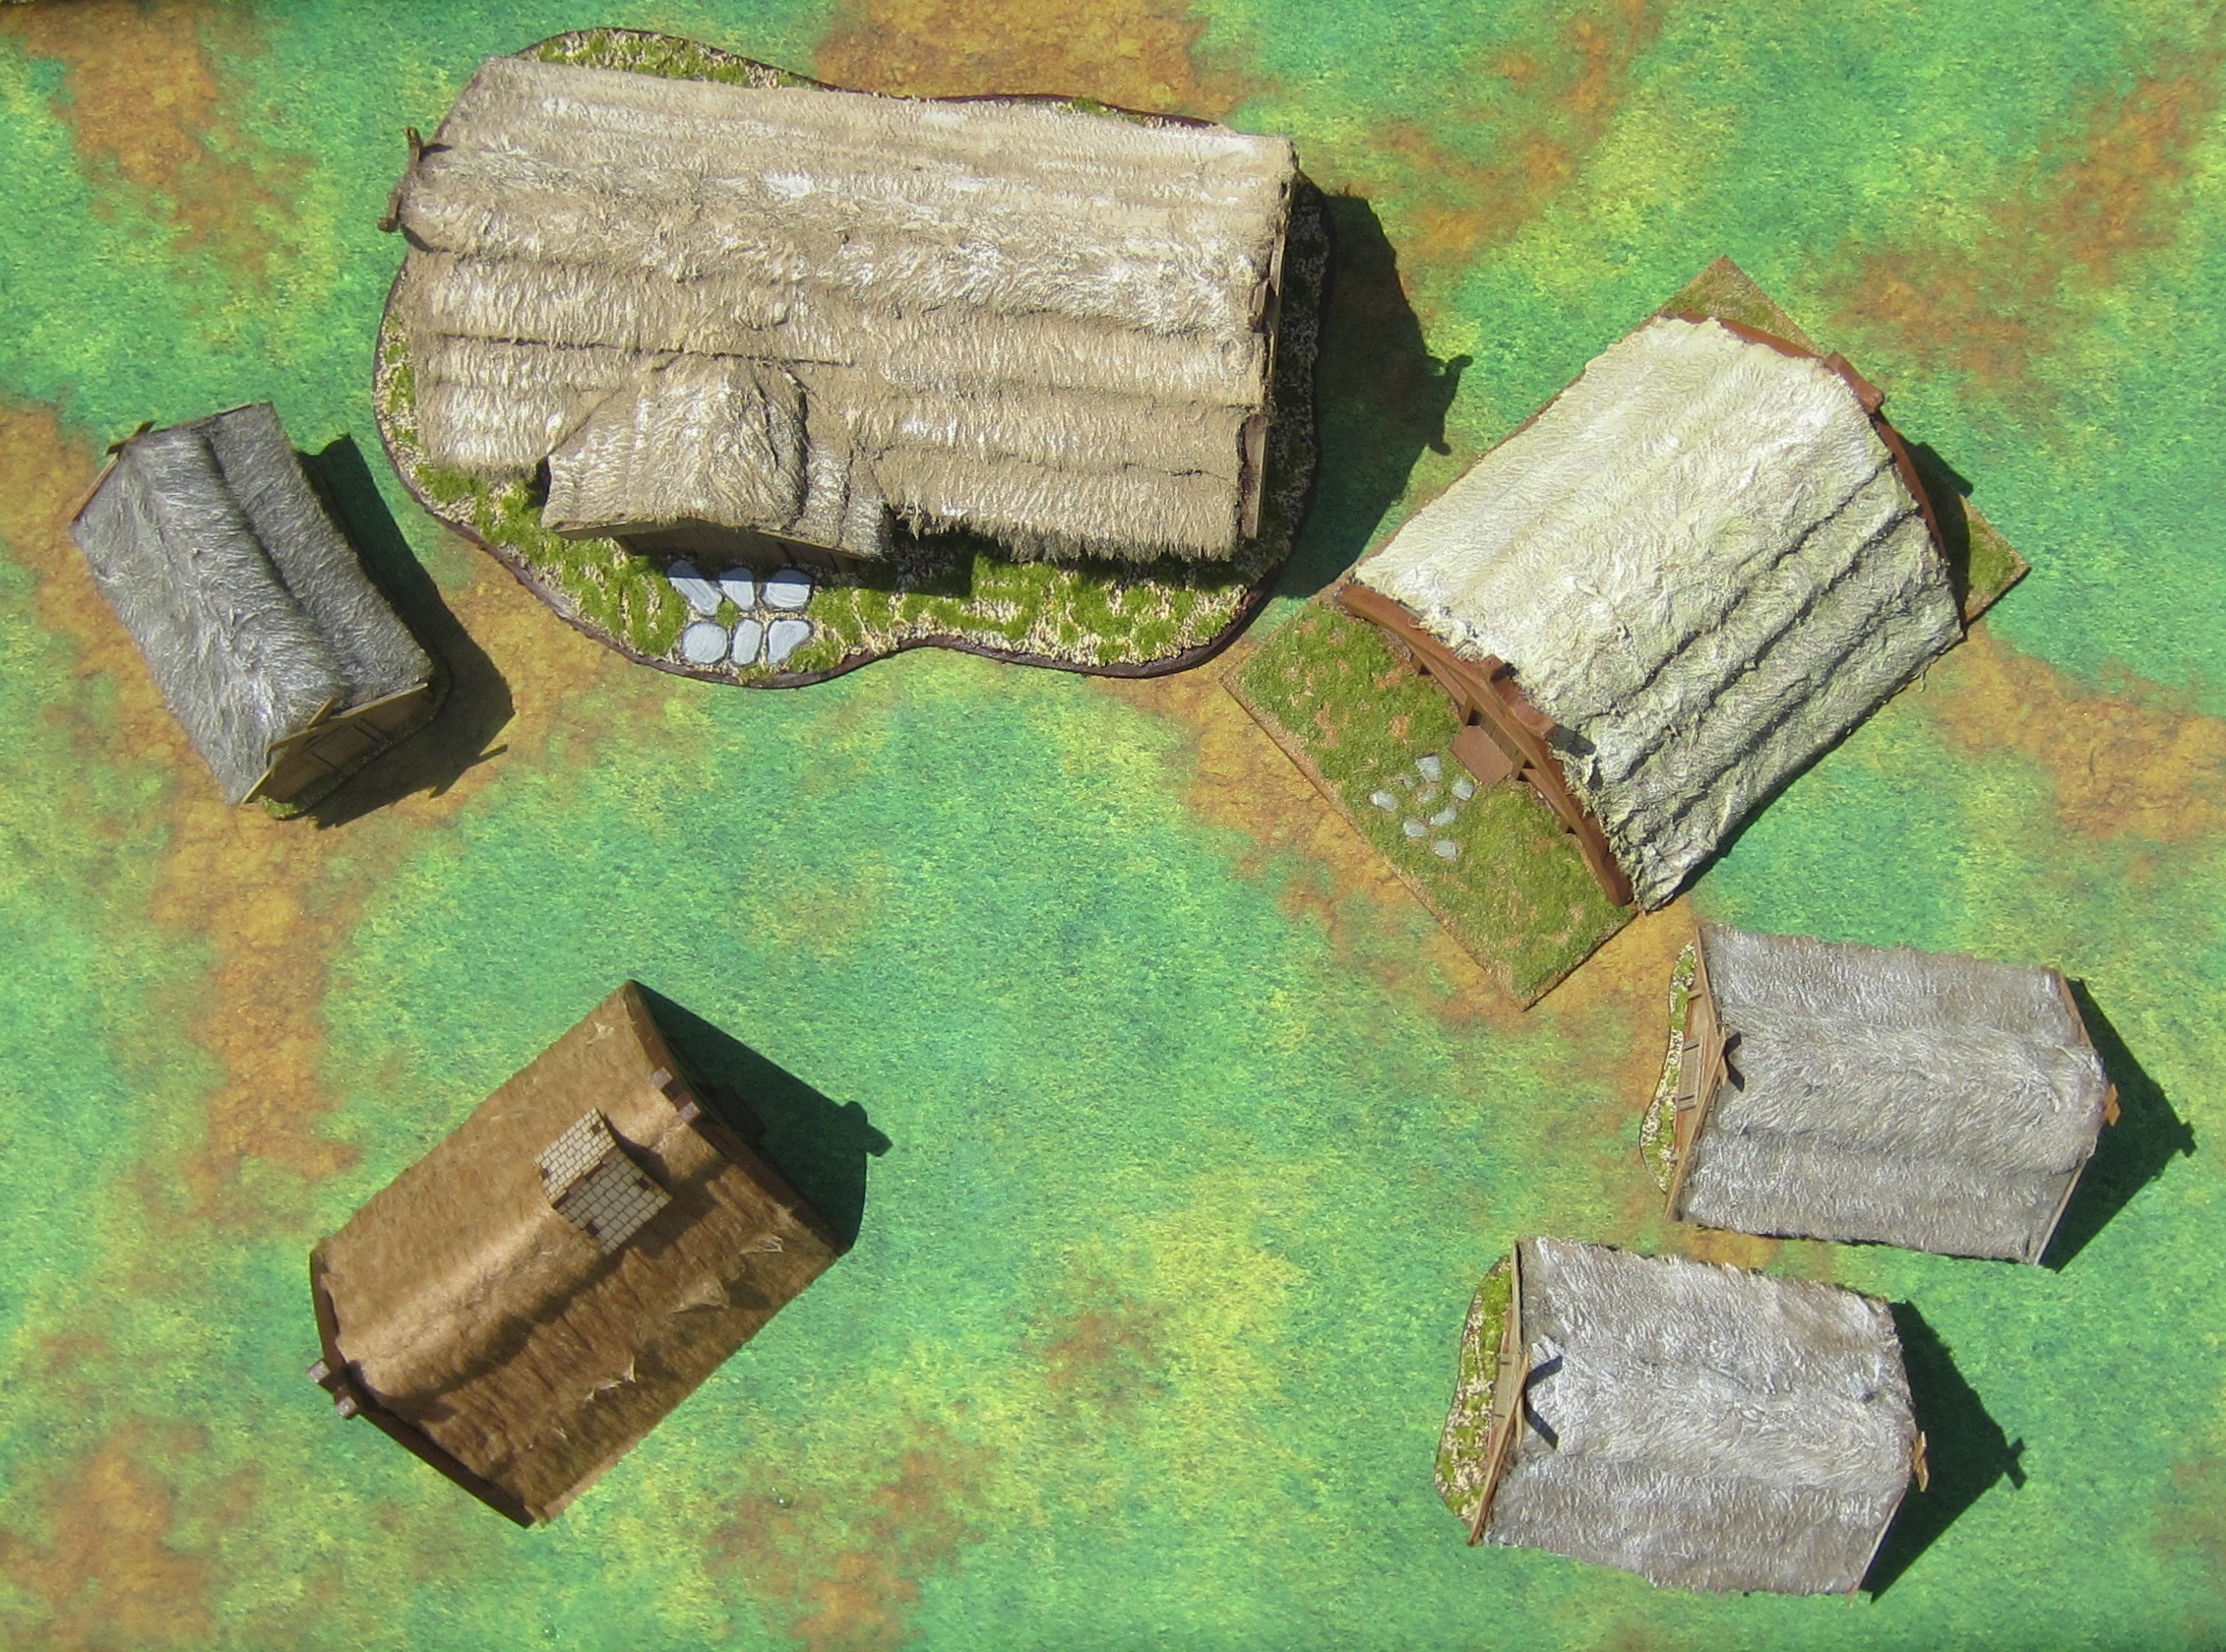
| Aerial view of the building. |
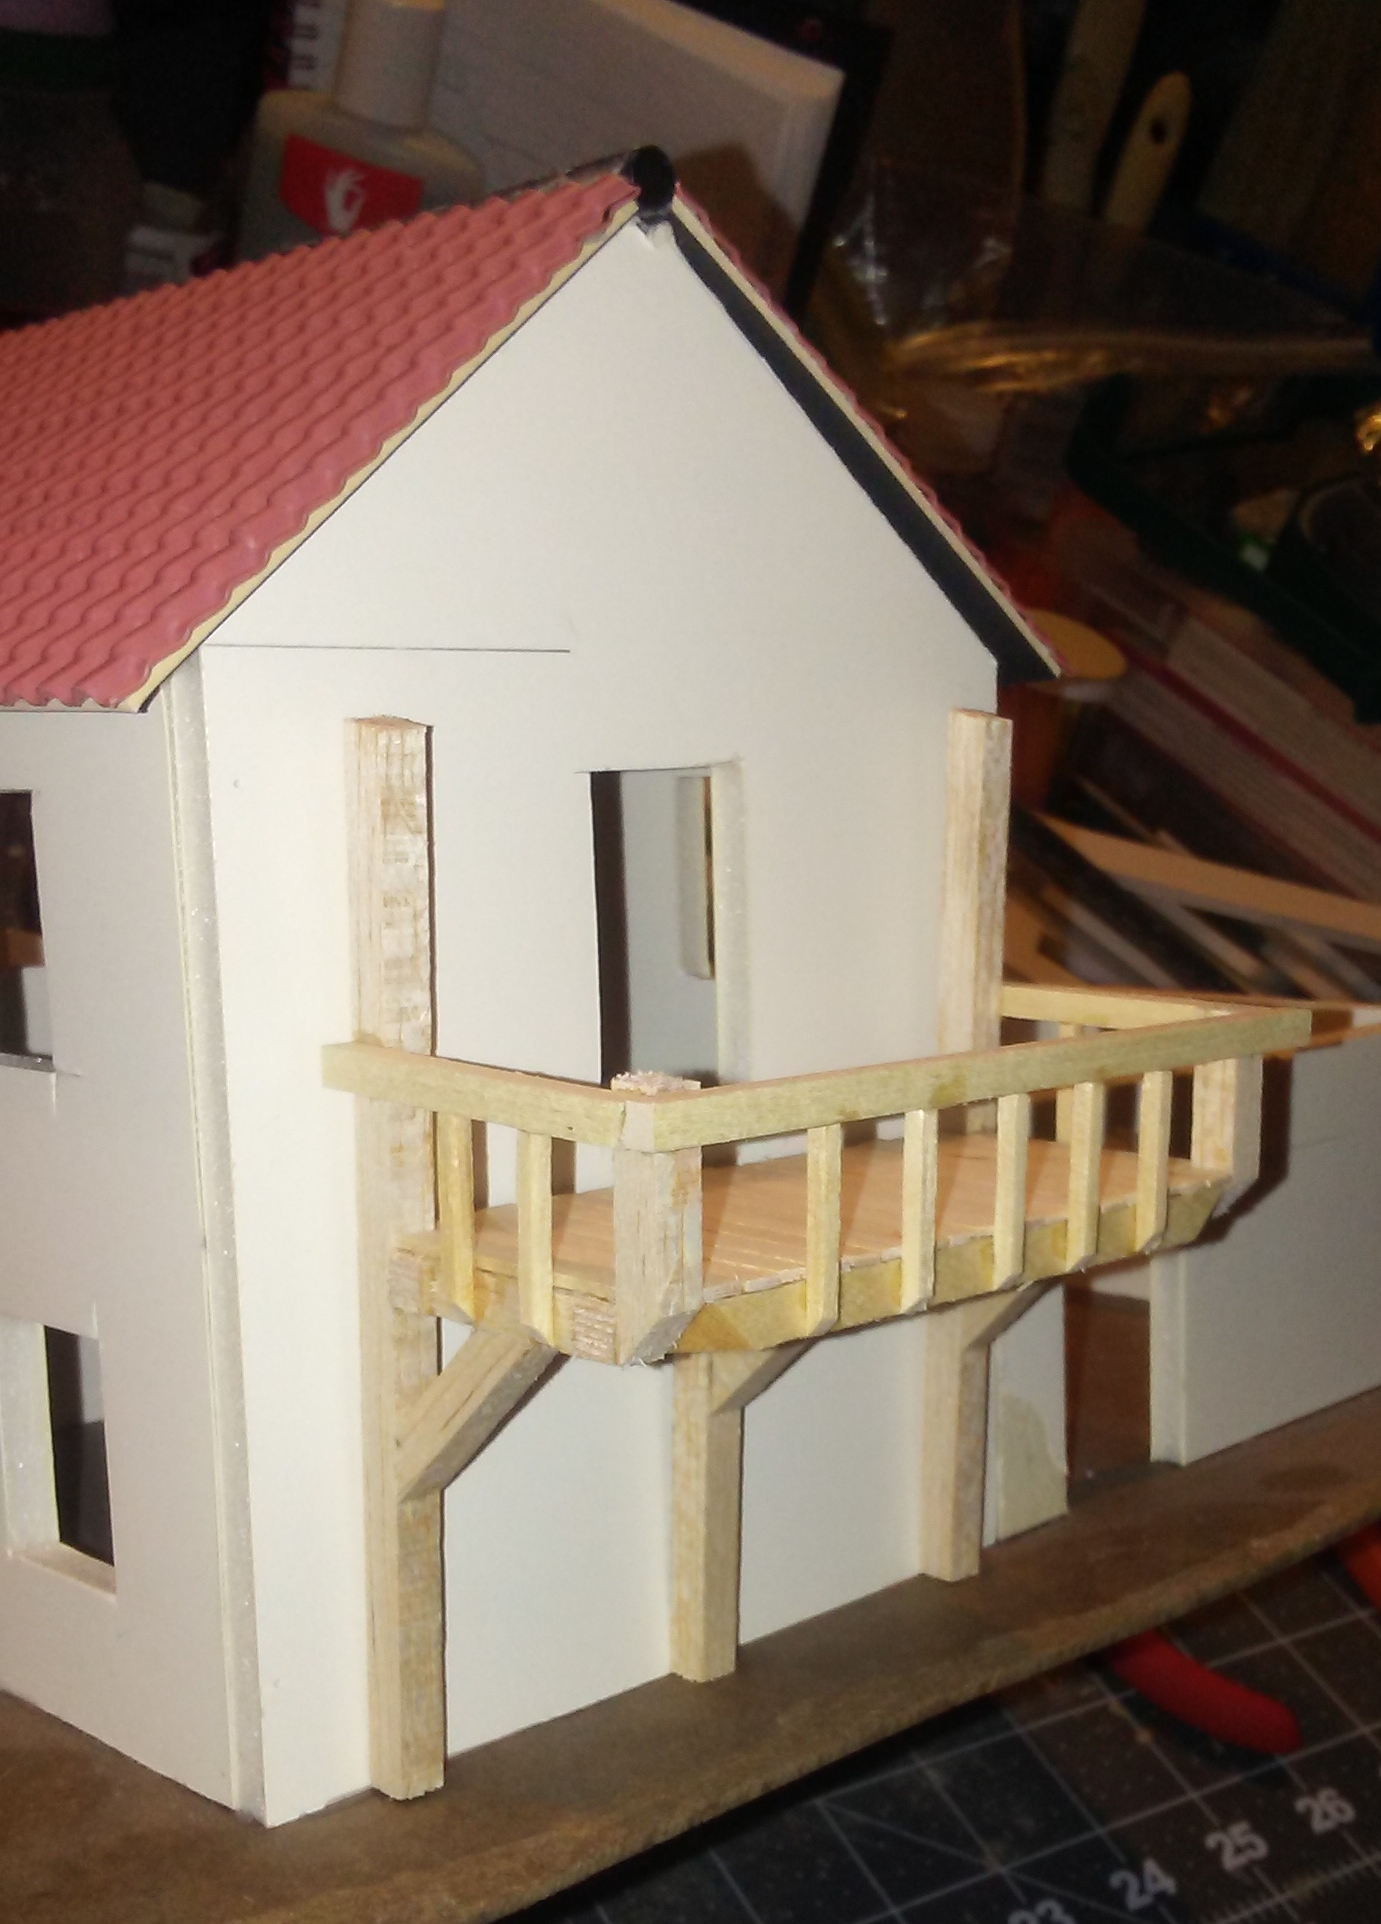
Next up was to add a little detail to give the building some visual interest and break up the look of the large blank walls. I decided that what this building needed was a large balcony coming from a second-story door.
I made the balcony using scrap pieces of balsa wood for the beams, and coffee stirrers for the planking.
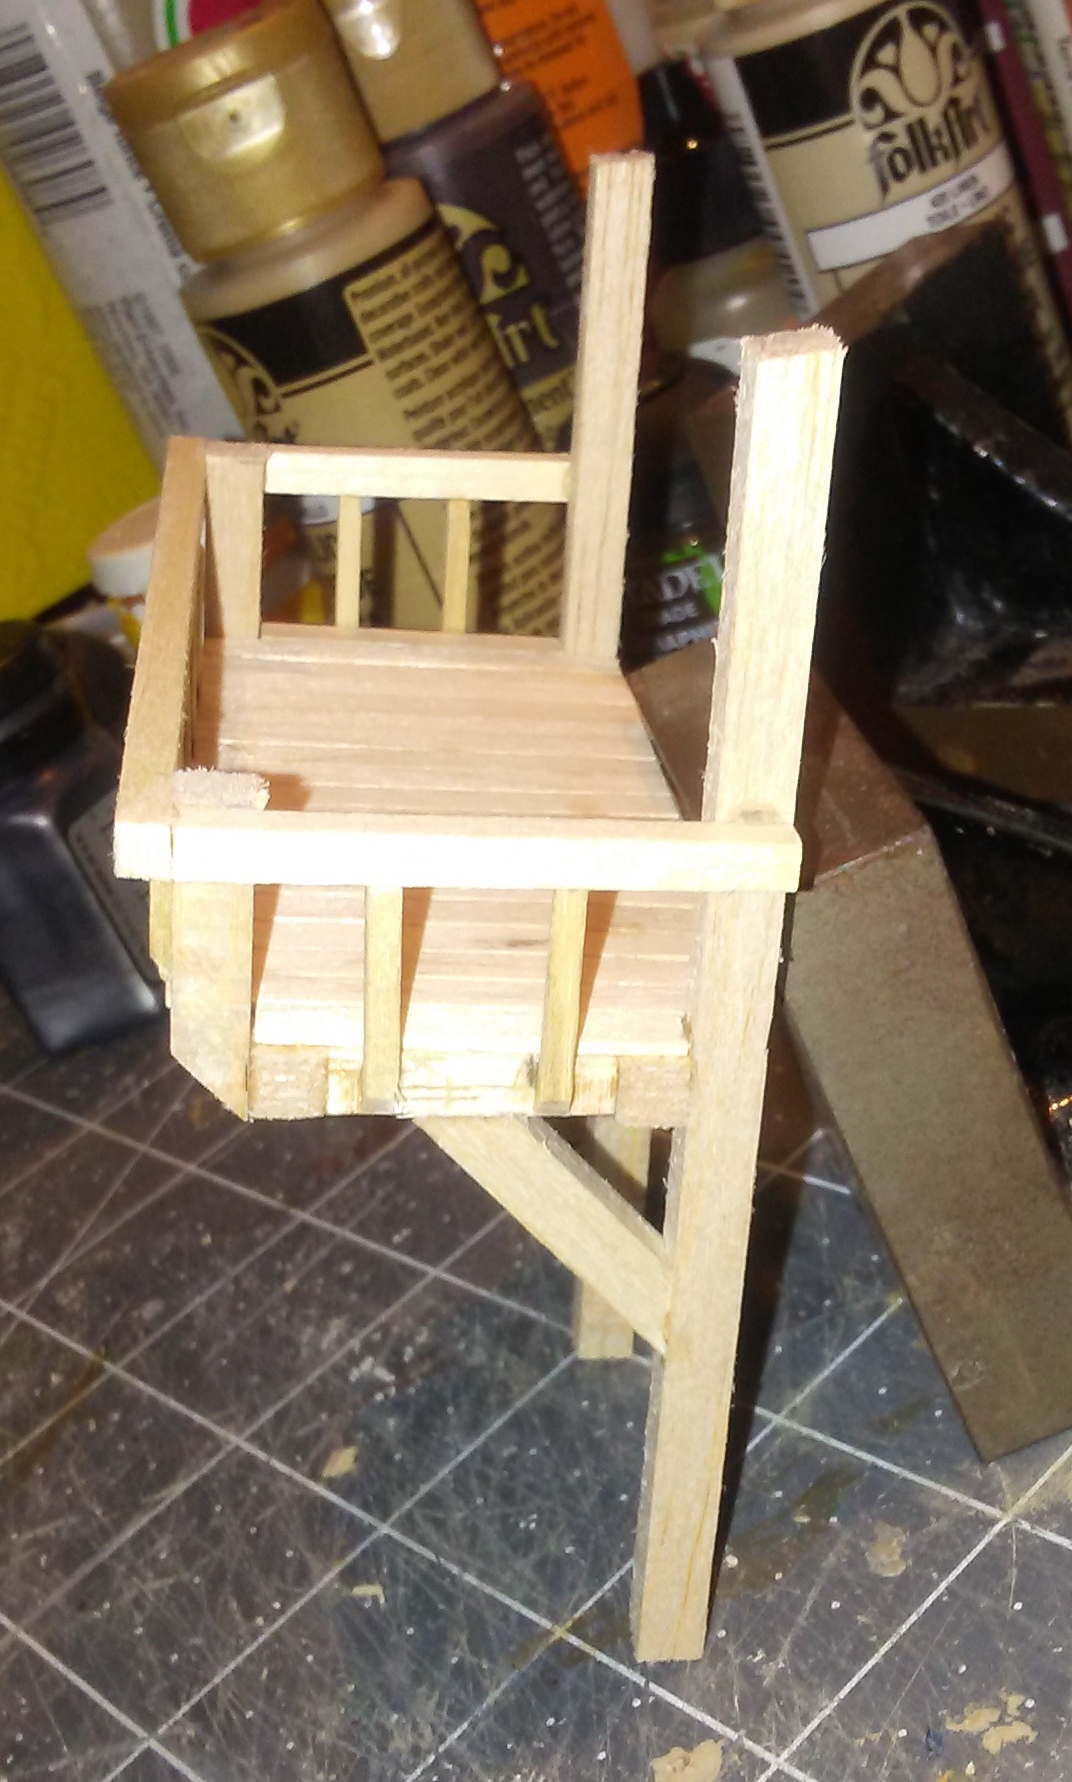 |
| Side view of balcony. |
 |
| Completed balcony. |
 |
| Balcony temporarily put in place. |
 |
| Balcony on side of house. |
Once that was done, it was time to start painting the house. I painted the roofs the same way I've done all the roofs for the town so far, for continuity. But I always mix the colors slightly differently, so that while all the roofs are the same color, there is variation in the lightness and darkness.
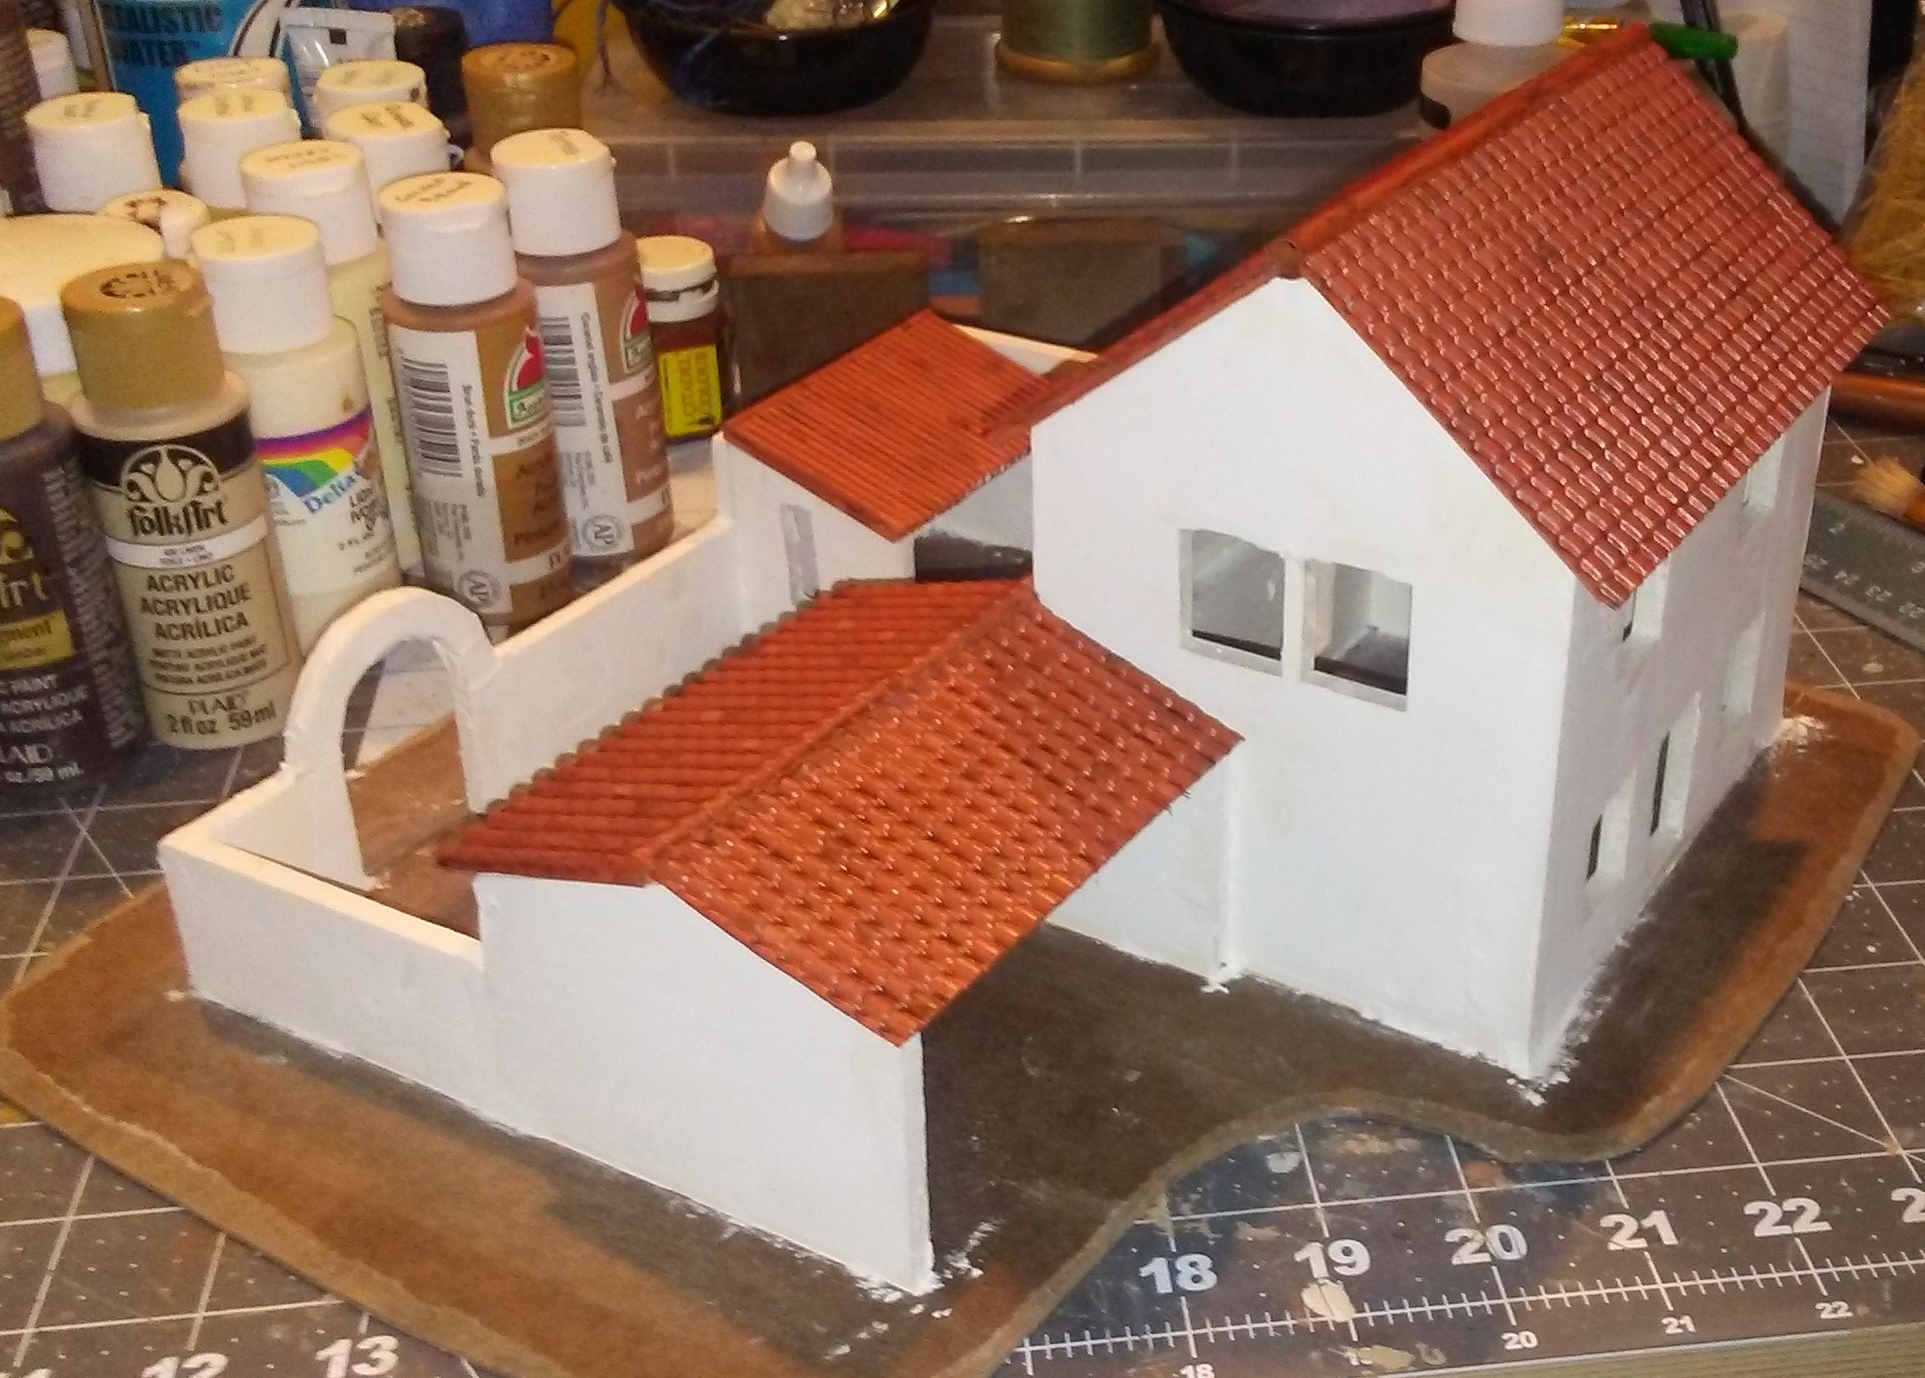 |
| Painted tile roofs. |
 |
| Tile roofs complete. |
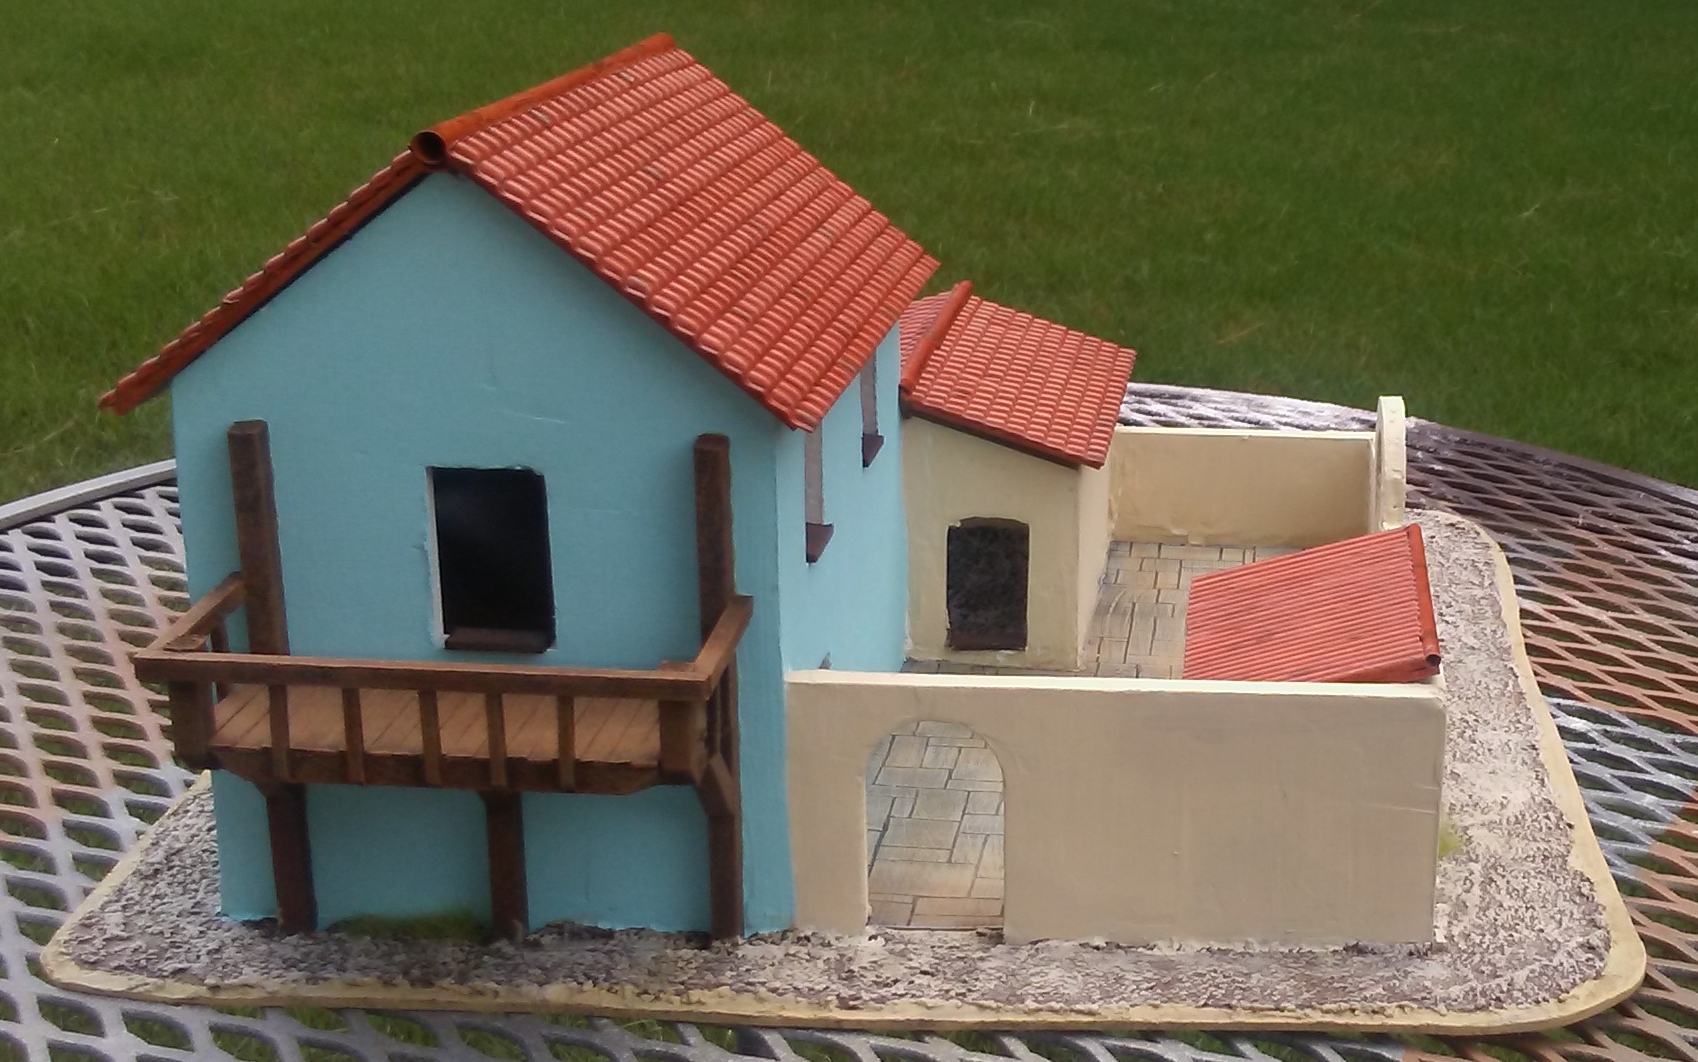
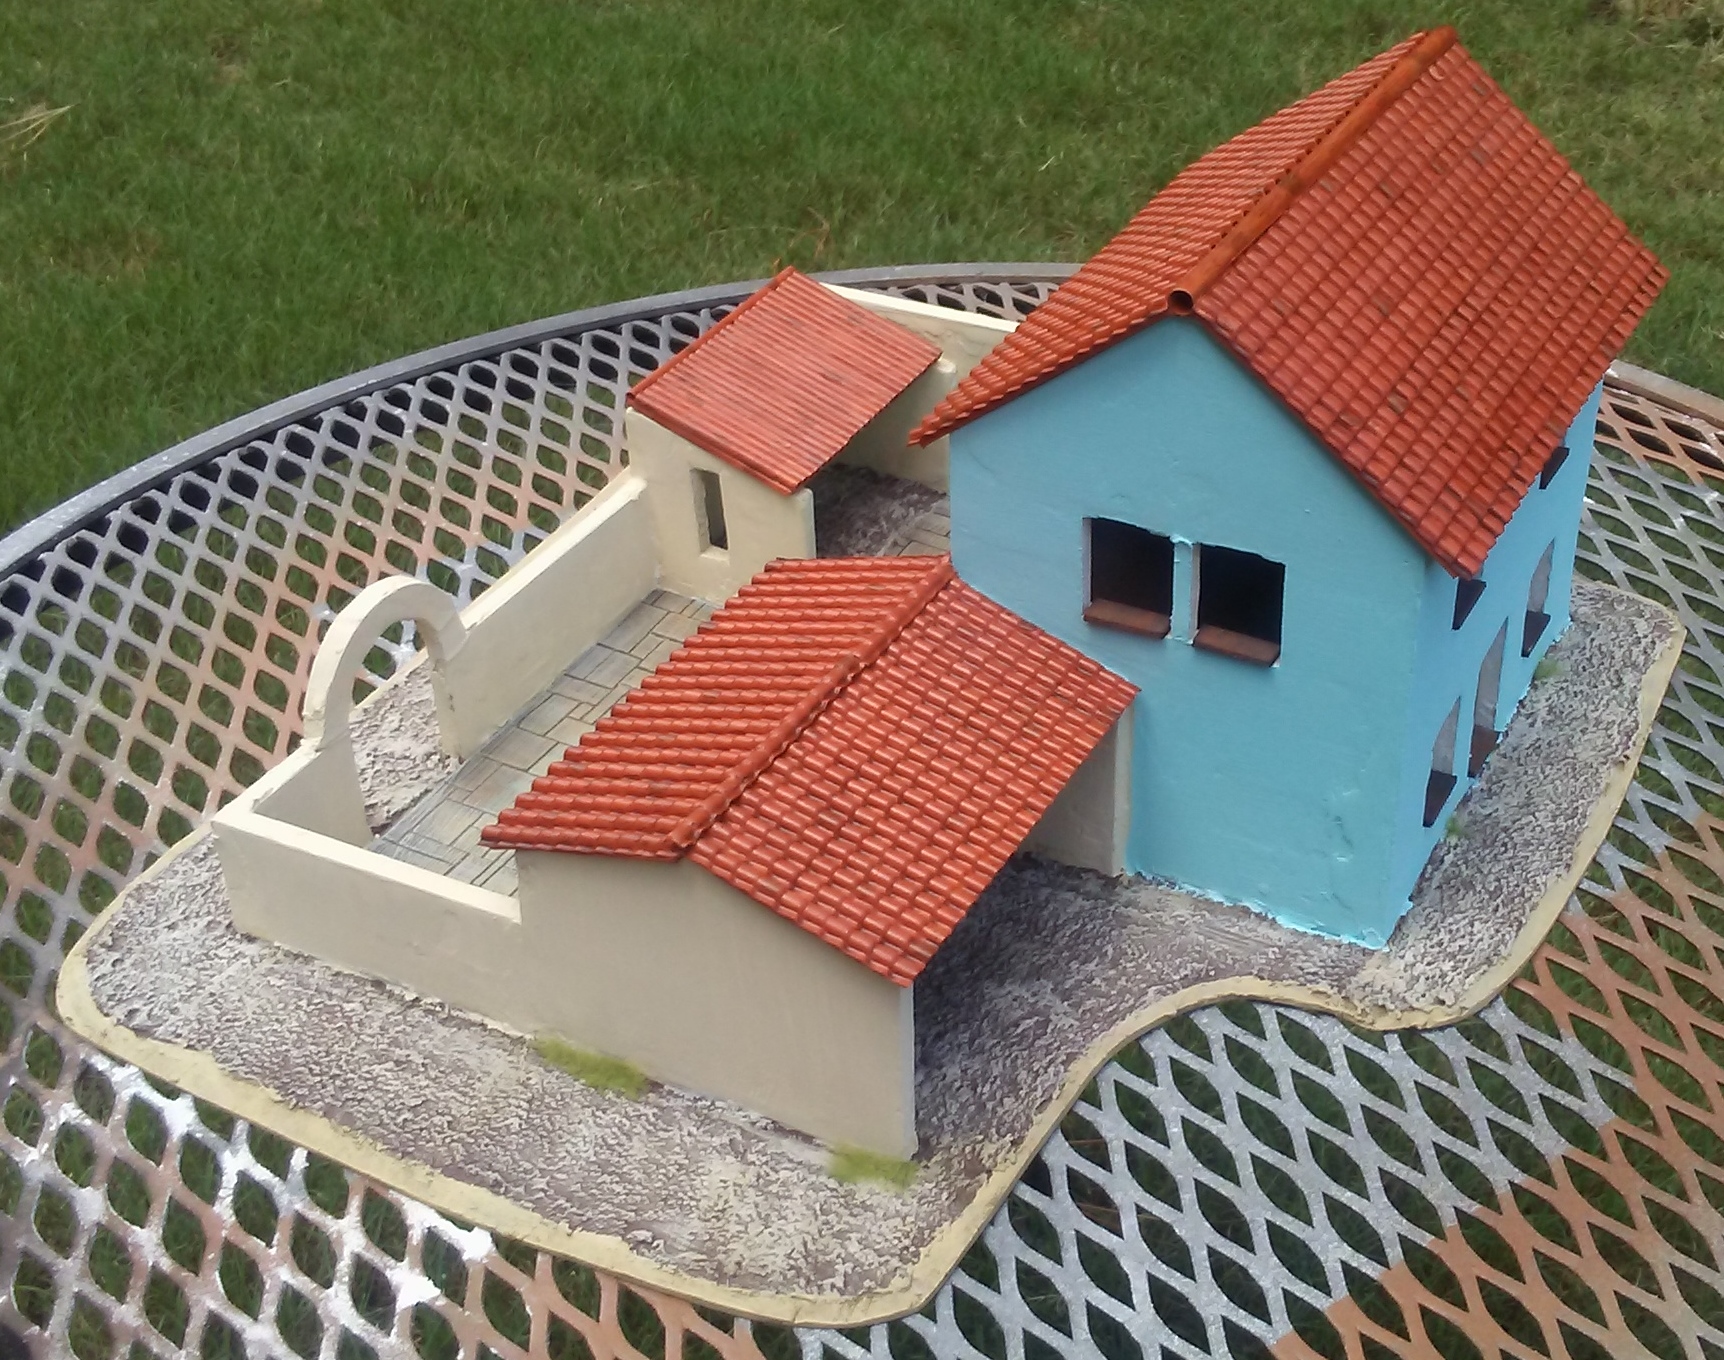
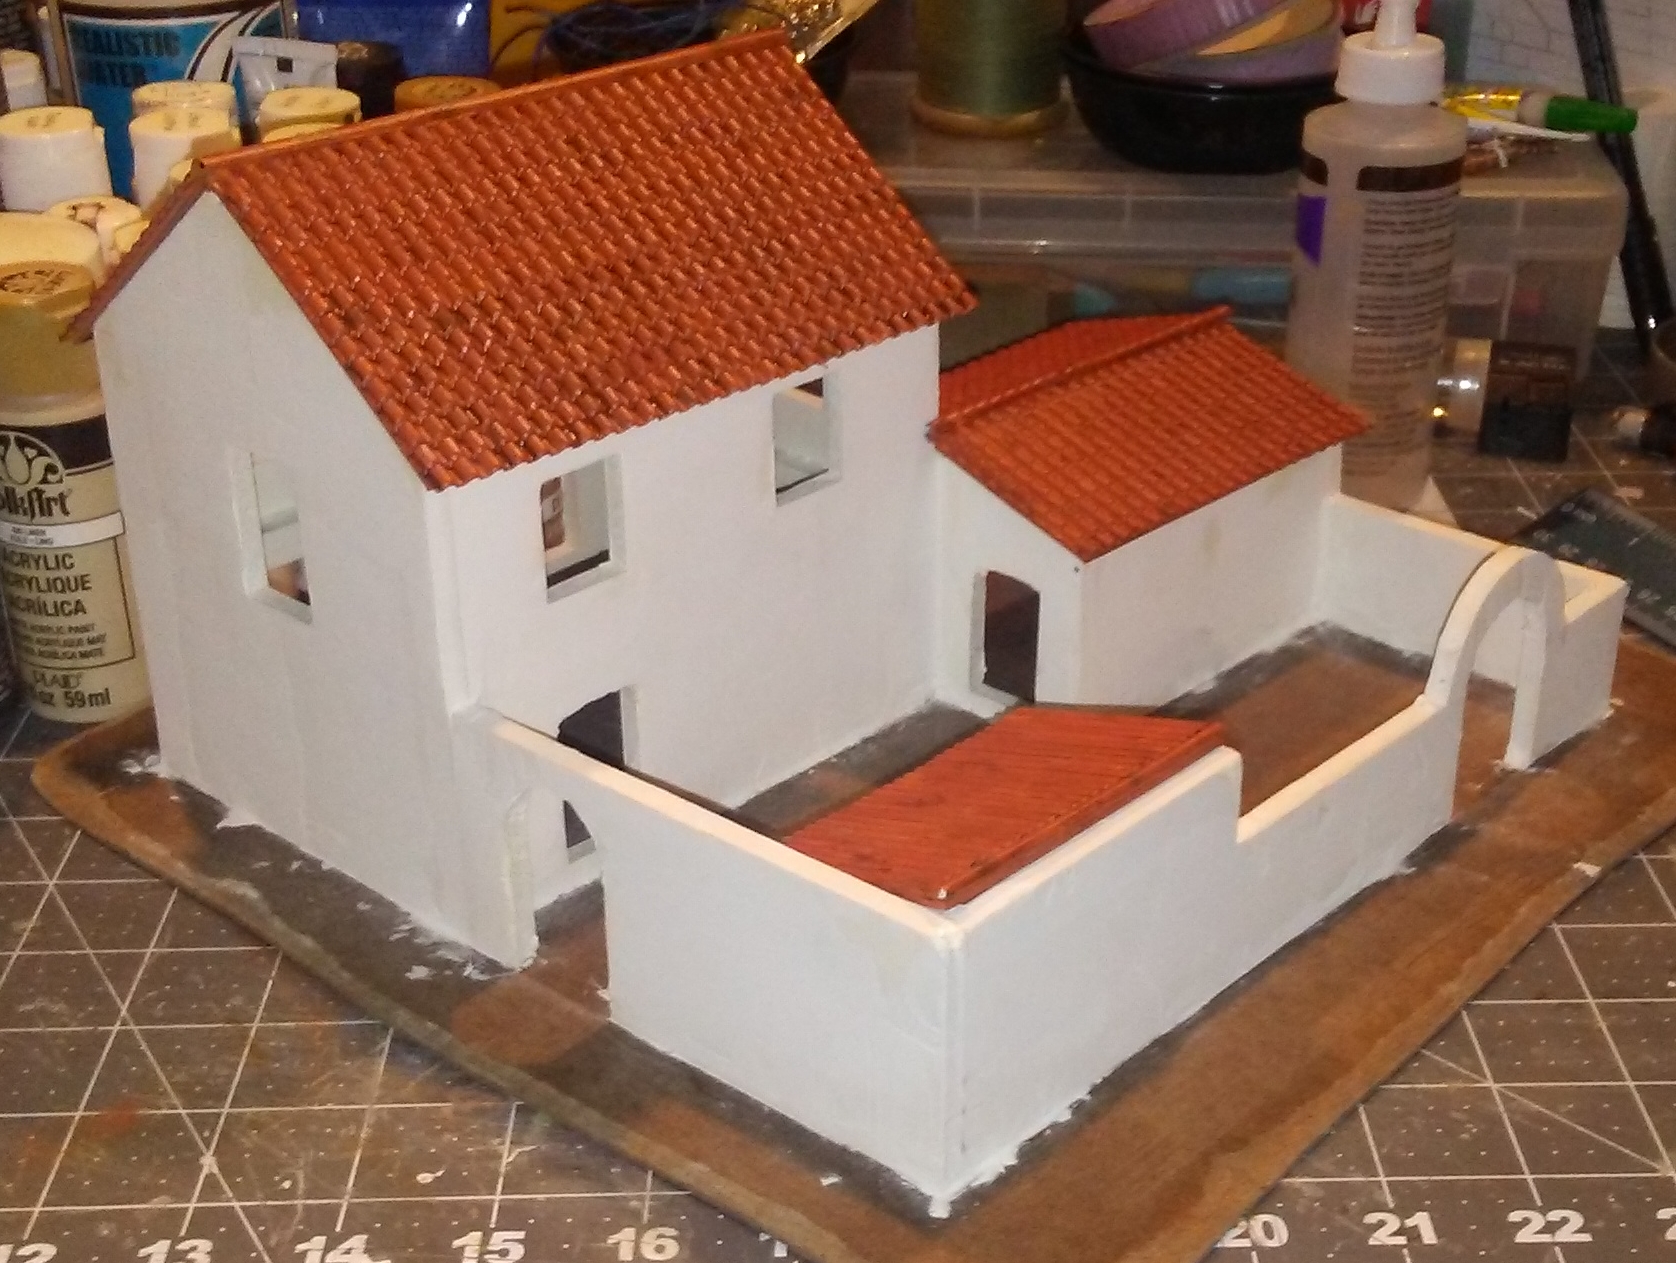
I gave my daughter the choice of color for the house, and she went with her favorite color, blue. I found a nice pastel shade that I felt would go well with a Caribbean-themed colonial town. I painted the walls around the courtyard and the sheds a neutral light color for contrast. The wooden balcony is painted a dark brown, drybrushed with lighter browns.
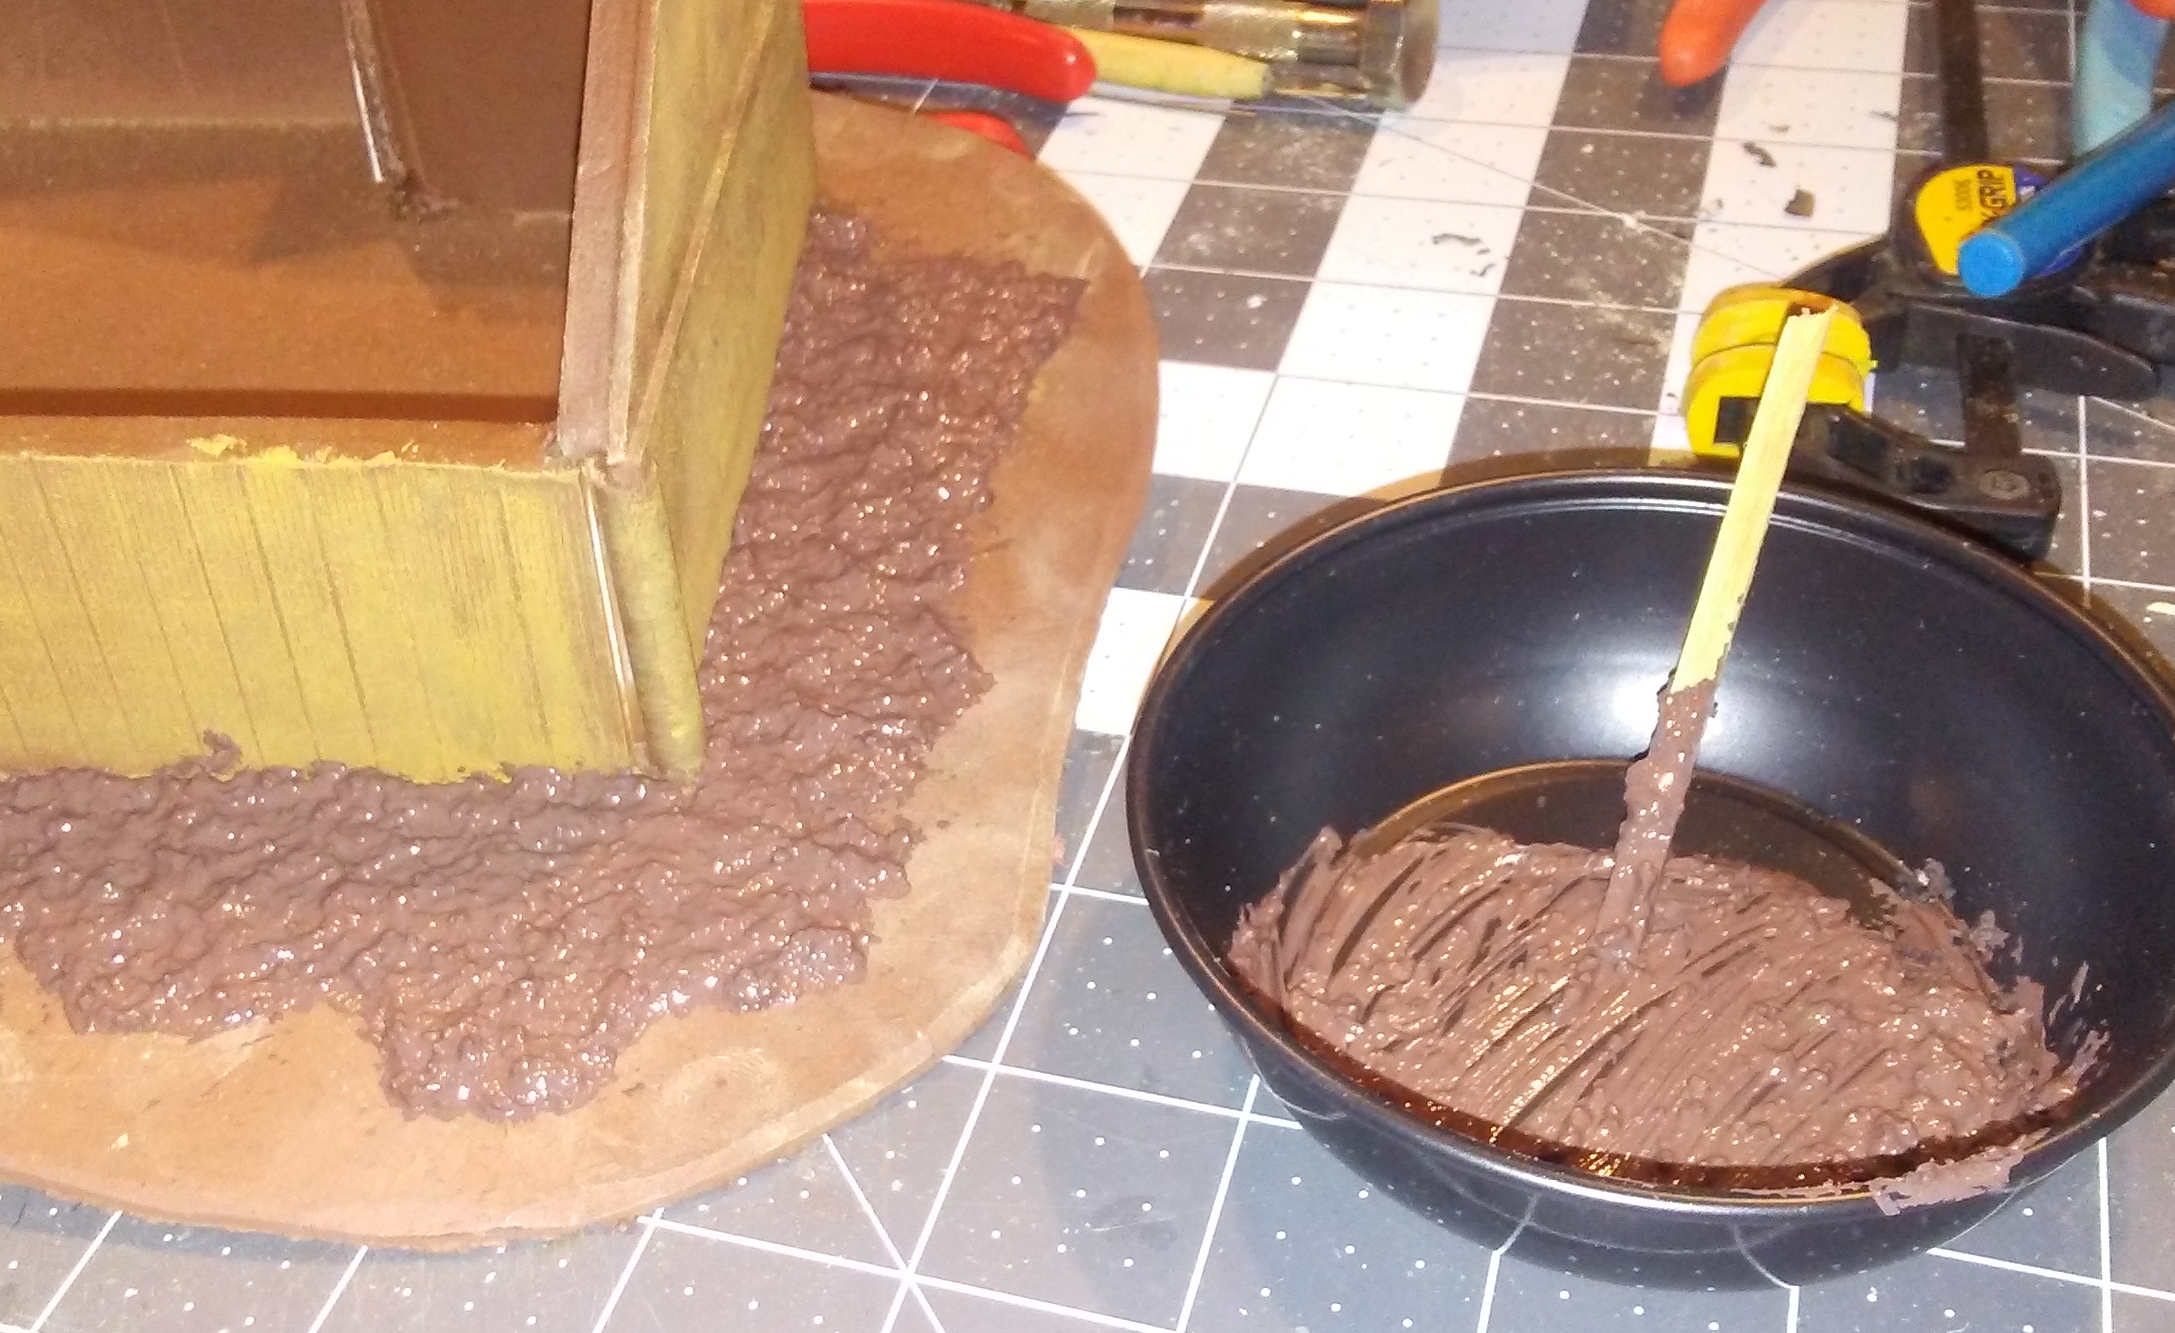
I mixed up a batch of my usual terrain goop and applied it to the grounds. Before doing that, however, I taped off a section of the courtyard where I wanted to try something different.
I used a different textured Plastruct sheet for the courtyard, called Patio Stones. I painted them dark gray, gave them a dark black wash followed by a heavy drybrush of lighter gray. Then I gave it a lighter drybrush over that, using the same lighter cream shade I use on my terrain. I wanted it to look like people walking into the courtyard would carry in the same light dirt that was outside, and also blend into the color palette I use for my terrain.
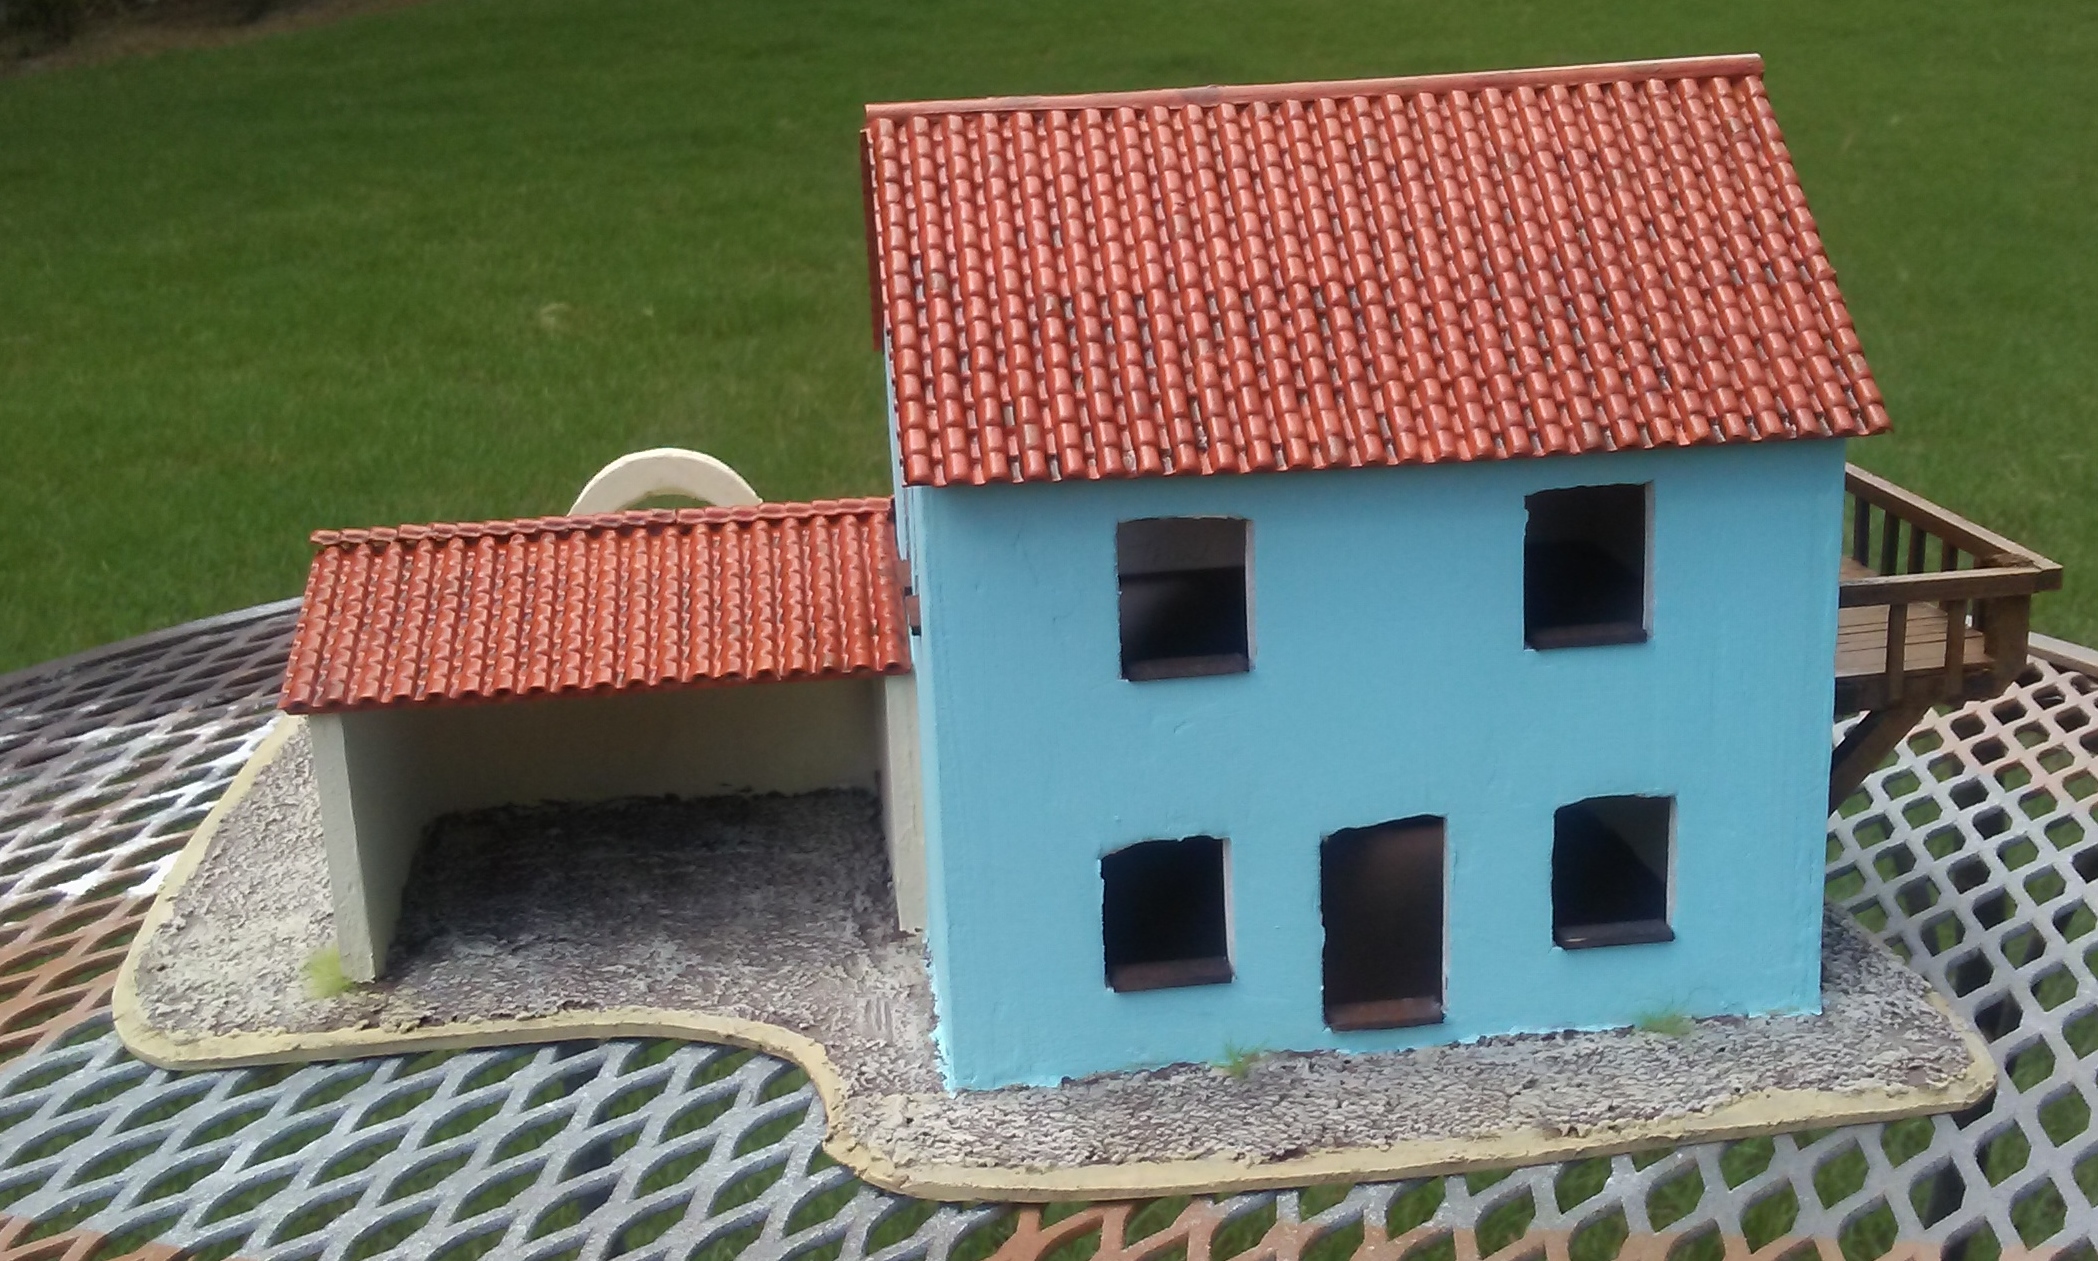
Below is the completed house, showing the courtyard. All I need is a carriage for the Governor that I can park in the large stable/shed beside the house. And a Governor's Daughter figure to put on the balcony!
 |
| Plastruct Patio Stone courtyard. |
|
| Completed Governor's House. |
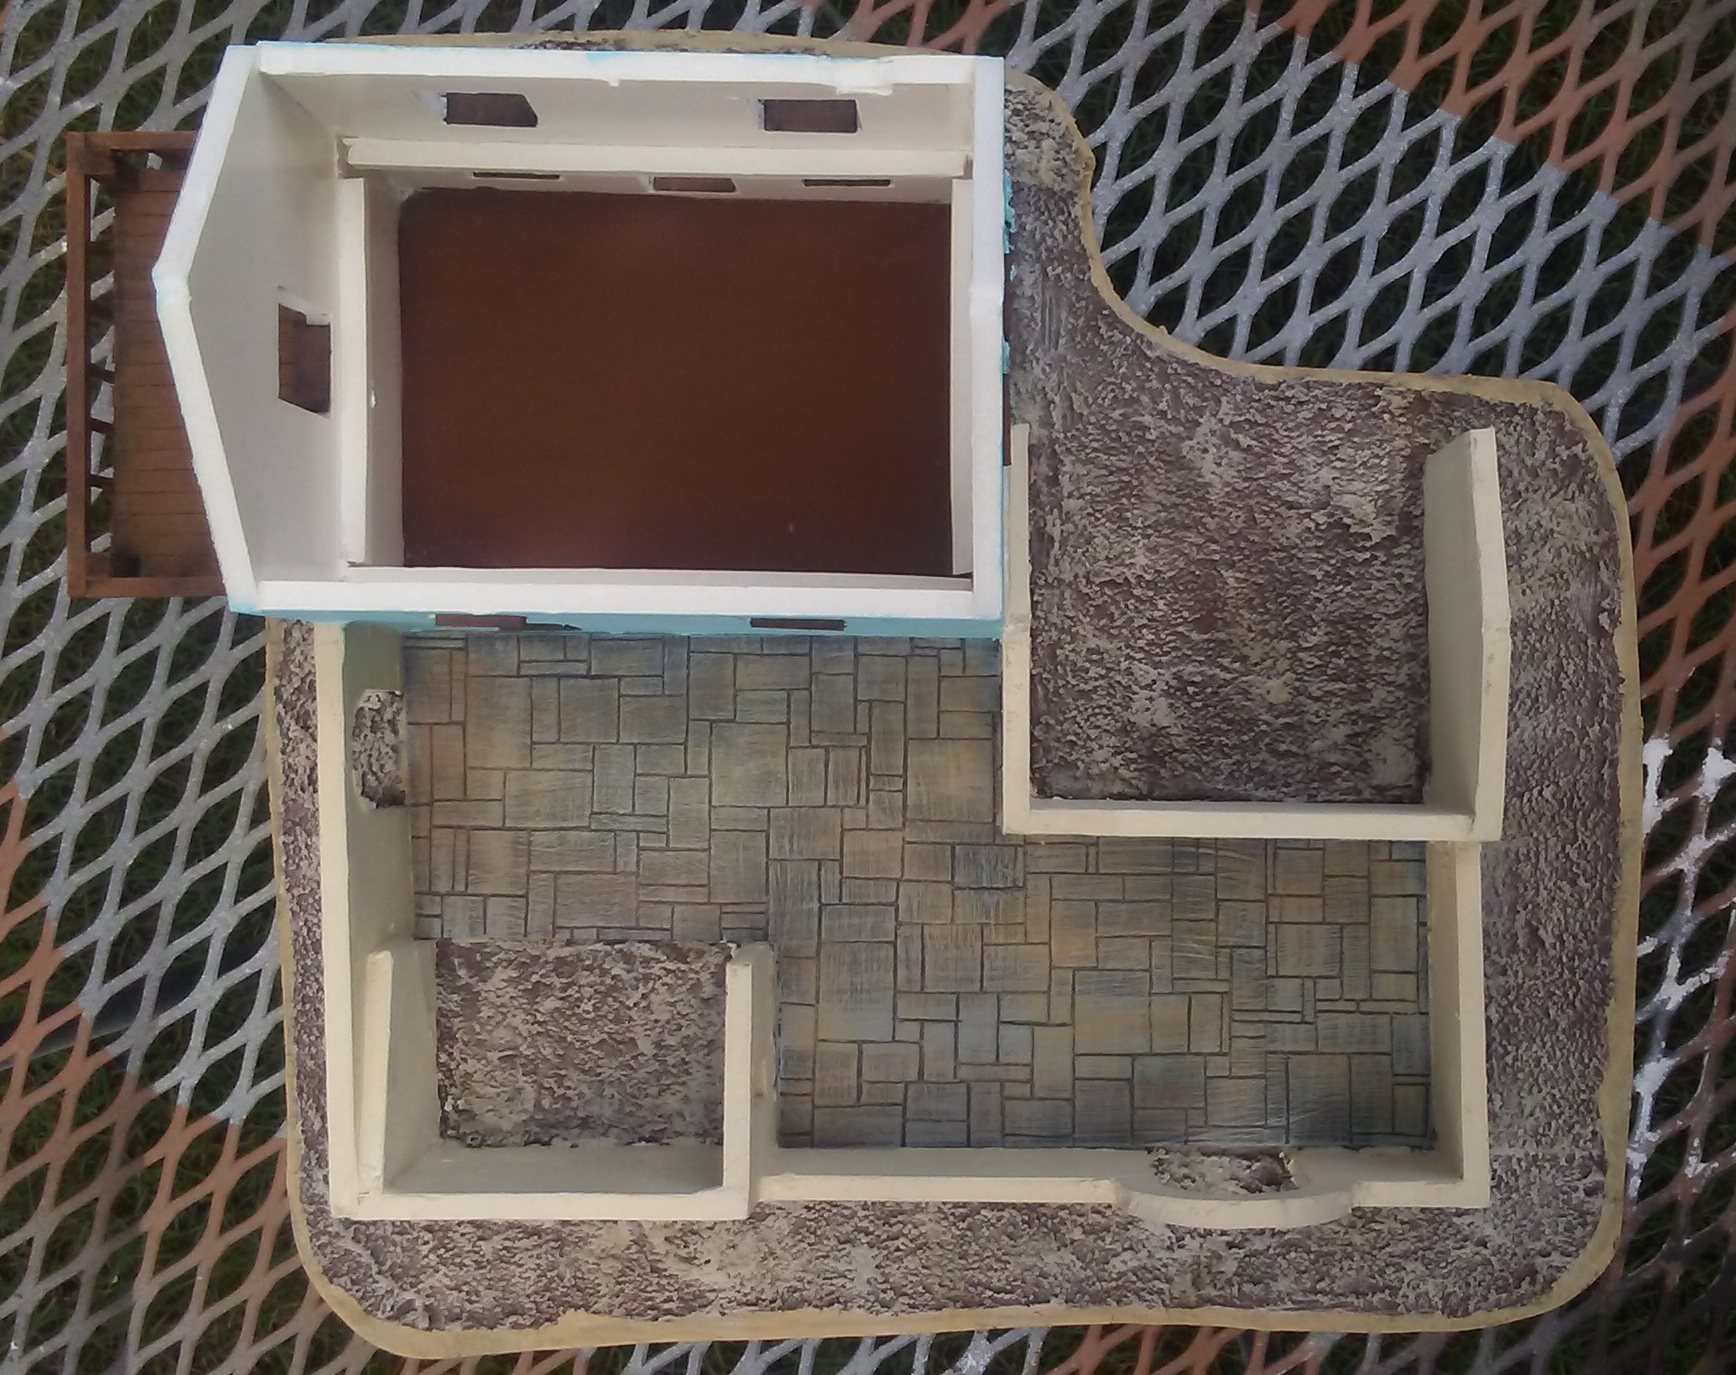 |
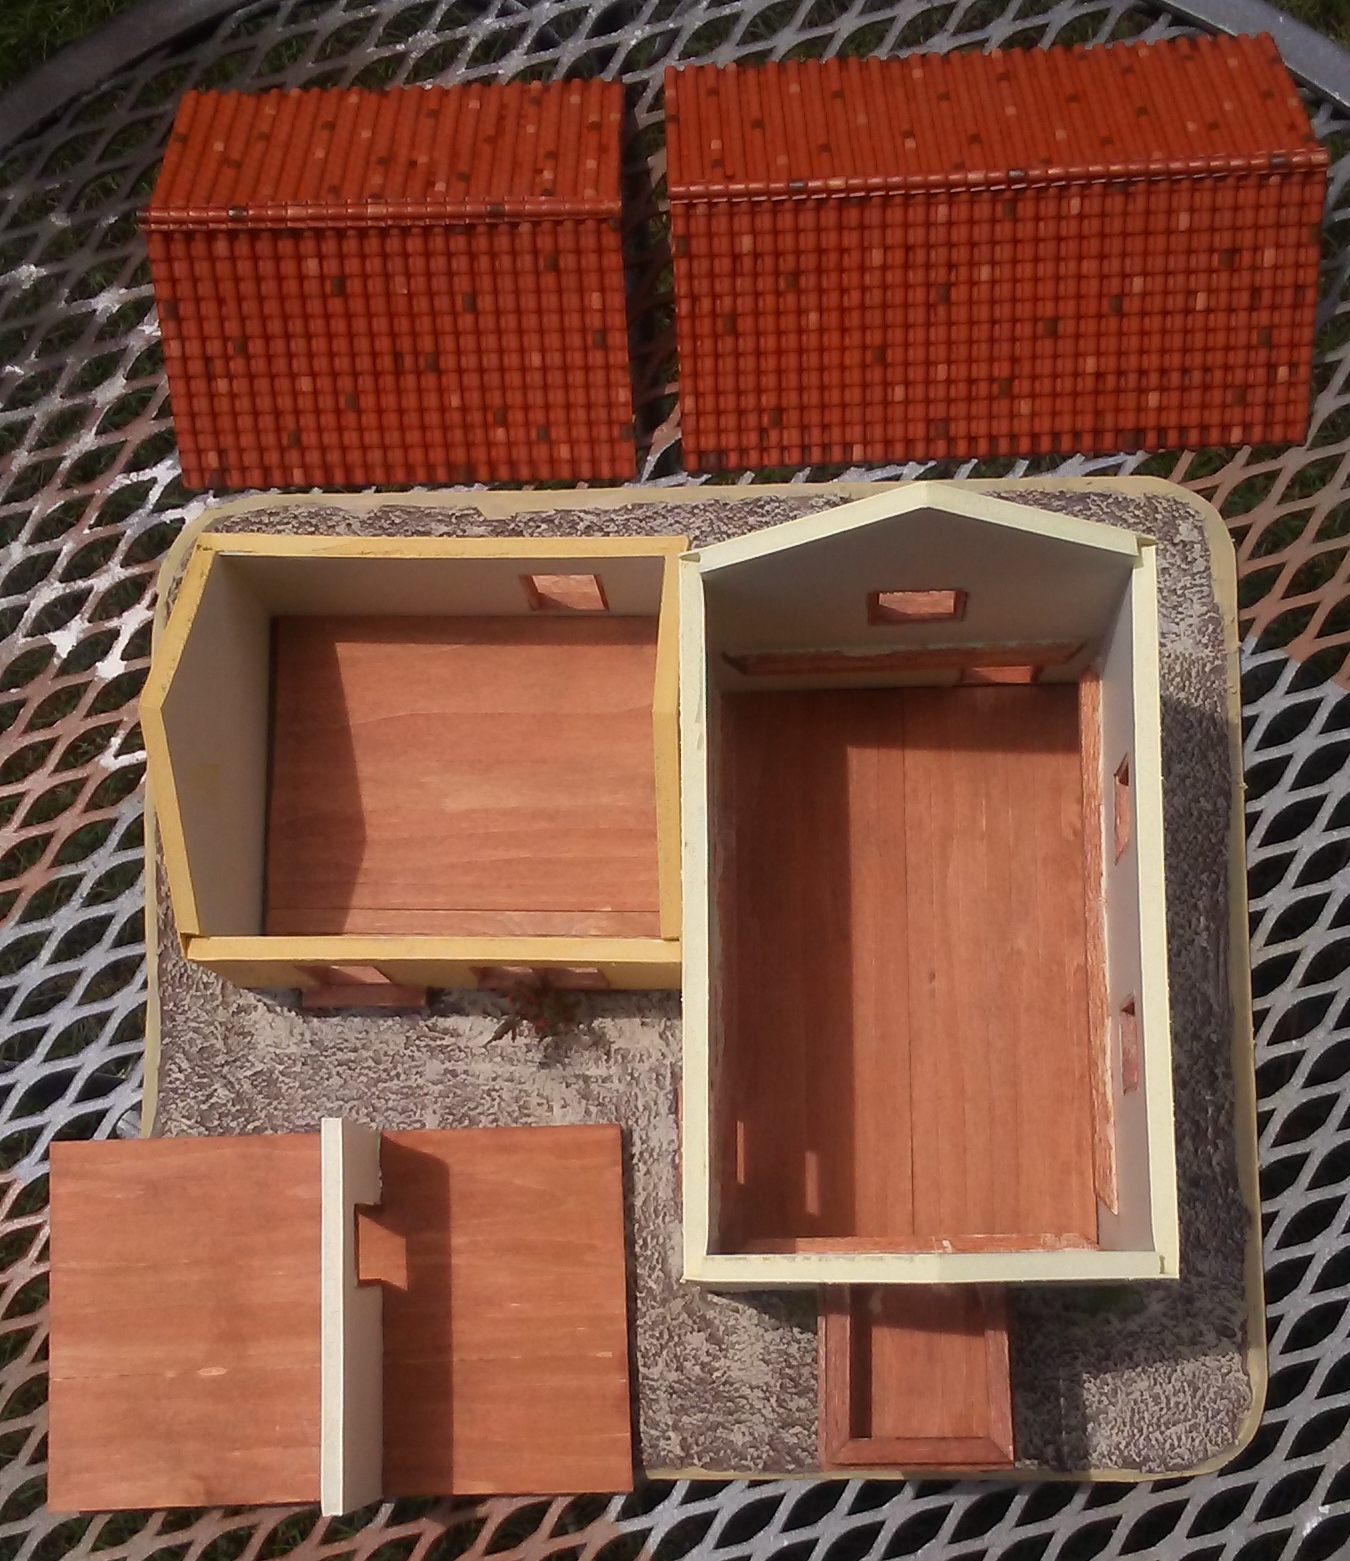
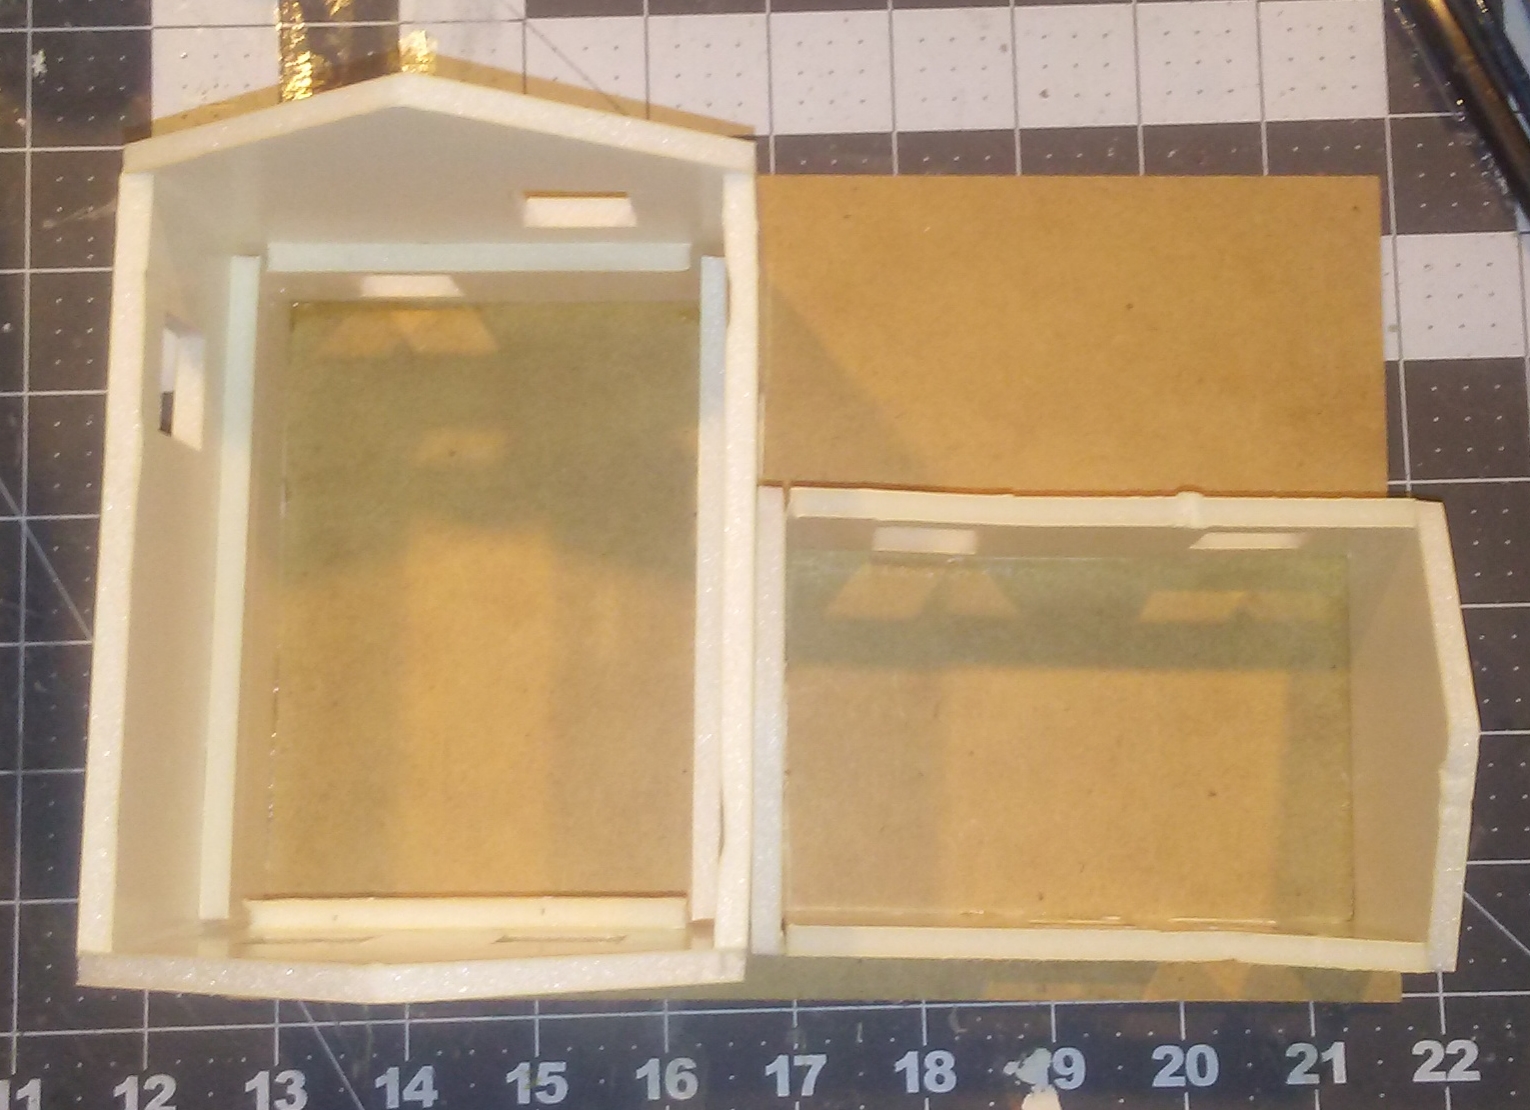
| Overhead view with roofs and second floor removed. |
The second house I finished need just a little work, as it was almost complete when I left off.
It needed roofs, which was not a big deal. And it needed to have terrain goop applied to the base. The pictures are self explanatory.
The nearly completed house. There is a large open space on the base between the two doors, and I am not 100% certain yet how I am going to finish it off. I made a small flowering bush to place there for now, and I may turn that area into a small garden with a path between both doors. Whatever I do, I need to be sure to make it something that will hold up in a terrain piece. Some of the more realistic flowers and bushes can be quite delicate.
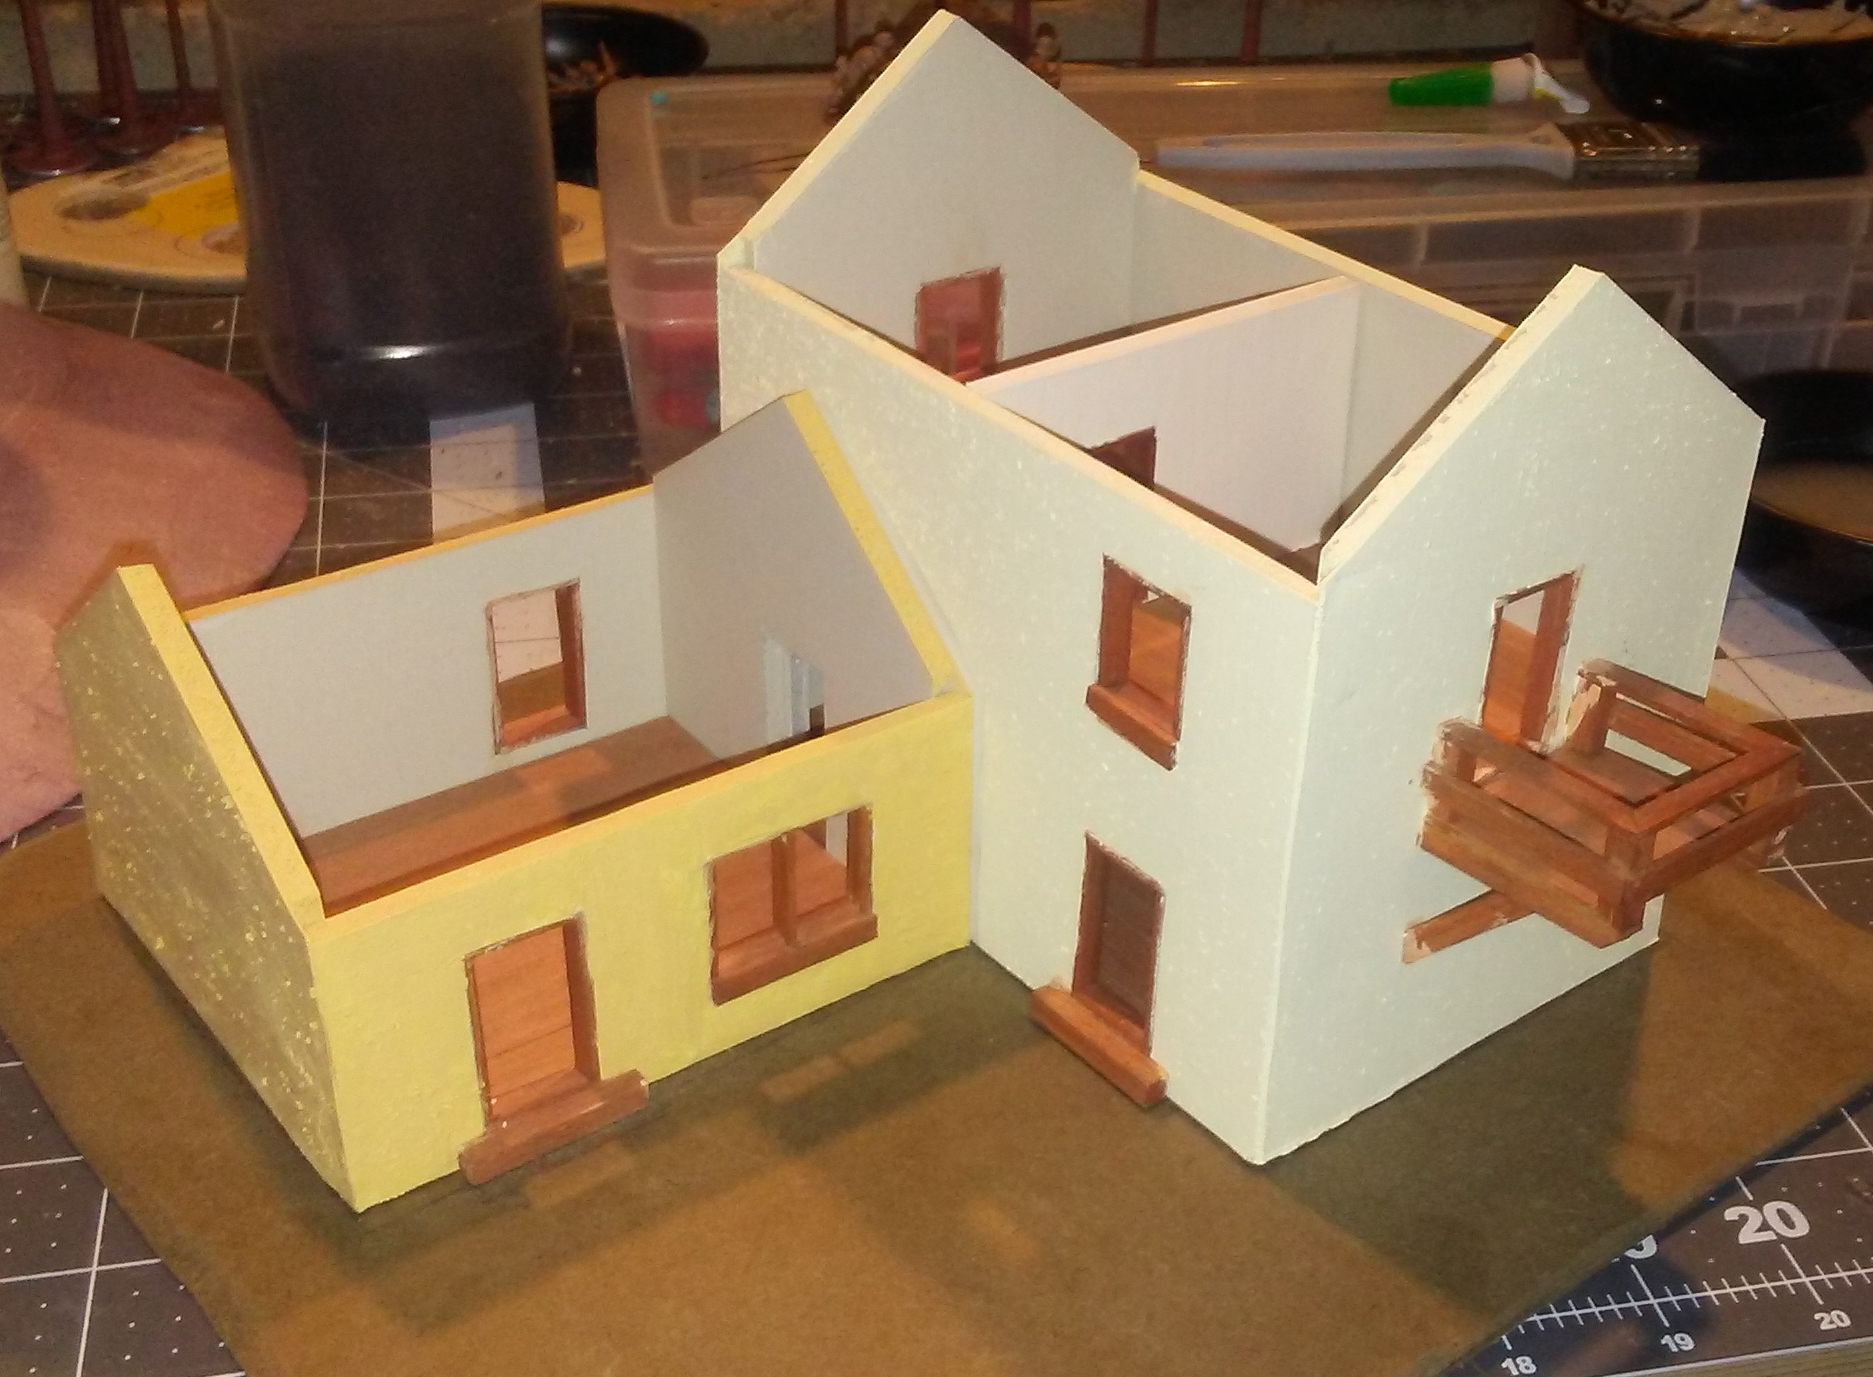
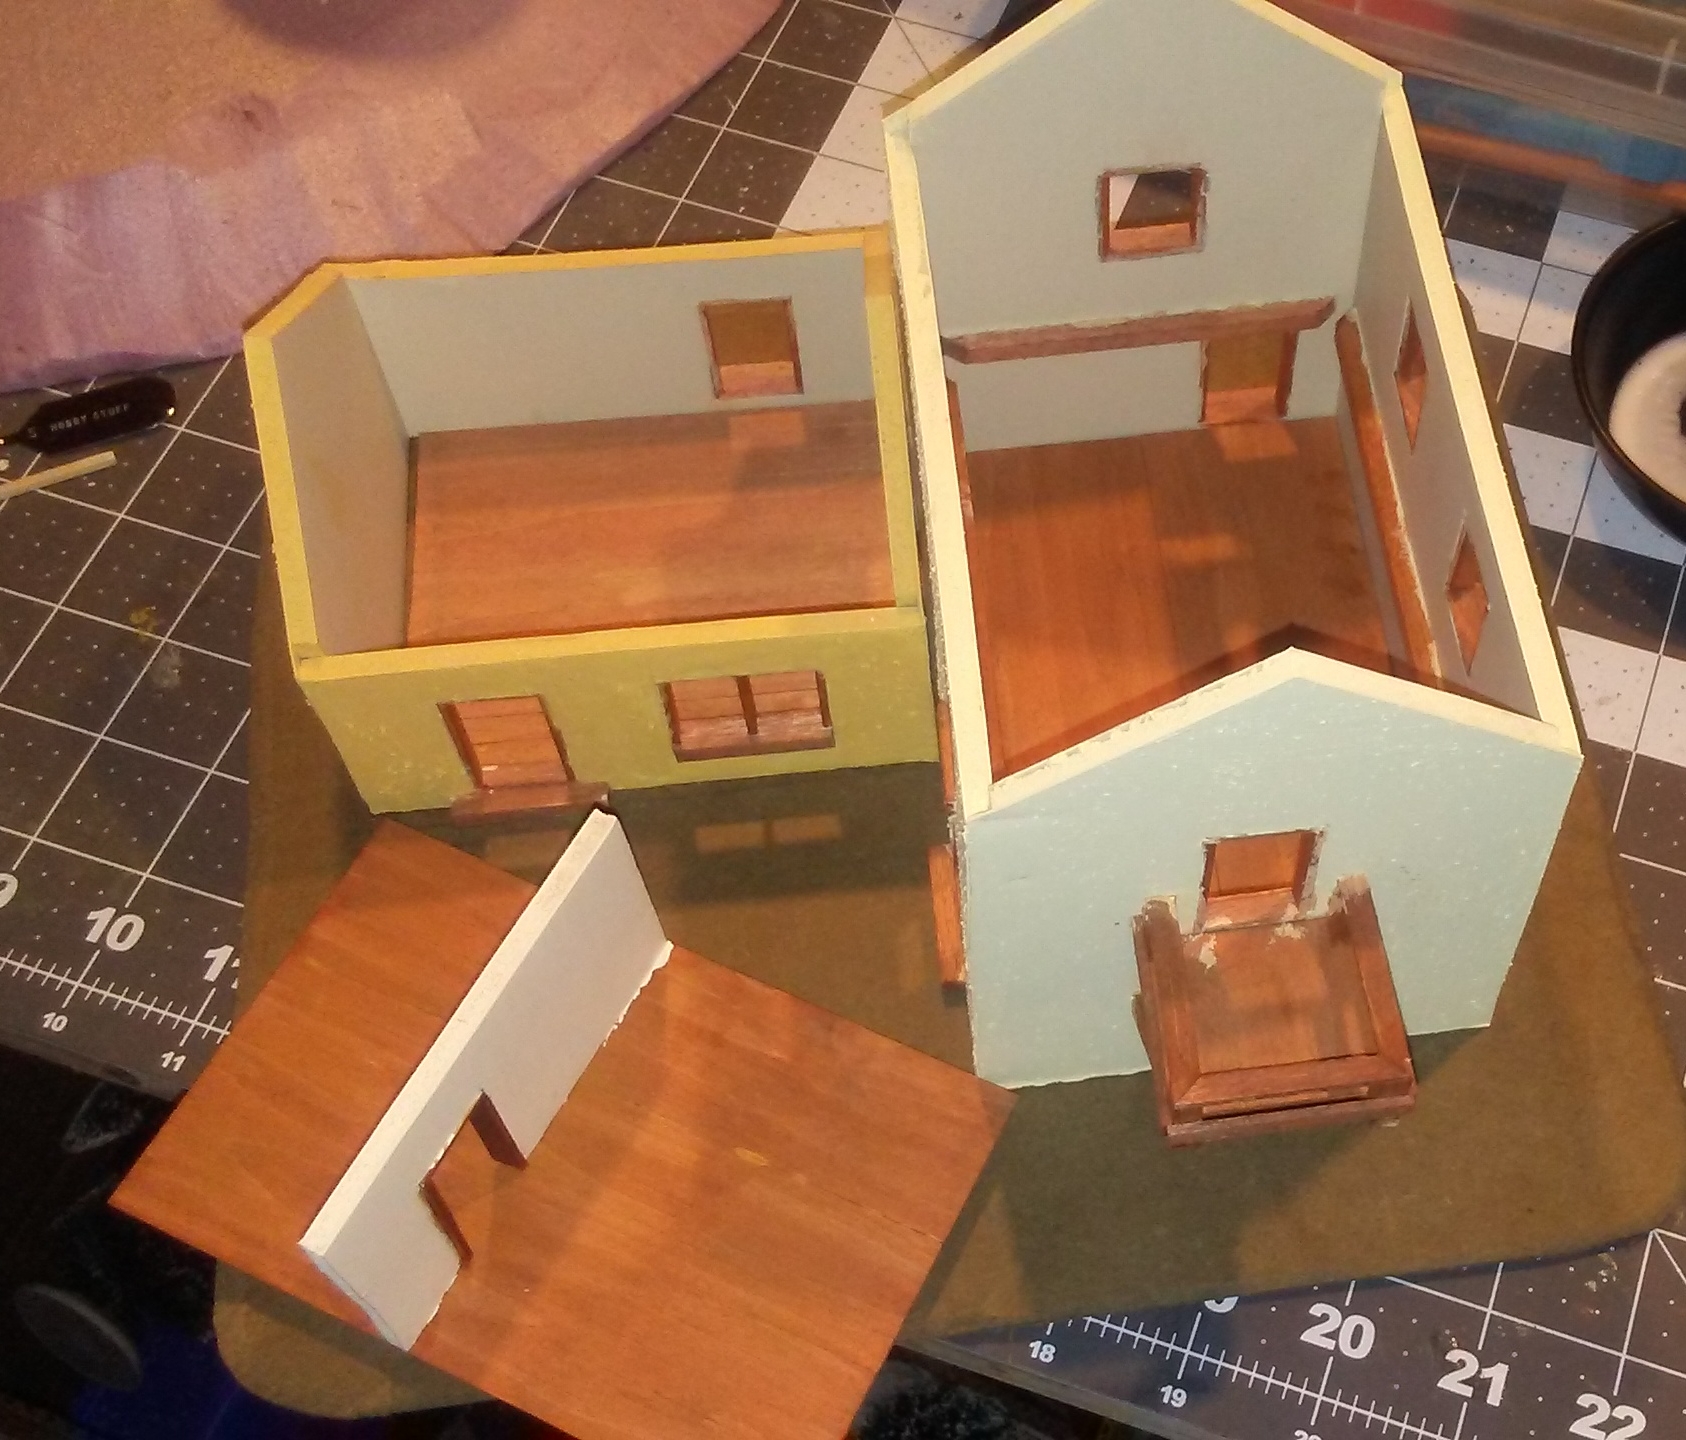
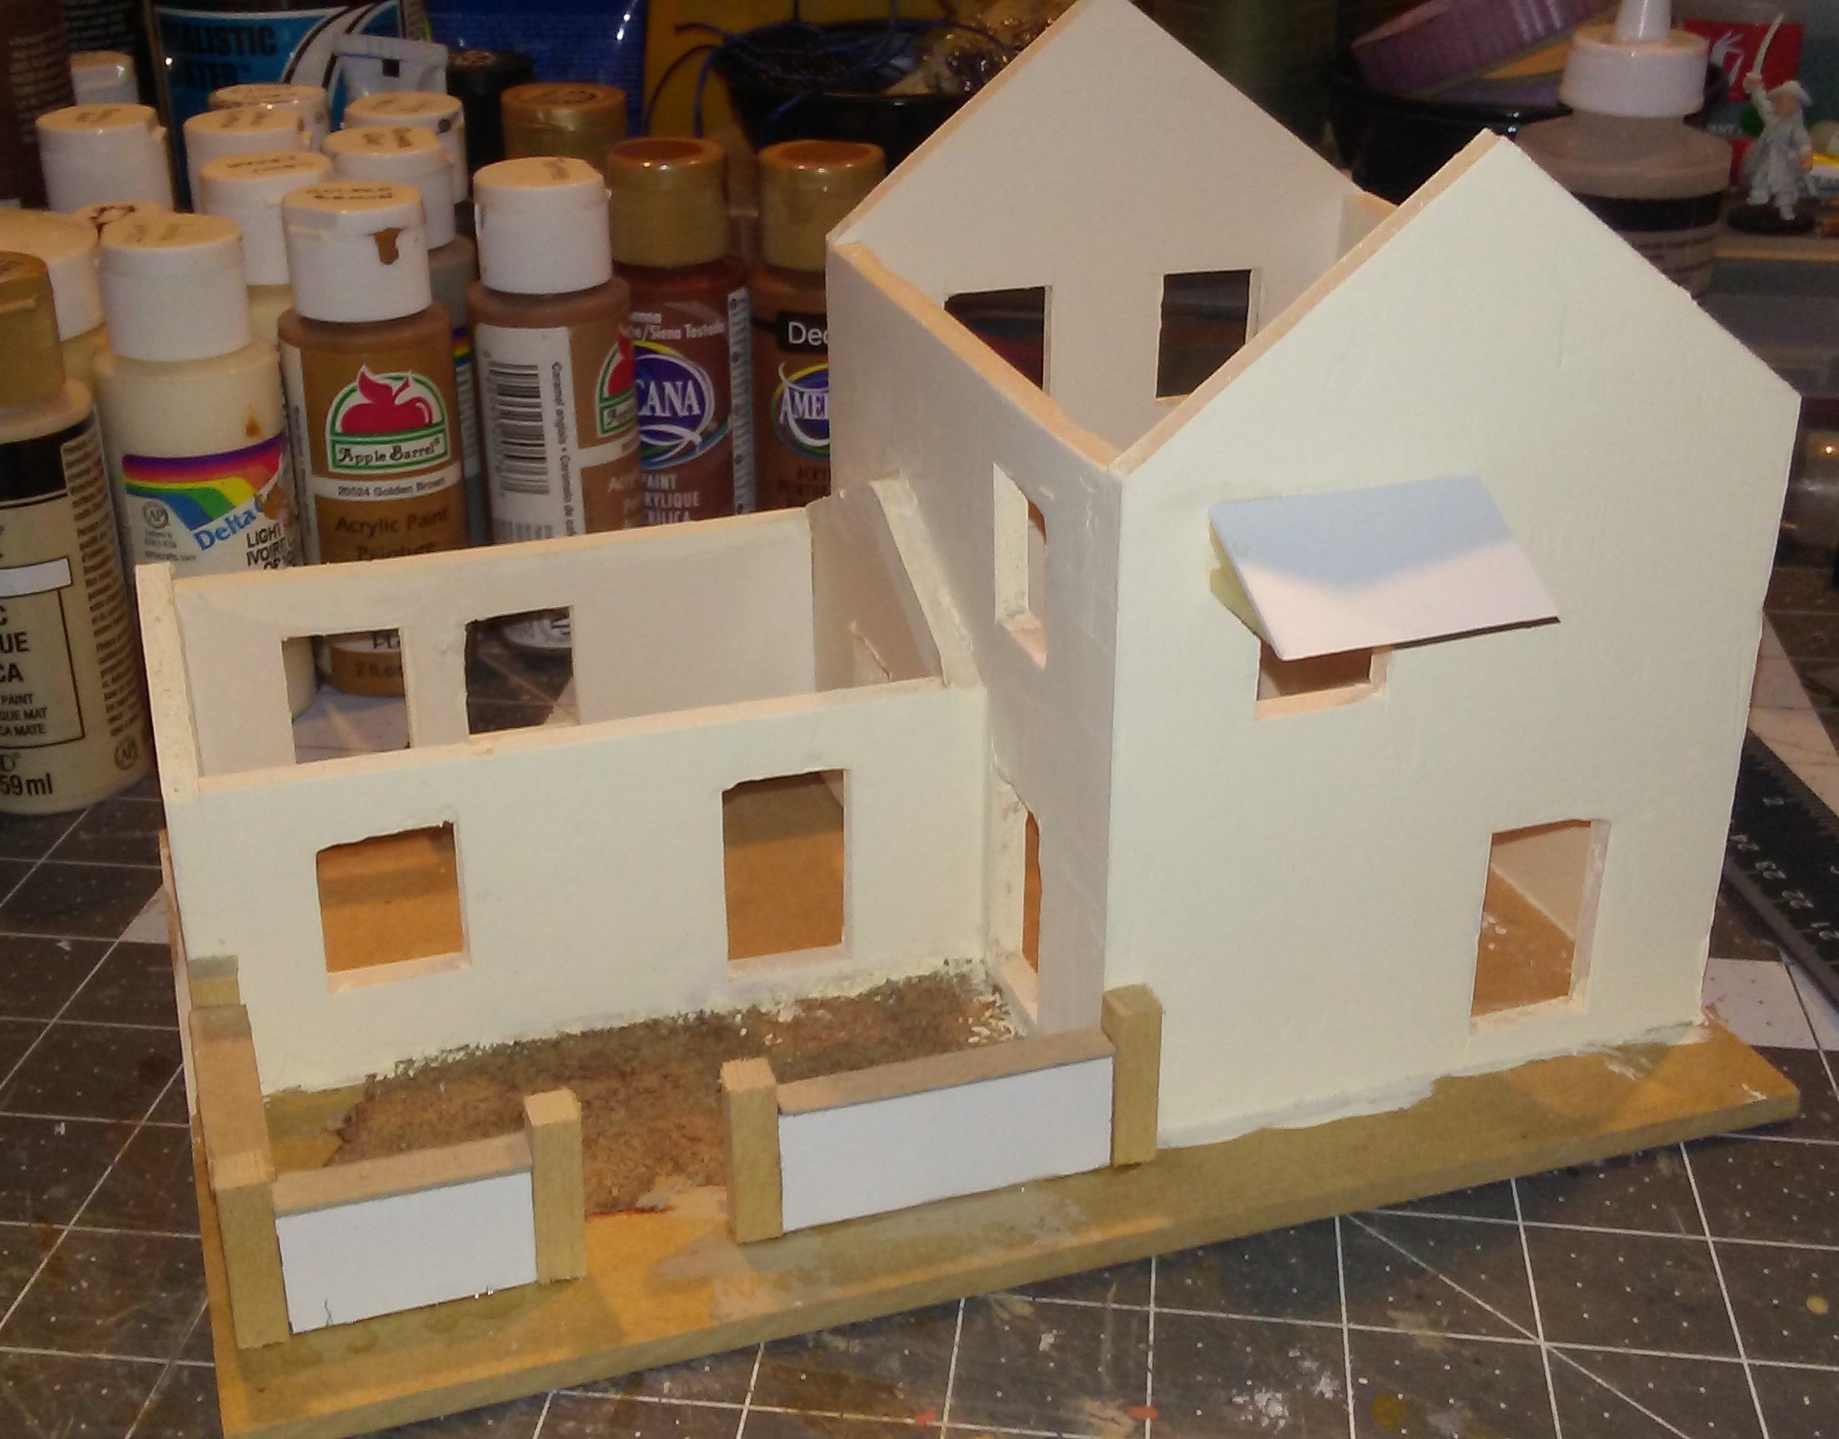
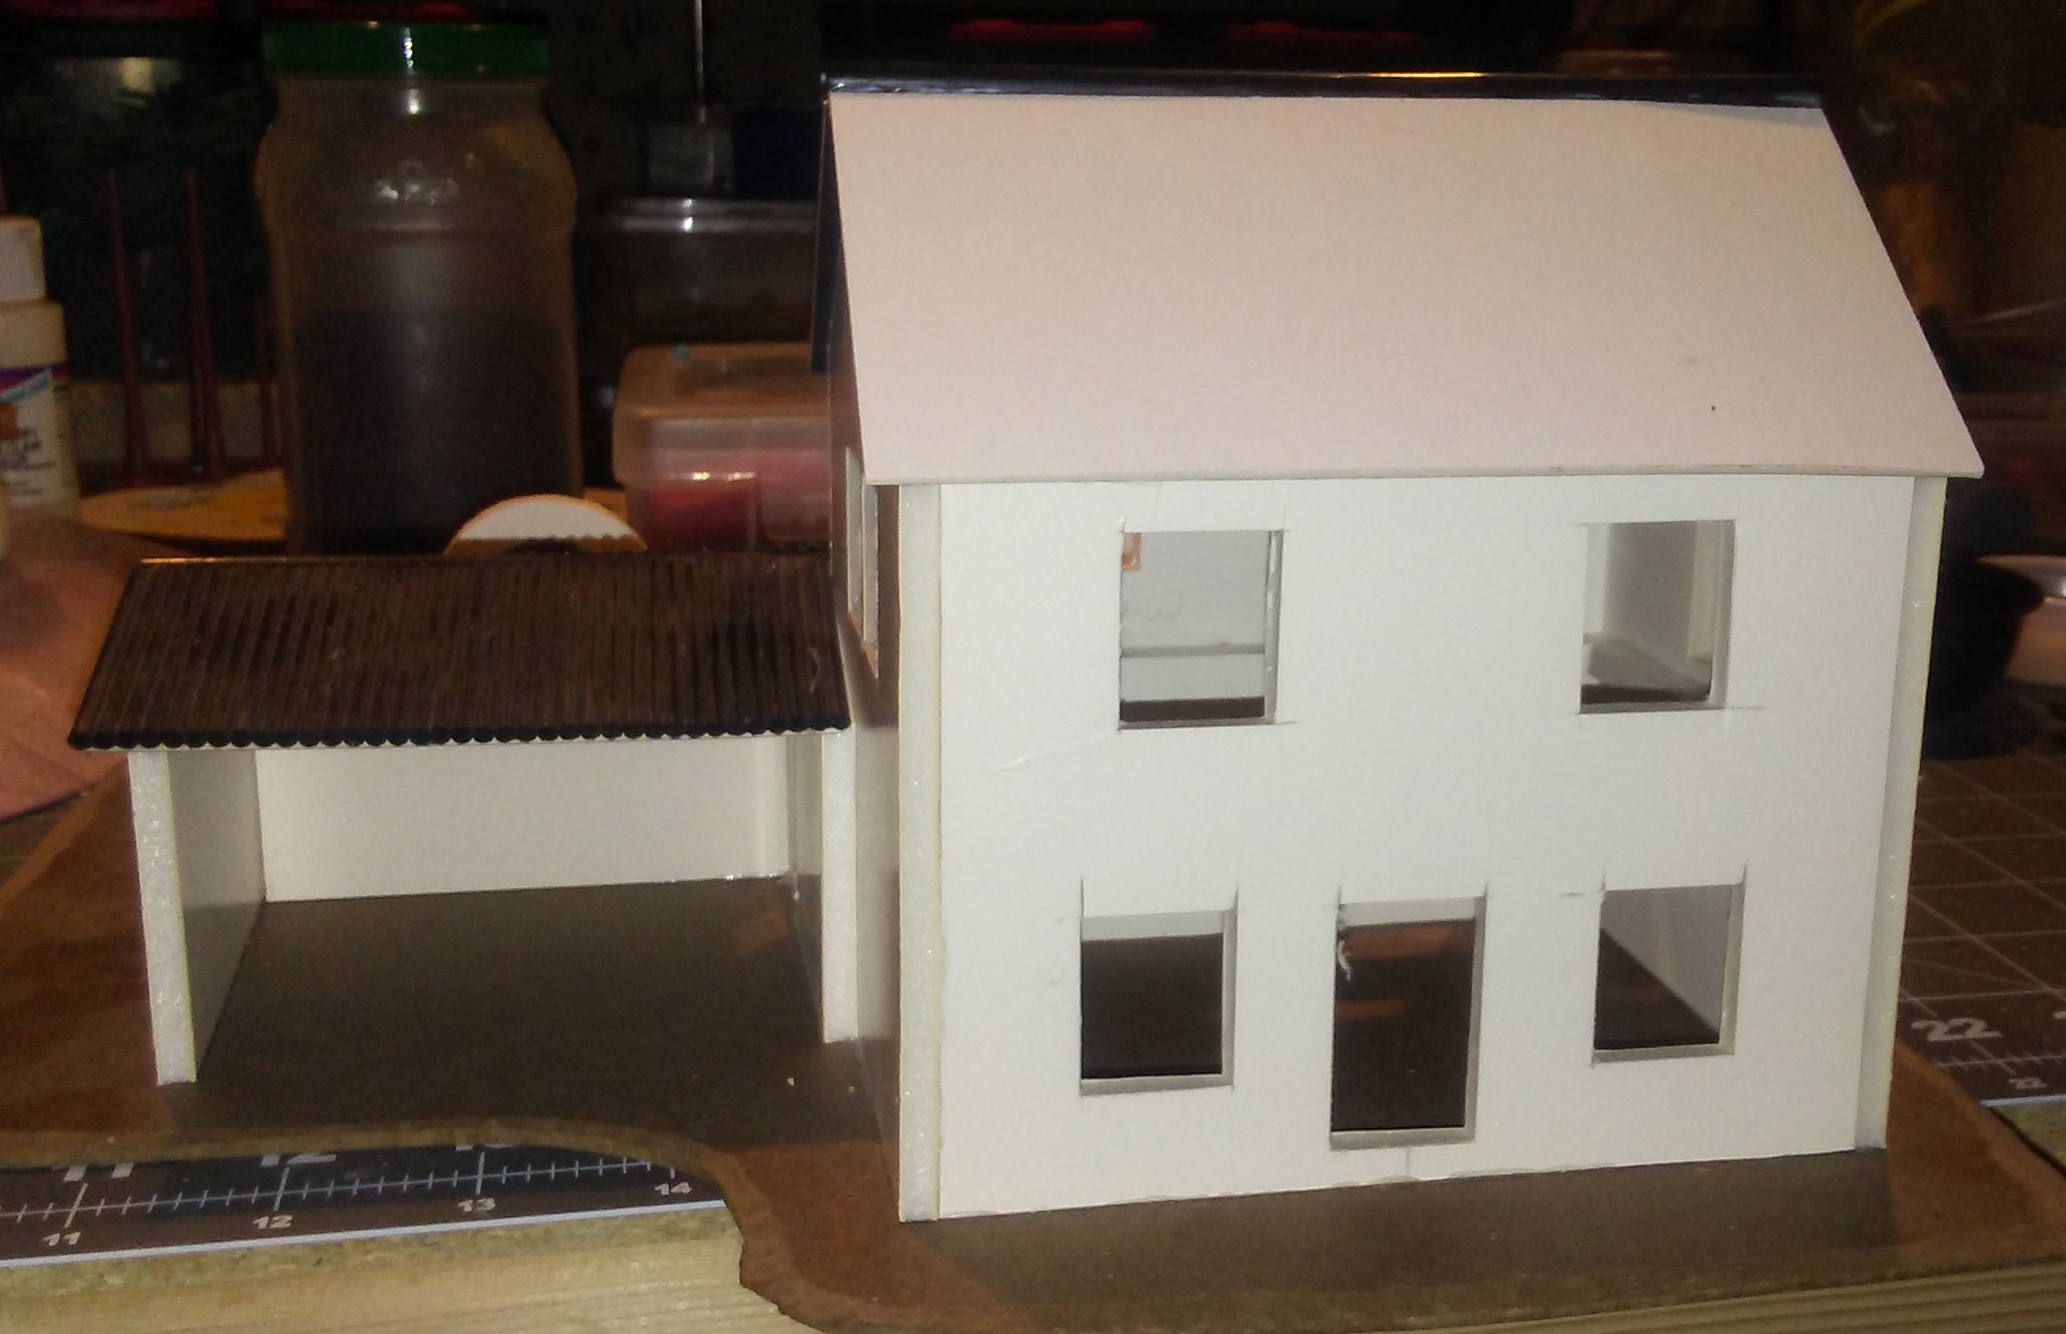
The final house was the one most in need of work. I'd cut out and glued the main walls, but they'd not been attached to a base and had suffered for it. Also, as you can see in the pictures, since this was one of my earliest houses, I did not rabbet the corners of the foamcore to help hide the seams.
The first thing I did was glue the walls to a sturdy base to stabilize and protect them.
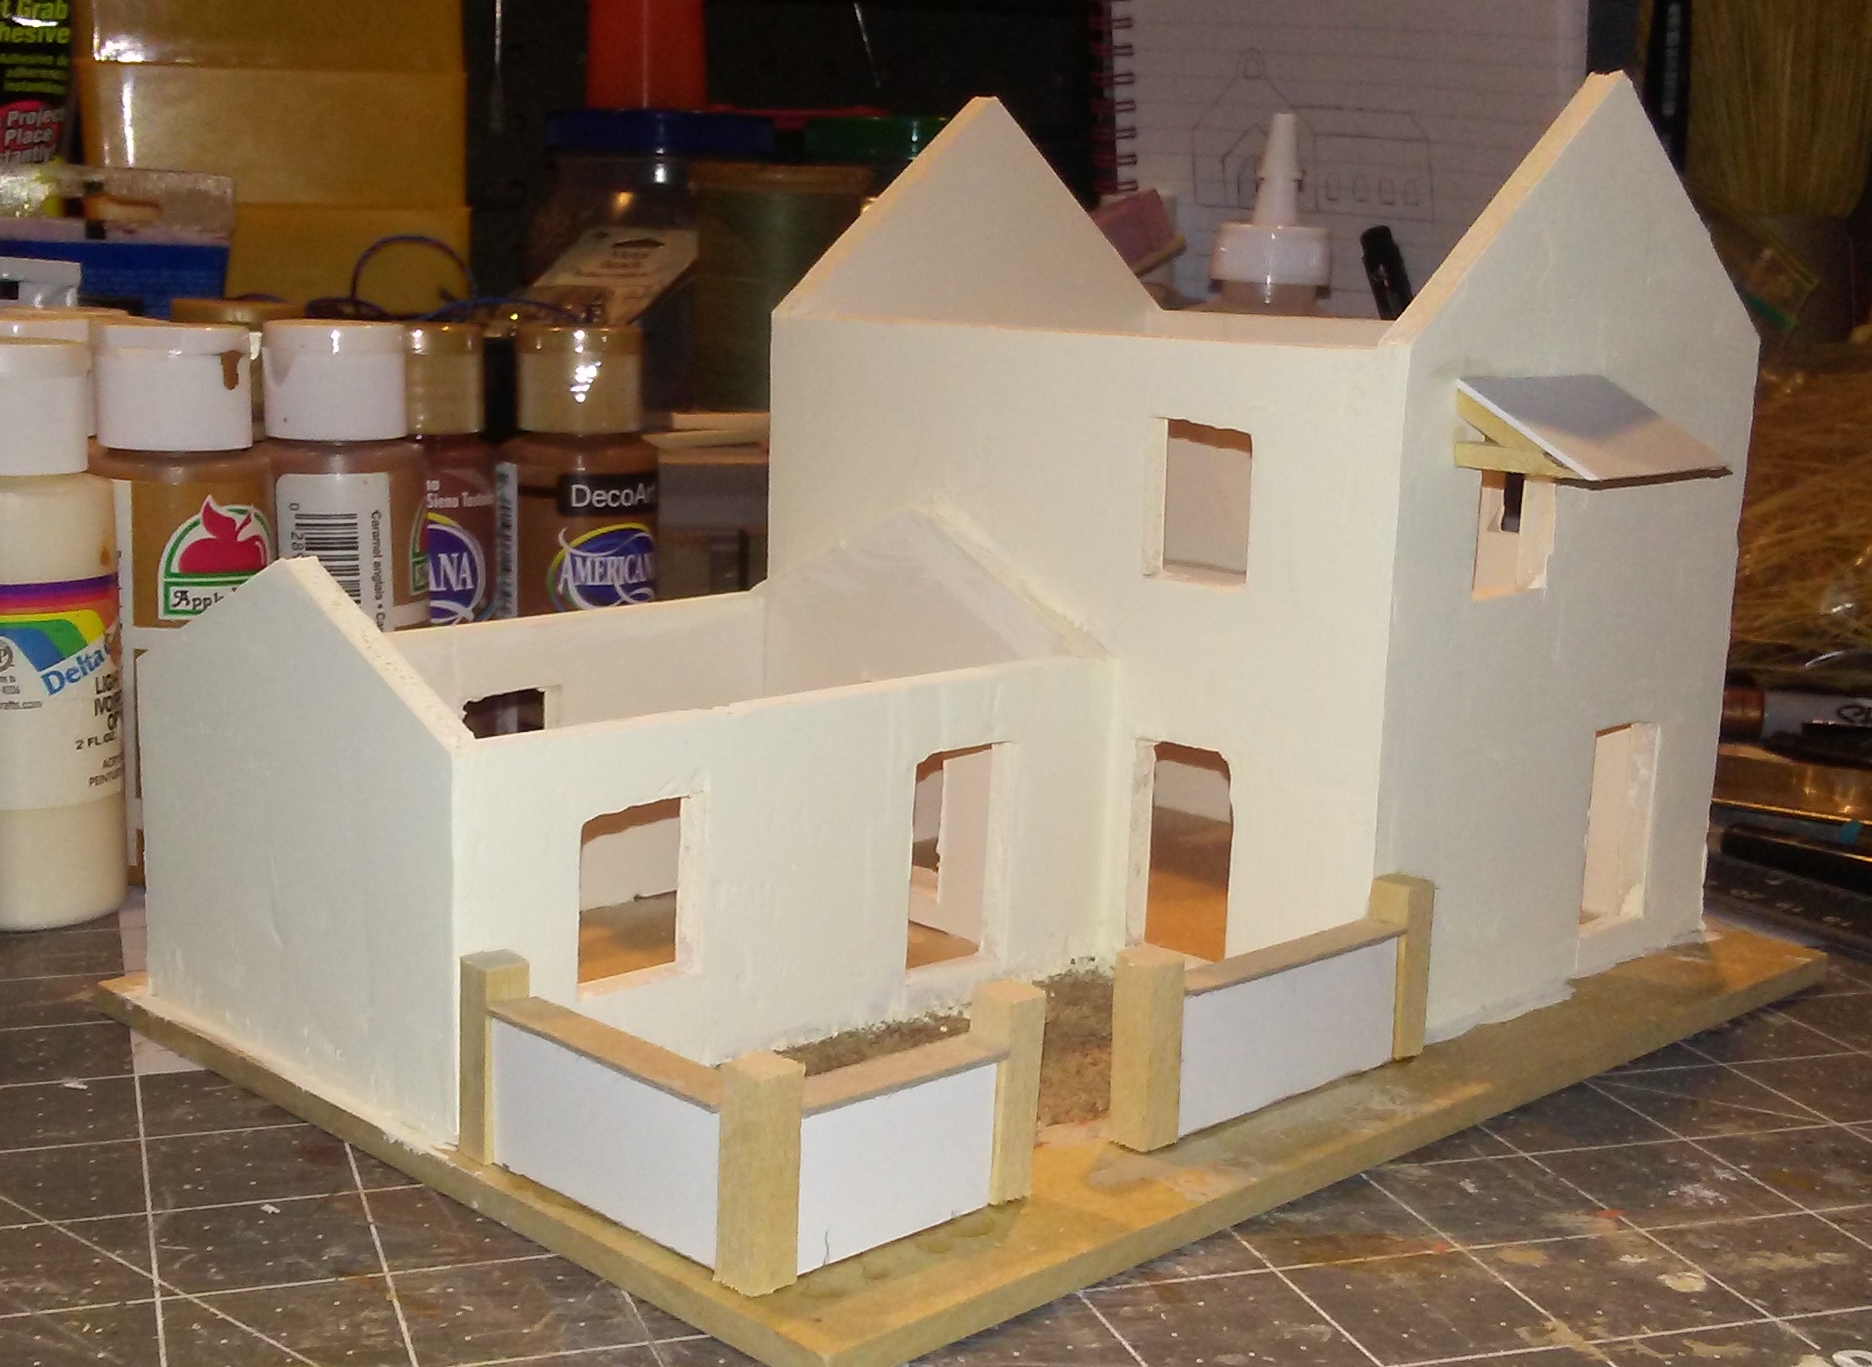
Like the other houses, I wanted to add some visual interest. For this house, that would consist of a trellis climbing to a window that would be beneath a small awning (my wife's idea) and a walled patio.
I built the frame for the awning from scrap balsa and styrene, then cut a small piece of tile sheet to fit.
The walls were foamcore, with balsa wood used for the ends, and a strip of cardboard to cover the top of the foamcore. Cheap, easy and effective.
Here's the wall and awning glued in place.
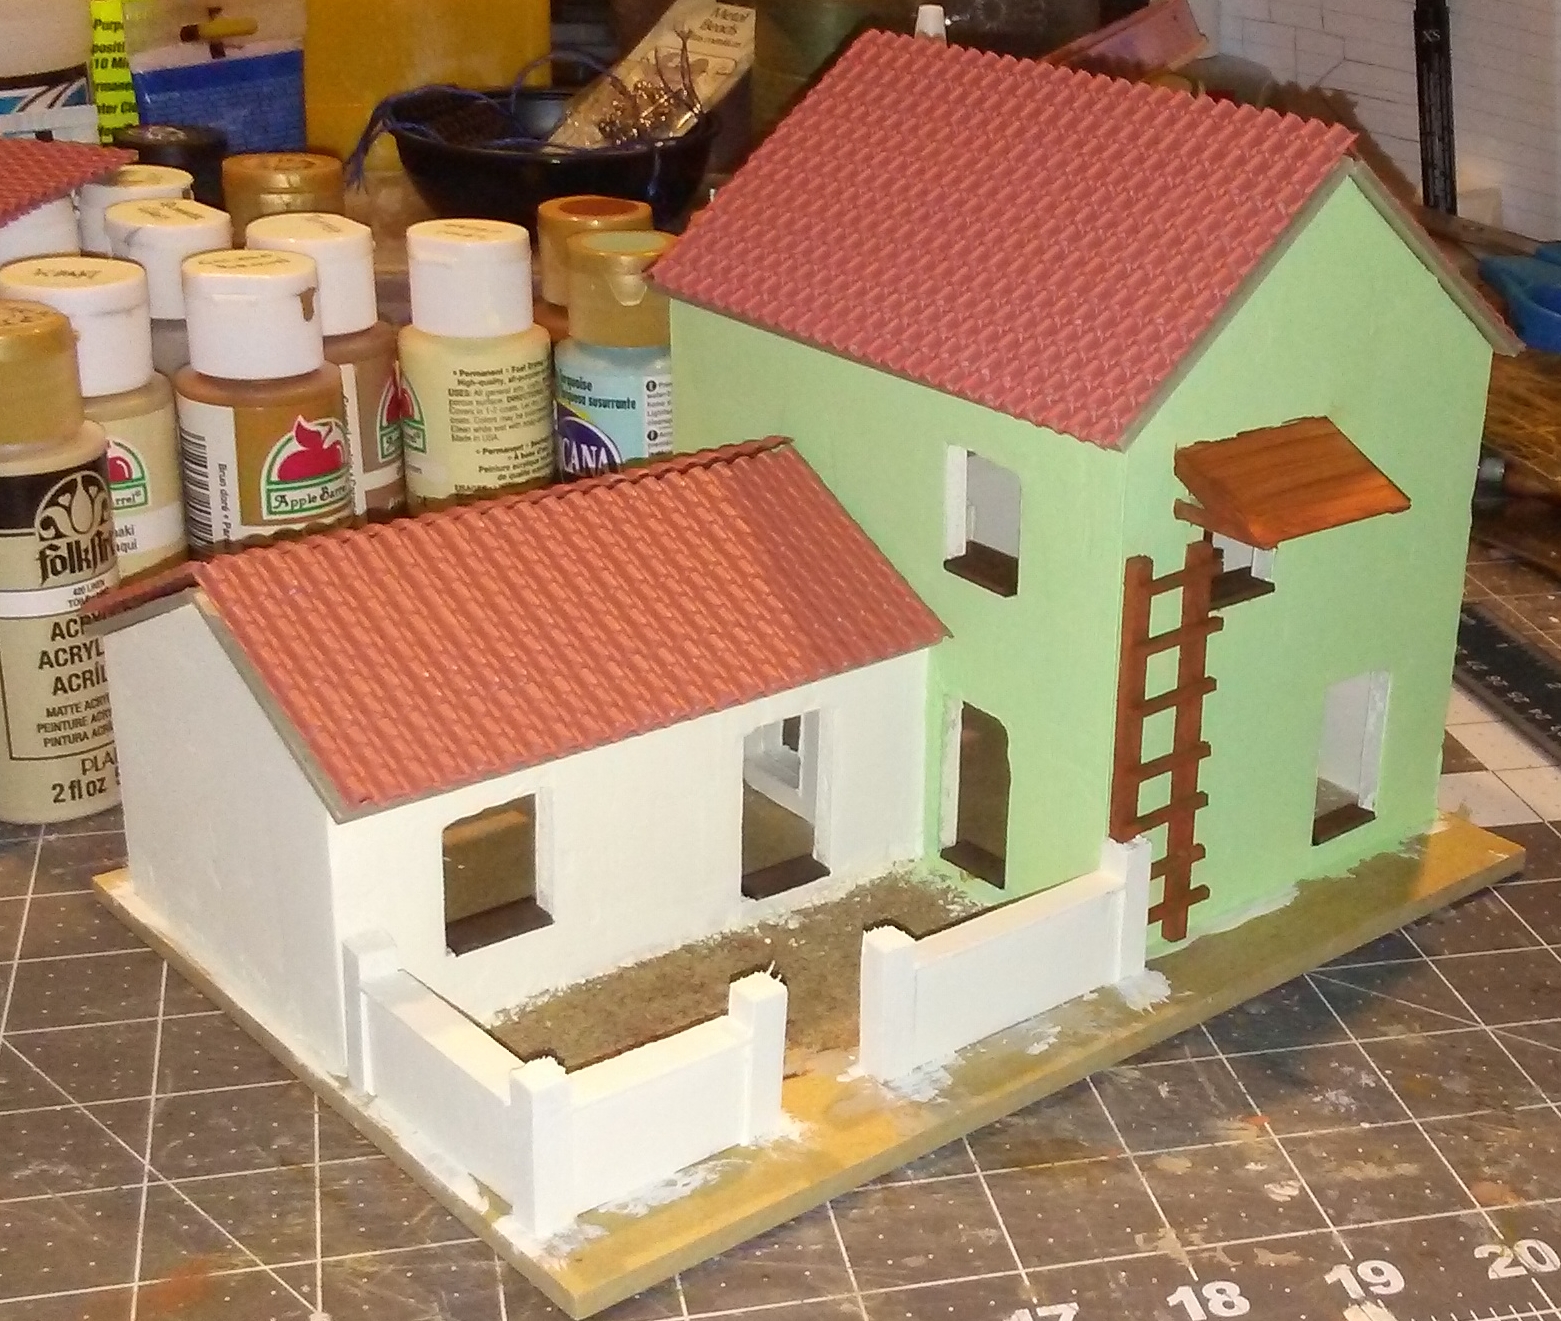
Since my wife was helping with ideas for this house, I decided to paint it her favorite color, green. As was the case with the blue, I chose a nice pastel green that looked "tropical." I painted the attached building a light cream-tan.
The trellis is made from balsa strips, and glued in place.
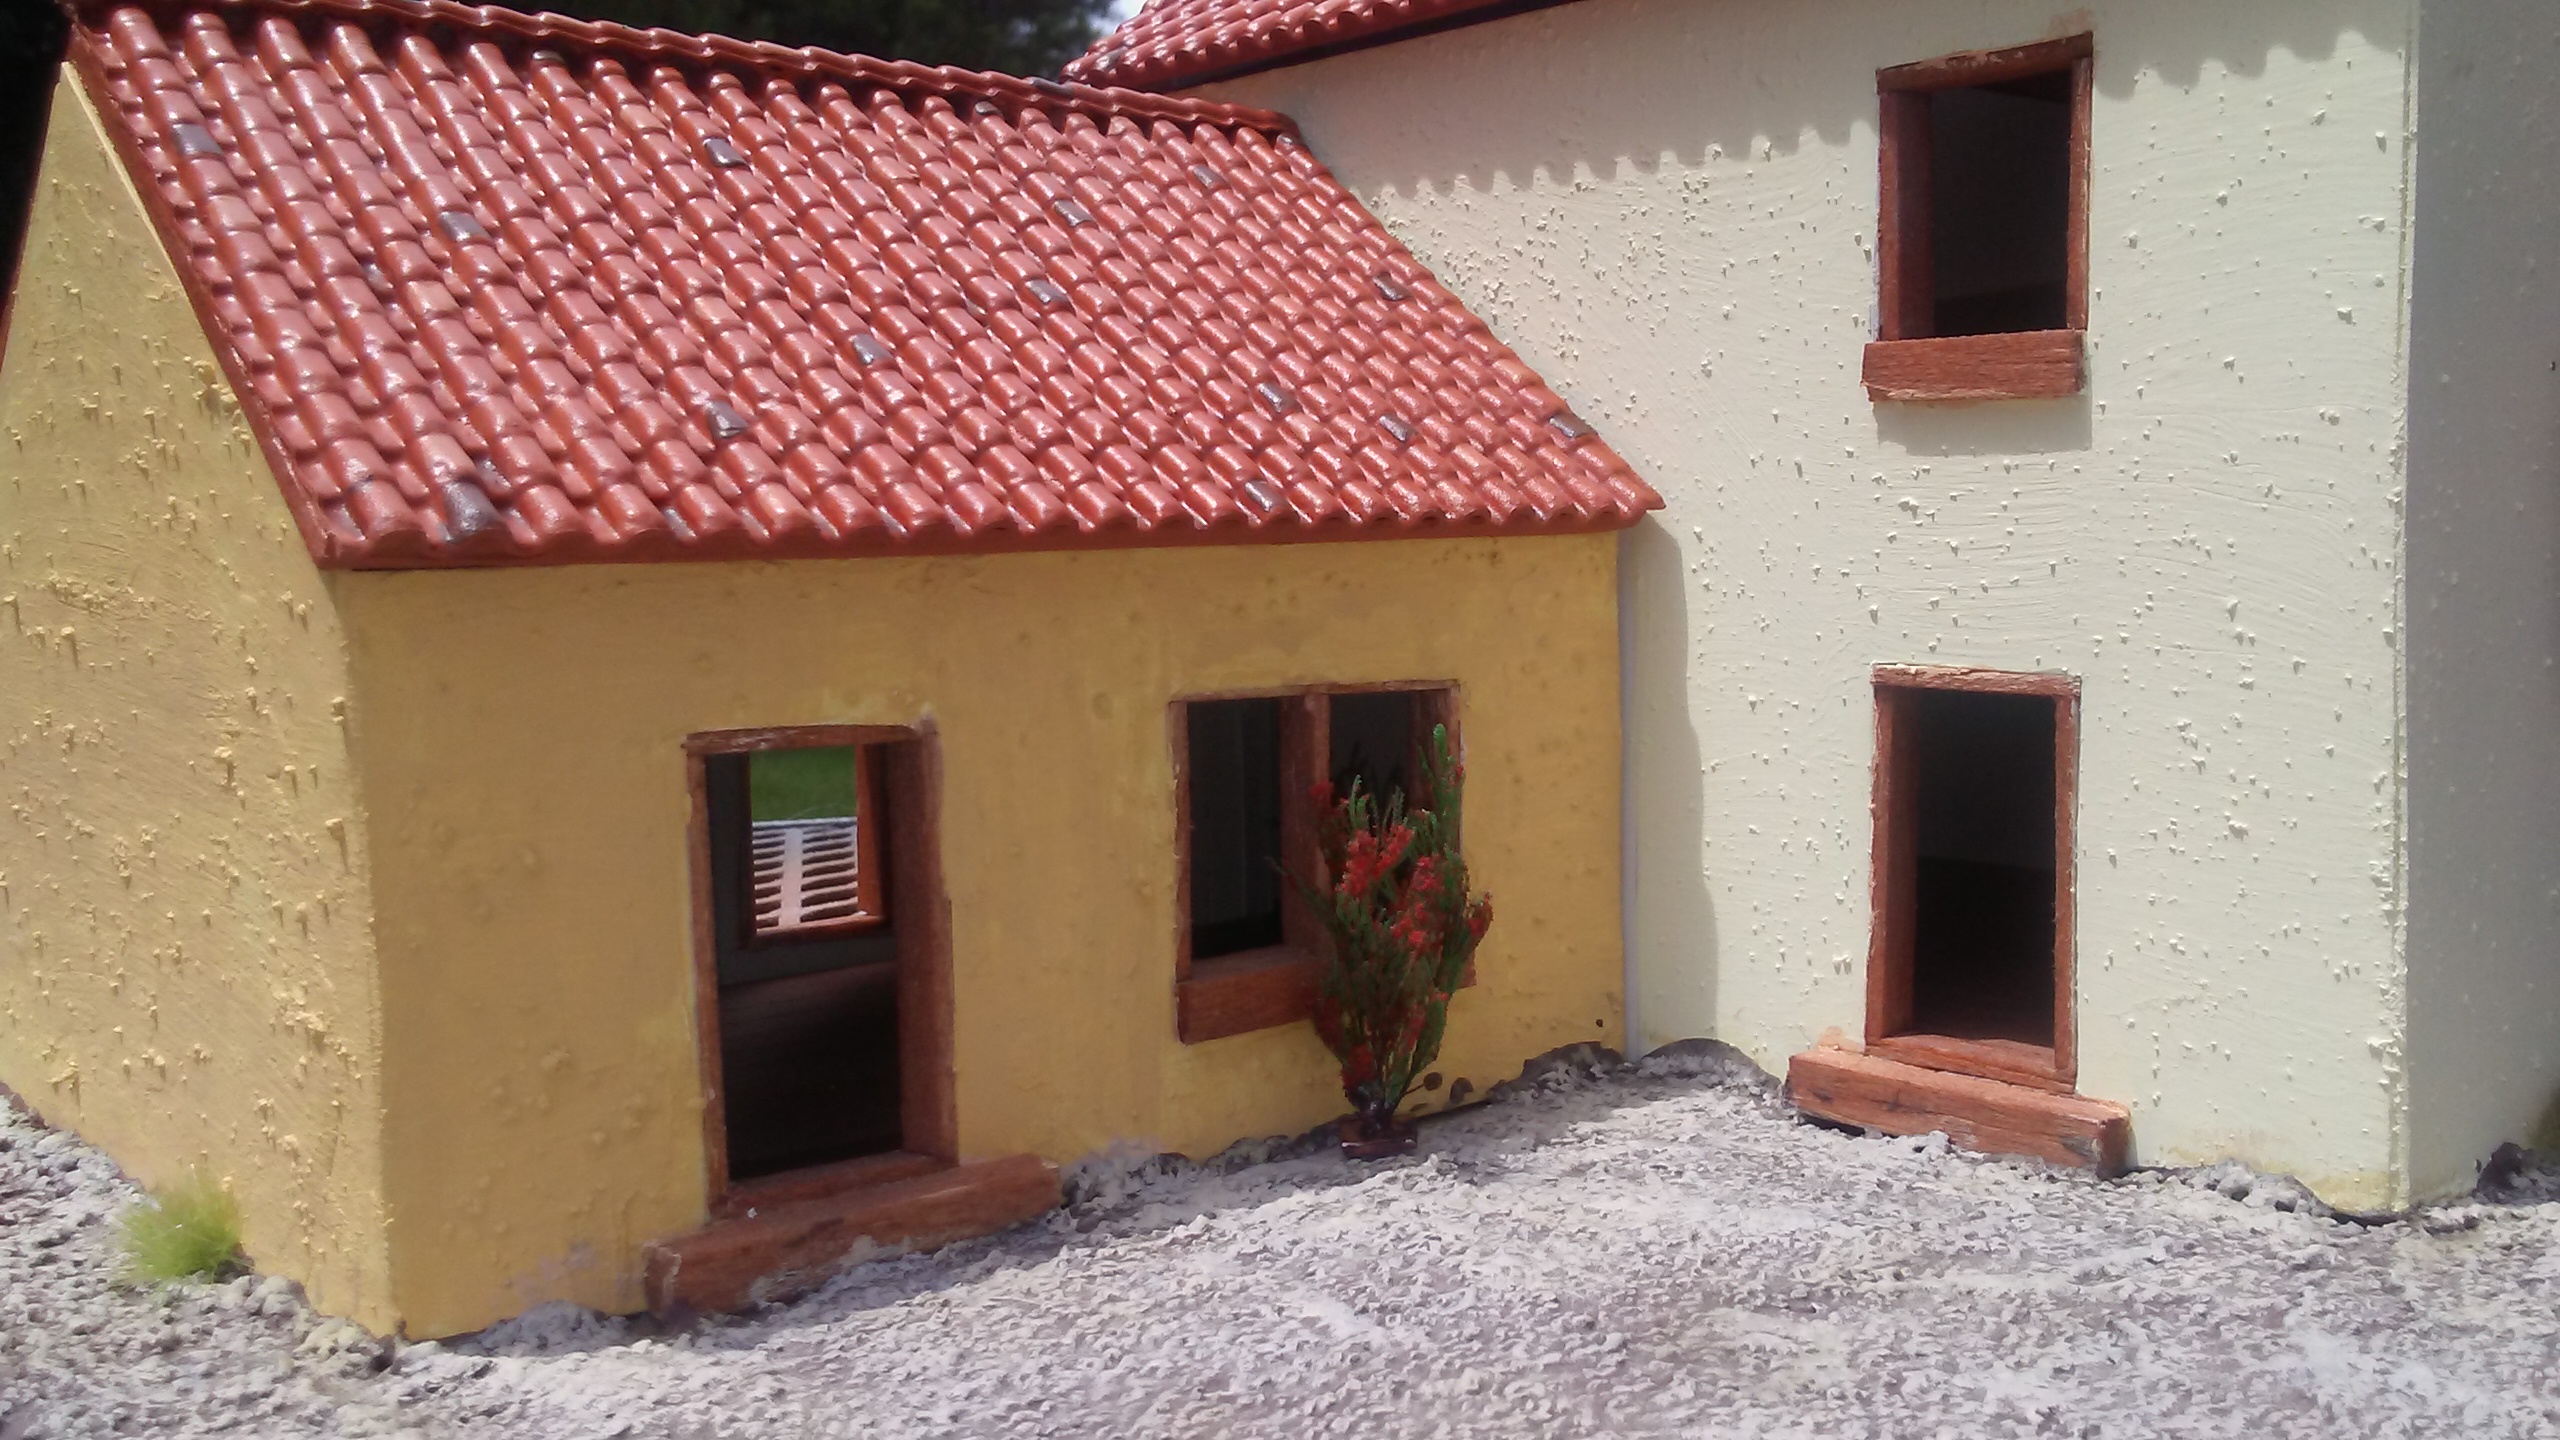
For the actual plant climbing the trellis, I looked at several options. I found some strands of a vine-like plant in a bin and tried that first.
I also tried a version with small red flowers glued to the ends of the "leaves."
The third option was made from plastic tree branches covered in green flock and red flowers. This was the one my wife liked the most, so that is what i used.
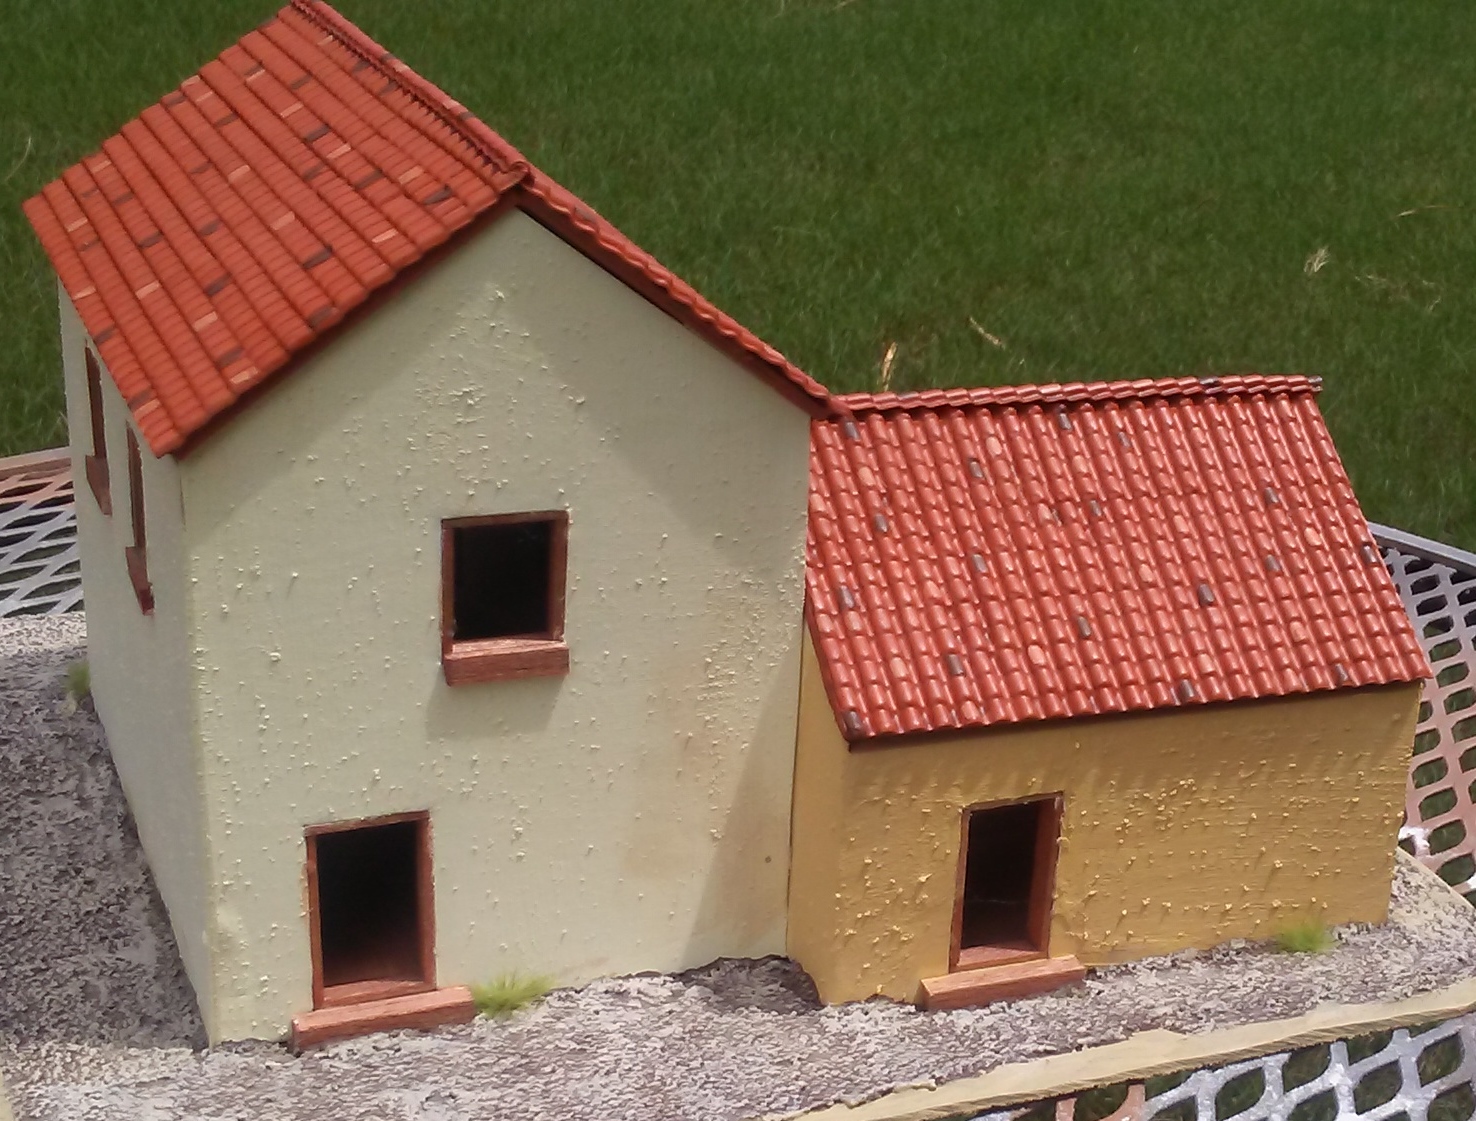
The completed green house:
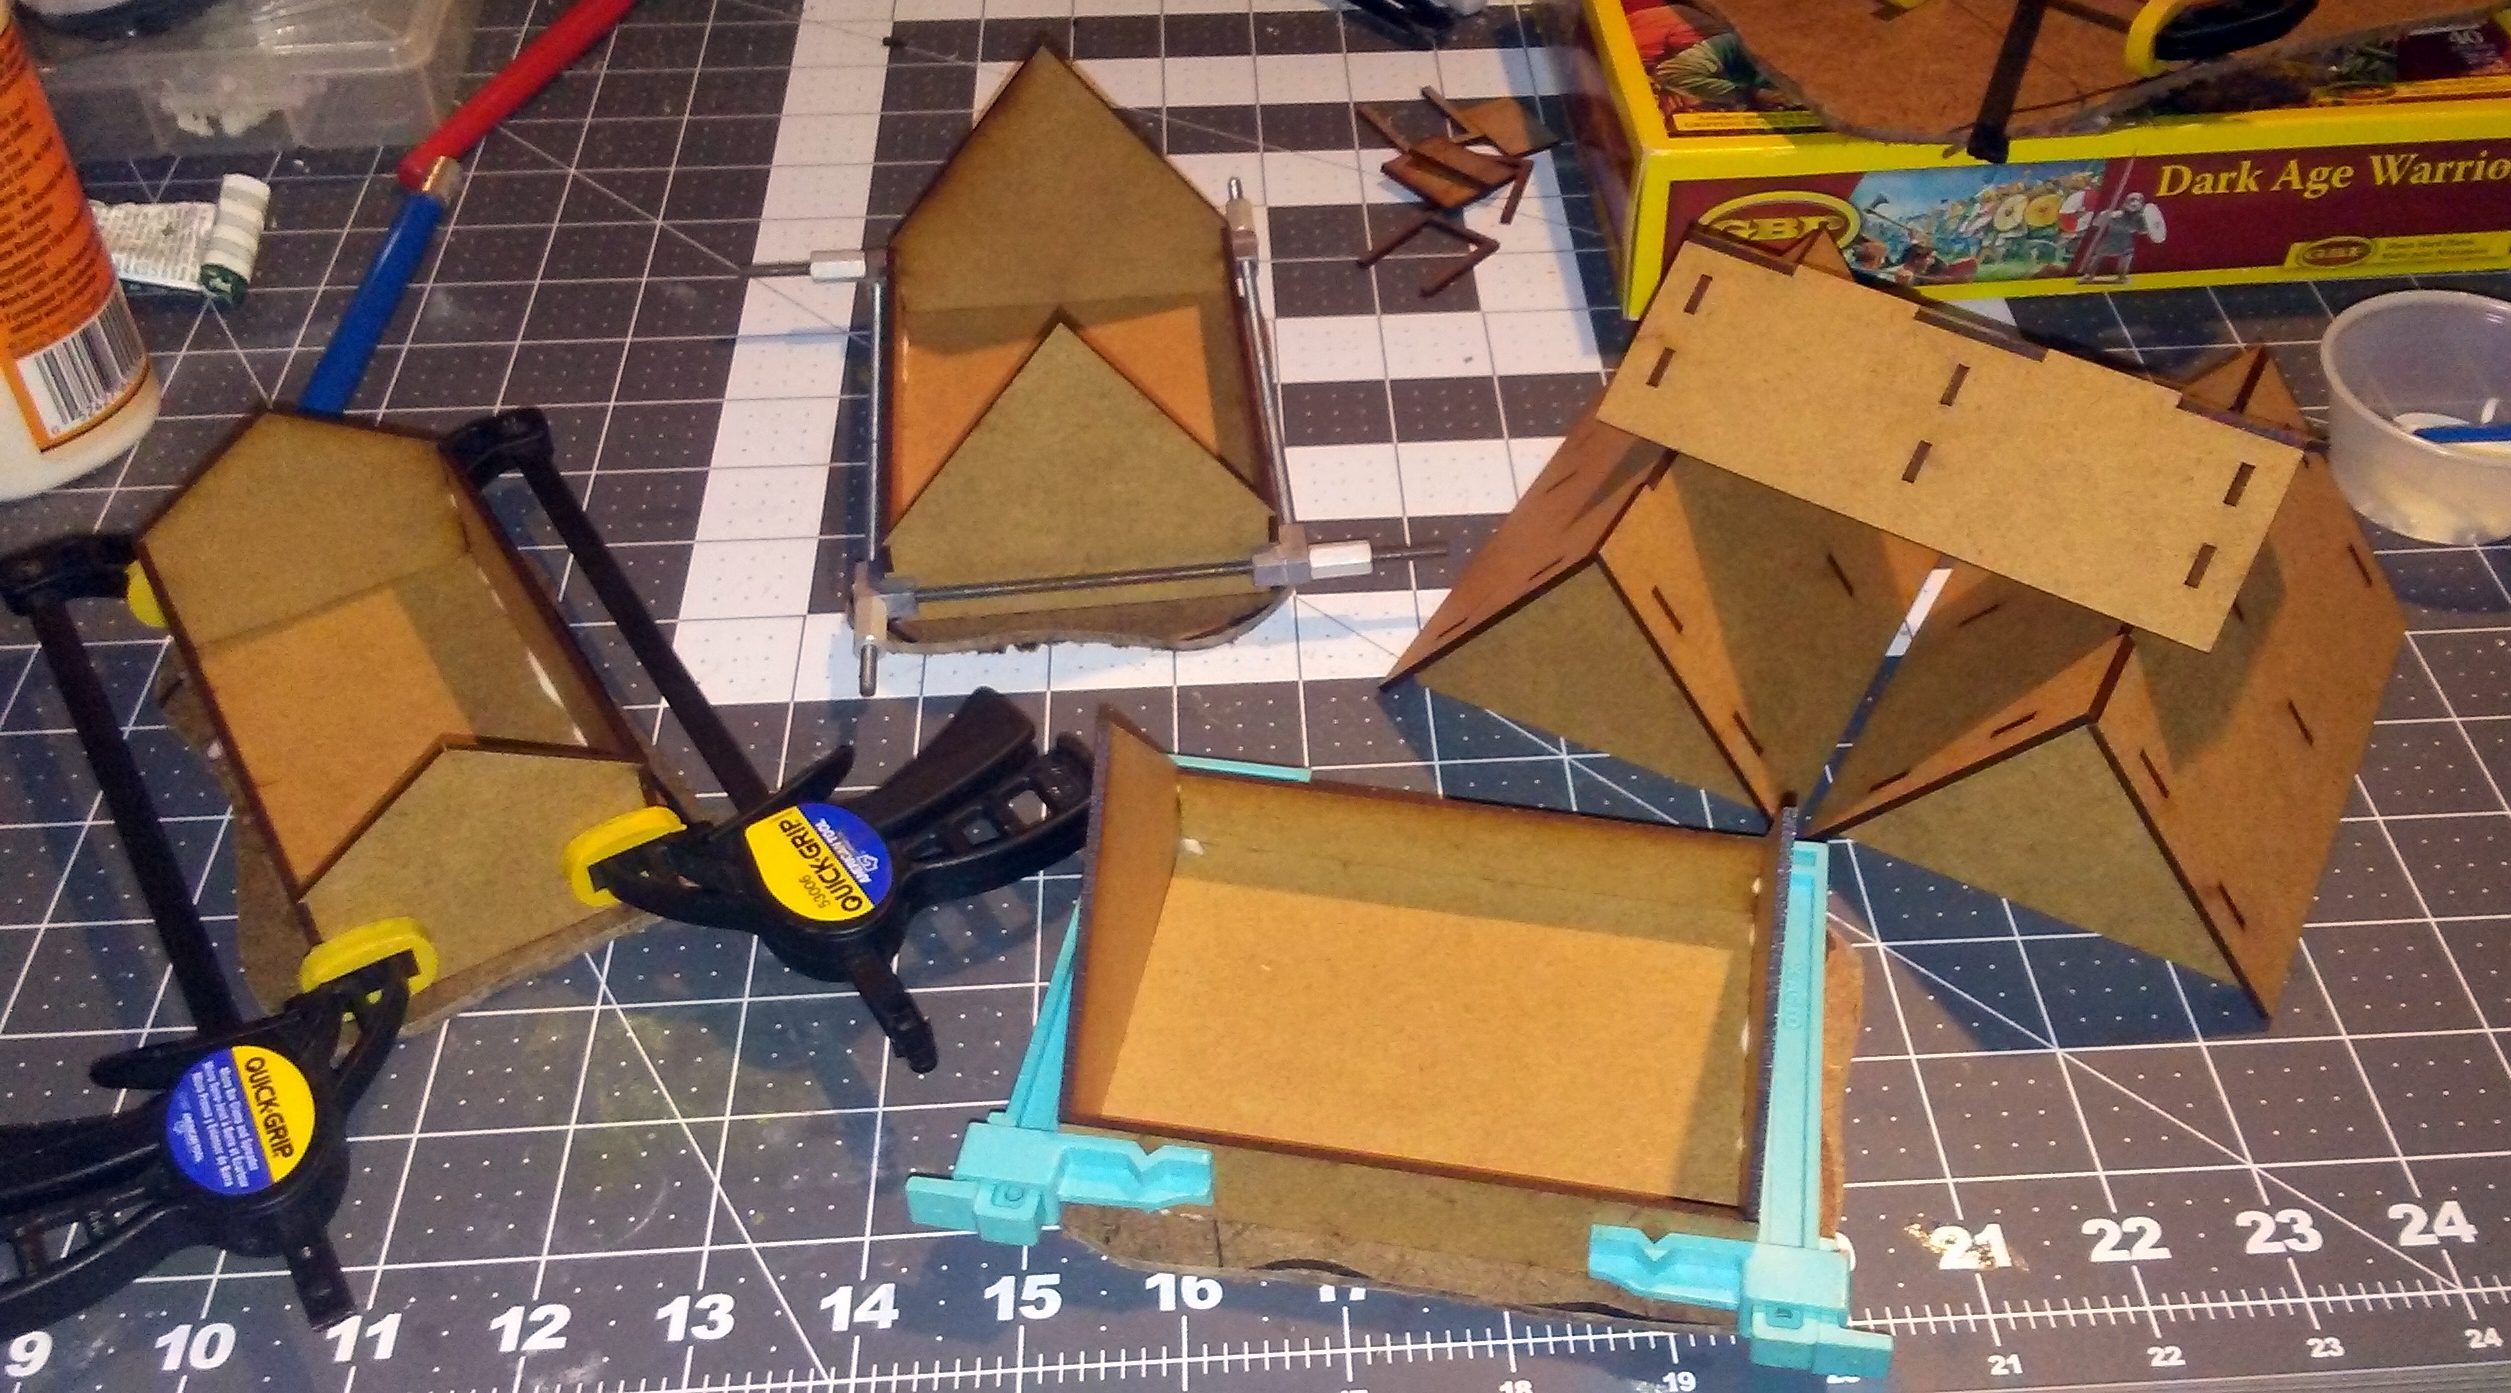
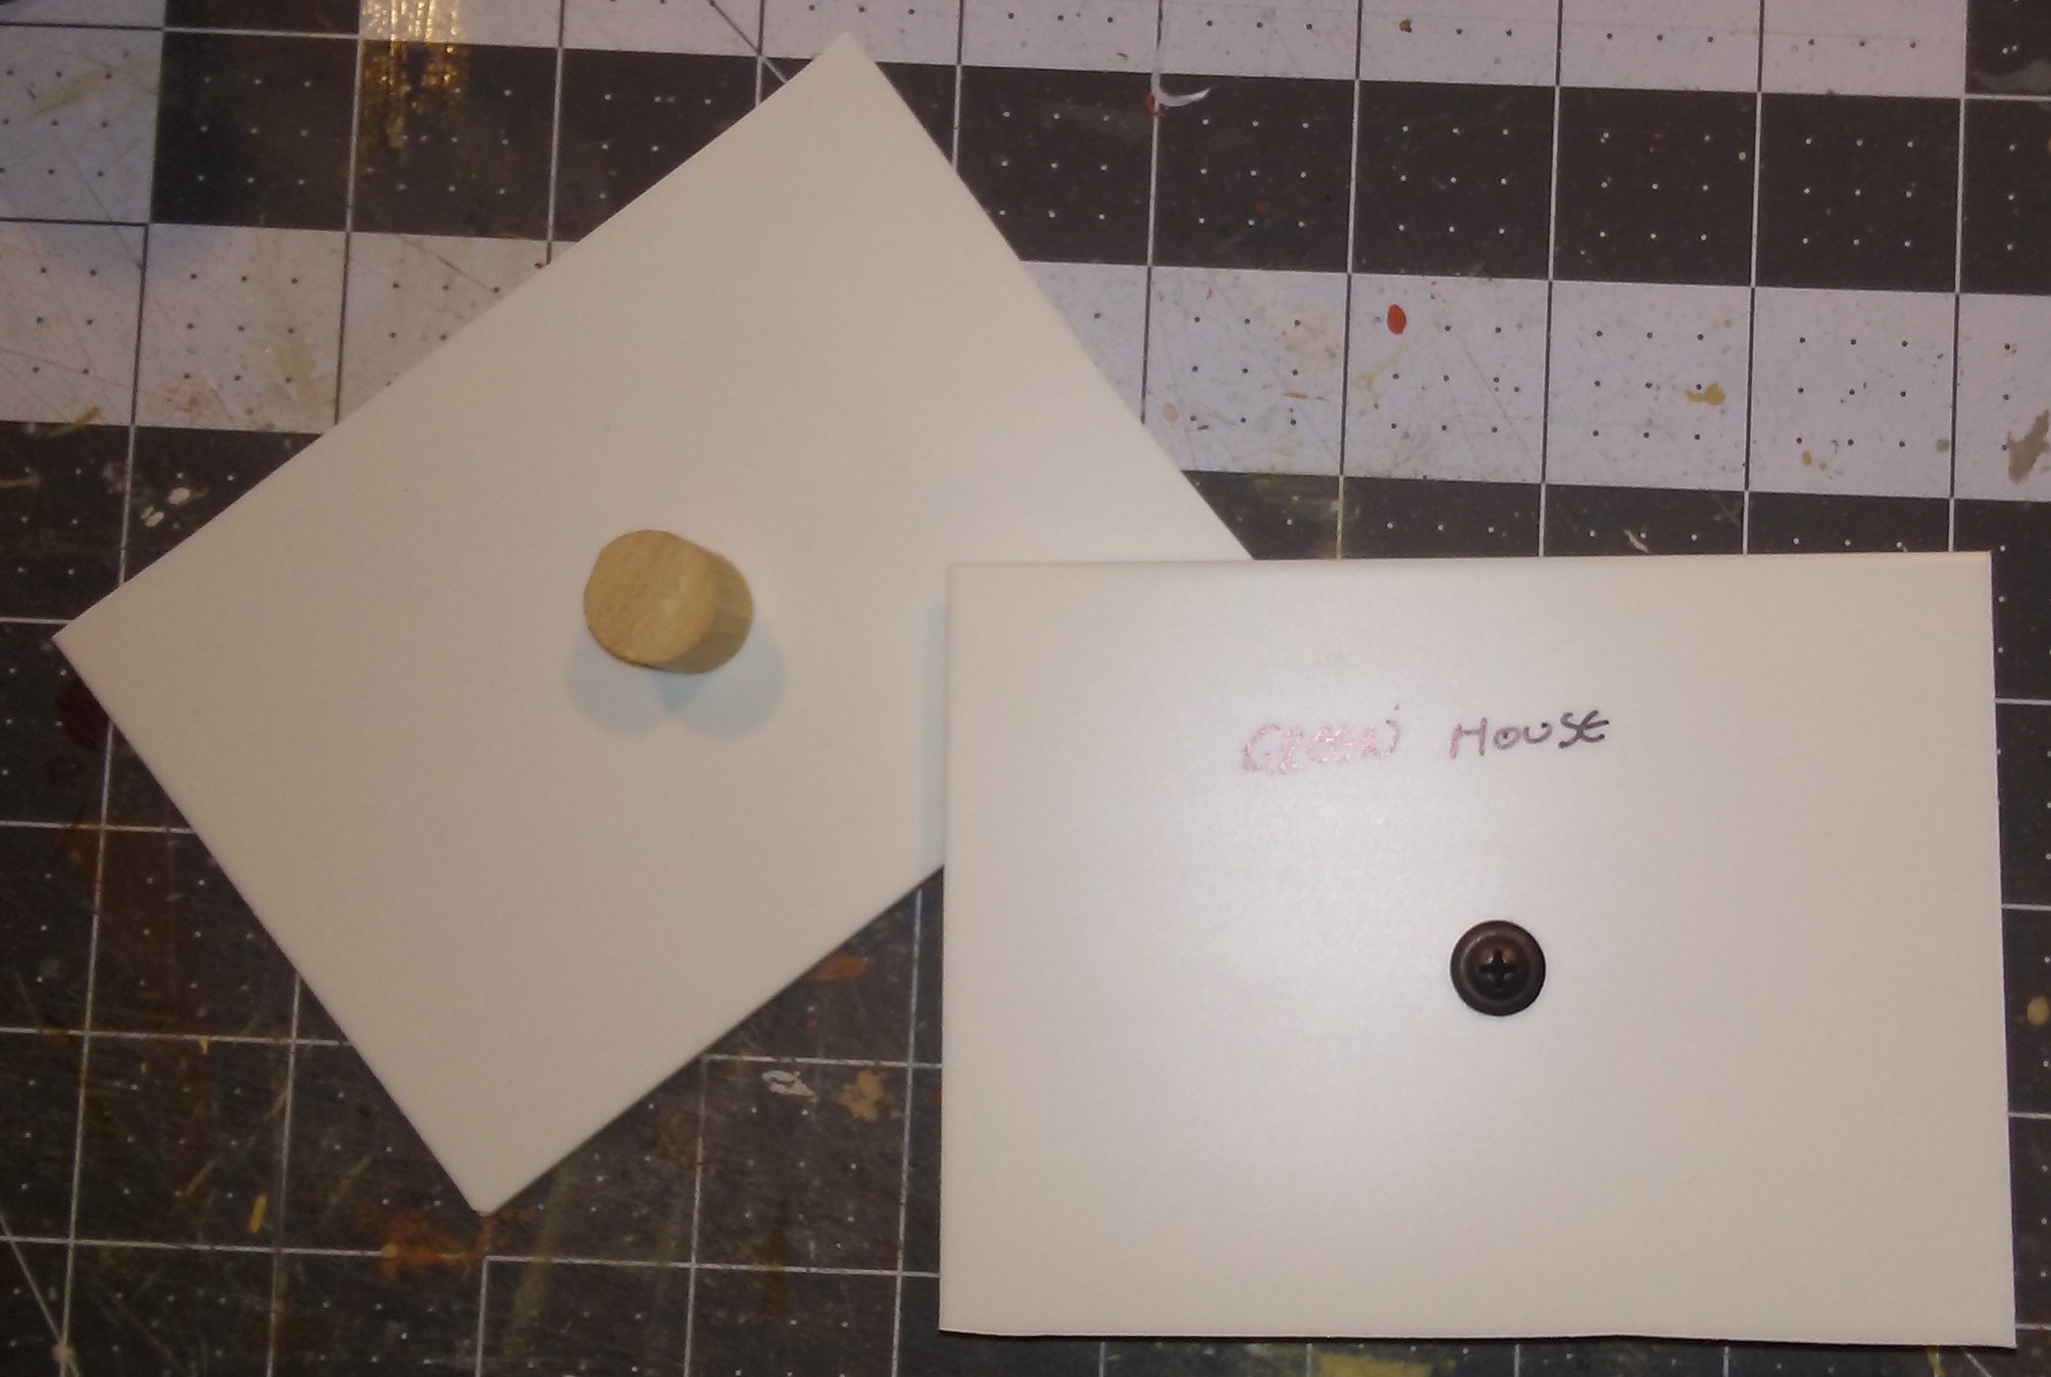
Since I've had some questions about certain techniques, I thought I'd show them below. First, the roofs. They are very simple to make. I just cut foamcore wedges into the correct angles, and glue cardboard to them. Once the glue is completely dry, I cut
Plastruct tile sheet to fit, and glue it on using
DAP Strong Stik. This adhesive has a caulk-like consistency, so I run a bead of it on the roof and spread it thin, then press the tile sheet into it and let it dry completely before painting.
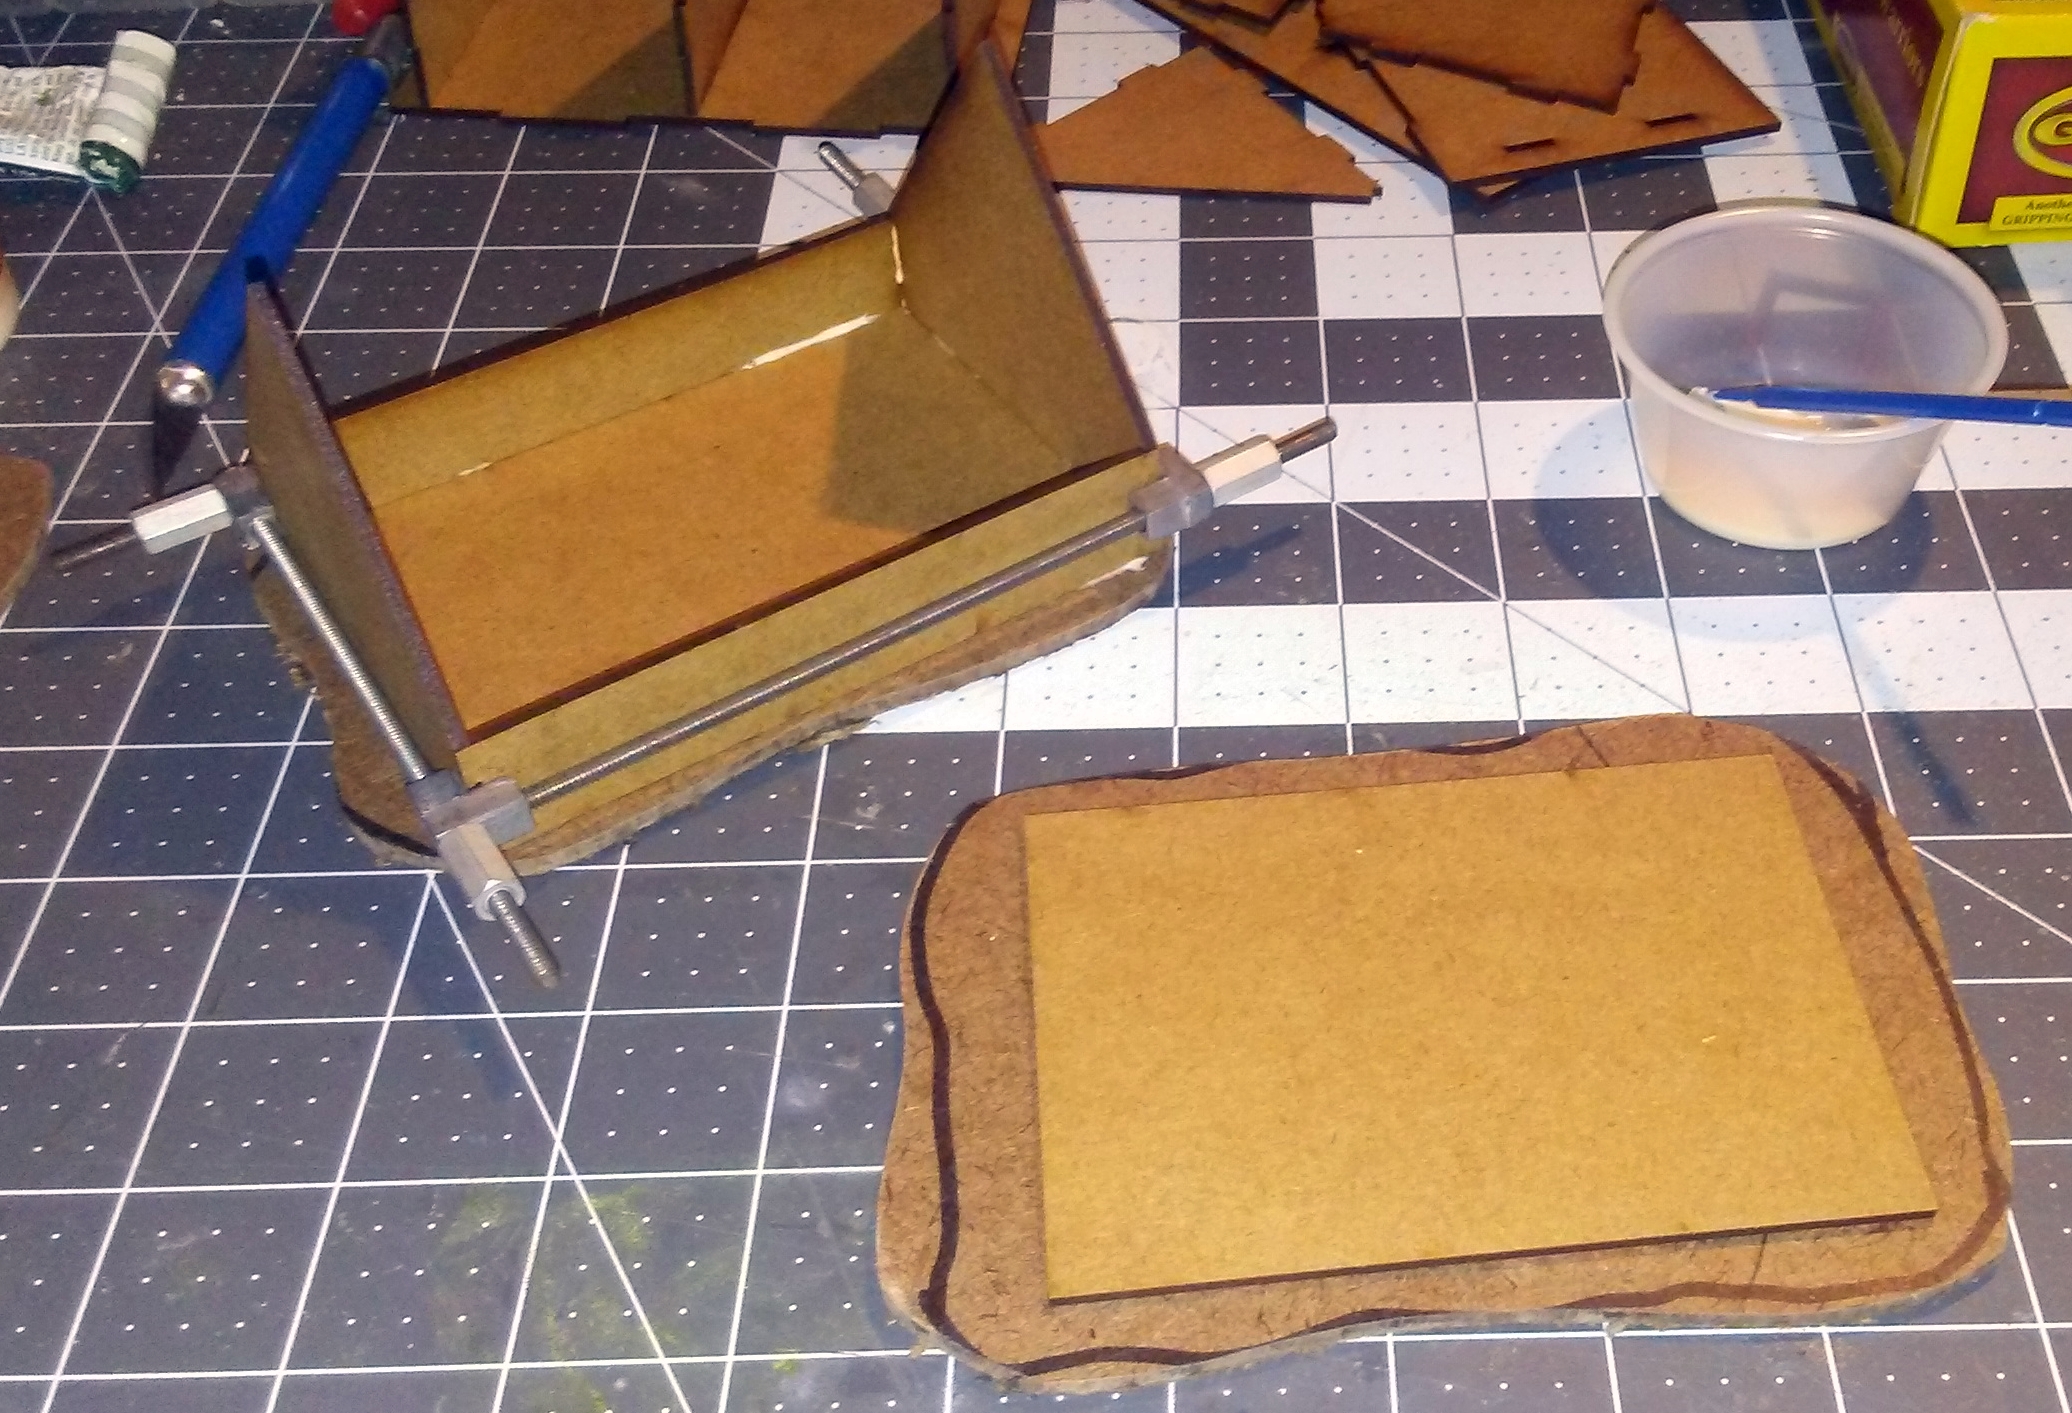
For the removable second floors, I have come up with an easy way to make very strong floors. I used to make the from balsa and glue a wall section to them to use as a "handle" for removing them for play. There were two drawbacks to this. First, when I painted the balsa it tended to expand, which made the floors fit too snugly unless I trimmed them back. Also, the walls sometimes just lifted off the floor sections and had to be re-glued.
I solved these problems by making my floors from thick styrene. I drill a hole in the middle and screw a section of wooden dowel to it. After a quick spray with a dark brown paint, they're done.
I hope you enjoyed the latest installment in the development of my Spanish colonial town. I now have a total of ten completed buildings, and one still in progress. I think that when the 11th building is done I will call the main part of the town finished. I'll undoubtedly be tempted to build "just one more" but I will probably move onto something different, for a change of pace.
Please do let me know if you have any questions, suggestions or critiques by commenting below. I love hearing what my readers think!
'Til next time.